全文来自于https://itbaima.net/document
通过注解配置spring

快速配置 @Configuration+@Bean
- MainConfig
MainConfig需要配置@Configuration- 里面的bean需要配置
@Bean - 通过
@Bean注册的,默认名称是对应的方法名称
@Configuration
public class MainConfig {
    //    @DependsOn("student")//后于。。。创建
    @Bean("student1")
    public Student getStudent() {
        return new Student();
    }

}
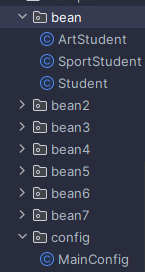
- App中进行扫描
   @Test
    public void test() {
        var context = new AnnotationConfigApplicationContext("org.example.config");
        var student = (Student)context.getBean("student");
        System.out.println(student);
        student.hello();

    }
不同的装配方式
- 目标属性
    @Bean("pa") //下面三个需要装配的属性
public P getP() {
        return new P2();
}
public interface P {
}
public class P2 implements P {

}
- 当基于构造器配置的时候
@Bean("p1")
public P1 getP1(P p) {
        P1 p1 = new P1(p);
        return p1;
}
public class P1 {
    public  P p;
    public P1(P p){
        this.p = p;
    }
}
- 当基于setter配置的时候
@Bean("p3")
public P3 getP3(P p) {
        P3 p3 = new P3();
        p3.setP(p);
        return p3;
}
public class P3 {
    public P p;

    public void setP(P p) {
        this.p = p;
    }
}
- 当基于@Autowired配置的时候
@Bean("p4")
public P4 getP4() {
        return new P4();
}
public class P4 {
    @Autowired//也能注入 idea的问题
    public P p;
}
- 统一测试
 @Test
    public void test2() {
        var context = new AnnotationConfigApplicationContext("org.example.config");
        var p4 = (P4)context.getBean("p4");//@Autowired 注入
        var p1 = (P1)context.getBean("p1");//构造器注入
        var p3 = (P3)context.getBean("p3");//setter注入
        var p = (P)context.getBean("p");//普通注入
        System.out.println(p4.p);//org.example.bean3.P2@4e31276e
        System.out.println(p1.p);//org.example.bean3.P2@4e31276e
        System.out.println(p3.p);//org.example.bean3.P2@4e31276e
        System.out.println(p);//org.example.bean3.P2@4e31276e
    }
当有多个相同类型的bean的时候
- 当出现这种情况的时候
 @Bean("pa")
public P getP() {
        return new P2();
        }
@Bean("pb")
public P getP5() {
        return new P5();
        }
@Bean("p4")
public P4 getP4() {
        return new P4();
        }
用@Resouce
- Maven引入
<dependency>
    <groupId>jakarta.annotation</groupId>
    <artifactId>jakarta.annotation-api</artifactId>
    <version>2.1.1</version>
</dependency>
public class P4 {
    @Resource(name = "pb")
    public P p;
}
@Autowired+@Qualifier(“beanName”)
public class P4 {
    @Qualifier("pb")
    @Autowired//也能注入 idea的问题
    public P p;
}
区别(推荐用name找)
@Resource默认ByName如果找不到则ByType,可以添加到set方法、字段上。@Autowired默认是byType,只会根据类型寻找,可以添加在构造方法、set方法、字段、方法参数上。
bean的常用注解
1. 写在bean上的
@Bean
@Lazy(true)     //对应lazy-init属性
@Scope("prototype")    //对应scope属性
@DependsOn("teacher")    //对应depends-on属性
public Student student(){
    return new Student();
}
2. 写在class里的
@PostConstruct和@PreDestroy,它们效果和init-method和destroy-method是一样的:
public class b1{
    @PostConstruct
    public void init(){
        System.out.println("我是初始化方法");
    }

    @PreDestroy
    public void destroy(){
        System.out.println("我是销毁方法");
    }
}
快速配置 @ComponetScan+@Component+@Configuration
- 我们可以在需要注册为Bean的类上添加
@Component("name")注解来将一个类进行注册
@Component("lbwnb")   //同样可以自己起名字
public class Student {

}
@ComponetScan("路径")+@Configuration扫描路径下的类并生成bean
@Configuration
@ComponentScan("com.test.bean")   //包扫描,这样Spring就会去扫描对应包下所有的类
public class MainConfiguration {

}
工厂模式的@component配置(了解)
@Component
public class StudentFactory implements FactoryBean<Student> {
    @Override
    public Student getObject() {   //生产的Bean对象
        return new Student();
    }

    @Override
    public Class<?> getObjectType() {   //生产的Bean类型
        return Student.class;
    }

    @Override
    public boolean isSingleton() {   //生产的Bean是否采用单例模式
        return false;
    }
}


 本文详细介绍了如何在Spring框架中使用`@Configuration`和`@Bean`注解进行组件配置,以及不同类型的依赖注入(构造器、setter和@Autowired),还涵盖了`ComponentScan`和FactoryBean的使用。此外,文章提及了Maven引入的Jakarta.annotation-api及其在资源注入中的作用。


 995
995

 被折叠的 条评论
为什么被折叠?


