


文章目录
一、介绍
一个应用程序在docker中的层次结构(自上而下):
- 堆:Stack
- 服务:Services
- 容器:Container (you are here)
二、新的运行环境
以前要编写java,pthyn应用程序,我们需要首先配置它们的运行环境。然而这个运行环境只与本机相匹配。
在docker的容器中,我们可以抓取一个运行环境,不需要安装。这个抓取的运行环境的配置定义在Dockerfile中。
三、使用一个Dockerfile定义一个容器(Define a container with Dockerfile)
3.1 第一个项目
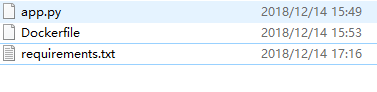
新建一个文件夹docker,其内容如下
目录结构:
from flask import Flask
from redis import Redis, RedisError
import os
import socket

# Connect to Redis
redis = Redis(host="redis", db=0, socket_connect_timeout=2, socket_timeout=2)

app = Flask(__name__)

@app.route("/")
def hello():
    try:
        visits = redis.incr("counter")
    except RedisError:
        visits = "<i>cannot connect to Redis, counter disabled</i>"

    html = "<h3>Hello {name}!</h3>" \
           "<b>Hostname:</b> {hostname}<br/>" \
           "<b>Visits:</b> {visits}"
    return html.format(name=os.getenv("NAME", "world"), hostname=socket.gethostname(), visits=visits)

if __name__ == "__main__":
    app.run(host='0.0.0.0', port=80)
requirments.txt
Redis
Flask
Dockerfile(win10无后缀)
# Use an official Python runtime as a parent image
FROM python:2.7-slim

# Set the working directory to /app
WORKDIR /app

# Copy the current directory contents into the container at /app
COPY . /app

# Install any needed packages specified in requirements.txt
RUN pip install --trusted-host pypi.python.org -r requirements.txt

# Make port 80 available to the world outside this container
EXPOSE 80

# Define environment variable
ENV NAME World

# Run app.py when the container launches
CMD ["python", "app.py"]
然后到docker目录中,执行下面命令(’.'别忘了)
docker build -t friendlyhello .
运行程序,"-p"将主机的4000端口映射到80端口。
docker run -p 4000:80 friendlyhello
关闭程序(ID是容器的id)
docker container stop Id
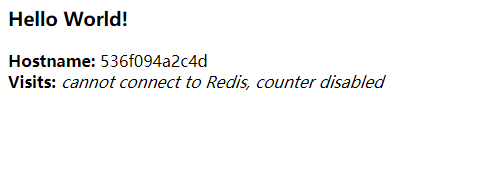
运行结果(访问http://localhost:4000):
关闭程序,以分离模式运行程序()
docker run -d -p 4000:80 friendlyhello
效果就是这样:

这样我们的容器就可以运行在后台,也可以访问localhost:4000,并且你还可以在该终端上输入内容。
3.2 期间遇到的问题
-
“no matching manifest for windows/amd64 in the manifest list entries”
解决方法:
(https://stackoverflow.com/questions/48066994/docker-no-matching-manifest-for-windows-amd64-in-the-manifest-list-entries)
-
Temporary failure in name resolution
解决方法是加入:
dns": [
    "8.8.4.4",
    "8.8.8.8"
  ]
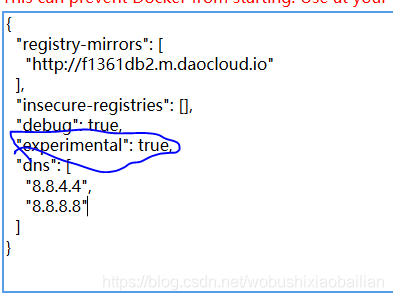
我的电脑上为:
{
  "registry-mirrors": [
    "http://f1361db2.m.daocloud.io"
  ],
  "insecure-registries": [],
  "debug": true,
  "experimental": true,
  "dns": [
    "8.8.4.4",
    "8.8.8.8"
  ]
}
四、分享我们的镜像
为了证明刚才的项目是可移植的,可以允许在任何地方。我们需要知道怎样将应用提交到仓库中。
仓库、注册表、镜像的关系:注册表是仓库的集合,仓库是镜像的集合。
4.1 登陆
如果没有docker account,登陆 官网注册一个账号。
在终端输入
docker login
4.2 标记我们的镜像
docker tag image username/repository:tag
repository:tag,其中tag是可选的,但推荐带上tag。比如get-started:part2,这会将镜像放入get-started存储库并将其标记为part2。
比如:
docker tag friendlyhello fenglifengli/get-started:part2
然后我们用命令:
docker images
查看

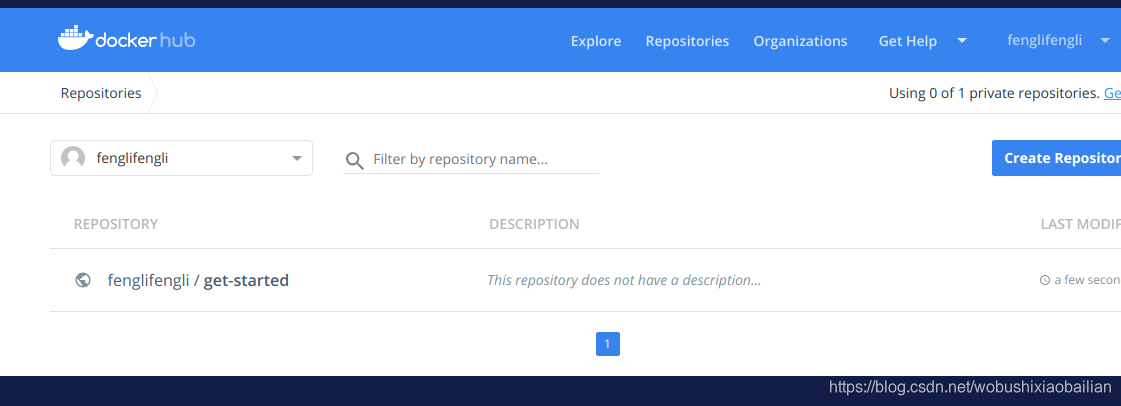
4.3 发布我们的镜像
使用命令:
docker push username/repository:tag
username/repository:tag是要本地有才行。成功之后看我们远程仓库:
4.4 从远程仓库拉取我们的镜像和运行我们的镜像
发布镜像到远程仓库之后,我们就可以在任何计算机上使用一下命令来运行我们的应用(只用装docker,不用装运行环境)。
docker run -p 4000:80 username/repository:tag


 2326
2326

 被折叠的 条评论
为什么被折叠?
被折叠的 条评论
为什么被折叠?
 到【灌水乐园】发言


