


 本文介绍了如何从零开始搭建Spring Boot开发环境,包括安装IDEA、Maven,配置阿里云镜像,并创建第一个'Hello, Spring Boot!'应用。通过引入spring-boot-starter-web依赖,创建主程序及Controller,实现简单的RESTful API。
基础:
- 熟悉Java se
- 熟悉Tomcat
环境配置
- 安装IDEA
- 安装Maven
- 安装完之后,打开maven安装路径下的conf/settings.xml
在任意紧靠注释边插入如下代码
<mirrors>
      <mirror>
        <id>nexus-aliyun</id>
        <mirrorOf>central</mirrorOf>
        <name>Nexus aliyun</name>
        <url>http://maven.aliyun.com/nexus/content/groups/public</url>
      </mirror>
  </mirrors>

  <profiles>
         <profile>
              <id>jdk-1.8</id>
              <activation>
                <activeByDefault>true</activeByDefault>
                <jdk>1.8</jdk>
              </activation>
              <properties>
                <maven.compiler.source>1.8</maven.compiler.source>
                <maven.compiler.target>1.8</maven.compiler.target>
                <maven.compiler.compilerVersion>1.8</maven.compiler.compilerVersion>
              </properties>
         </profile>
  </profiles>
- 然后打开IDEA,按快捷键ctrl+alt+s
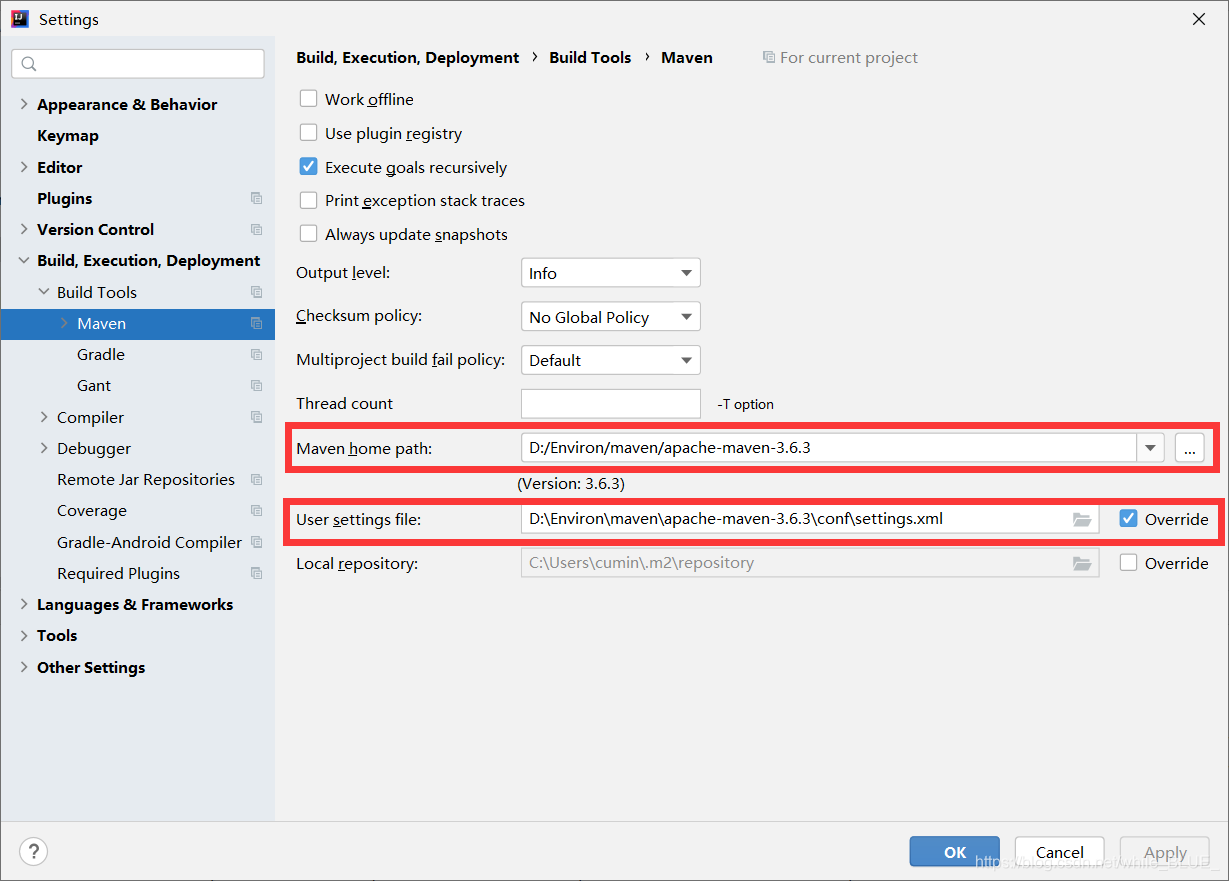
按图所示,将maven路径填入
创建工程helloworld
-
新建maven工程
helloworld,其他都默认 -
注入依赖
在pom.xml中写入
<parent>
        <groupId>org.springframework.boot</groupId>
        <artifactId>spring-boot-starter-parent</artifactId>
        <version>2.3.4.RELEASE</version>
    </parent>


    <dependencies>
        <dependency>
            <groupId>org.springframework.boot</groupId>
            <artifactId>spring-boot-starter-web</artifactId>
        </dependency>

    </dependencies>
这里要等IDEA下载一会,就不会报错了。
- 创建主程序
新建MainApplication类
/**
 * 主程序类
 * @SpringBootApplication:这是一个SpringBoot应用
 */
@SpringBootApplication
public class MainApplication {

    public static void main(String[] args) {
        SpringApplication.run(MainApplication.class,args);
    }
}
注:main方法固定为以上格式
- 编写helloworld
@RestController
public class HelloController {


    @RequestMapping("/hello")
    public String handle(){
        return "Hello, Spring Boot!";
    }


}
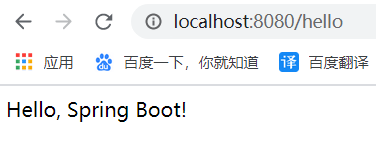
- 运行
运行后在浏览器打开
http://localhost:8080/hello


 1万+
1万+


 到【灌水乐园】发言


