


一、整合Struts2和Spring框架
1.把Struts2的action交给Spring管理
2.步骤
(1)导入jar包
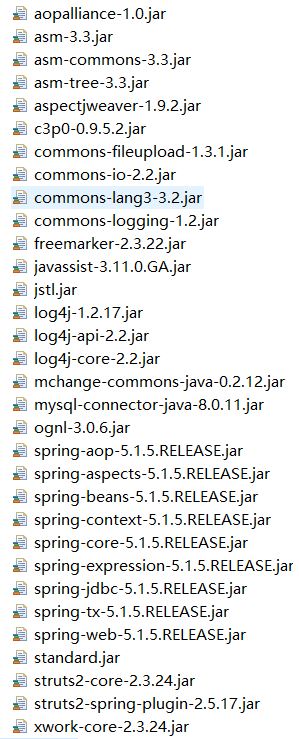
(2)在web.xml中配置struts2过滤器
    <filter>
        <filter-name>struts2</filter-name>
        <filter-class>org.apache.struts2.dispatcher.ng.filter.StrutsPrepareAndExecuteFilter</filter-class>
    </filter>

    <filter-mapping>
        <filter-name>struts2</filter-name>
        <url-pattern>/*</url-pattern>
    </filter-mapping>
(3)在spring和struts的配置文件中分别配置
<?xml version="1.0" encoding="UTF-8"?>
<beans xmlns="http://www.springframework.org/schema/beans"
	xmlns:xsi="http://www.w3.org/2001/XMLSchema-instance"
	xmlns:context="http://www.springframework.org/schema/context"
	xmlns:aop="http://www.springframework.org/schema/aop"
	xmlns:tx="http://www.springframework.org/schema/tx"
	xsi:schemaLocation="http://www.springframework.org/schema/beans
		http://www.springframework.org/schema/beans/spring-beans.xsd
		http://www.springframework.org/schema/context
		http://www.springframework.org/schema/context/spring-context.xsd
		http://www.springframework.org/schema/aop
		http://www.springframework.org/schema/aop/spring-aop.xsd
		http://www.springframework.org/schema/tx
		http://www.springframework.org/schema/tx/spring-tx.xsd">

	<!-- 配置c3p0连接池 -->
	<bean id="dataSource" class="com.mchange.v2.c3p0.ComboPooledDataSource">
		<property name="driverClass" value="com.mysql.cj.jdbc.Driver"></property>
		<property name="jdbcUrl" value="jdbc:mysql://localhost:3306/spring?serverTimezone=UTC"></property>
		<property name="user" value="root"></property>
		<property name="password" value="123"></property>
	</bean>
	<!-- 配置action对象 -->
	<bean id="userAction" class="cn.itcast.action.UserAction" scope="prototype"></bean>
</beans>
<?xml version="1.0" encoding="UTF-8"?>
<!DOCTYPE struts PUBLIC
	"-//Apache Software Foundation//DTD Struts Configuration 2.3//EN"
	"http://struts.apache.org/dtds/struts-2.3.dtd">
<struts>

	<package name="demo1" extends="struts-default" namespace="/">
		<!-- 在spring中配置后,class属性写spring中配置该action对象的bean标签id值 -->
		<action name="userAction" class="userAction"></action>
	</package>
</struts>
二、整合Spring和Hibernate框架
如果单独使用hibernate框架,核心配置文件名称hibernate.cfg.xml和位置src下 是固定的;如果和spring整合,则无固定要求
1.把hibernate核心配置文件中的数据库信息在spring中进行配置
2.把hibernate里面的sessionFactory创建交给spring管理
3.步骤
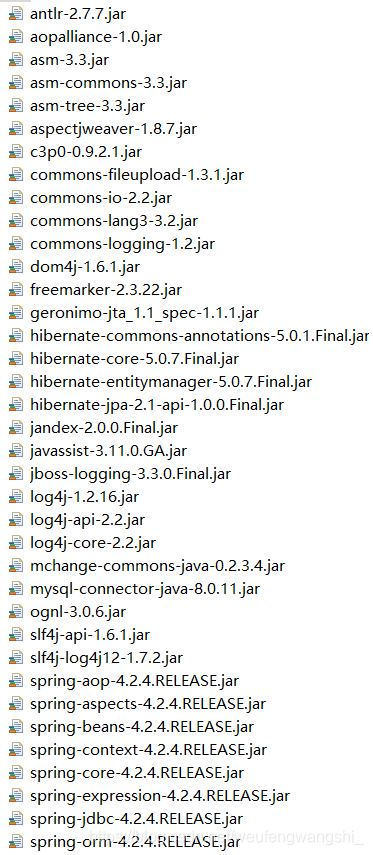
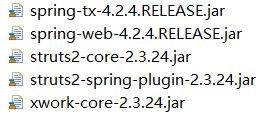
(1)导入jar包(所有的如下)
(2)创建hibernate的核心配置文件hibernate.cfg.xml
<?xml version="1.0" encoding="UTF-8"?>
<!DOCTYPE hibernate-configuration PUBLIC
    "-//Hibernate/Hibernate Configuration DTD 3.0//EN"
    "http://www.hibernate.org/dtd/hibernate-configuration-3.0.dtd">
<hibernate-configuration>
	<session-factory>
		<property name="hibernate.show_sql">true</property>
		<property name="hibernate.format_sql">trues</property>
		<property name="hibernate.hbm2ddl.auto">create</property>
		<property name="hibernate.dialect">org.hibernate.dialect.MySQL5InnoDBDialect</property>
		<mapping resource="cn/itcast/entity/User.hbm.xml"/>
	</session-factory>
</hibernate-configuration>
(3)在spring的核心配置文件中创建sessionFactory
<?xml version="1.0" encoding="UTF-8"?>
<beans xmlns="http://www.springframework.org/schema/beans"
xmlns:xsi="http://www.w3.org/2001/XMLSchema-instance"
xmlns:context="http://www.springframework.org/schema/context"
xmlns:aop="http://www.springframework.org/schema/aop"
xmlns:tx="http://www.springframework.org/schema/tx"
xsi:schemaLocation="http://www.springframework.org/schema/beans
http://www.springframework.org/schema/beans/spring-beans.xsd
http://www.springframework.org/schema/context
http://www.springframework.org/schema/context/spring-context.xsd
http://www.springframework.org/schema/aop
http://www.springframework.org/schema/aop/spring-aop.xsd
http://www.springframework.org/schema/tx
http://www.springframework.org/schema/tx/spring-tx.xsd">
<bean id="dataSource" class="com.mchange.v2.c3p0.ComboPooledDataSource">
<property name="driverClass" value="com.mysql.cj.jdbc.Driver"></property>
<property name="jdbcUrl" value="jdbc:mysql://localhost:3306/sshzh?&userSSL=false&serverTimezone=UTC"></property>
<property name="user" value="root"></property>
<property name="password" value="123"></property>
</bean>
<!-- sessionFactory创建交给spring管理 -->
<bean id="sessionFactory" class="org.springframework.orm.hibernate5.LocalSessionFactoryBean">
<!-- 在hibernate核心配置文件中,没有写数据库的配置,要注入dataSource -->
<property name="dataSource" ref="dataSource"></property>
<!-- 指定hibernate核心配置文件 -->
<property name="configLocations" value="classpath:hibernate.cfg.xml"></property>
</bean>
<!-- 创建action对象 -->
<bean id="userAction" class="cn.itcast.action.UserAction" scope="prototype"></bean>
</beans>
三、在dao层使用hibernateTemplate
在spring核心配置文件中,创建service对象,实体类对象,hibernateTemplate对象,配置事务
<?xml version="1.0" encoding="UTF-8"?>
<beans xmlns="http://www.springframework.org/schema/beans"
xmlns:xsi="http://www.w3.org/2001/XMLSchema-instance"
xmlns:context="http://www.springframework.org/schema/context"
xmlns:aop="http://www.springframework.org/schema/aop"
xmlns:tx="http://www.springframework.org/schema/tx"
xsi:schemaLocation="http://www.springframework.org/schema/beans
http://www.springframework.org/schema/beans/spring-beans.xsd
http://www.springframework.org/schema/context
http://www.springframework.org/schema/context/spring-context.xsd
http://www.springframework.org/schema/aop
http://www.springframework.org/schema/aop/spring-aop.xsd
http://www.springframework.org/schema/tx
http://www.springframework.org/schema/tx/spring-tx.xsd">
<!-- 第一步 配置事务管理器 -->
<!-- 不同持久层框架的事务管理器是不同的 -->
<bean id="transactionManager" class="org.springframework.orm.hibernate5.HibernateTransactionManager">
<!-- 注入sessionFactory -->
<property name="sessionFactory" ref="sessionFactory"></property>
</bean>
<!-- 第二步 开启事务注解 -->
<!-- 在service层中使用@Transactional -->
<tx:annotation-driven transaction-manager="transactionManager"/>
<bean id="dataSource" class="com.mchange.v2.c3p0.ComboPooledDataSource">
<property name="driverClass" value="com.mysql.cj.jdbc.Driver"></property>
<property name="jdbcUrl" value="jdbc:mysql://localhost:3306/sshzh?&userSSL=false&serverTimezone=UTC"></property>
<property name="user" value="root"></property>
<property name="password" value="123"></property>
</bean>
<!-- sessionFactory创建交给spring管理 -->
<bean id="sessionFactory" class="org.springframework.orm.hibernate5.LocalSessionFactoryBean">
<!-- 在hibernate核心配置文件中,没有写数据库的配置,要注入dataSource -->
<property name="dataSource" ref="dataSource"></property>
<!-- 指定hibernate核心配置文件 -->
<property name="configLocations" value="classpath:hibernate.cfg.xml"></property>
</bean>
<!-- 创建action对象 -->
<bean id="userAction" class="cn.itcast.action.UserAction" scope="prototype">
<property name="userService" ref="userService"></property>
</bean>
<!-- 创建service对象 -->
<bean id="userService" class="cn.itcast.service.UserService">
<property name="userDao" ref="userDaoImpl"></property>
</bean>
<!-- 创建实现类对象 -->
<bean id="userDaoImpl" class="cn.itcast.dao.UserDaoImpl">
<property name="hibernateTemplate" ref="hibernateTemplate"></property>
</bean>
<!-- 创建hibernateTemplate对象 -->
<bean id="hibernateTemplate" class="org.springframework.orm.hibernate5.HibernateTemplate">
<!-- 注入sessionFactory -->
<property name="sessionFactory" ref="sessionFactory"></property>
</bean>
</beans>
测试:
UserAction:
public class UserAction extends ActionSupport {
	private UserService userService;

	public void setUserService(UserService userService) {
		this.userService = userService;
	}

	@Override
	public String execute() throws Exception {
		System.out.println("action");
		userService.add();
		return NONE;
	}
}
UserService:
@Transactional
public class UserService {
	private UserDao userDao;

	public void setUserDao(UserDao userDao) {
		this.userDao = userDao;
	}

	public void add(){
		userDao.add();
	}
}
UserDao接口:
public interface UserDao {
	public void add();
}
UserDaoImpl实现类:
public class UserDaoImpl implements UserDao{
	private HibernateTemplate hibernateTemplate;

	public void setHibernateTemplate(HibernateTemplate hibernateTemplate) {
		this.hibernateTemplate = hibernateTemplate;
	}

	public void add() {
		User user = new User();
		user.setAddress("日本新津");
		user.setUsername("带带大师兄");
		hibernateTemplate.save(user);
	}

}
在浏览器中访问userAction,数据库成功添加数据。
web.xml
<?xml version="1.0" encoding="UTF-8"?>
<web-app xmlns:xsi="http://www.w3.org/2001/XMLSchema-instance" xmlns="http://java.sun.com/xml/ns/javaee" xsi:schemaLocation="http://java.sun.com/xml/ns/javaee http://java.sun.com/xml/ns/javaee/web-app_3_0.xsd" id="WebApp_ID" version="3.0">
  <display-name>ssh</display-name>

  	<context-param>
  		<param-name>contextConfigLocation</param-name>
  		<param-value>classpath:bean1.xml</param-value>
  	</context-param>
     <filter>
        <filter-name>struts2</filter-name>
        <filter-class>org.apache.struts2.dispatcher.ng.filter.StrutsPrepareAndExecuteFilter</filter-class>
    </filter>

    <filter-mapping>
        <filter-name>struts2</filter-name>
        <url-pattern>/*</url-pattern>
    </filter-mapping>

  	<listener>
  		<listener-class>org.springframework.web.context.ContextLoaderListener</listener-class>
  	</listener>
  <welcome-file-list>
    <welcome-file>index.html</welcome-file>
    <welcome-file>index.htm</welcome-file>
    <welcome-file>index.jsp</welcome-file>
    <welcome-file>default.html</welcome-file>
    <welcome-file>default.htm</welcome-file>
    <welcome-file>default.jsp</welcome-file>
  </welcome-file-list>
</web-app>
四、过程总结
第一步 导入jar包
第二步 搭建strtus2环境
(1)创建action,创建struts.xml配置文件配置action
(2)配置struts过滤器
第三步 搭建hibernate环境
(1)创建实体类
(2)配置实体类和数据库表映射关系
(3)创建hibernate核心配置文件,引入映射配置文件
第四步 搭建spring框架
(1)创建spring核心配置文件
(2)让spring配置文件在服务器启动时加载(web.xml中listener)
第五步 struts2和spring整合
(1)把action在spring中配置(scope="prototype"多例)
(2)在struts.xml中action标签class属性中写bean的id值
第六步 spring和hibernate整合
(1)把hibernate核心配置文件中的数据库部分在spring里配置
(2)把hibernate的sessionFactory在spring中配置
第七步 在dao层中使用hibernateTemplate
(1)在dao注入hibernateTemplate对象
(2)在hibernateTemplate对象中注入sessionFactory
第八步 配置事务
五、其他整合方式
spring整合hibernate时,可以把hibernate核心配置文件中的基本配置信息和映射文件都放到spring中
    <bean id="sessionFactory" class="org.springframework.orm.hibernate5.LocalSessionFactoryBean">
    	<!-- 在hibernate核心配置文件中,没有写数据库的配置,要注入dataSource -->
    	<property name="dataSource" ref="dataSource"></property>
    	<!-- 指定hibernate核心配置文件 -->
    	<!-- <property name="configLocations" value="classpath:hibernate.cfg.xml"></property> -->
    	<property name="hibernateProperties">
    		<props>
    			<prop key="hibernate.show_sql">true</prop>
    			<prop key="hibernate.format_sql">true</prop>
    			<prop key="hibernate.hbm2ddl.auto">update</prop>
    			<prop key="hibernate.dialect">org.hibernate.dialect.MySQL5InnoDBDialect</prop>
    		</props>
    	</property>
    	<property name="mappingResources">
    		<list>
    			<value>cn/itcast/entity/User.hbm.xml</value>
    		</list>
    	</property>
    </bean>
六、spring分模块开发
1.把spring核心配置文件中的一部分放到单独的配置文件中,之后引入到核心配置文件中。例如将user类有关的配置拿出去创建一个user.xml
user.xml
<?xml version="1.0" encoding="UTF-8"?>
<beans xmlns="http://www.springframework.org/schema/beans"
    xmlns:xsi="http://www.w3.org/2001/XMLSchema-instance"
    xmlns:context="http://www.springframework.org/schema/context"
    xmlns:aop="http://www.springframework.org/schema/aop"
    xmlns:tx="http://www.springframework.org/schema/tx"
    xsi:schemaLocation="http://www.springframework.org/schema/beans
    http://www.springframework.org/schema/beans/spring-beans.xsd
    http://www.springframework.org/schema/context
    http://www.springframework.org/schema/context/spring-context.xsd
    http://www.springframework.org/schema/aop
    http://www.springframework.org/schema/aop/spring-aop.xsd
    http://www.springframework.org/schema/tx
    http://www.springframework.org/schema/tx/spring-tx.xsd">

    <!-- 创建action对象 -->
    <bean id="userAction" class="cn.itcast.action.UserAction" scope="prototype">
    	<property name="userService" ref="userService"></property>
    </bean>

    <!-- 创建service对象 -->
    <bean id="userService" class="cn.itcast.service.UserService">
    	<property name="userDao" ref="userDaoImpl"></property>
    </bean>

    <!-- 创建实现类对象 -->
    <bean id="userDaoImpl" class="cn.itcast.dao.UserDaoImpl">
    	<property name="hibernateTemplate" ref="hibernateTemplate"></property>
    </bean>

    <!-- 创建hibernateTemplate对象 -->
	<bean id="hibernateTemplate" class="org.springframework.orm.hibernate5.HibernateTemplate">
    	<!-- 注入sessionFactory -->
    	<property name="sessionFactory" ref="sessionFactory"></property>
    </bean>
</beans>
核心配置文件:
<?xml version="1.0" encoding="UTF-8"?>
<beans xmlns="http://www.springframework.org/schema/beans"
xmlns:xsi="http://www.w3.org/2001/XMLSchema-instance"
xmlns:context="http://www.springframework.org/schema/context"
xmlns:aop="http://www.springframework.org/schema/aop"
xmlns:tx="http://www.springframework.org/schema/tx"
xsi:schemaLocation="http://www.springframework.org/schema/beans
http://www.springframework.org/schema/beans/spring-beans.xsd
http://www.springframework.org/schema/context
http://www.springframework.org/schema/context/spring-context.xsd
http://www.springframework.org/schema/aop
http://www.springframework.org/schema/aop/spring-aop.xsd
http://www.springframework.org/schema/tx
http://www.springframework.org/schema/tx/spring-tx.xsd">
<!-- 第一步 配置事务管理器 -->
<!-- 不同持久层框架的事务管理器是不同的 -->
<bean id="transactionManager" class="org.springframework.orm.hibernate5.HibernateTransactionManager">
<!-- 注入sessionFactory -->
<property name="sessionFactory" ref="sessionFactory"></property>
</bean>
<!-- 第二步 开启事务注解 -->
<!-- 在service层中使用@Transactional -->
<tx:annotation-driven transaction-manager="transactionManager"/>
<bean id="dataSource" class="com.mchange.v2.c3p0.ComboPooledDataSource">
<property name="driverClass" value="com.mysql.cj.jdbc.Driver"></property>
<property name="jdbcUrl" value="jdbc:mysql://localhost:3306/sshzh?&userSSL=false&serverTimezone=UTC"></property>
<property name="user" value="root"></property>
<property name="password" value="123"></property>
</bean>
<!-- sessionFactory创建交给spring管理 -->
<bean id="sessionFactory" class="org.springframework.orm.hibernate5.LocalSessionFactoryBean">
<!-- 在hibernate核心配置文件中,没有写数据库的配置,要注入dataSource -->
<property name="dataSource" ref="dataSource"></property>
<!-- 指定hibernate核心配置文件 -->
<!-- <property name="configLocations" value="classpath:hibernate.cfg.xml"></property> -->
<property name="hibernateProperties">
<props>
<prop key="hibernate.show_sql">true</prop>
<prop key="hibernate.format_sql">true</prop>
<prop key="hibernate.hbm2ddl.auto">update</prop>
<prop key="hibernate.dialect">org.hibernate.dialect.MySQL5InnoDBDialect</prop>
</props>
</property>
<property name="mappingResources">
<list>
<value>cn/itcast/entity/User.hbm.xml</value>
</list>
</property>
</bean>
<!-- 引入其他spring配置文件 -->
<import resource="classpath:user.xml"/>
</beans>


 1130
1130

 被折叠的 条评论
为什么被折叠?
被折叠的 条评论
为什么被折叠?
 到【灌水乐园】发言


