


前言
本期讲解:通过@Controller、@Service、@Repository、@Component、@Configurtion类注解、@Bean方法注解,来更加简单的在Spring中存与读对象。
目录
1. 类注解
首先,我们创建一个 Spring 项目,创建 Spring 项目和配置文件所需要的代码在上篇博客中以及讲到了。
1.1 通过<bean>标签
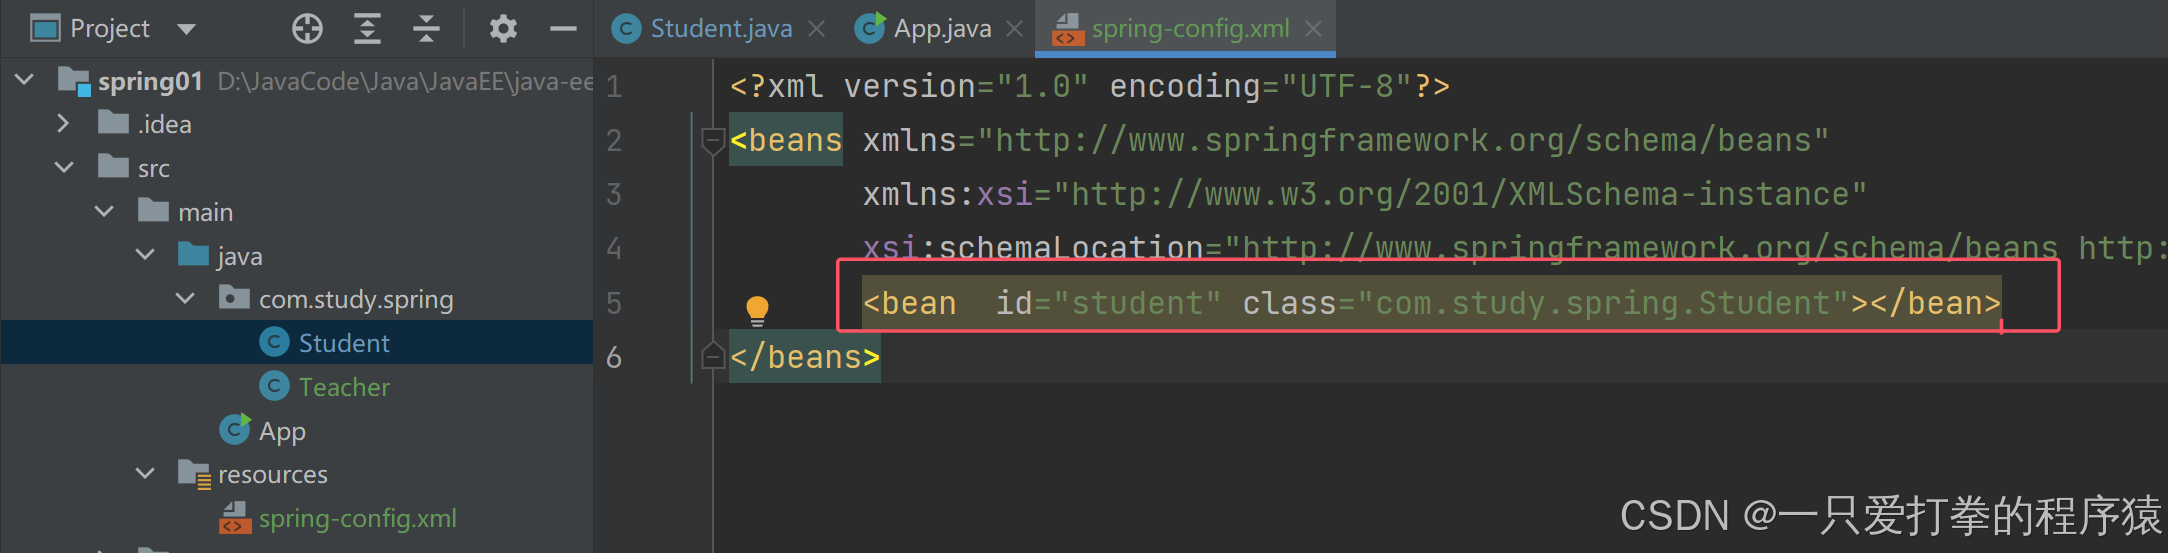
在之前的学习中,我们存储 Bean 对象时,用到的是 <bean></bean> 标签。我们需要将 Bean 对象的 id 以及类所在的位置所标注到 <bean> 标签里面。如下所示:
创建一个 Bean 对象 Student 类:
package com.study.spring;

public class Student {
    public void hello() {
        System.out.println("Hello Student!");
    }
}
将创建好的 Bean 对象通过 <bean></bean> 标签存入 Spring 中:
创建一个启动类 App 并运行:
public class App {
    public static void main(String[] args) {
        // 1.获取 Spring 的上下文对象
        ApplicationContext context =
                new ClassPathXmlApplicationContext("spring-config.xml");
        // 2.加载到 id 为 student 的 Bean 中
        Student student = (Student) context.getBean("student");
        // 3.运行 Student 类中 hello 方法
        student.hello();
    }
}
运行结果:

我们可以发现这种方式是比较传统且基础的,但我们可以通过类注解来进行存储,通过类注解的存储方式只需要标注类所在的地址,就能将 Bean 对象存入 Spring 中。具体请看下面讲解。
1.2 使用类注解
上面我们提到了通过 <bean></bean> 标签来存储并使用 Bean 对象,更加简单的存与用可以有:
- 通过类注解:@Controller、@Service、@Repository、@Component、@Configurtion
- 通过方法注解:@Bean
1.3 什么是类注解
@Configuration:声明当前类是一个配置类,相当于一个Spring配置的XML文件。这个注解用于替代XML配置文件,简化配置。
@Component:这是一个泛化的注解,可以用于任何Spring管理的组件。它告诉Spring这个类是一个Spring管理的bean。
@Controller:用于标注控制器层组件,通常用于处理HTTP请求。它是@Component的衍生注解,功能相同。
@Service:用于标注服务层组件,通常处理业务逻辑。它也是@Component的衍生注解。
@Repository:用于标注数据访问层组件,通常用于数据库操作。同样是@Component的衍生注解。
通过类注解,我们需要将 Spring 的配置文件加入 <content></content> 标签,并将 Bean 对象所在地址存入该文件中:
<?xml version="1.0" encoding="UTF-8"?>
<beans xmlns="http://www.springframework.org/schema/beans"
       xmlns:xsi="http://www.w3.org/2001/XMLSchema-instance"
       xmlns:content="http://www.springframework.org/schema/context"
       xsi:schemaLocation="http://www.springframework.org/schema/beans
       http://www.springframework.org/schema/beans/spring-beans.xsd
       http://www.springframework.org/schema/context
       https://www.springframework.org/schema/context/spring-context.xsd">
       <content:component-scan base-package="com.study.spring"></content:component-scan>
</beans>
创建一个 Teacher 类:
@Controller
public class Teacher {
    public void hello() {
        System.out.println("Hello Teacher!");
    }
}
在创建该类时,我们可以发现,在代码的上头使用了 @Controller 注解。因此在获取该对象时可使用类名小写来获取。
使用 App 启动类:
public class App {
    public static void main(String[] args) {
        // 1. 获取Spring容器
        ApplicationContext context =
                new ClassPathXmlApplicationContext("spring-config.xml");
        // 2. 得到Bean对象
        Teacher teacher = context.getBean("teacher",Teacher.class);
        // 3. 使用Bean对象的内容
        teacher.hello();
    }
}
运行结果:

由于上面的几个类注解都是 @Component 的衍生注解,因此这几个类注解使用上述功能达到的结果是一致的,因此不再重复操作。
1.4 获取Bean对象命名问题
在上述代码中,我们使用类名 Teacher 的小写 teacher 即能获取该对象。但有特例,当类名为 TEacher 时,则只能原类名 TEacher 来获取该对象。
因此衍生一个问题,为什么不直接使用类名?当我们打开生成 Bean 对象的获取名源代码,发现该功能是来自于 jdk ,如下图所示:
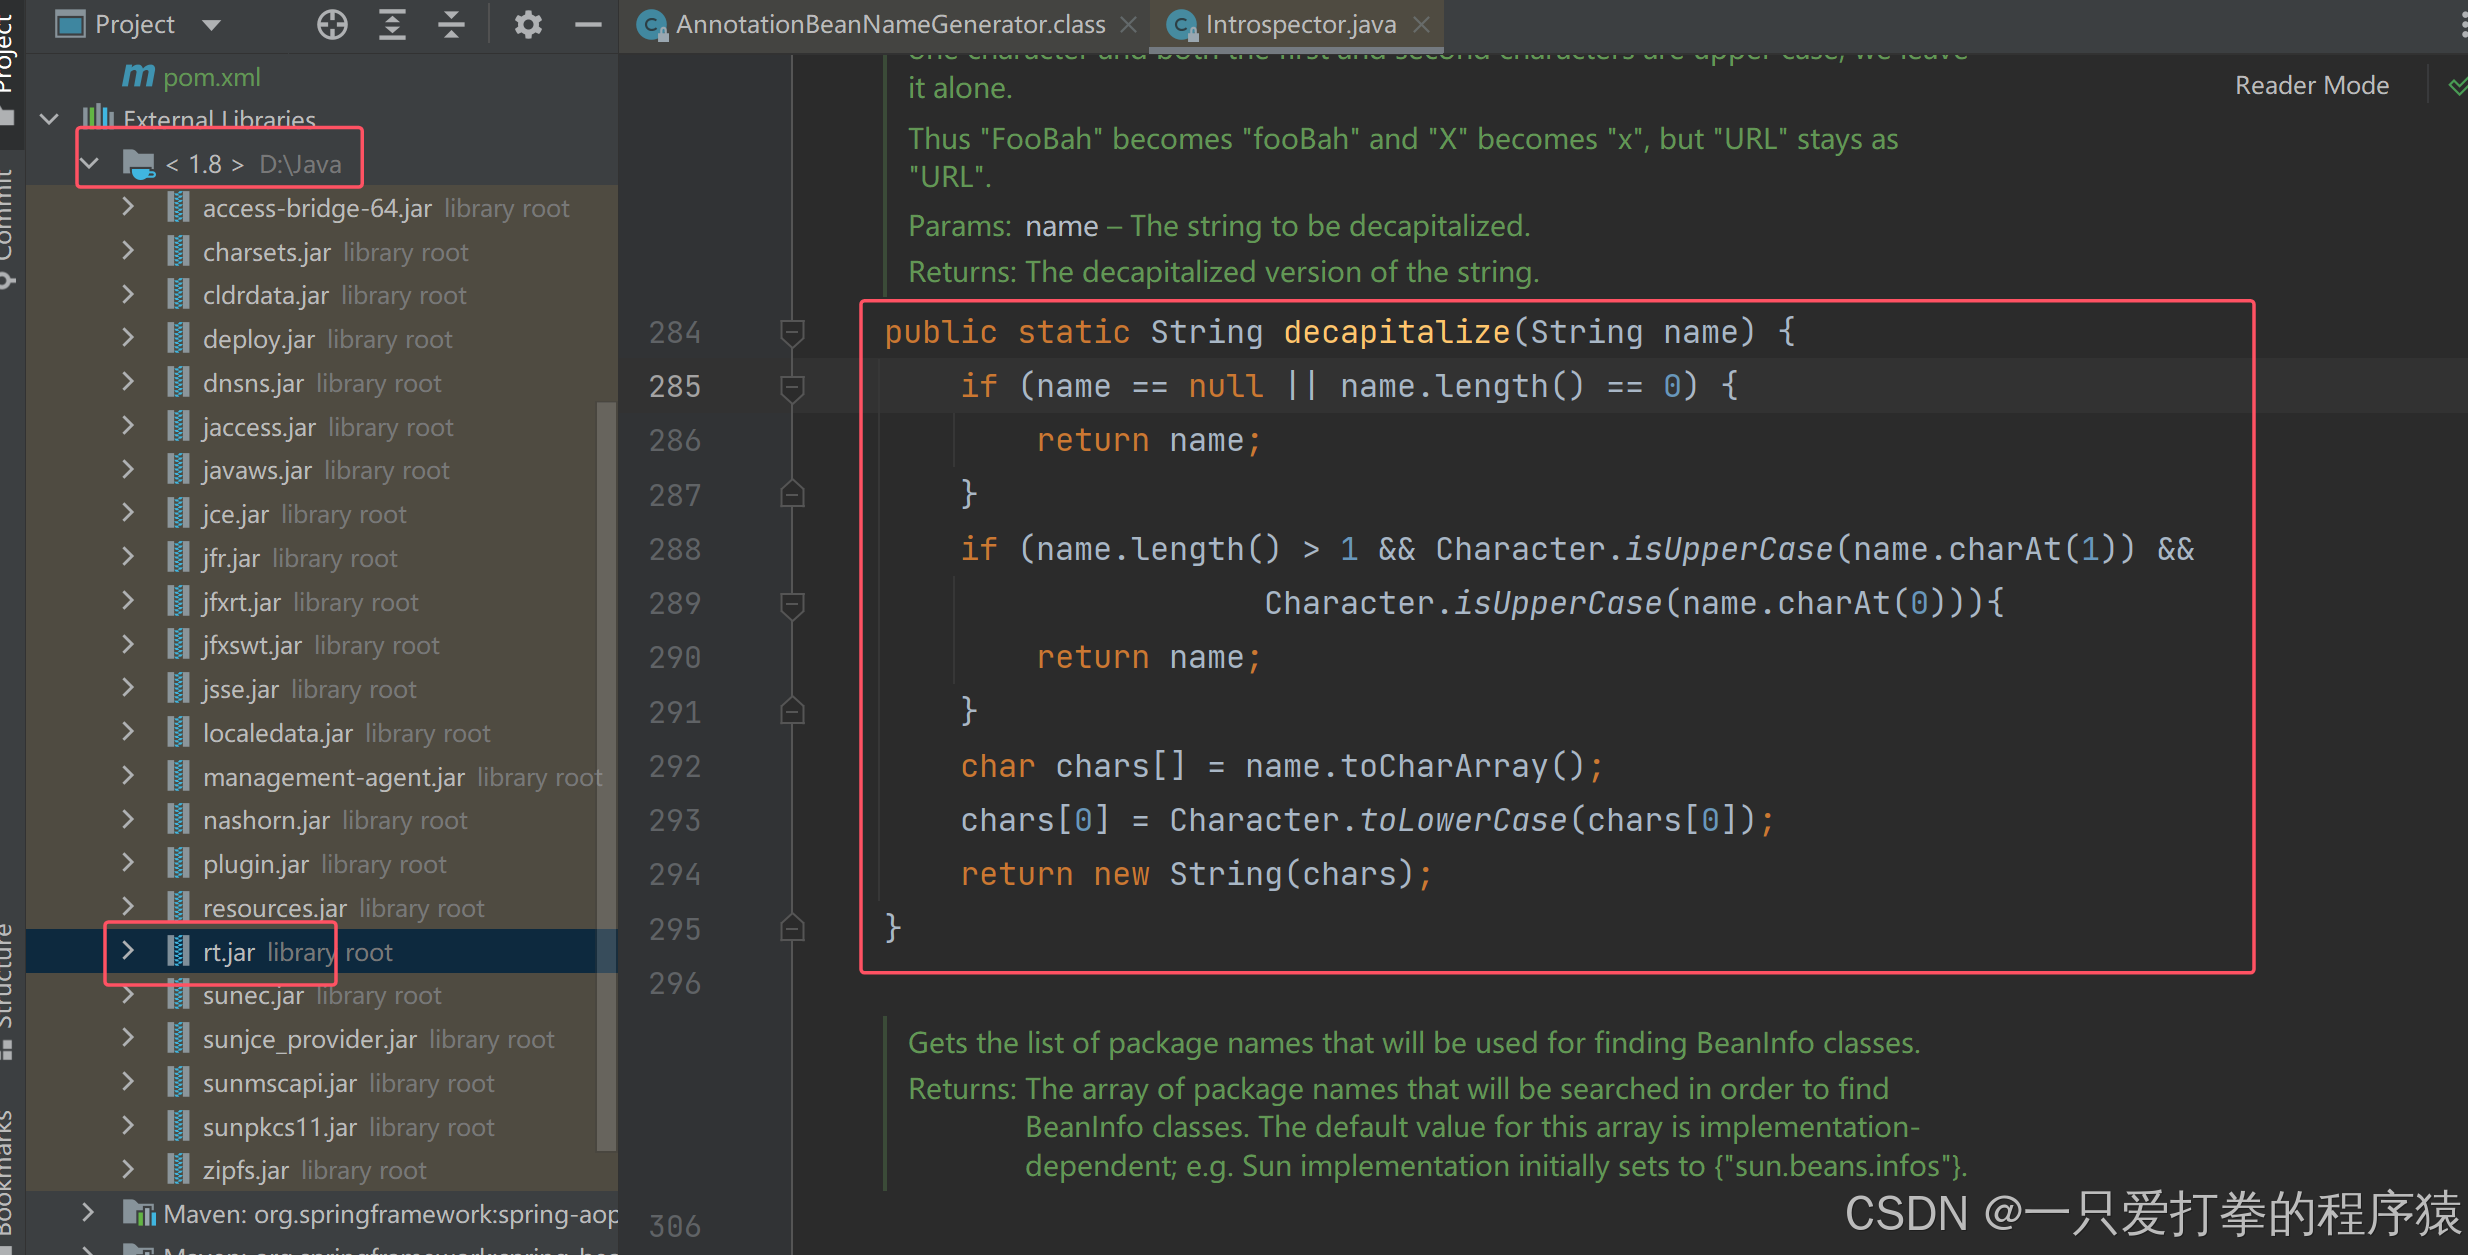
我们来阅读该内容,如果 name 长度大于1,判断第一、二个字母是否大写,大写就返回原类名。
否则从第一个字母开始转为小写,并返回。由此可见,Bean 对象的获取名是由此所制订的。
2. 方法注解
方法注解,即为在对象中的方法上加入 @Bean 注解,也能达到存入 Spring 的效果。
2.1 使用@Bean方法注解
创建一个实体类 Dog,里面的参数有 id,name,content,并设置 getter and setter 方法和重写 toString 方法:
public class Dog {
    private int id;
    private String name;
    private String content;

    @Override
    public String toString() {
        return "Dog{" +
                "id=" + id +
                ", name='" + name + '\'' +
                ", content='" + content + '\'' +
                '}';
    }

    public int getId() {
        return id;
    }

    public void setId(int id) {
        this.id = id;
    }

    public String getName() {
        return name;
    }

    public void setName(String name) {
        this.name = name;
    }

    public String getContent() {
        return content;
    }

    public void setContent(String content) {
        this.content = content;
    }
}
创建一个 Dogs 类用来设置 Dog 类里面的参数,并在 dog 方法上加入 @Bean 方法注解(由于我们要使用 dog 方法):
public class Dogs {
    @Bean
    public Dog dog() {
        Dog dog = new Dog();
        dog.setId(1);
        dog.setName("小白");
        dog.setContent("汪汪汪!");
        return dog;
    }
}
在启动类 App 使用:
public class App {
    public static void main(String[] args) {
        // 1. 获取Spring容器
        ApplicationContext context =
                new ClassPathXmlApplicationContext("spring-config.xml");
        // 2. 得到Bean对象
        Dog dog = context.getBean("dog", Dog.class);
        // 3. 使用Bean对象的内容
        System.out.println(dog.toString());
    }
}
运行结果:

我们会发现,报错了。因为 @Bean 方法注解需要搭配,@Controller、@Service、@Repository、@Component、@Configurtion 中的其中任意一个类注解来使用。
2.2 @Bean方法注解搭配类注解
我们在 Dogs 类上加上一个 @Component 类注解,再运行程序:
@Component
public class Dogs {
    @Bean
    public Dog dog() {
        Dog dog = new Dog();
        dog.setId(1);
        dog.setName("小白");
        dog.setContent("汪汪汪!");
        return dog;
    }
}
运行结果:

注意,我们通过 @Bean 方法注解时,在获取 Bean 对象时应与被注解的方法名保持一致,如下图所示:
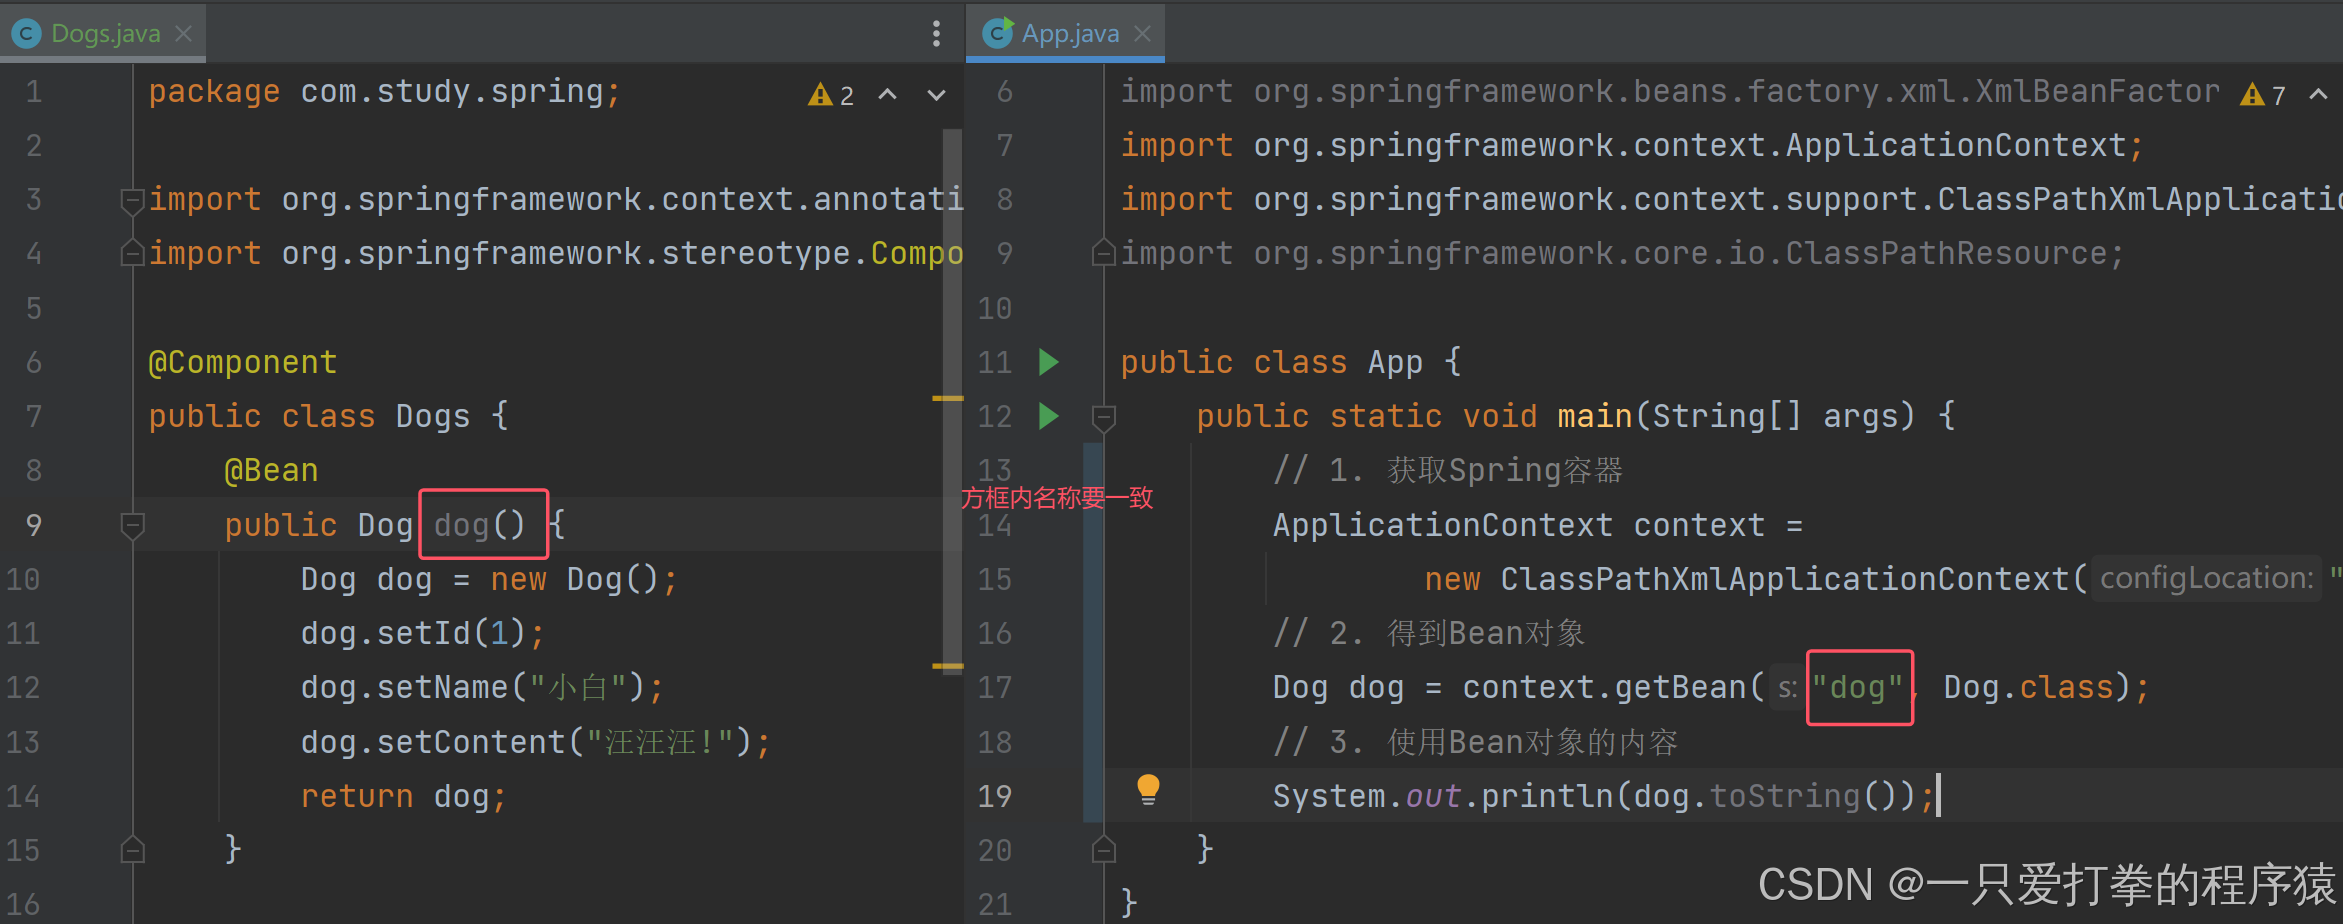
另外,由于上面 Dogs 类中使用了 @Component 类注解,由此 Dosg 类里面的未使用 @Bean 方法注解的类也注入到了 Spring 当中。
我们在 Dogs 类中创建一个 hello 方法,并使用 App 类启动。Dogs 类中添加 hello 方法:
@Component
public class Dogs {
    @Bean
    public Dog dog() {
        Dog dog = new Dog();
        dog.setId(1);
        dog.setName("小白");
        dog.setContent("汪汪汪!");
        return dog;
    }

    public void hello() {
        System.out.println("Hello Dogs");
    }
}
App 类启动:
public class App {
    public static void main(String[] args) {
        // 1. 获取Spring容器
        ApplicationContext context =
                new ClassPathXmlApplicationContext("spring-config.xml");
       /* // 2. 得到Bean对象
        Dog dog = context.getBean("dog", Dog.class);
        // 3. 使用Bean对象的内容
        System.out.println(dog.toString());*/

        Dogs dogs = context.getBean("dogs",Dogs.class);
        dogs.hello();
    }
}
运行结果:

2.3 重命名@Bean方法注解
通过上述的学习,我们知道了使用 @Bean 方法注解时,获取该方法使用的是被注解的方法的方法名,听起来有点拗口但并不难理解,也就是说直接使用 @Bean 方法注解时,默认获取方式为被注解的方法名。
更好的方式为使用 @Bean 注解里面 name 和 value 值,有四种重命名方式:
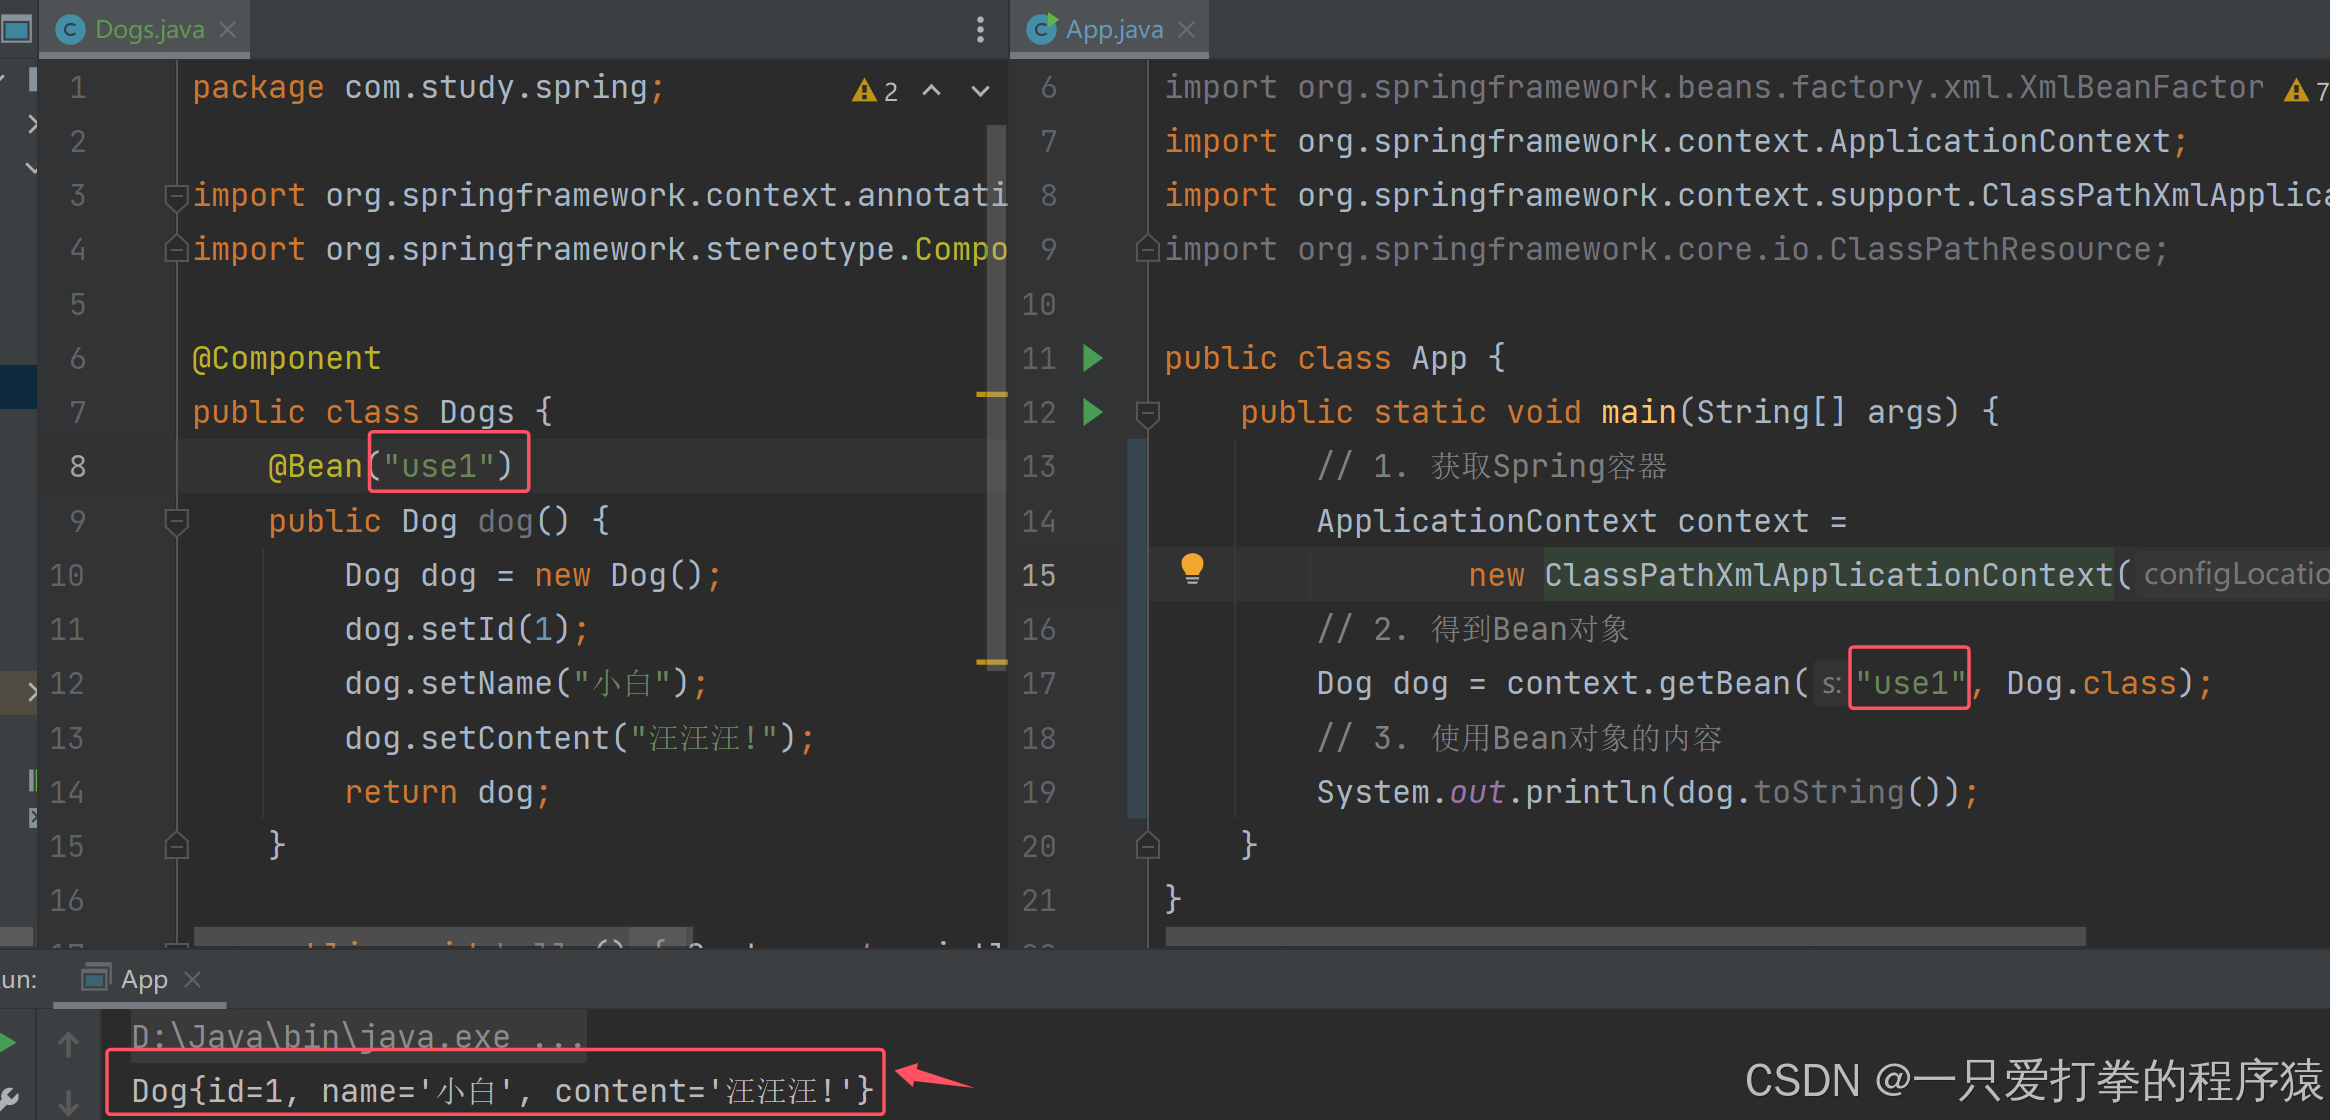
- @Bean("use1")
- @Bean(name="use1)
- @Bean(value="use1")
- @Bean(name={"use1","use2",...})
假设重命名名称为 use1,使用 @Bean("use1"),并通过 use1 获取该对象。
使用 @Bean(name={"use1"}),可通过 use1 获取该对象。
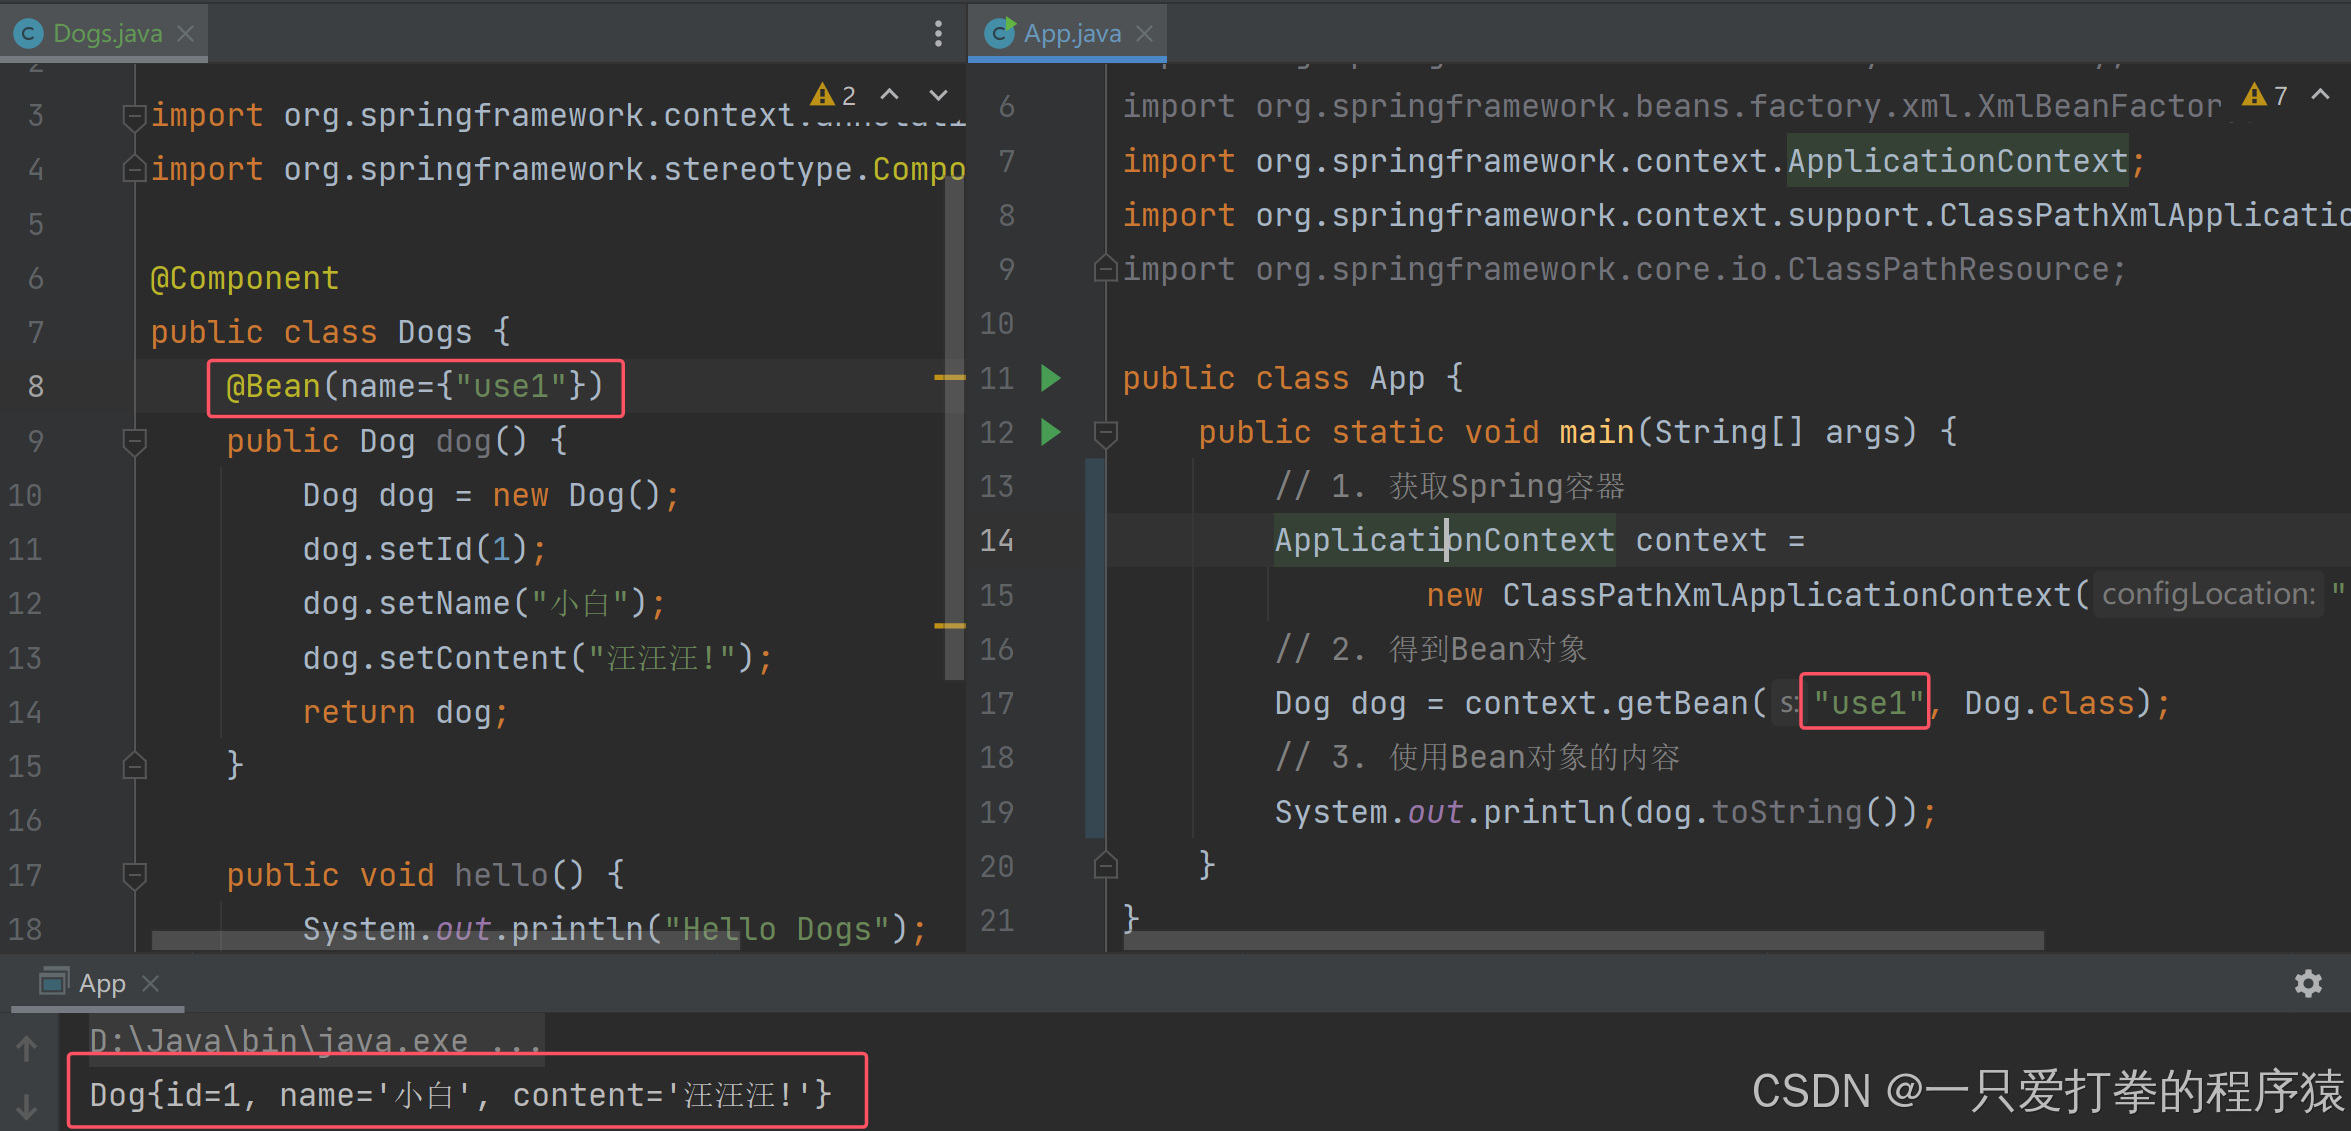
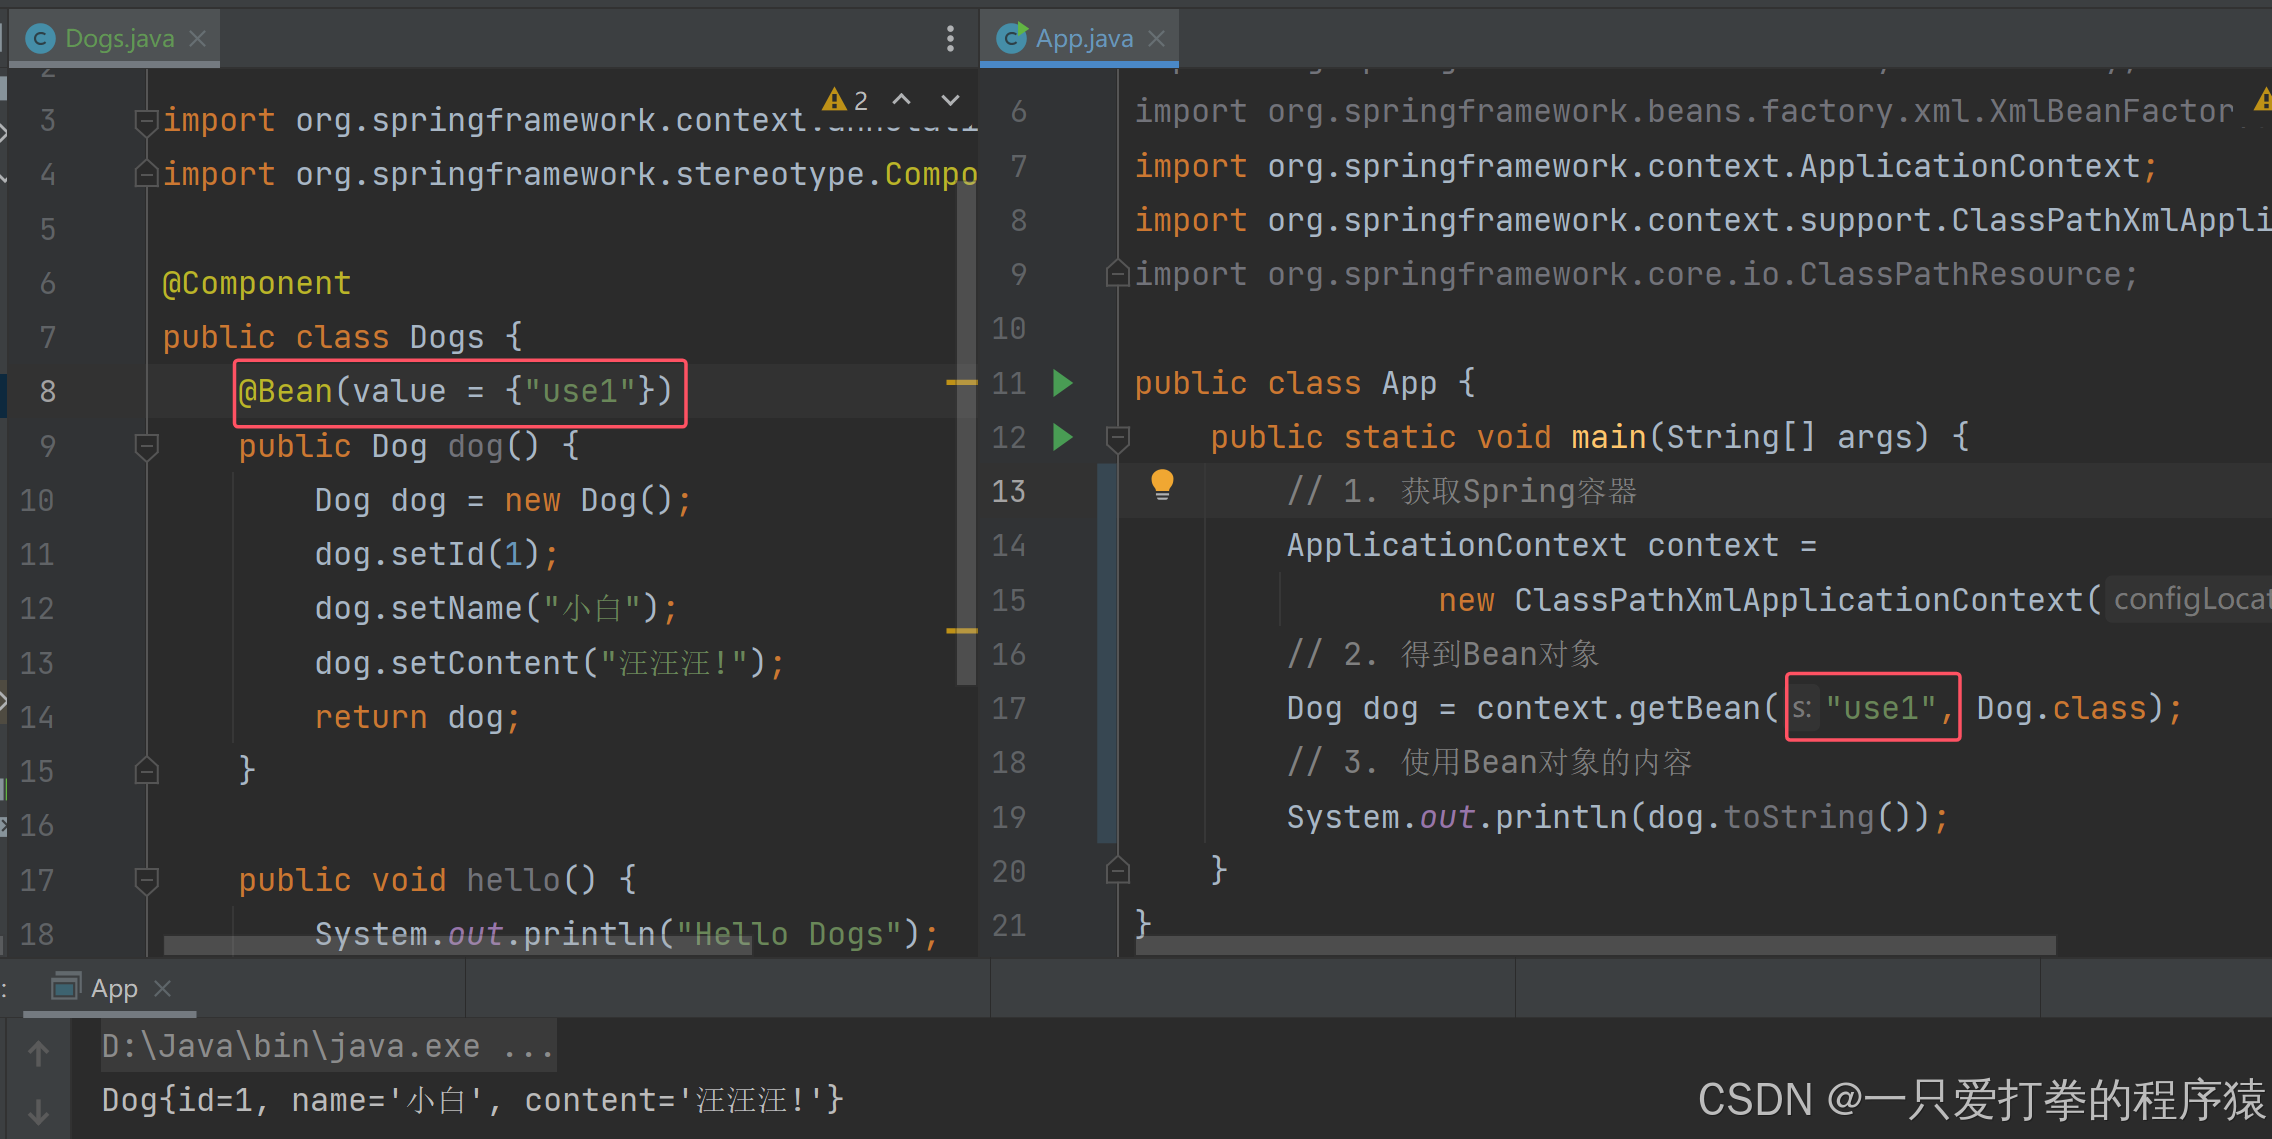
使用 @Bean(value = {"use1"}),可通过 use1 获取该对象。
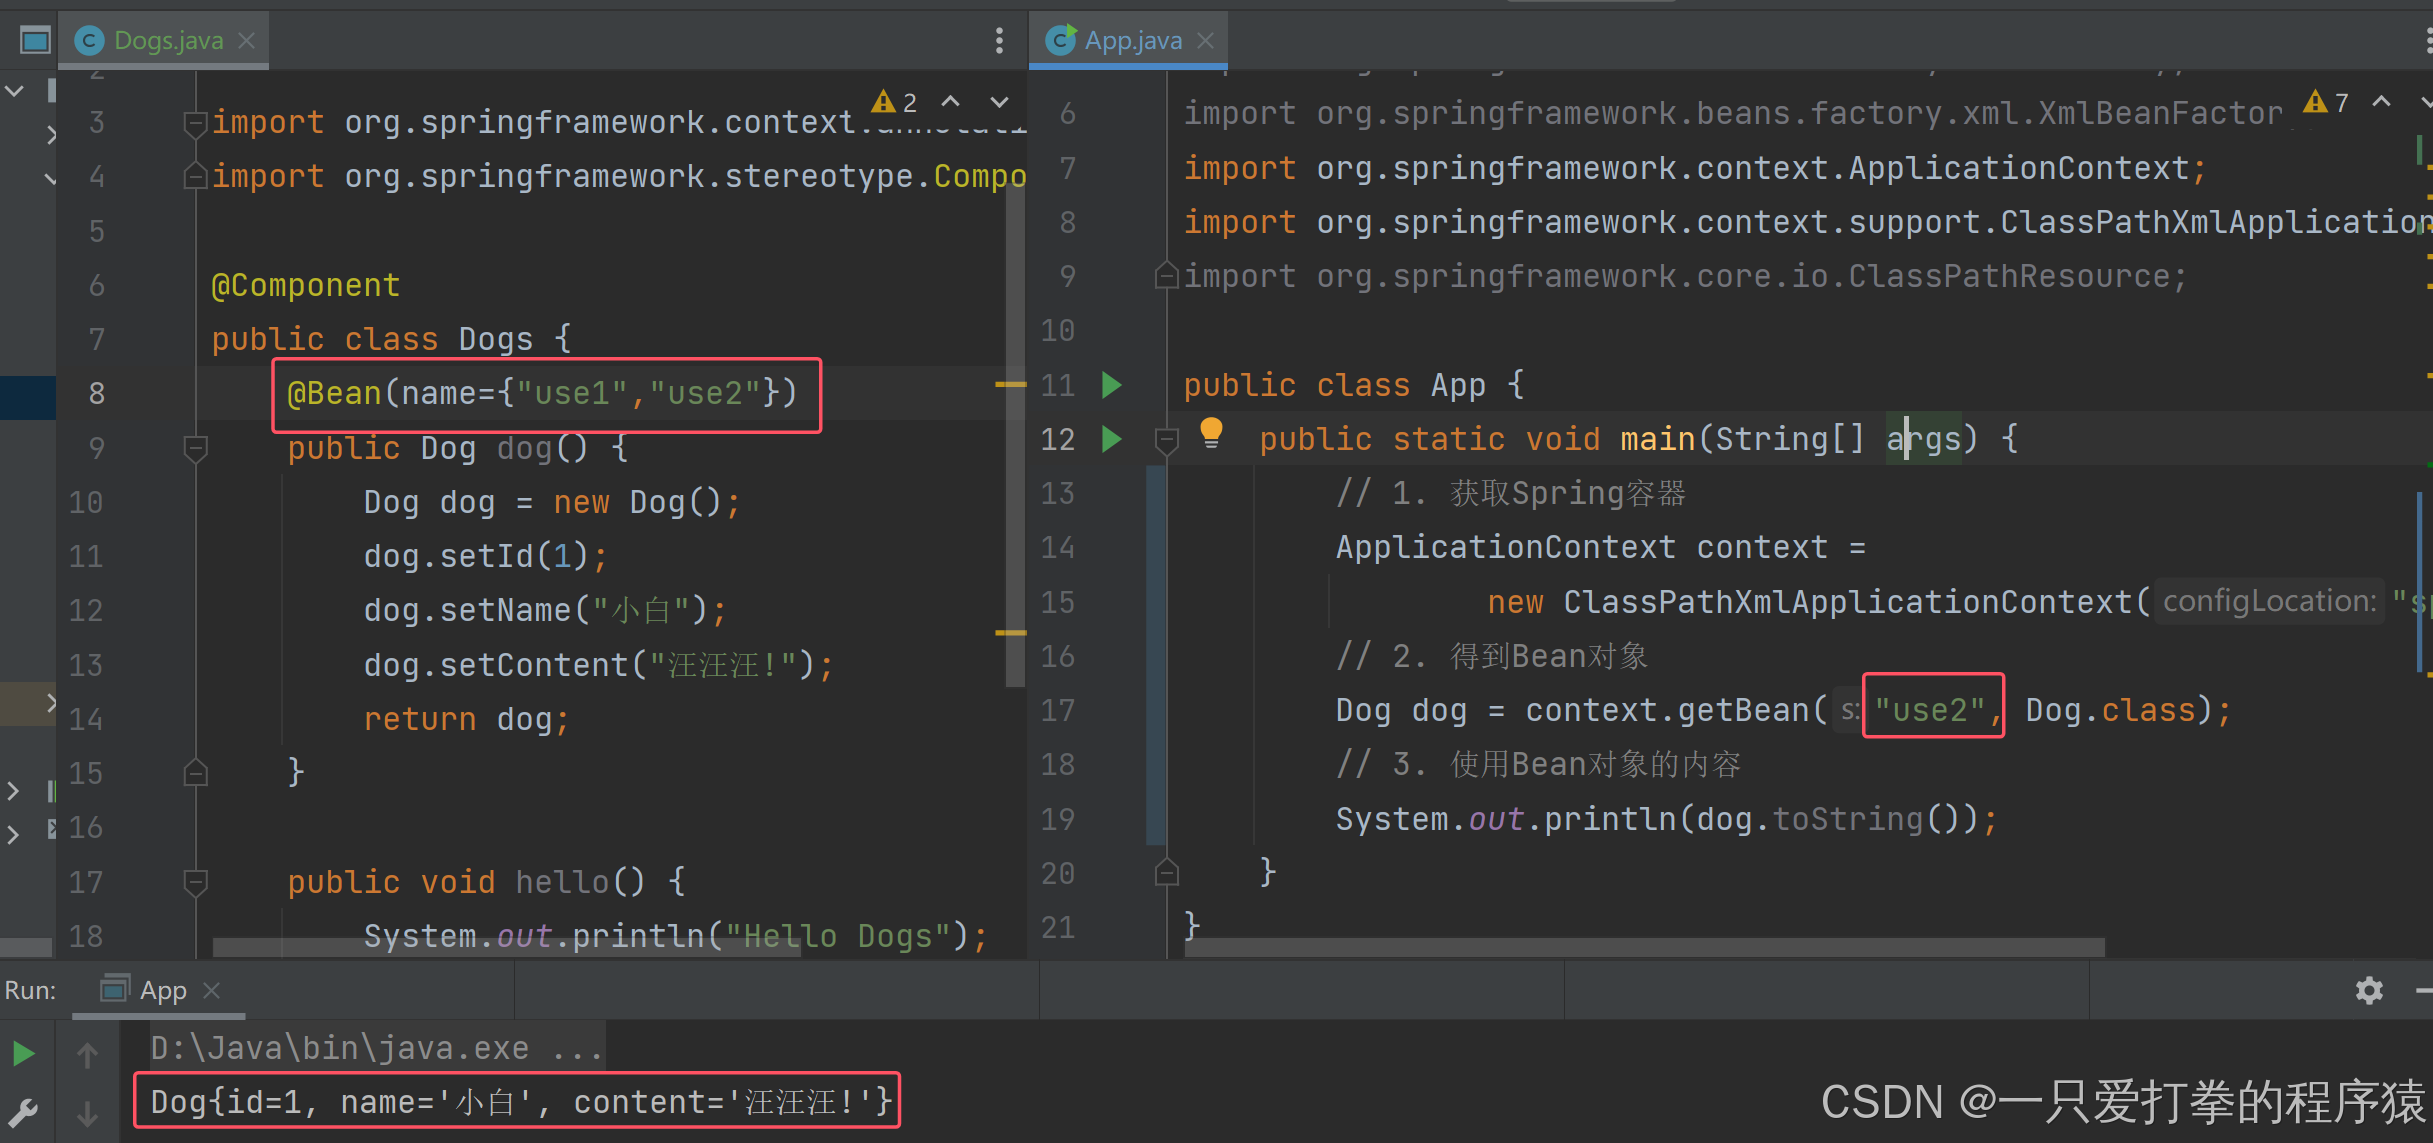
使用 @Bean(name={"use1","use2"}),可通过 use1 或 use2 来获取对象。
2.4 无法使用默认方式
当我们重命名后,再次使用默认的获取方式(被 @Bean 注解的方法名)时,程序报错了。因此得出被重命名后无法再使用默认方式了,只能使用重命名后的名称。
本期博客到这就结束了,感谢各位的阅读!
🥊作者:一只爱打拳的程序猿,Java领域新星创作者,优快云、阿里云社区优质创作者


 被折叠的 条评论
为什么被折叠?
被折叠的 条评论
为什么被折叠?
 到【灌水乐园】发言


