


目录
之前的想法是 Blander + Three.js 去实现看看,发现一堆问题
通过vue如何利用 Three 绘制 简单3D模型(源码案例)
AI生成模型
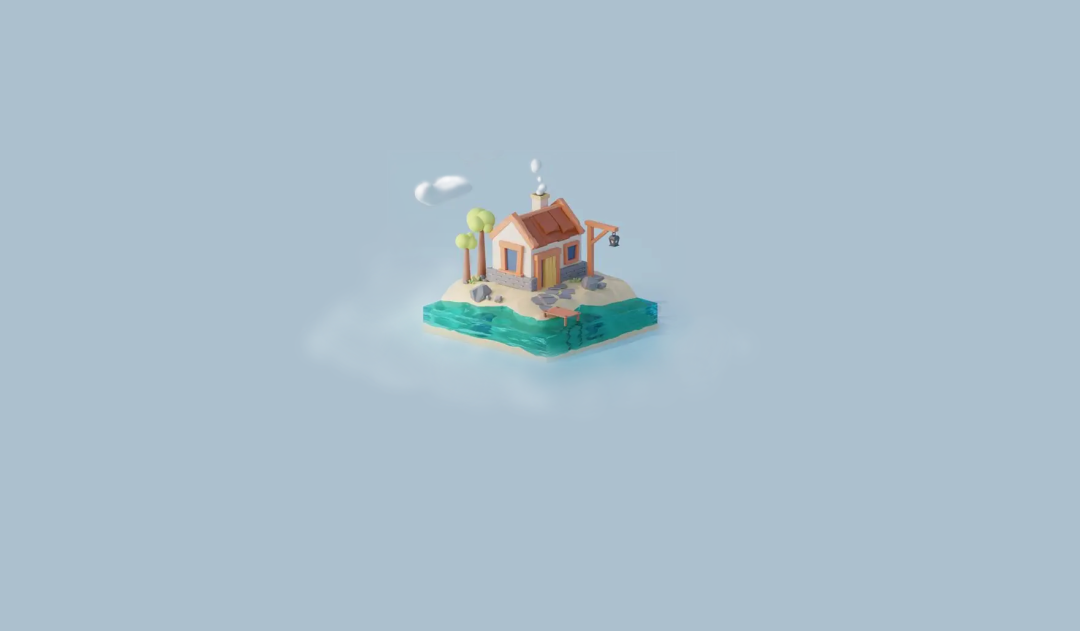
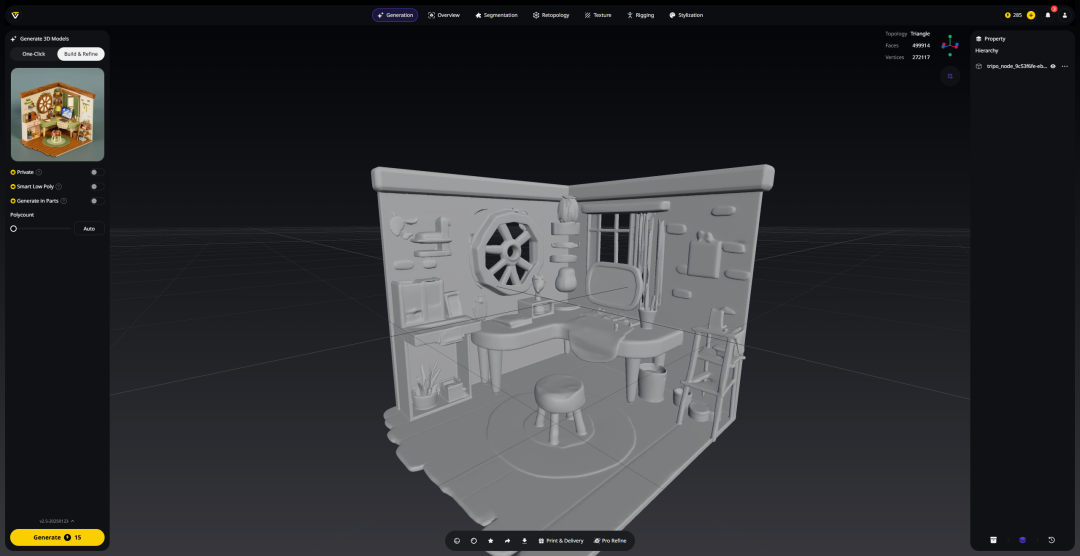
Tripo Studio 3D
https://studio.tripo3d.ai/workspace/generate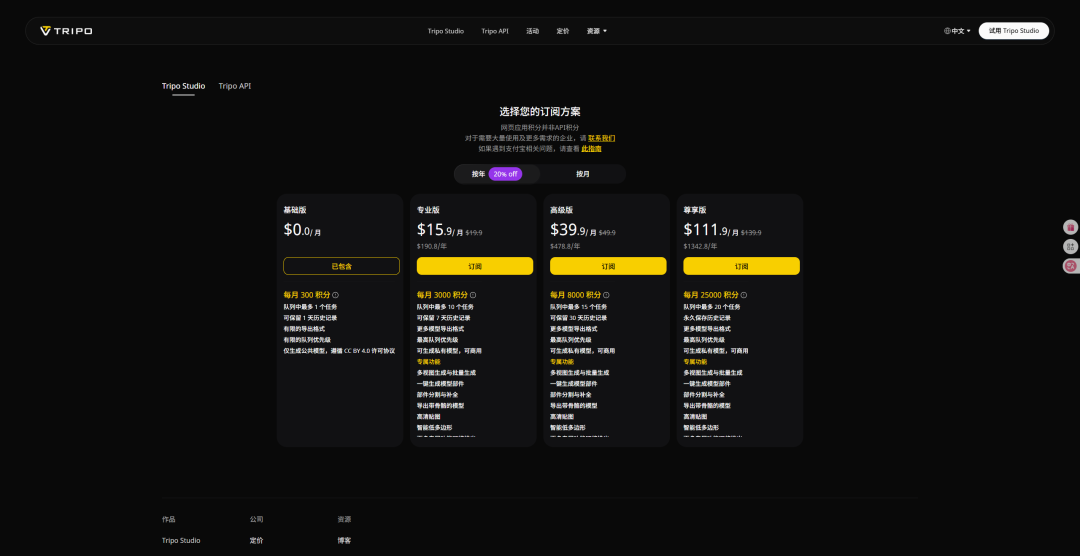
格式转换
http://glbxz.com/如今使用这个方式来实现看看吧!!
技术架构
Vue3(语法糖) + Blander(导出gltf) + TroisJS + Babylon.js(点击事件)
版本信息
Vue: 3.5.17
Blander: 4.4
TroisJS: 0.3.4
Babylon.JS: 8.16.0
安装依赖
Vue
npm init vue@latest my-smart-homecd my-smart-homenpm install
TroisJS
npm install troisjsBabylon.JS
npm install @babylonjs/core @babylonjs/loaders建模模型
随便网上找找教程摸一摸就弄出来了,如果不想找,用我的吧
网盘分享的文件:Shara3DFile
https://pan.baidu.com/s/1Ph7m_5VE5v2Uj47RLhpO7w?pwd=tiv4 提取码: tiv4
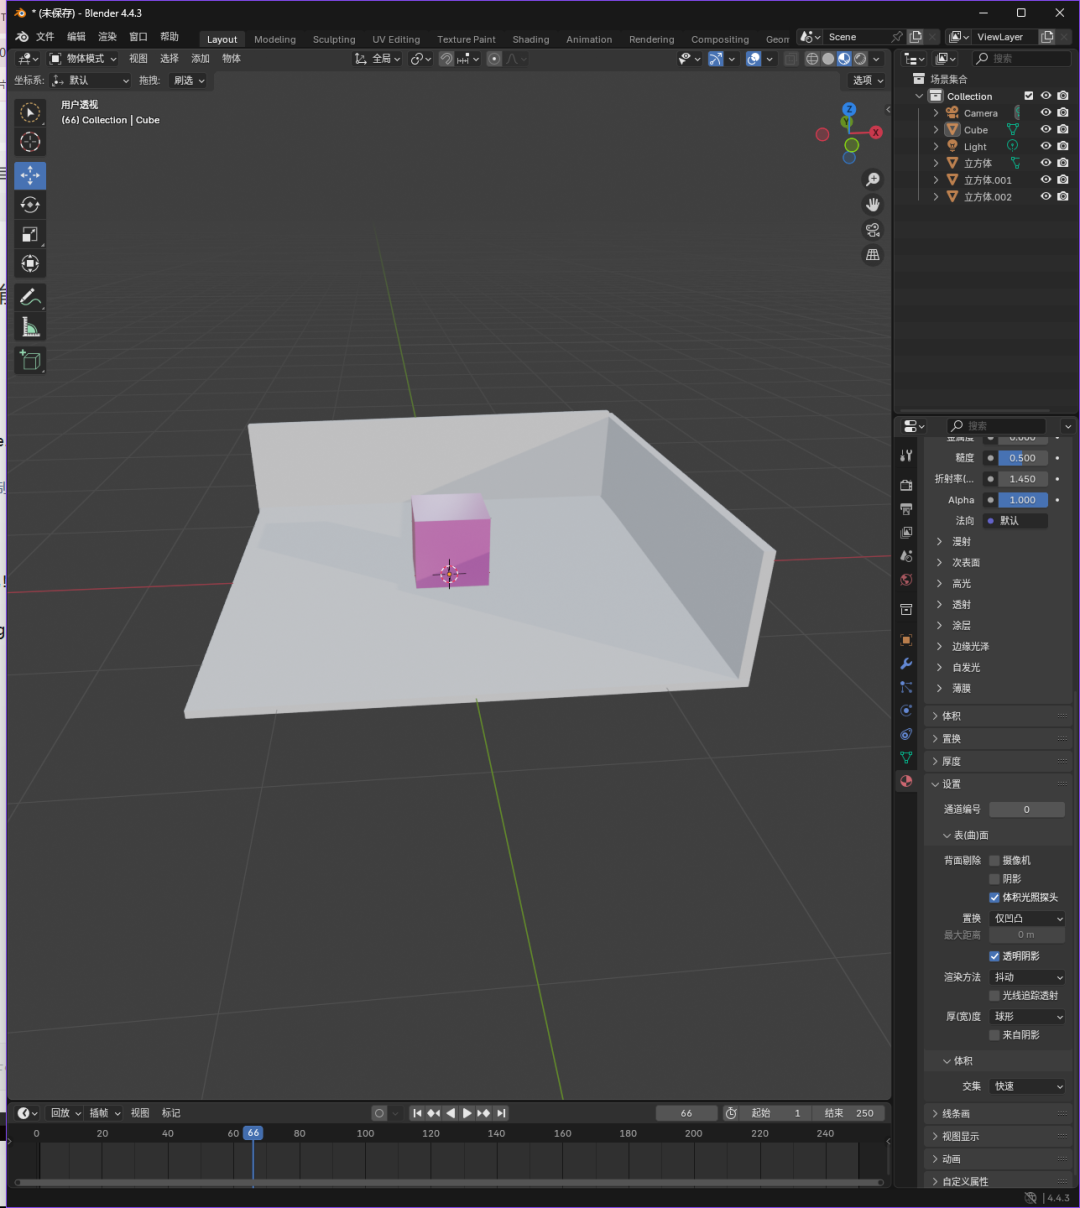
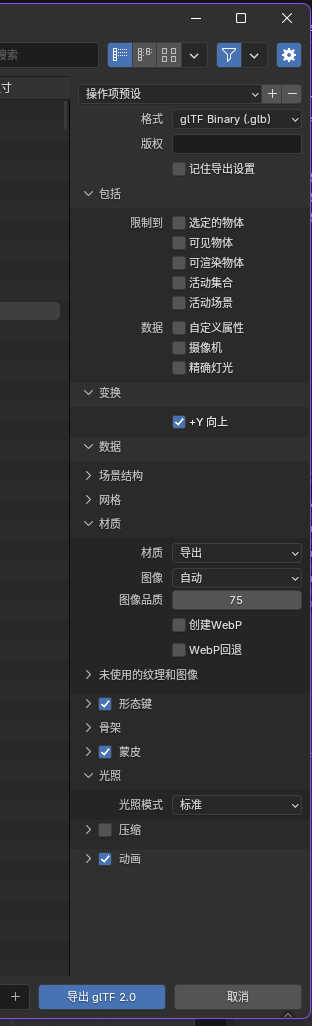
导出GLB/GLTF
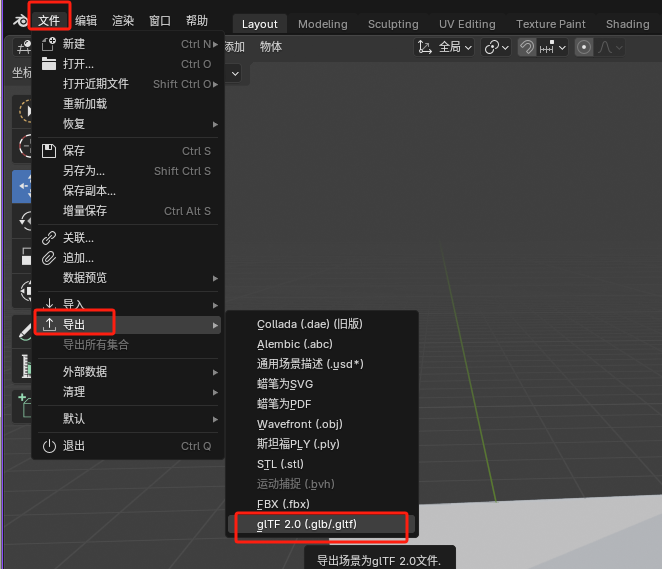
点击后在右边 可以进行 配置
模型测试网站
把图片丢进去解析就完事了
https://gltf-viewer.donmccurdy.com/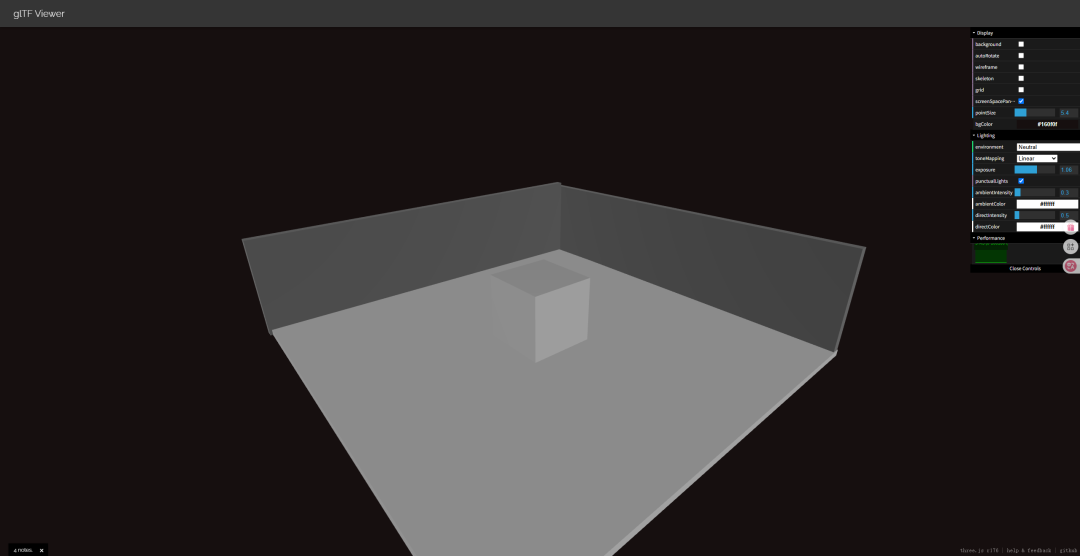
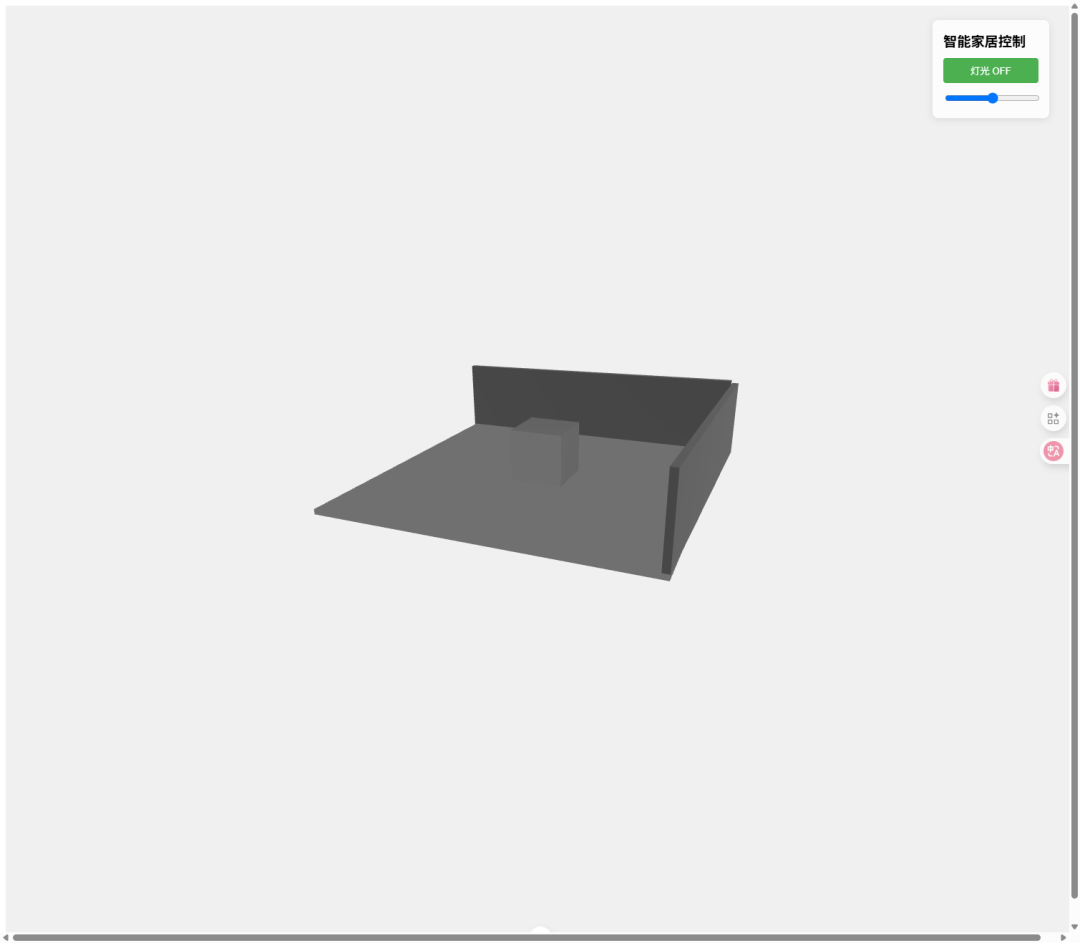
项目案例一
<script setup>import { ref, onMounted, onBeforeUnmount } from 'vue'import * as THREE from 'three'import { OrbitControls } from 'three/examples/jsm/controls/OrbitControls'import { GLTFLoader } from 'three/examples/jsm/loaders/GLTFLoader'import { RoomEnvironment } from 'three/examples/jsm/environments/RoomEnvironment'const canvasRef = ref(null)// 场景变量let scene, camera, renderer, controls, mixer, clock// 初始化场景function initScene() {if (!canvasRef.value) return// 初始化场景scene = new THREE.Scene()camera = new THREE.PerspectiveCamera(75, window.innerWidth / window.innerHeight, 0.1, 1000)renderer = new THREE.WebGLRenderer({ antialias: true, alpha: true })// 设置渲染器renderer.setSize(window.innerWidth, window.innerHeight)renderer.setPixelRatio(window.devicePixelRatio)renderer.outputEncoding = THREE.sRGBEncodingcanvasRef.value.appendChild(renderer.domElement)// 相机位置camera.position.set(5, 2, 5)// 添加控制器controls = new OrbitControls(camera, renderer.domElement)controls.enableDamping = truecontrols.dampingFactor = 0.05// 添加环境光const ambientLight = new THREE.AmbientLight(0xffffff, 0.5)scene.add(ambientLight)// 添加平行光const directionalLight = new THREE.DirectionalLight(0xffffff, 0.8)directionalLight.position.set(5, 10, 7)scene.add(directionalLight)// 加载环境const pmremGenerator = new THREE.PMREMGenerator(renderer)scene.environment = pmremGenerator.fromScene(new RoomEnvironment(), 0.04).texture// 加载GLTF模型const loader = new GLTFLoader()loader.load('/public/3d/3dDemo.gltf',(gltf) => {scene.add(gltf.scene)// 如果有动画if (gltf.animations && gltf.animations.length) {mixer = new THREE.AnimationMixer(gltf.scene)gltf.animations.forEach(clip => {mixer.clipAction(clip).play()})}// 调整模型位置和缩放gltf.scene.position.set(0, 0, 0)gltf.scene.scale.set(1, 1, 1)},undefined,(error) => {console.error('Error loading GLTF model:', error)})// 初始化时钟clock = new THREE.Clock()}// 动画循环function animate() {requestAnimationFrame(animate)if (mixer) {const delta = clock.getDelta()mixer.update(delta)}if (controls) controls.update()if (renderer && scene && camera) renderer.render(scene, camera)}// 响应式调整function onWindowResize() {camera.aspect = window.innerWidth / window.innerHeightcamera.updateProjectionMatrix()renderer.setSize(window.innerWidth, window.innerHeight)}onMounted(() => {initScene()animate()window.addEventListener('resize', onWindowResize)})onBeforeUnmount(() => {window.removeEventListener('resize', onWindowResize)if (canvasRef.value && renderer && canvasRef.value.contains(renderer.domElement)) {canvasRef.value.removeChild(renderer.domElement)}// 清理资源if (scene) {scene.traverse(object => {if (object.isMesh) {object.geometry.dispose()if (object.material) {if (Array.isArray(object.material)) {object.material.forEach(material => material.dispose())} else {object.material.dispose()}}}})}if (renderer) renderer.dispose()})</script><template><div class="scene-container" ref="canvasRef"></div></template><style scoped>.scene-container {width: 100%;height: 100vh;position: fixed;top: 0;left: 0;z-index: 0;}</style>

项目案例二
<template><div class="container"><!-- 3D场景容器 --><canvas ref="canvasRef" class="scene-canvas"></canvas><!-- 控制面板 --><div class="control-panel"><h2>智能家居控制</h2><button @click="toggleLight">灯光 {{ lightOn ? 'ON' : 'OFF' }}</button><inputtype="range"v-model="curtainPosition"min="0"max="100"@input="updateCurtain"/></div></div></template><script setup>import { ref, onMounted, onBeforeUnmount } from 'vue'import * as THREE from 'three'import { OrbitControls } from 'three/addons/controls/OrbitControls.js'import { GLTFLoader } from 'three/addons/loaders/GLTFLoader.js'import { DRACOLoader } from 'three/addons/loaders/DRACOLoader.js'// 元素引用const canvasRef = ref(null)// 状态const lightOn = ref(false)const curtainPosition = ref(50)// Three.js 变量let scene, camera, renderer, controls, mixer, clock// 初始化场景const initScene = () => {// 创建场景scene = new THREE.Scene()scene.background = new THREE.Color(0xf0f0f0)// 创建相机camera = new THREE.PerspectiveCamera(75,window.innerWidth / window.innerHeight,0.1,1000)camera.position.set(2, 2, 5)// 创建渲染器renderer = new THREE.WebGLRenderer({canvas: canvasRef.value,antialias: true})renderer.setSize(window.innerWidth, window.innerHeight)renderer.setPixelRatio(Math.min(window.devicePixelRatio, 2))// 添加轨道控制器controls = new OrbitControls(camera, renderer.domElement)controls.enableDamping = true// 添加灯光const ambientLight = new THREE.AmbientLight(0x404040)scene.add(ambientLight)const directionalLight = new THREE.DirectionalLight(0xffffff, 1)directionalLight.position.set(1, 1, 1)scene.add(directionalLight)// 初始化时钟clock = new THREE.Clock()// 加载模型loadModel()// 开始动画循环animate()}// 加载GLTF模型const loadModel = () => {const loader = new GLTFLoader()// 可选:设置DRACO解码器const dracoLoader = new DRACOLoader()dracoLoader.setDecoderPath('https://www.gstatic.com/draco/v1/decoders/')loader.setDRACOLoader(dracoLoader)loader.load('/public/3d/3dDemo.gltf',(gltf) => {const model = gltf.scenescene.add(model)// 设置动画混合器if (gltf.animations?.length) {mixer = new THREE.AnimationMixer(model)gltf.animations.forEach(clip => {mixer.clipAction(clip).play()})}// 遍历模型设置交互model.traverse((child) => {if (child.isMesh) {// 启用阴影child.castShadow = truechild.receiveShadow = true// 标记可交互对象if (child.name.includes('lamp')) {child.userData.isLight = true}if (child.name.includes('curtain')) {child.userData.isCurtain = truechild.originalPosition = child.position.clone()}}})console.log('模型加载完成', gltf)},undefined,(error) => {console.error('模型加载错误:', error)})}// 动画循环const animate = () => {requestAnimationFrame(animate)const delta = clock.getDelta()if (mixer) {mixer.update(delta)}if (controls) {controls.update()}renderer.render(scene, camera)}// 灯光控制const toggleLight = () => {lightOn.value = !lightOn.valuescene.traverse((child) => {if (child.isMesh && child.userData.isLight) {child.material.emissive = lightOn.value? new THREE.Color(0xffffaa): new THREE.Color(0x000000)}})}// 窗帘控制const updateCurtain = () => {const position = curtainPosition.value / 100scene.traverse((child) => {if (child.isMesh && child.userData.isCurtain) {child.position.x = child.originalPosition.x + (position * 2 - 1)}})}// 窗口大小调整const onWindowResize = () => {camera.aspect = window.innerWidth / window.innerHeightcamera.updateProjectionMatrix()renderer.setSize(window.innerWidth, window.innerHeight)}// 生命周期钩子onMounted(() => {initScene()window.addEventListener('resize', onWindowResize)})onBeforeUnmount(() => {window.removeEventListener('resize', onWindowResize)if (renderer) {renderer.dispose()}})</script><style scoped>.container {position: relative;width: 100%;height: 100vh;}.scene-canvas {display: block;width: 100%;height: 100%;}.control-panel {position: absolute;top: 20px;right: 20px;background: rgba(255, 255, 255, 0.8);padding: 15px;border-radius: 8px;box-shadow: 0 2px 10px rgba(0, 0, 0, 0.1);z-index: 100;}.control-panel h2 {margin: 0 0 10px 0;font-size: 1.2em;}.control-panel button {display: block;width: 100%;padding: 8px;margin-bottom: 10px;background: #4CAF50;color: white;border: none;border-radius: 4px;cursor: pointer;}.control-panel input[type="range"] {width: 100%;}</style>
问题
-
是否考虑用 uv / unity
-
还是用 Sketchfab 作为展示即可
* Thanks you *
如果觉得文章内容不错,随手帮忙点个赞、在看、转发一下,如果想第一时间收到推送,也可以给我个星标⭐~谢谢你看我的文章。
*往期推荐 *
实现如何利用 Kafka 延时删除 用户邮箱的验证码(如何发送邮箱+源码) - 第一期
Docker小白入门教程一篇领你入门(CRUD全命令+无废话版+问题集)-第三期
Docker小白入门教程一篇领你入门(CRUD全命令+无废话版+问题集)
想要高效处理,那不妨看看 Python的 异步 Asyncio 保证效率翻多倍
银河麒麟 | ubuntu 安装国产达梦DM8数据库(安装+外网通+IDEA连接)
网络设备日志存储到指定的Kiwi-log服务器(图解+软件)
银河麒麟 | ubuntu 安装运用 docker 容器,实现容器化部署项目
银河麒麟 | ubuntu 安装zabbix监控设备信息(亲测包对)
国产操作系统-银河麒麟本地化部署Ollama国产开源的AI大模型Qwen3
Swagger | 手把手带你写自动生成接口文档的爽感(零基础亲测实用)
SpringBoot整合Openfeign接入Kimi Ai!!超简单,居然没多少行代码??(附加兜底教程)
Maven | 站在初学者的角度配置与项目创建(新手必学会)
Spring Ai | 极简代码从零带你一起走进AI项目(中英)
MongoDB | 零基础学习与Springboot整合ODM实现增删改查(附源码)
Openfeign | 只传递城市代码,即可获取该地域实时的天气数据(免费的天气API)
Mongodb | 基于Springboot开发综合社交网络应用的项目案例(中英)
感谢阅读 | 更多内容尽在公棕号 WMCode | 优快云@小Mie不吃饭


 被折叠的 条评论
为什么被折叠?
被折叠的 条评论
为什么被折叠?
 到【灌水乐园】发言


