


为了方便阅读Zephyr源码以及编译调试,我们可以在VsCode中安装这些插件:
- clangd (阅读代码跳转)
- CMake、CMake Tools
- Cortex-Debug
- DeviceTree
- Git Graph
- Serial Monitor (串口调试)
代码跳转
clangd需要利用compile_commands.json才能实现跳转功能,因此我们需要对west进行配置:
west config build.cmake-args -- -DCMAKE_EXPORT_COMPILE_COMMANDS=ON配置完后重新编译一次,就会在build目录下生成compile_commands.json了,代码跳转也可以正常使用了

Debug
利用Cortex-Debug插件可以实现Debug功能,类似在Keil中Debug那样。
在项目根目录创建.vscode/launch.json,内容如下:
{
"version": "0.2.0",
"configurations": [
{
"name": "Cortex Debug",
"cwd": "${workspaceFolder}",
"executable": "./zephyr/build/zephyr/zephyr.elf",
"request": "launch",
"type": "cortex-debug",
"runToEntryPoint": "main",
"servertype": "openocd",
"device": "STM32F407VET6",
"configFiles": [
"interface/cmsis-dap.cfg",
"target/stm32f4x.cfg",
],
"svdFile": "./zephyr/boards/arm/lcpcb_stm32f407vet6/STM32F407.svd",
"liveWatch": {
"enabled": true,
"samplesPerSecond": 4
}
}
]
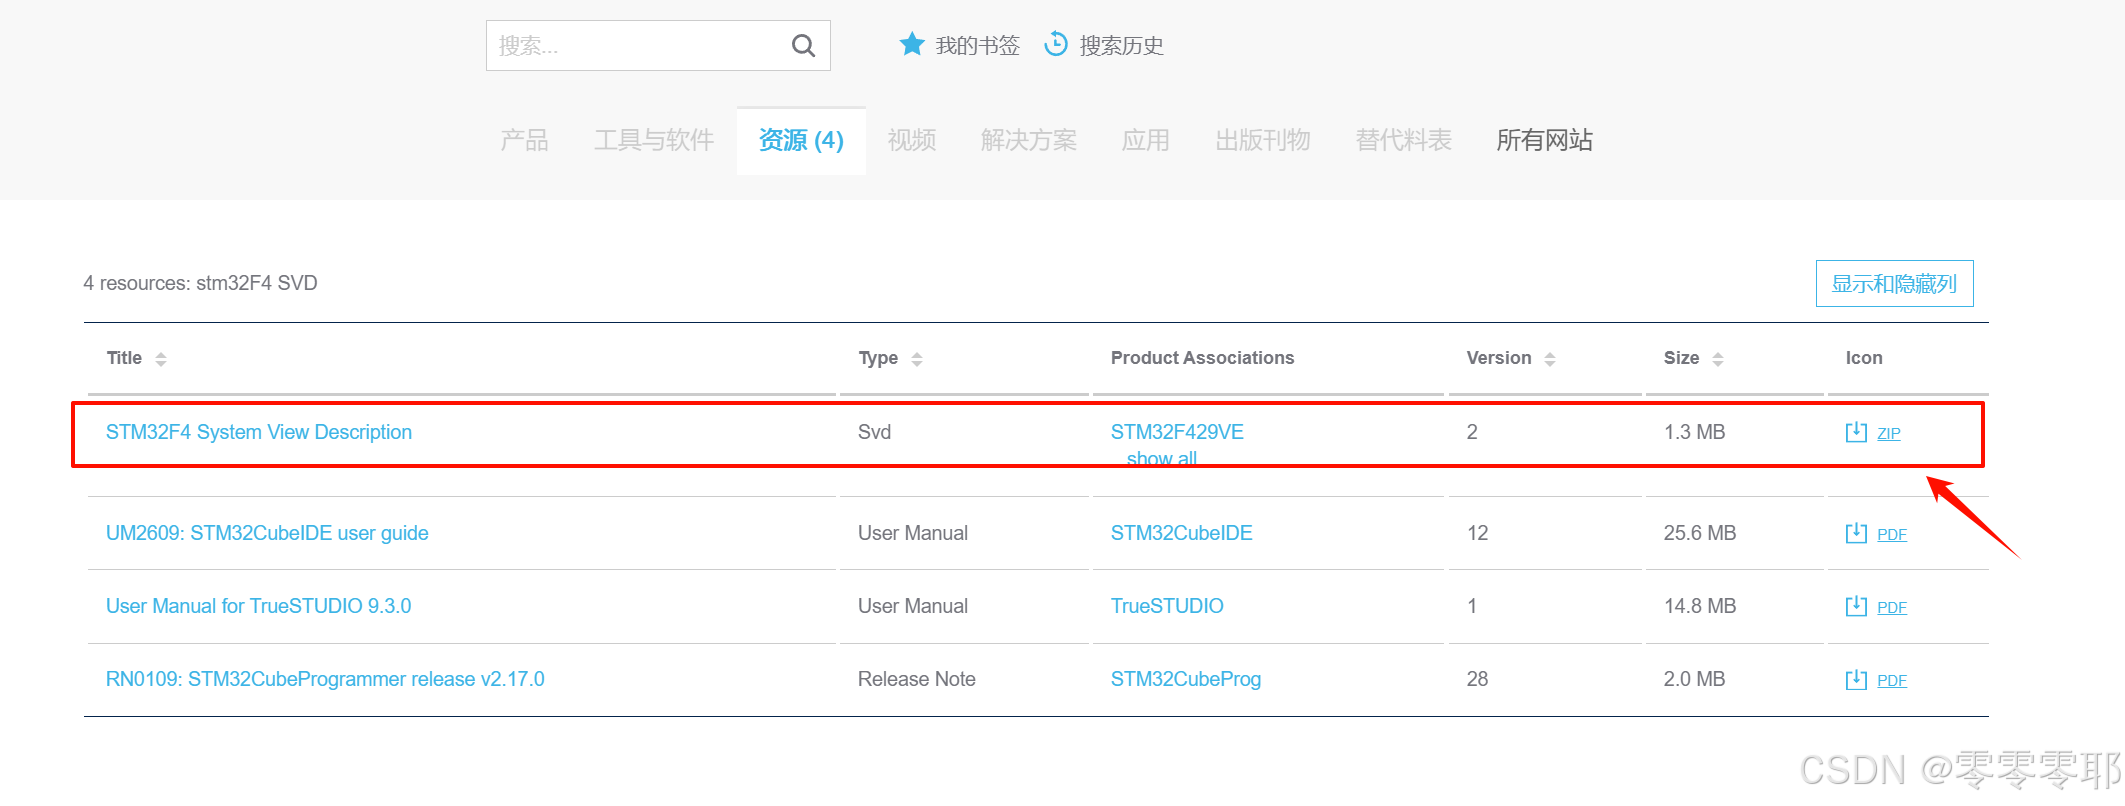
}接着去ST官网下载你主控的svd文件,比如我的是STM32F407VET6
stm32F4 SVD - 资源 - Search STMicrocontrollers
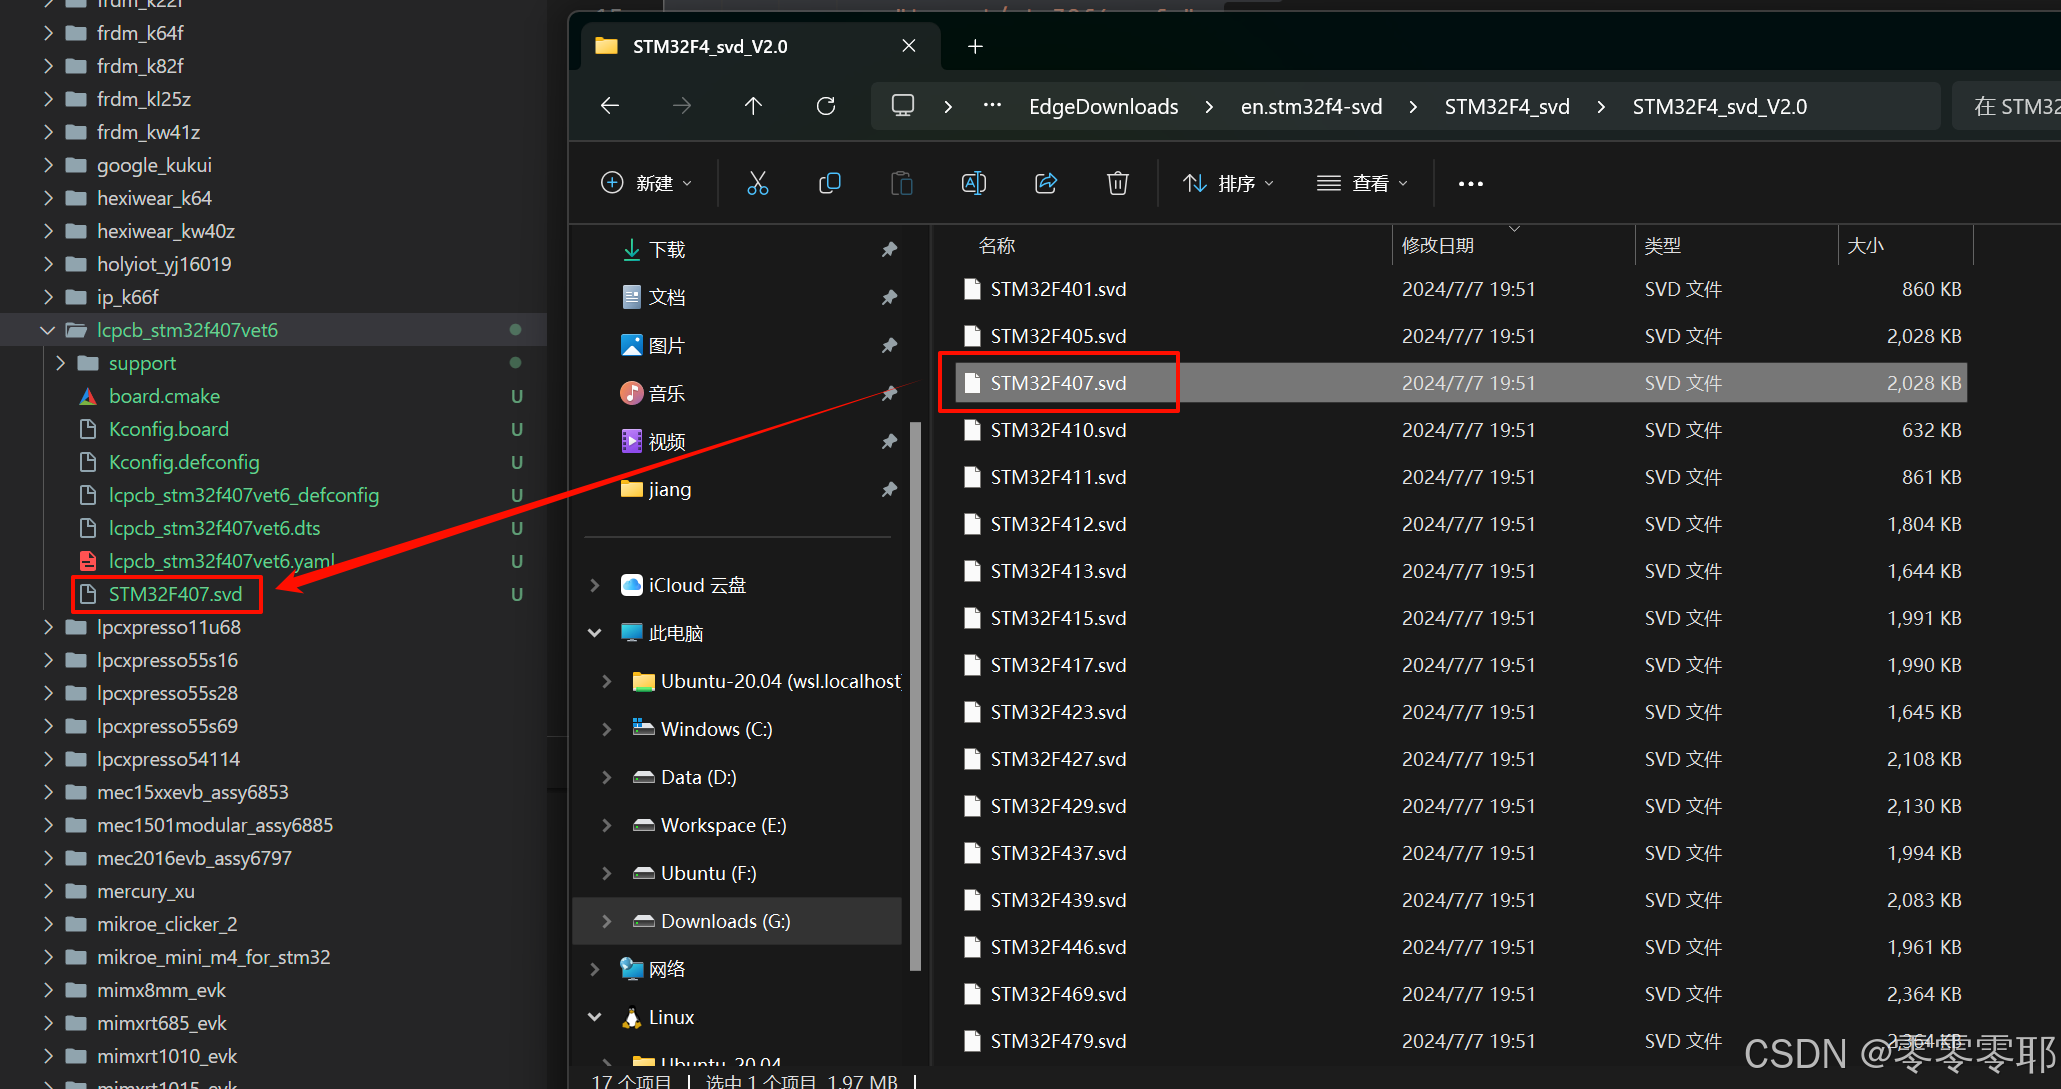
把主控对应的svd文件放到前面创建的文件夹里:
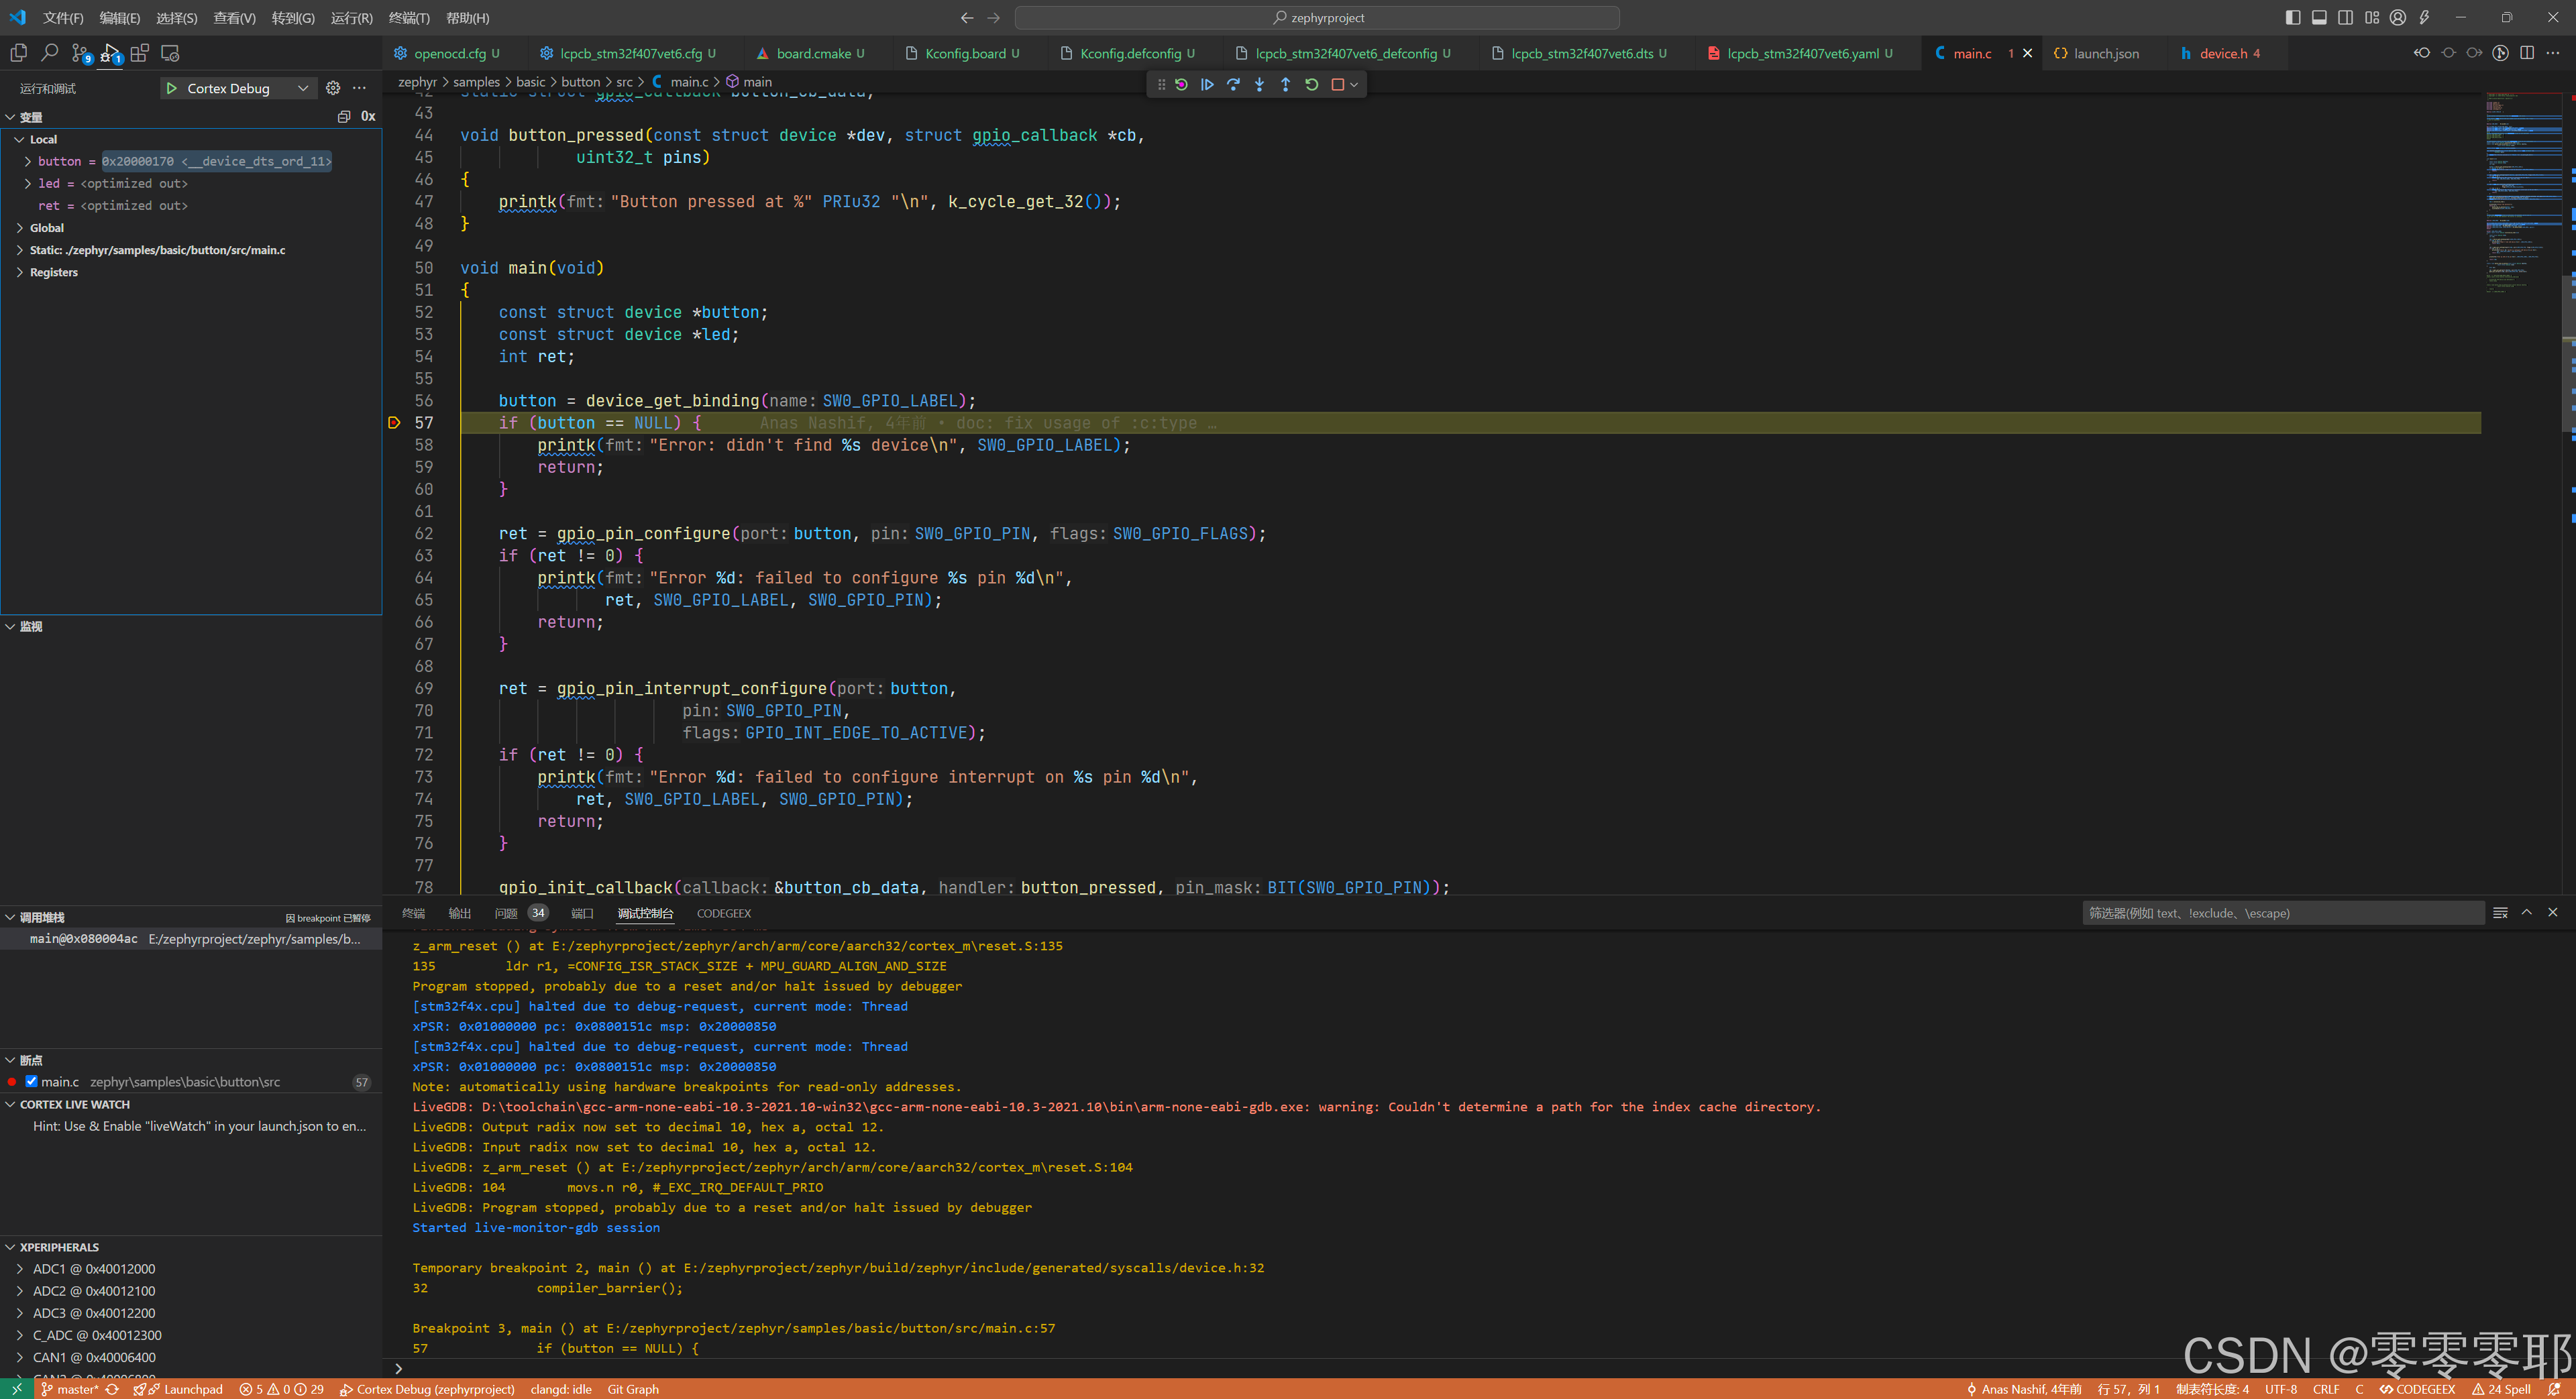
然后就可以直接调用VSCode的debug进行debug了,debug体验操作下来还是挺不错的


 2318
2318

 被折叠的 条评论
为什么被折叠?
被折叠的 条评论
为什么被折叠?
 到【灌水乐园】发言


