


大文件上传系统开发指南(基于原生JS+SpringBoot)
项目背景
老哥我最近接了个"硬骨头"项目,客户要求实现20G大文件上传下载,还要支持文件夹结构保留、加密传输、断点续传,还要兼容IE9这种古董浏览器。预算只有100块,还要7×24小时技术支持…这活儿简直比相亲还难!
不过没关系,谁让我进了这个"坑"呢?下面我就把这段时间折腾出来的代码和经验分享给大家,希望能帮到同样在"水深火热"中的同行们。
技术选型
- 前端:Vue3 CLI + 原生JavaScript(客户要求必须用原生JS实现上传核心功能)
- 后端:SpringBoot + Tomcat
- 数据库:MySQL(主要存用户信息和文件元数据)
- 文件存储:直接服务器存储(简单粗暴,符合预算)
- 加密:SM4(国密)和AES双支持
系统架构
浏览器(IE9+等) ←HTTP/HTTPS→ SpringBoot后端 ←本地文件IO→ 服务器存储
                      ↑
                    MySQL
前端实现(Vue3 + 原生JS上传核心)
1. 文件选择组件(支持文件夹)
export default {
  data() {
    return {
      fileList: [],
      isUploading: false,
      progress: 0,
      chunkSize: 5 * 1024 * 1024, // 5MB每片
      currentUploads: {}
    }
  },
  methods: {
    triggerFileInput() {
      document.getElementById('fileInput').click();
    },

    handleFileChange(e) {
      const files = Array.from(e.target.files);
      if (files.length === 0) return;

      // 处理文件夹结构
      const fileTree = {};
      files.forEach(file => {
        const path = file.webkitRelativePath || file.name;
        this.fileList.push({
          file: file,
          relativePath: path,
          size: file.size,
          chunks: Math.ceil(file.size / this.chunkSize),
          uploadedChunks: 0
        });
      });
    },
  }
}
后端实现(SpringBoot)
1. 文件上传控制器
// src/main/java/com/example/uploader/controller/FileUploadController.java
package com.example.uploader.controller;

@RestController
@RequestMapping("/api")
public class FileUploadController {

    @Value("${file.upload-dir}")
    private String uploadDir;

    // 存储上传进度信息(实际项目应该用数据库)
    private final Map progressMap = new ConcurrentHashMap<>();

    @PostMapping("/upload")
    public Map handleFileUpload(
            @RequestParam("file") MultipartFile file,
            @RequestParam("relativePath") String relativePath,
            @RequestParam("totalChunks") int totalChunks,
            @RequestParam("currentChunk") int currentChunk,
            @RequestParam("fileSize") long fileSize,
            @RequestParam("fileMd5") String fileMd5,
            HttpServletRequest request) throws IOException {

        Map result = new HashMap<>();

        try {
            // 创建文件存储目录(保留文件夹结构)
            Path filePath = Paths.get(uploadDir, relativePath);
            Files.createDirectories(filePath.getParent());

            // 如果是加密上传,这里应该先解密(示例省略)

            // 以追加模式写入文件块
            try (RandomAccessFile randomAccessFile = new RandomAccessFile(filePath.toFile(), "rw")) {
                randomAccessFile.seek((long) currentChunk * 5 * 1024 * 1024); // 5MB每块
                randomAccessFile.write(file.getBytes());
            }

            // 更新上传进度
            UploadProgress progress = progressMap.computeIfAbsent(
                fileMd5,
                k -> new UploadProgress(fileMd5, relativePath, fileSize, totalChunks)
            );
            progress.markChunkUploaded(currentChunk);

            // 如果是最后一块,清理进度信息
            if (progress.isComplete()) {
                progressMap.remove(fileMd5);
                // 这里可以触发文件后处理,如加密存储等
            }

            result.put("success", true);
            result.put("message", "Chunk uploaded successfully");
            result.put("uploadedChunks", progress.getUploadedChunks());
        } catch (Exception e) {
            result.put("success", false);
            result.put("message", "Upload failed: " + e.getMessage());
        }

        return result;
    }

}
2. 文件下载控制器
// src/main/java/com/example/uploader/controller/FileDownloadController.java

@RestController
@RequestMapping("/api")
public class FileDownloadController {

    @Value("${file.upload-dir}")
    private String uploadDir;

    @GetMapping("/download")
    public ResponseEntity downloadFile(
            @RequestParam String relativePath,
            HttpServletRequest request) throws IOException {

        Path filePath = Paths.get(uploadDir, relativePath).normalize();
        Resource resource = new UrlResource(filePath.toUri());

        if (!resource.exists()) {
            return ResponseEntity.notFound().build();
        }

        // 确定内容类型
        String contentType = request.getServletContext().getMimeType(resource.getFile().getAbsolutePath());
        if (contentType == null) {
            contentType = "application/octet-stream";
        }

        return ResponseEntity.ok()
                .contentType(MediaType.parseMediaType(contentType))
                .header(HttpHeaders.CONTENT_DISPOSITION,
                        "attachment; filename=\"" + filePath.getFileName() + "\"")
                .body(resource);
    }
}
3. 加密工具类(简化版)
// src/main/java/com/example/uploader/util/CryptoUtil.java
package com.example.uploader.util;

import javax.crypto.Cipher;
import javax.crypto.spec.SecretKeySpec;
import java.util.Base64;

public class CryptoUtil {

    private static final String AES = "AES";

    // 实际项目应该从安全配置中获取密钥
    private static final byte[] AES_KEY = "ThisIsASecretKey1234567890".getBytes(); // 16/24/32字节

    public static byte[] encryptAES(byte[] data) throws Exception {
        SecretKeySpec keySpec = new SecretKeySpec(AES_KEY, AES);
        Cipher cipher = Cipher.getInstance(AES);
        cipher.init(Cipher.ENCRYPT_MODE, keySpec);
        return cipher.doFinal(data);
    }
}
配置文件
application.properties
# 文件上传目录(确保应用有写入权限)
file.upload-dir=./uploads

# Spring Boot默认配置
server.port=8080
spring.servlet.multipart.max-file-size=10GB
spring.servlet.multipart.max-request-size=10GB

# 数据库配置(如果需要)
spring.datasource.url=jdbc:mysql://localhost:3306/uploader?useSSL=false&serverTimezone=UTC
spring.datasource.username=root
spring.datasource.password=password
spring.datasource.driver-class-name=com.mysql.cj.jdbc.Driver
部署说明
-
环境准备:
- JDK 8+
- Maven
- Node.js (用于前端开发)
- MySQL (可选,如果需要数据库)
-
构建前端:
cd frontend npm install npm run build -
构建后端:
mvn clean package -
部署:
- 将前端构建产物(
dist目录)复制到SpringBoot的src/main/resources/static目录 - 运行SpringBoot应用:
java -jar target/uploader-0.0.1-SNAPSHOT.jar
- 将前端构建产物(
-
Nginx配置(可选):
如果需要处理大文件上传,建议使用Nginx反向代理:server { listen 80; server_name yourdomain.com; client_max_body_size 21G; location / { proxy_pass http://localhost:8080; proxy_set_header Host $host; proxy_set_header X-Real-IP $remote_addr; } }
兼容性处理
IE9兼容性方案
由于IE9不支持FormData和File API的某些特性,我们需要做特殊处理:
- 前端修改:
// 在FileUploader.vue中添加IE9兼容代码
methods: {
  handleFileChange(e) {
    const files = e.target.files;
    if (!files) {
      // IE9兼容处理
      this.handleIE9FileSelect();
      return;
    }
    // 原有代码...
  },
}
- 后端调整:
对于IE9的上传请求,可能需要使用传统的multipart/form-data方式而非分块上传。
加密传输实现
如果需要端到端加密,可以在前端加密后上传:
// 在uploadFile方法中添加加密处理
async uploadFile(fileItem) {
  // ...之前的代码

  const chunk = file.slice(start, end);
  let encryptedChunk = chunk;

  // 根据配置选择加密方式
  if (this.encryptType === 'AES') {
    encryptedChunk = await this.encryptAES(chunk);
  } else if (this.encryptType === 'SM4') {
    encryptedChunk = await this.encryptSM4(chunk);
  }

  const formData = new FormData();
  formData.append('file', new Blob([encryptedChunk]));
  // ...其他参数

  // ...上传代码
},
性能优化建议
- 分块大小调整:根据网络情况动态调整分块大小(5MB-20MB之间)
- 并发控制:根据用户带宽和设备性能调整并发上传数
- Web Worker:将哈希计算和加密操作放到Web Worker中,避免阻塞UI
- 本地缓存:使用IndexedDB缓存已计算的哈希值
- 心跳机制:定期向服务器发送心跳,维护上传会话
完整项目结构
file-uploader/
├── frontend/                  # Vue3前端
│   ├── src/
│   │   ├── components/
│   │   │   └── FileUploader.vue
│   │   ├── App.vue
│   │   └── main.js
│   ├── package.json
│   └── vue.config.js
├── backend/                   # SpringBoot后端
│   ├── src/
│   │   ├── main/
│   │   │   ├── java/com/example/uploader/
│   │   │   │   ├── controller/
│   │   │   │   ├── util/
│   │   │   │   └── Application.java
│   │   │   └── resources/
│   │   │       └── application.properties
│   └── pom.xml
├── uploads/                   # 文件存储目录(自动创建)
├── nginx.conf                 # Nginx配置示例
└── README.md                  # 项目说明
总结
这个项目确实是个挑战,特别是在100元预算和兼容IE9的双重限制下。不过通过分块上传、断点续传和合理的架构设计,我们还是能够实现客户的需求。
关键点总结:
- 前端使用原生JS实现核心上传逻辑,Vue3负责UI和状态管理
- 后端SpringBoot处理文件存储和进度跟踪
- 分块上传+本地缓存实现断点续传
- 保留完整的文件夹结构
- 通过Nginx处理大文件上传
实际项目中,你可能还需要:
- 添加用户认证
- 实现更完善的错误处理和重试机制
- 添加文件预览功能
- 实现更安全的加密方案
- 添加管理员界面
希望这个示例能帮到你,也欢迎加入我们的QQ群(374992201)一起交流技术、合作项目。群里定期有技术分享和红包活动,还有项目合作机会哦!
最后提醒一句:这种预算的项目,记得在合同里明确需求范围和变更条款,不然很容易亏本哦!
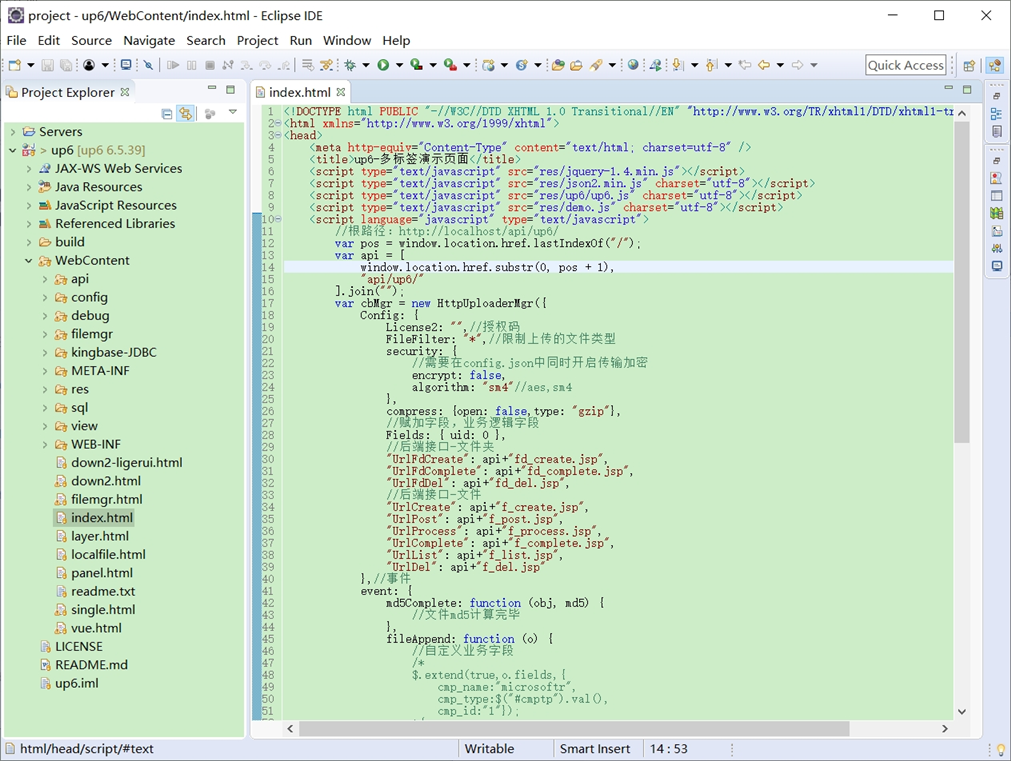
导入项目
导入到Eclipse:点南查看教程
导入到IDEA:点击查看教程
springboot统一配置:点击查看教程
工程
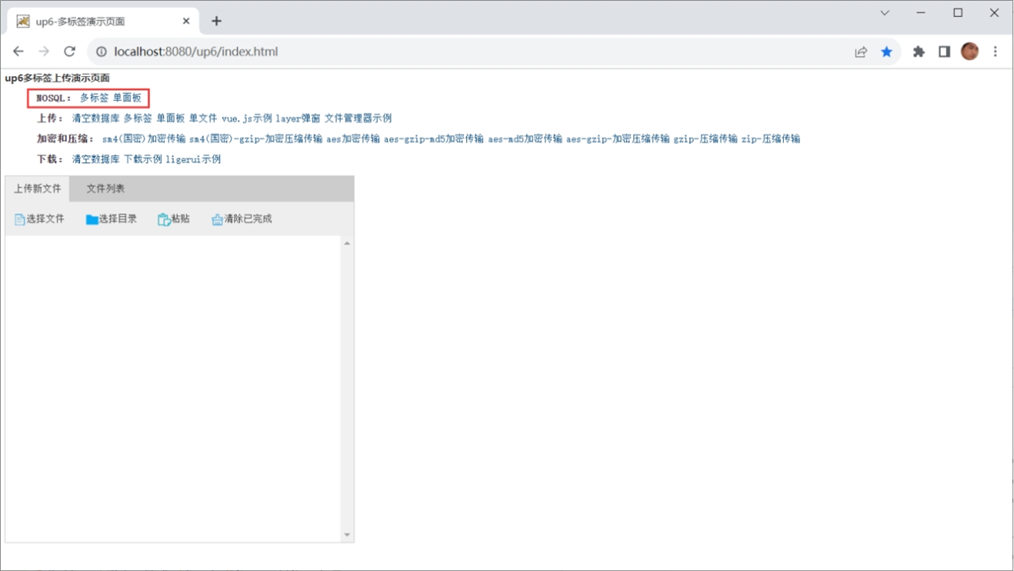
NOSQL
NOSQL示例不需要任何配置,可以直接访问测试
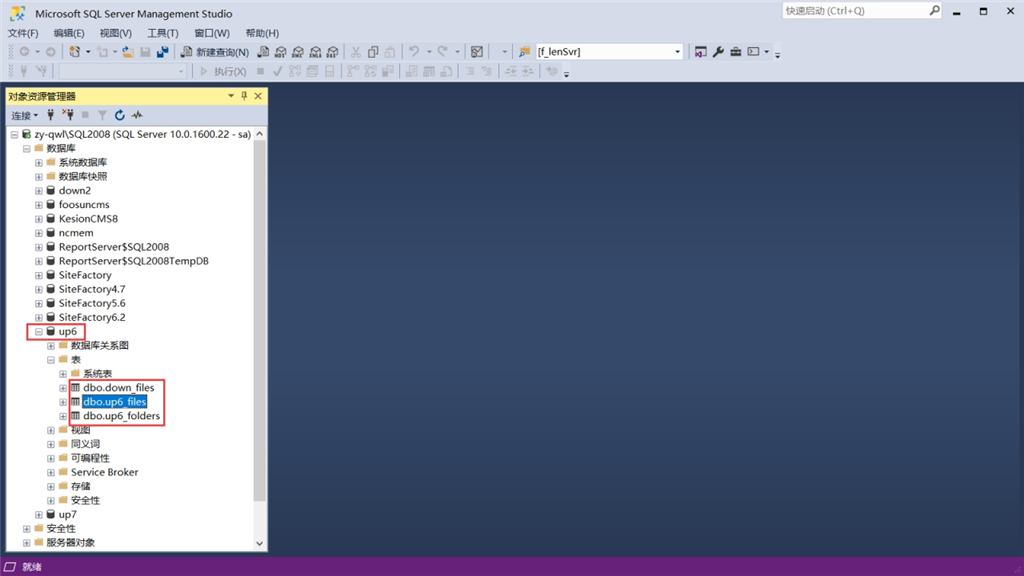
创建数据表
选择对应的数据表脚本,这里以SQL为例

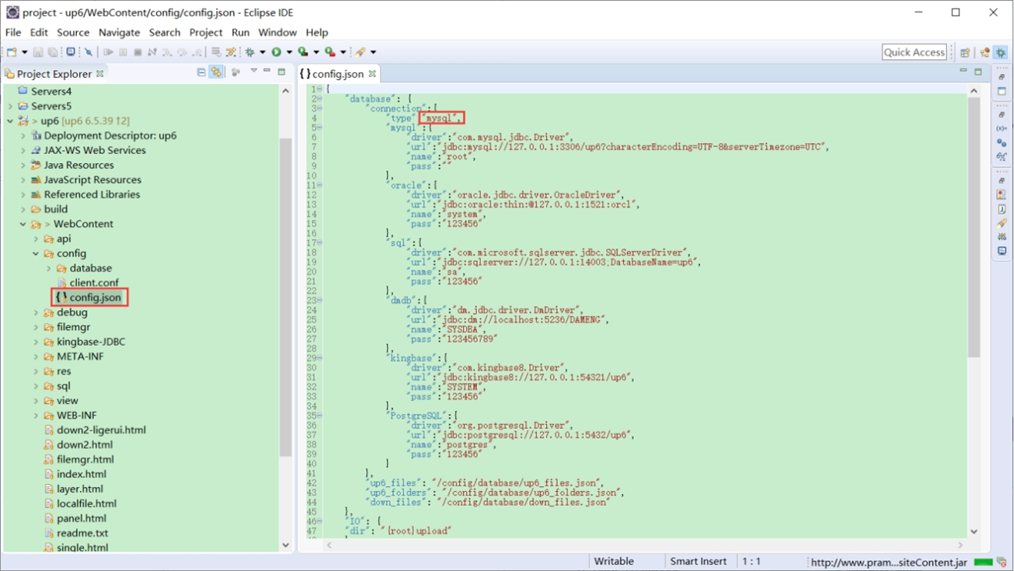
修改数据库连接信息
访问页面进行测试
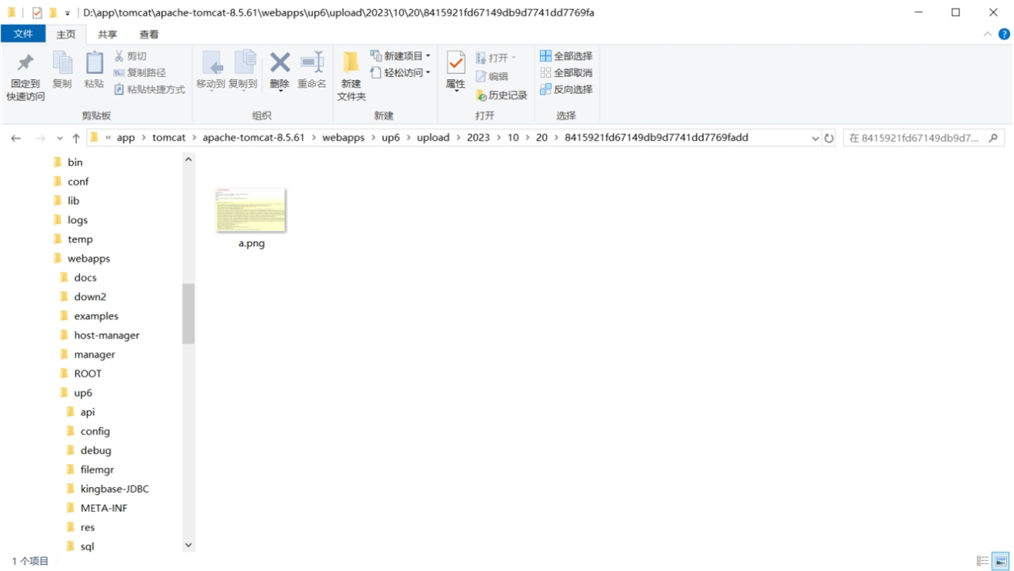
文件存储路径
up6/upload/年/月/日/guid/filename
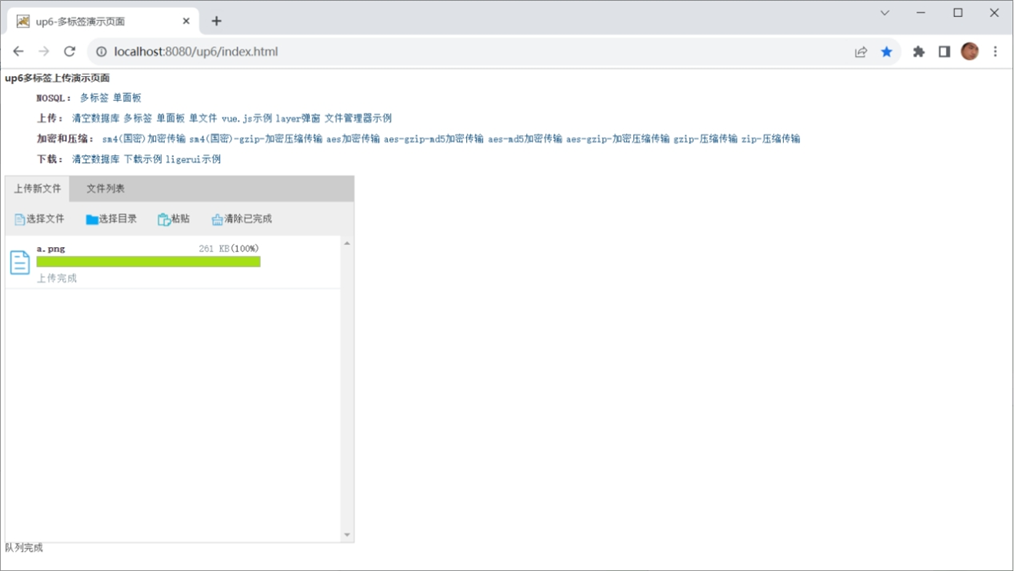
效果预览
文件上传
文件刷新续传
支持离线保存文件进度,在关闭浏览器,刷新浏览器后进行不丢失,仍然能够继续上传

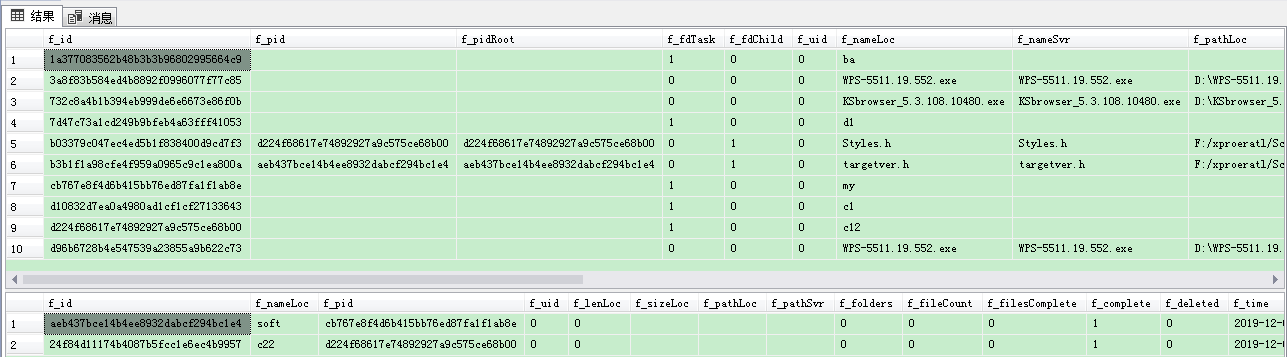
文件夹上传
支持上传文件夹并保留层级结构,同样支持进度信息离线保存,刷新页面,关闭页面,重启系统不丢失上传进度。


 1047
1047

 被折叠的 条评论
为什么被折叠?
被折叠的 条评论
为什么被折叠?
 到【灌水乐园】发言


