


一、环境
| 服务器 | IP |
|---|---|
| 服务器1 | 192.168.109.66 |
| 服务器2 | 192.168.109.77 |
| 服务器3 | 192.168.109.88 |
二、部署
服务器1
服务器2
服务器3
#关闭防火墙
systemctl stop firewalld
setenforce 0
服务器1
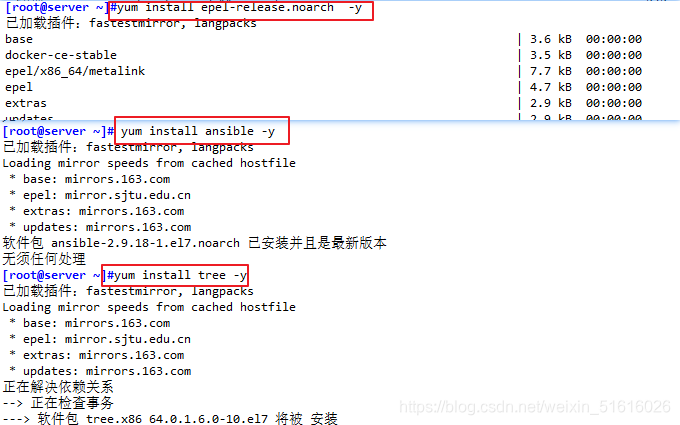
#安装相关软件
yum install epel-release.noarch  -y
yum install ansible -y
yum install tree -y
#查看/etc/ansible结构
[root@server ~]#tree /etc/ansible/
/etc/ansible/
├── ansible.cfg
├── hosts
└── roles
1 directory, 2 files
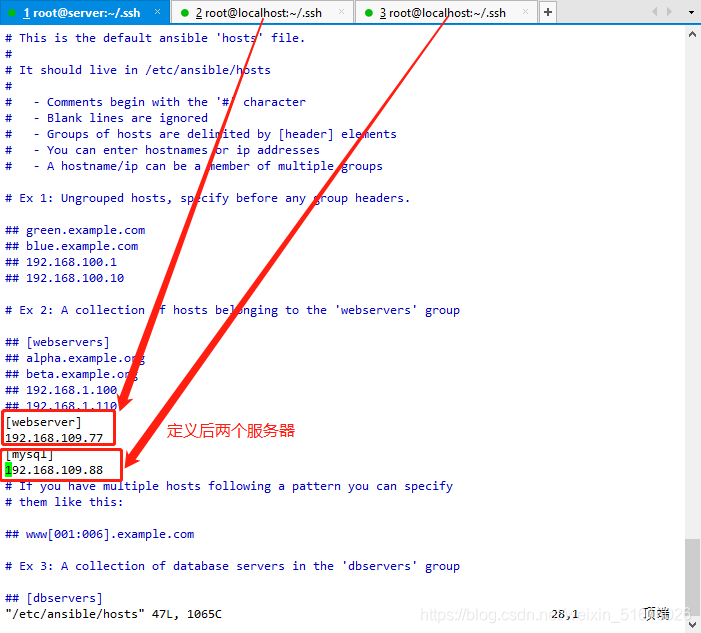
#改主机清单hosts文件
[root@server ~]#vim /etc/ansible/hosts
[webserver]
192.168.109.77
[mysql]
192.168.109.88
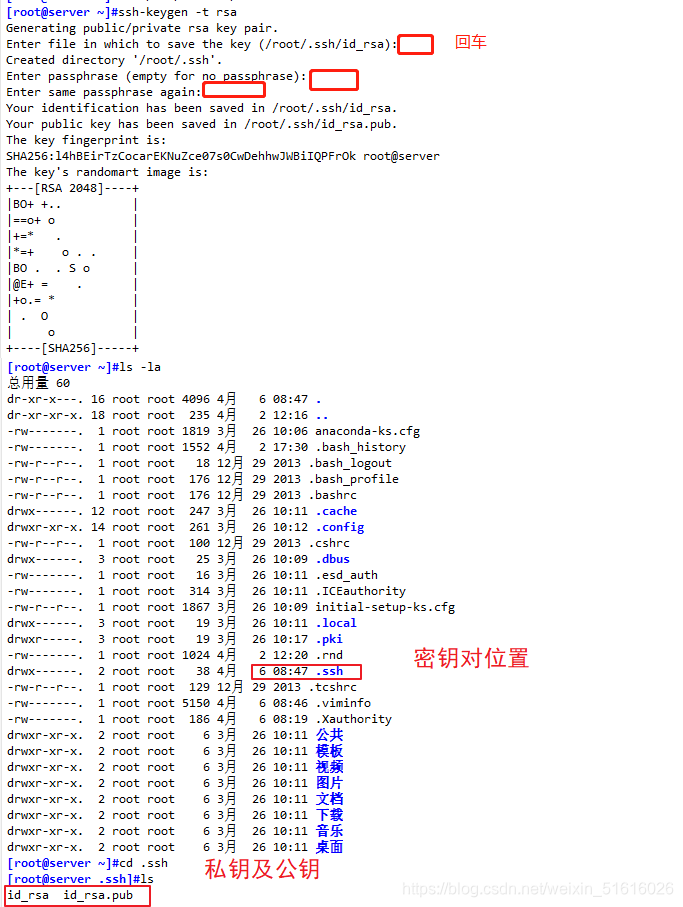
#生成密钥对
ssh-keygen -t rsa

[root@server ~]#ssh-keygen -t rsa
Generating public/private rsa key pair.
Enter file in which to save the key (/root/.ssh/id_rsa):
Created directory '/root/.ssh'.
Enter passphrase (empty for no passphrase):
Enter same passphrase again:
Your identification has been saved in /root/.ssh/id_rsa.
Your public key has been saved in /root/.ssh/id_rsa.pub.
The key fingerprint is:
SHA256:l4hBEirTzCocarEKNuZce07s0CwDehhwJWBiIQPFrOk root@server
The key's randomart image is:
+---[RSA 2048]----+
|BO+ +..          |
|==o+ o           |
|+=*   .          |
|*=+    o . .     |
|BO .  . S o      |
|@E+ =    .       |
|+o.= *           |
| .  O            |
|     o           |
+----[SHA256]-----+
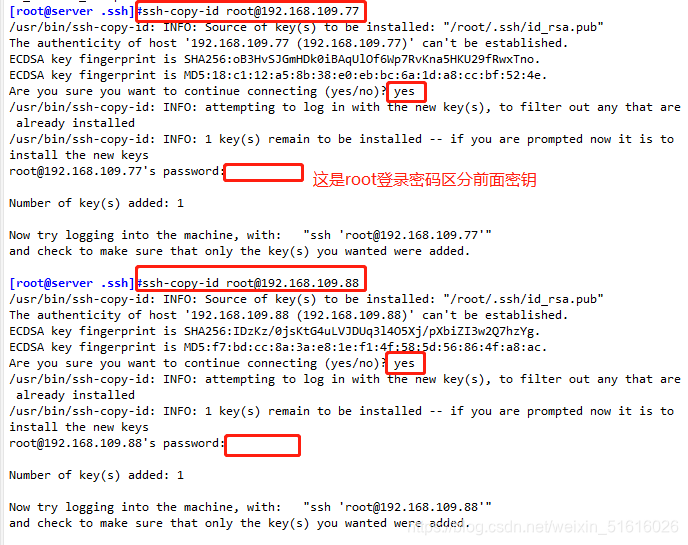
#将公钥推给其他服务器
[root@server .ssh]#ssh-copy-id root@192.168.109.77

[root@server .ssh]#ssh-copy-id root@192.168.109.88
服务器2
服务器3
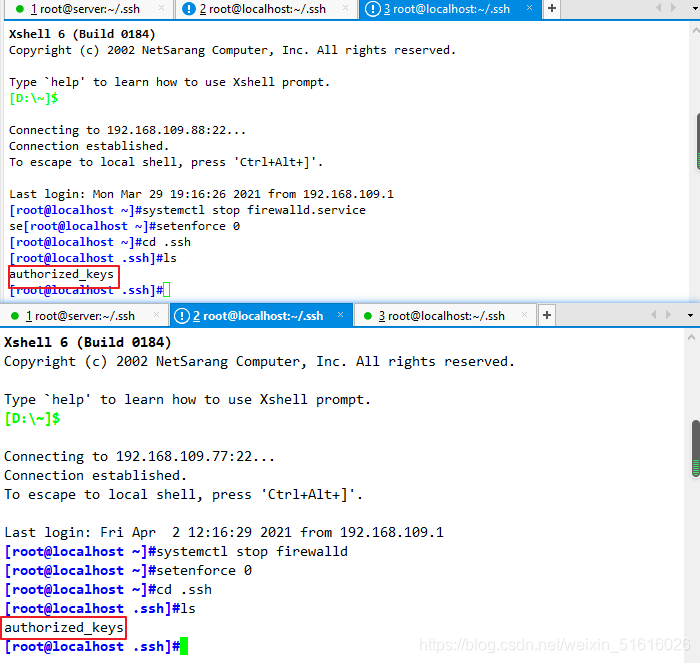
#查看服务器2、3是否有公钥
[root@localhost ~]#cd .ssh
[root@localhost .ssh]#ls
authorized_keys
三、连接访问
服务器1
[root@server .ssh]#ansible webserver -m command -a 'date'
Enter passphrase for key '/root/.ssh/id_rsa':
192.168.109.77 | CHANGED | rc=0 >>
2021年 04月 06日 星期二 08:51:34 CST

[root@server .ssh]#ansible mysql -m command -a 'date'
Enter passphrase for key '/root/.ssh/id_rsa':
192.168.109.88 | CHANGED | rc=0 >>
2021年 04月 06日 星期二 08:52:26 CST

#前面每次都要密码,这可以做免交互代理
[root@server .ssh]#ssh-agent bash
[root@server .ssh]# ssh-add
Enter passphrase for /root/.ssh/id_rsa:
Identity added: /root/.ssh/id_rsa (/root/.ssh/id_rsa)

做完免交互不需要密码直接执行


 772
772

 被折叠的 条评论
为什么被折叠?
被折叠的 条评论
为什么被折叠?
 到【灌水乐园】发言


