 Springfox Swagger2配置与使用指南


 本文档详细介绍了如何在Spring Boot项目中集成并配置Springfox Swagger2,以生成RESTful API的文档。首先,添加了Swagger的相关依赖,接着在`application.yaml`中配置Swagger的基本信息,并创建了`SwaggerProperties`和`SwaggerConfig`类进行进一步的定制。在`SwaggerConfig`中,定义了API的元数据,并通过`Docket`选择要生成文档的包路径。此外,还展示了如何使用注解来标注控制器、方法、参数及实体类。最后,提供了接口文档的访问地址,并提到了如何配置拦截器以允许未登录用户访问Swagger UI。
一、添加依赖
<!-- https://mvnrepository.com/artifact/io.springfox/springfox-swagger-ui -->
<dependency>
    <groupId>io.springfox</groupId>
    <artifactId>springfox-swagger-ui</artifactId>
    <version>2.9.2</version>
</dependency>
<!-- https://mvnrepository.com/artifact/io.springfox/springfox-swagger2 -->
<dependency>
    <groupId>io.springfox</groupId>
    <artifactId>springfox-swagger2</artifactId>
    <version>2.9.2</version>
</dependency>
二、添加配置
在我们的application.yaml 添加配置
swagger:
  title: xxx项目RESTful API
  description: 开发人员太懒,没有写描述
  version: 1.0
  contactName: lxt
  contactEmail:
  contactUrl:
  basePackageRest: com.qcby.xxx.rest
termsOfServiceUrl:在我们的config配置包下添加SwaggerProperties.java文件
@Component
@ConfigurationProperties(prefix = "swagger")
@Data
public class SwaggerProperties {
    private String title;
    private String contactName;
    private String contactUrl;
    private String contactEmail;
    private String version;
    private String description;
    private String basePackageRest;
    private String termsOfServiceUrl;

}再建立SwaggerConfig.java
@Configuration
@EnableSwagger2
public class SwaggerConfig {

    @Autowired
    private SwaggerProperties swaggerProperties;

    @Bean
    public Docket createRestApi() {
        return new Docket(DocumentationType.SWAGGER_2)
                .groupName("REST接口8000")
                .apiInfo(apiInfo())
                .select()
                //  配置自动扫描那些包下类型生成接口文档
                .apis(RequestHandlerSelectors.basePackage(swaggerProperties.getBasePackageRest()))
                .build();
    }
    //构建 api文档的详细信息函数,注意这里的注解引用的是哪个
    private ApiInfo apiInfo() {
        return new ApiInfoBuilder()
                //页面标题
                .title(swaggerProperties.getTitle())
                //创建人
                .contact(new Contact(swaggerProperties.getContactName(), swaggerProperties.getContactUrl(),swaggerProperties.getContactEmail()))
                //版本号
                .version(swaggerProperties.getVersion())
                //描述
                .description(swaggerProperties.getDescription())
                .build();
    }
}另外其他类中的注解加方法
//  controller类
@Api(value = "通用接口", tags = {"通用接口"})


// 方法
@ApiOperation("演示接口")

// 参数
@ApiImplicitParams(
    {@ApiImplicitParam(name = "Authorization",
        value = "Authorization token", required = true,
        dataType = "string", paramType = "header")}
        )
// 实体类
@ApiModel("用户实体")
// 实体类字段
@ApiModelProperty(value = "创建时间")
拦截器不拦截接口文档(拦截则需要登录后可以登录)
如果需要不登陆即可访问,才需要配置(可选)
@Override
public void addInterceptors(InterceptorRegistry registry) {
    registry.addInterceptor(loginInterceptor()).addPathPatterns("/**")
            // 那些路径不拦截
            .excludePathPatterns("/login/**","/error"
            ,"/swagger-ui.html/**","/swagger-resources/**");
}
三、测试
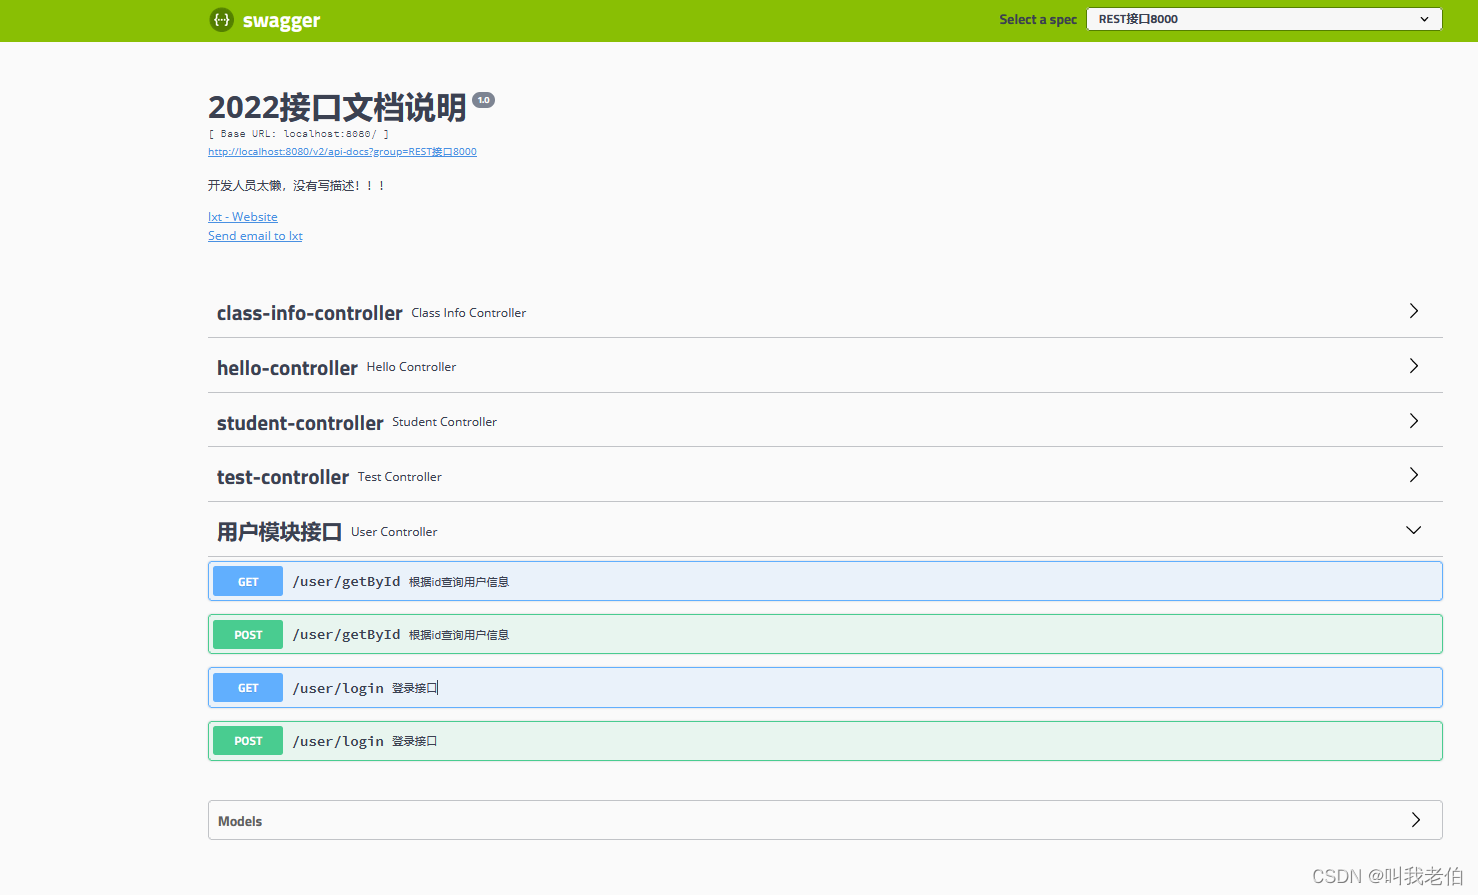
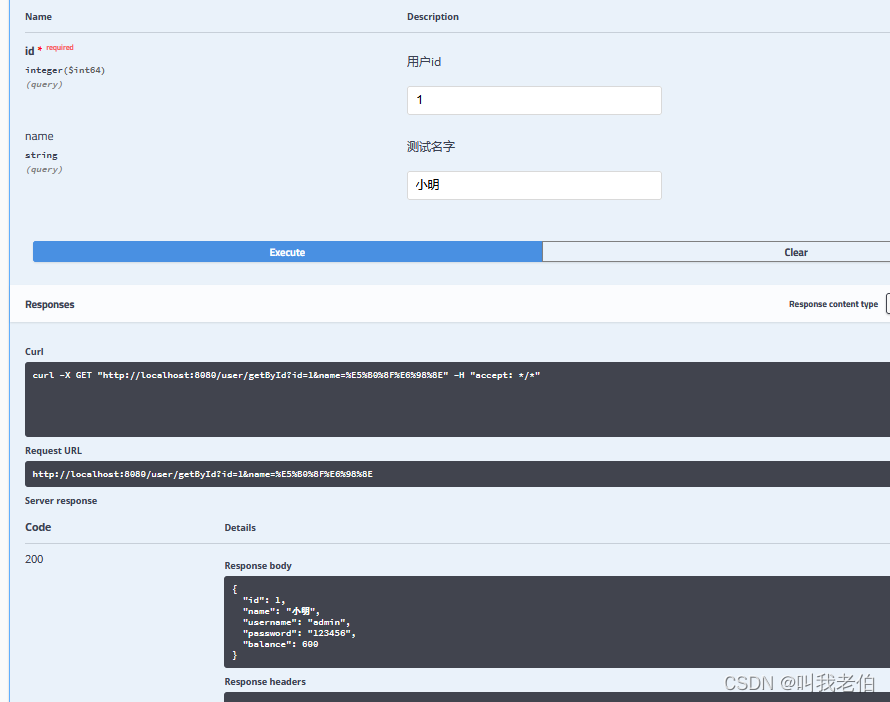
接口文档地址:http://localhost:8080/swagger-ui.html


 20万+
20万+

 被折叠的 条评论
为什么被折叠?
被折叠的 条评论
为什么被折叠?
 到【灌水乐园】发言


