


 本文详细介绍了SpringBoot结合Thymeleaf的配置和使用,包括maven配置、idea设置、自动配置、配置文件路径、环境选择以及Thymeleaf模板引擎的使用步骤,如引入依赖、页面模板、语法格式、后台数据传递和前端展示。
1、maven配置(给maven的settings.xml配置文件的Profiles标签添加如下内容)
    <profile>
      <id>jdk-1.8</id>
      <activation>
        <activeByDefault>true</activeByDefault>
          <jdk>1.8</jdk>
          <value>dev</value>
      </activation>
      <properties>
        <maven.compiler.source>1.8</maven.compiler.source>
        <maven.compiler.target>1.8</maven.compiler.target>
        <maven.compiler.compilerVersion>1.8</maven.compiler.compilerVersion>
      </properties>
    </profile>
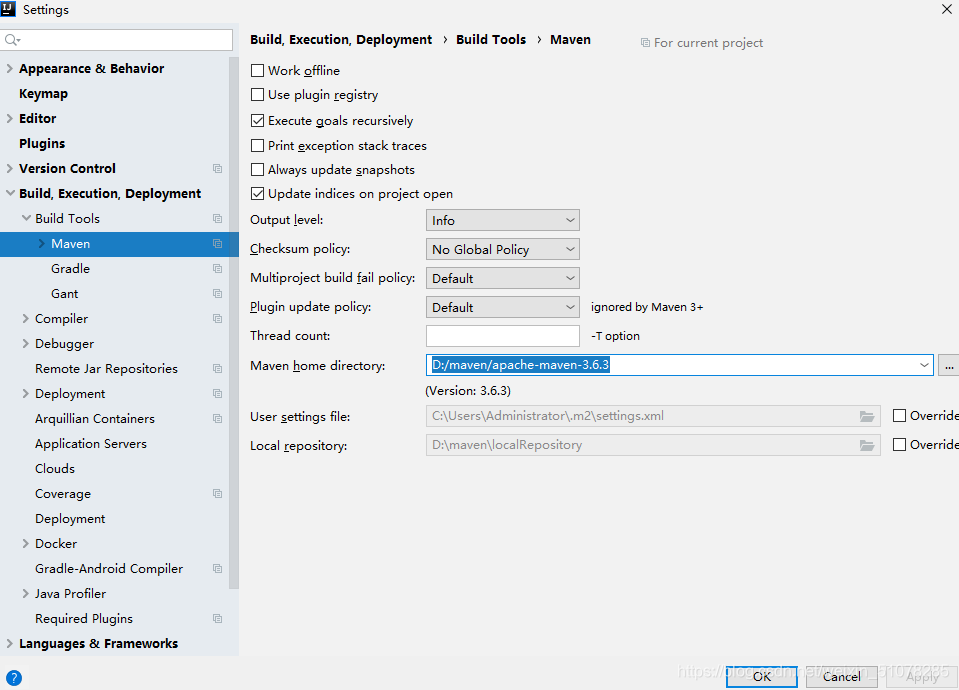
2、idea配置,配置maven路径及maven配置文件路径
3、SpringBoot项目是以父目录来实现版本控制,我们导包就可以不用写版本号了
	<parent>
        <groupId>org.springframework.boot</groupId>
        <artifactId>spring-boot-starter-parent</artifactId>
        <version>2.1.6.RELEASE</version>
        <relativePath/> <!-- lookup parent from repository -->
    </parent>
4、自动配置
@SpringBootApplication     //主类,SpringBoot程序入口
@SpringBootConfiguration   //表示一个SpringBoot的配置类
@Configuration            //配置类上的注解,配置类也是一个组件  @Component
@EnableAutoConfiguration  //告诉SpringBoot容器开启自动装配功能(SpringBoot帮我们配置)
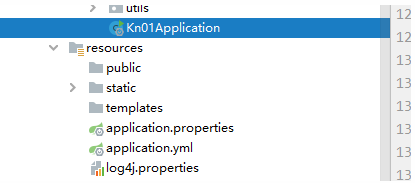
5、配置文件路径及静态资源存放路径文件名称是固定的:application.yml或者application.properties
6、yml中profiles片段选择环境
server:
  port: 8080
  servlet:
    # 系统跟路径
    context-path: /
spring:
#  mvc:
#    view:
#      prefix: /
#      suffix: .html
  # 配置数据源
  datasource:
    username: root
    password: 123456
    url: jdbc:mysql://127.0.0.1:3306/db_xxx?useUnicode=true&useJDBCCompliantTimezoneShift=true&useLegacyDatetimeCode=false&serverTimezone=UTC
    driver-class-name: com.mysql.jdbc.Driver
    type: com.alibaba.druid.pool.DruidDataSource

  # 配置thymeleaf模板引擎
  thymeleaf:
    # 禁用thymeleaf模板引擎的缓存
    cache: false
    prefix: "classpath:/static/"
    suffix: ".html"
  profiles:
  # 这里没有写就默认使用第一个profiles片段的配置
    active:
logging:
  pattern:
    console: "%d - %msg%n" #     定义打印的日志格式
  #    dateformat: #设置日志日期格式
  #    file: #定义输出到日志文件的日志格式
  #  config: #日志配置文件的位置。例如,classpath:logback.xml。
  file: E:/sell/sell.log #设置保存日志的日志文件
  #    max-history:
  #    max-size: #设置日志文件最大大小 #设置日志等级
  #  path: / #日志文件的位置,例如/var/log
  register-shutdown-hook: false #当初始化日志系统时,为其注册一个关闭钩子。
  level:
    com.kn: DEBUG
  root: INFO
---
server:
  port: 8081
spring:
  profiles: test
---
server:
  port: 8082
spring:
  profiles: prod
7、Thymeleaf模板引擎使用方法
7-1、引入jar包依赖
<dependency>
  <groupId>org.springframework.boot<groupId>
  <artifactId>spring-boot-starter-thymeleaf<artifactId>
<dependency>
7-2、默认在templates下面的.html被模板引擎修饰
public class ThymeleafProperties {
    private static final Charset DEFAULT_ENCODING;
    public static final String DEFAULT_PREFIX = "classpath:/templates/";
    public static final String DEFAULT_SUFFIX = ".html";
    private boolean checkTemplate = true;
    private boolean checkTemplateLocation = true;
7-3、页面引入模板引擎
<!DOCTYPE html>
<html lang="en" xmlns:th="http://www.thymeleaf.org">
7-4、语法格式
7-5、后台传值
    /*
        用户登录
        保存在map里面
     */
    @RequestMapping(value = "/login")
    public String userLogin(HttpServletRequest request, HttpServletResponse response, Map<String , Object> map) throws ServletException, IOException {
        //1、获取页面传来的参数  获取用户名和密码
        String username = request.getParameter("username");
        String password = request.getParameter("password");
        System.out.println("username: " + username + ";  password: " + password);
        map.put("UserLoginAlertInfo", null);
        //2、判断用户名和密码是否正确
        Act_id_user user = actIdUserService.queryAct_id_userByUsernameAndPassword(username, password);
        HttpSession session = request.getSession();
        if (user == null) {
            //登陆失败,没有这个人
            map.put("UserLoginAlertInfo","用户名或密码错误,请从新输入");
//            session.setAttribute("UserLoginAlertInfo", "用户名或密码错误,请从新输入");
//            request.getRequestDispatcher("/html/login.html").forward(request, response);
            return "login";
        } else {
            //获取验证码
            String identifyingcode = request.getParameter("identifyingcode");
            //3、判断验证码是否正确(获取验证码的时候保存的验证码信息)
            String verCode = (String) session.getAttribute("verCode");
            if (verCode.equals(identifyingcode.toLowerCase())) {
                //验证码正确(登陆成功:1、存储用户登陆信息,2、进入到主页)
                session.setAttribute("LOGIN_USERINFO", user);
//                request.getRequestDispatcher("/index.html").forward(request, response);
                return "index";
            } else {
                //验证码错误(返回登陆页面并给出对应提示)
                map.put("UserLoginAlertInfo","验证码错误,请从新输入");
//                session.setAttribute("UserLoginAlertInfo", "验证码错误,请从新输入");
//                request.getRequestDispatcher("/html/login.html").forward(request, response);
                return "login";
            }
        }
    }
7-6、前端取值
			   <li th:if="${session.LOGIN_USERINFO == null }">
                    <a href="../user/toLogin">  登 陆  </a>
                </li>
                <li th:if="${session.LOGIN_USERINFO != null }">
                    <a href="../user/userInfo" th:text="${session.LOGIN_USERINFO.FIRST_}"></a>
                    <a href="../user/loginOut">  退 出  </a>
                </li>
			//遍历集合
			<option th:each="user:${userList}" th:value="${pets.id}" th:text="${user.name}"></option>


 被折叠的 条评论
为什么被折叠?
被折叠的 条评论
为什么被折叠?
 到【灌水乐园】发言


