


 这篇博客介绍了如何利用Python的Flask框架和Jinja2模板引擎处理视频分镜。首先,讲解了Flask程序的基本结构,包括引入Flask、创建对象、编写主程序、定义路由和运行。接着,详细阐述了Jinja2模板的使用,通过创建HTML模板展示视频。然后,博主分享了一个实现视频分镜的实例,包括图像处理和动态判断镜头变化的算法。最后,记录了在PyCharm中运行Flask项目时遇到的问题及解决方法,如环境配置错误和文件路径问题。
目录
一、程序的基本结构
1、引入Flask类
from flask import Flask
2、创建Flask对象
- flask程序需要创建一个Flask类对象,用于应用的配置和运行
- name 是Python中的特殊变量,如果文件作为主程序执行,那么
__name__变量的值就是__main__,如果是被其他模块引入,那么__name__的值就是模块名称
app = Flask(__name__)
3、编写主程序
- 在主程序中,执行run()来启动应用
- 改名启动一个本地服务器,默认情况下其地址是localhost:5000,可以使用关键字参数port修改监听端口
if __name__ =="__main__":
app.run(debug=True, port=5008)
4、路由
- 使用app变量的route()装饰器来告诉Flask框架URL如何触发视图函数
- 处理URL和函数之间关系的程序称为路由
- 像index()这样的函数称为视图函数(view function),函数的返回值称为响应,是客户端会收到的内容
- 对路径’/'的请求将转为对index()函数的调用
@app.route('/')
def index():
return 'Hello World!'
- 尖括号里的内容是动态部分
@app.route('/user/<name>')
def user(name):
return '<h1>Hello, %s!</h1>' % name
5、运行
完整的flask程序:
from flask import Flask
app = Flask(__name__)

@app.route('/')
def index():
    return 'Hello, World!'

if __name__ == '__main__':
    app.run(port="5008")
二、Jinja2模板
- 在项目中创建文件夹templates
- 在templates里新建一个HTML文件,命名为index.html
- 使用模板时,视图函数应当返回
render_template()的调用结果
from flask import Flask,render_template
app=Flask(__name__)

@app.route('/')
def index():
    return render_template('index.html')

if __name__ == '__main__':
app.run(port="5008")- 模板文件
index.html依赖于变量name
<!DOCTYPE html>
<html lang="en">
<head>
<meta charset="UTF-8">
<title>Flask</title>
</head>
<body>
Flask
</body>
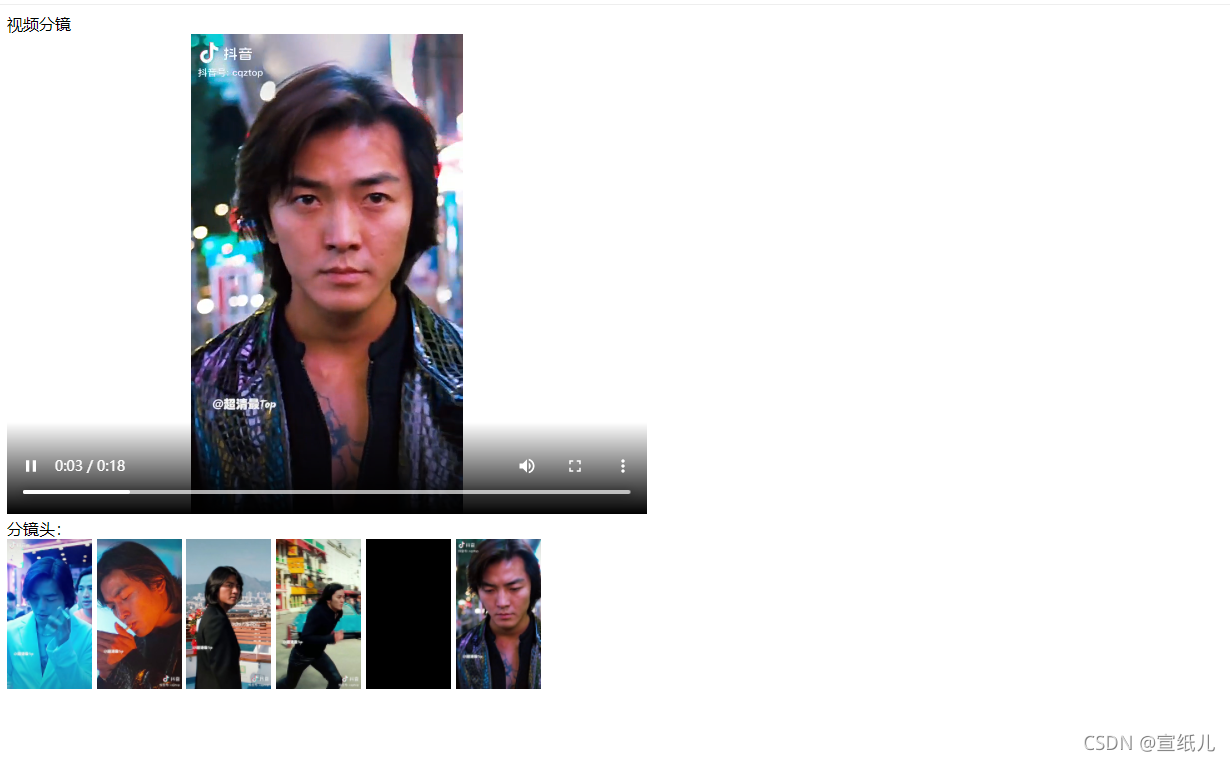
</html>三、实现视频分镜
运行结果:
 完整代码:
完整代码:
from flask import Flask,render_template
import cv2
import os
import numpy as np
import matplotlib.pyplot as plt

app=Flask(__name__)

def vs():
    def classify_hist_with_split(image1, image2, size=(256, 256)):
        image1 = cv2.resize(image1, size)
        image2 = cv2.resize(image2, size)
        sub_image1 = cv2.split(image1)
        sub_image2 = cv2.split(image2)
        sub_data = 0
        for im1, im2 in zip(sub_image1, sub_image2):
            sub_data += calculate(im1, im2)
        sub_data = sub_data / 3
        return sub_data
    def calculate(image1, image2):
        hist1 = cv2.calcHist([image1], [0], None, [256], [0.0, 255.0])
        hist2 = cv2.calcHist([image2], [0], None, [256], [0.0, 255.0])
        plt.plot(hist1, color="r")
        plt.plot(hist2, color="g")
        degree = 0
        for i in range(len(hist1)):
            if hist1[i] != hist2[i]:
                degree = degree + (1 - abs(hist1[i] - hist2[i]) / max(hist1[i], hist2[i]))
            else:
                degree = degree + 1
        degree = degree / len(hist1)
        return degree
    for i in range(549):
        img1 = cv2.imread('static/pic2/image{}.jpg'.format(i))
        img2 = cv2.imread('static/pic2/image{}.jpg'.format(i + 1))
        n = classify_hist_with_split(img1, img2)
        if (n < 0.6):
            cv2.imwrite('static/shot/image{}.jpg'.format(i + 1), img2)
    #重命名挑选出的分镜图片
    path = "D:\python learning\pycharm\static\shot"
    filelist = os.listdir(path)
    count = 0
    for file in filelist:
        Olddir = os.path.join(path, file)
        if os.path.isdir(Olddir):
            continue
        filetype = os.path.splitext(file)[1]    #分出'jpg'
        Newdir = os.path.join(path, str(count).zfill(1) + filetype)    #zfill()参数决定名称位数
        os.rename(Olddir, Newdir)
        count += 1

@app.route('/')
def index():
    #vs()    #离线计算(提前算好),在线展示
    pic='static/shot/'
    framecount=6
    return render_template('index.html',pic1=pic,framecount=framecount)

if __name__ == '__main__':
    app.run(port="5008")
<!DOCTYPE html>
<html lang="en">
<head>
<meta charset="UTF-8">
<title>Flask分镜</title>
</head>
<body>
视频分镜
<br>
<video width="640" height="480" controls autoplay>
<source src="static/ghz.mp4" type="video/mp4">
<object data="static/ghz.mp4" width="640" height="480">
<embed width="640" height="480" src="static/ghz.mp4">
</object>
</video>
<br>
分镜头:<br>
{% for i in range(framecount) %}
<img height="150" src="{{pic1}}{{i}}.jpg" />
{% endfor %}
</body>
</html>HTML语言:
| {{ }} 变量 | {% %} 代码 |
四、问题记录与总结
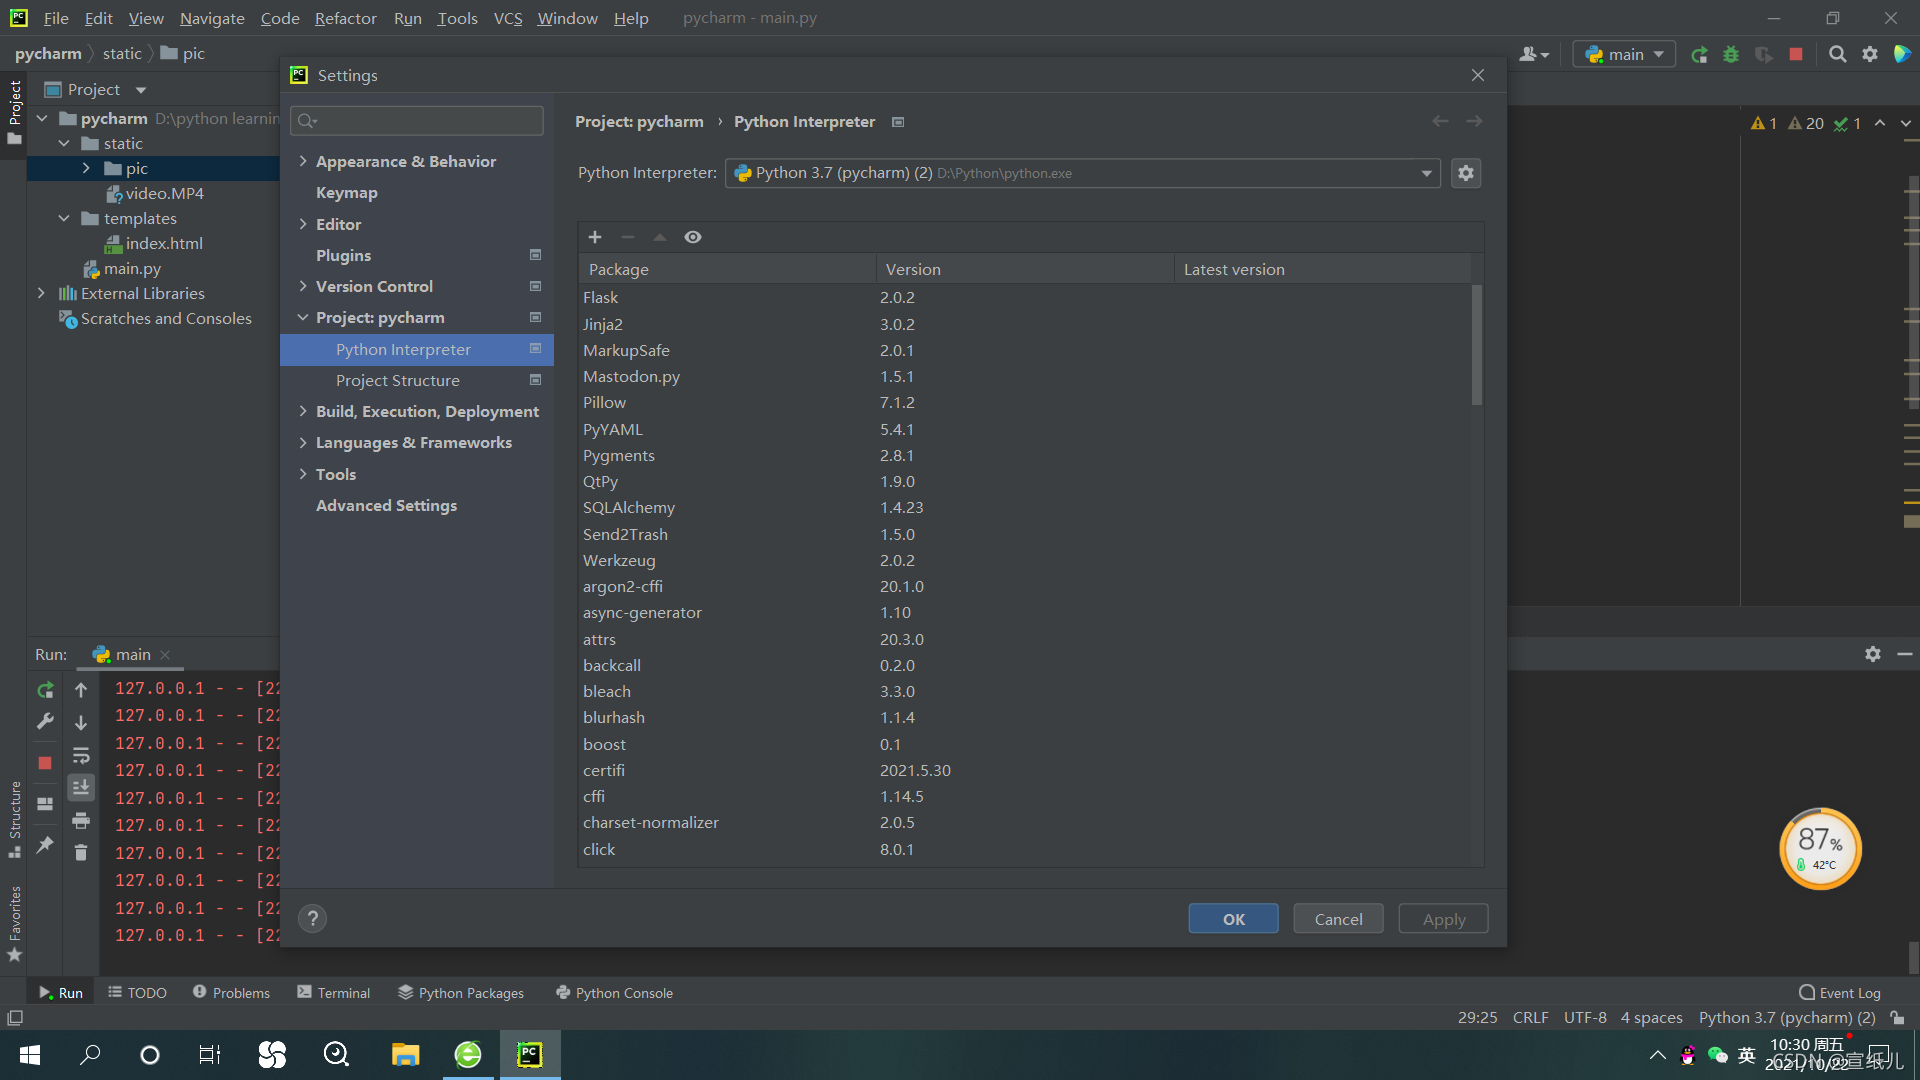
1、pycharm运行flask报错
出现报错:
ModuleNotFoundError: No module named 'flask'
解决方案:
- 打开左上角File->Settings->PROJECT:xxx->Project Interpreter
- 打开右边的Project Ineterpreter:的下拉列表,选择Python 3.7
- 如果打开python3.7一片空白,就点击右下角的Apply,然后点击OK
2、interpreter为invalid
出现报错:
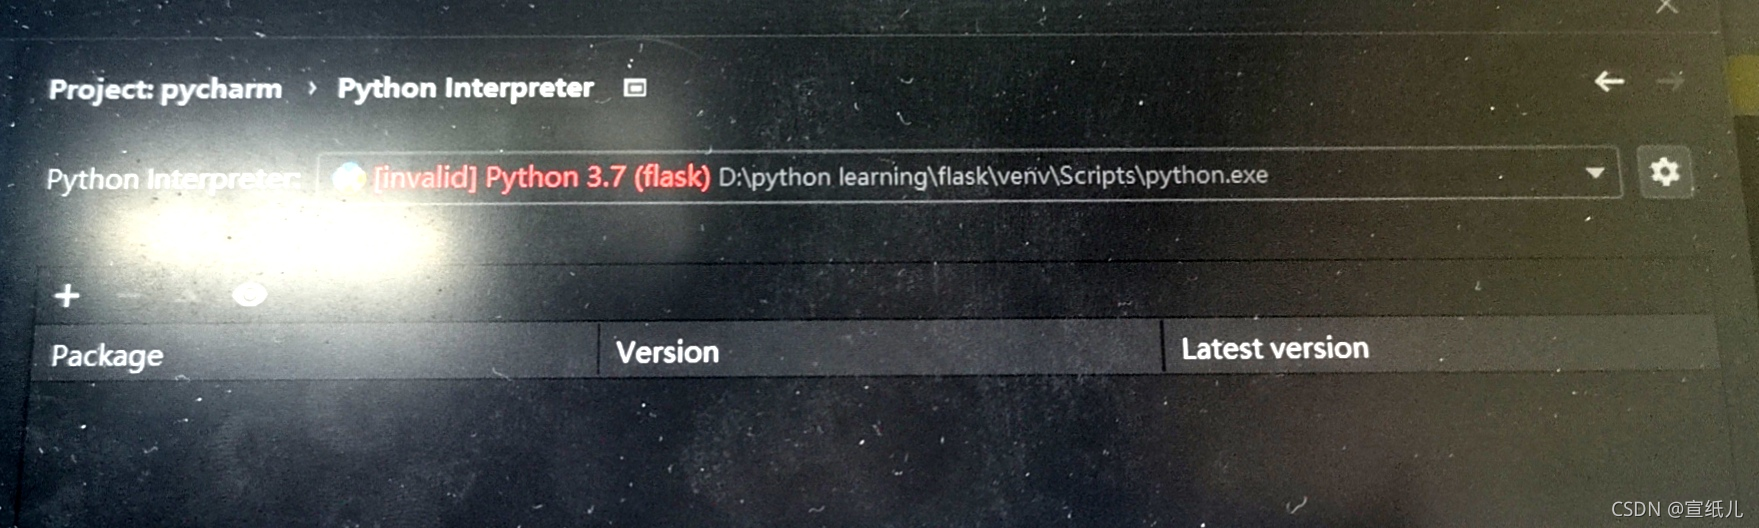
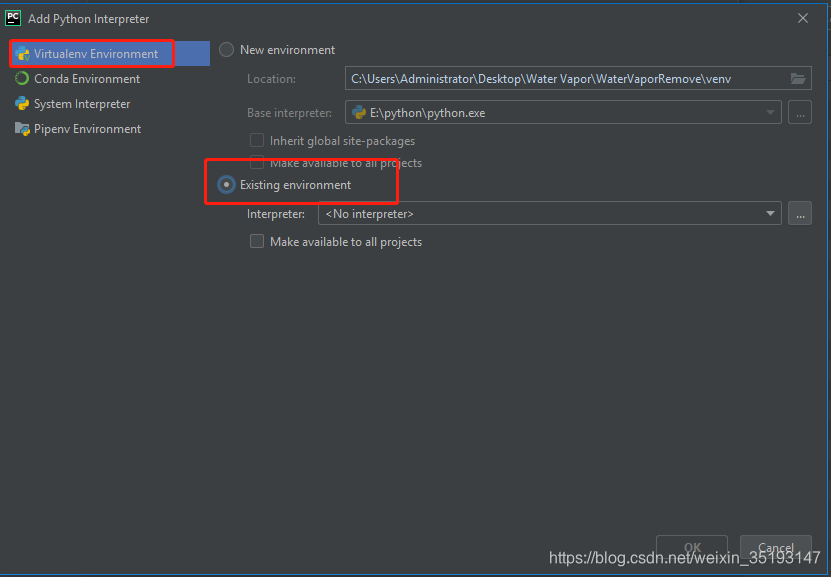
解决方案:
- 打开左上角File->Settings->PROJECT:xxx->Project Interpreter
- 打开右边的Project Ineterpreter:的设置,选择show all
- 单击右侧的“-”,移除invalid的interpreter
- 点击 “+”,添加正确的路径
3、分镜头没有按顺序输出
出现问题:

( 第一个镜头没有在相应的位置上)
解决方案:
- 修改main.py
@app.route('/')
def shot():
    path = 'static/hash'
    filename = os.listdir(path)
    framecount = len(filename)
    filename.sort(key=lambda x: int(x[5:-4]))    #取出image对应的编号
return render_template('hash.html', filename=filename, framecount=framecount)- 修改hash.html
<!DOCTYPE html>
<html lang="en">
<head>
    <meta charset="UTF-8">
    <title>hash分镜</title>
</head>
<body>
视频分镜
<br>
<video width="640" height="480" controls autoplay>
  <source src="static/ghz.mp4" type="video/mp4">
  <object data="static/ghz.mp4" width="640" height="480">
    <embed width="640" height="480" src="static/ghz.mp4">
  </object>
</video>
<br>
均值哈希帧数:{{framecount}}<br>
{% for i in range(framecount) %}
<img height="40" src="static/hash/{{filename[i]}}" />
{{filename[i]}}
{% endfor %}
</body>
</html>


 1万+
1万+

 被折叠的 条评论
为什么被折叠?
被折叠的 条评论
为什么被折叠?
 到【灌水乐园】发言


