


 本文介绍了如何使用Python库uiautomator2进行Android设备的UI自动化测试。该库解决了Google uiautomator的Java语言限制和必须在设备上运行的问题。首先,通过pip安装uiautomator2和Pillow库,然后通过初始化命令部署所需组件。测试时,可以通过WiFi或USB连接设备,并使用weditor工具辅助元素定位。示例脚本展示了获取设备信息的方法。
###介绍
uiautomator2 是一个可以使用Python对Android设备进行UI自动化的库。其底层基于Google uiautomator,Google提供的uiautomator库可以获取屏幕上任意一个APP的任意一个控件属性,并对其进行任意操作,但有两个缺点:
1、测试脚本只能使用Java语言。
2、测试脚本必须每次被上传到设备上运行。 我们希望测试能够用一个更脚本化的语言,例如Python编写,同时可以每次所见即所得地修改测试、运行测试。
###安装
安装uiautomator2
pip install --pre uiautomator2

pip install pillow
###初始化
部署相关的守护进程。
电脑连接上一个手机或多个手机, 确保adb已经添加到环境变量中,执行下面的命令会自动安装本库所需要的设备端程序:uiautomator-server 、atx-agent、openstf/minicap、openstf/minitouch
python -m uiautomator2 init
安装完成,设备上会多一个uiautomator的应用。
配置手机设备参数:
有两种方法,一种是通过WIFI,另一种是通过USB数据线将手机链接电脑。
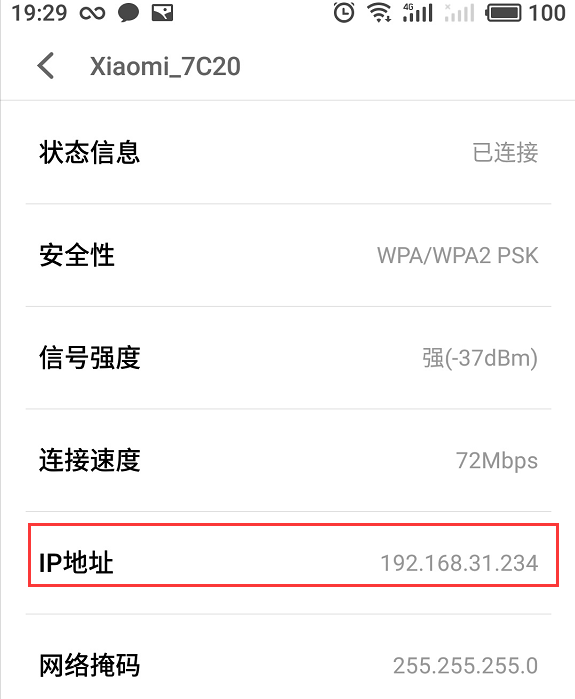
WiFi连接更方便一点,需要保持PC和手机使用的一个WIFI,查看手机连接WIFI的IP地址。###测试
编写以下脚本进行验证:
import uiautomator2 as u2

d = u2.connect('192.168.31.234')
print(d.info)
运行结果:
{'currentPackageName': 'com.meizu.flyme.launcher', 'displayHeight': 1920, 'displayRotation': 0, 'displaySizeDpX': 360, 'displaySizeDpY': 640, 'displayWidth': 1080, 'productName': 'meizu_PRO5', 'screenOn': True, 'sdkInt': 24, 'naturalOrientation': True}
###定位元素:
我们可以借助Android SDK自的uiautomatorviewer查看元素,这就要求手机必须以USB的方式连接PC,我前面使用的是WIFI连接进行连接的。所以,openatx提供了另外一个工具weditor 来解决这个问题。
GitHub地址:
uiautomator2 使用Python测试 Android应用 - 虫师 - 博客园GitHub - alibaba/web-editor: web editor for atx https://github.com/openatx/weditor


 1200
1200

 被折叠的 条评论
为什么被折叠?
被折叠的 条评论
为什么被折叠?
 到【灌水乐园】发言


