


在springboot中尽管提供了许多的官方starter,但是还是不能够全部覆盖到我们工作的场景中,因此有时候我们就需要自定义是starter
一、理解为什么需要自定义starter
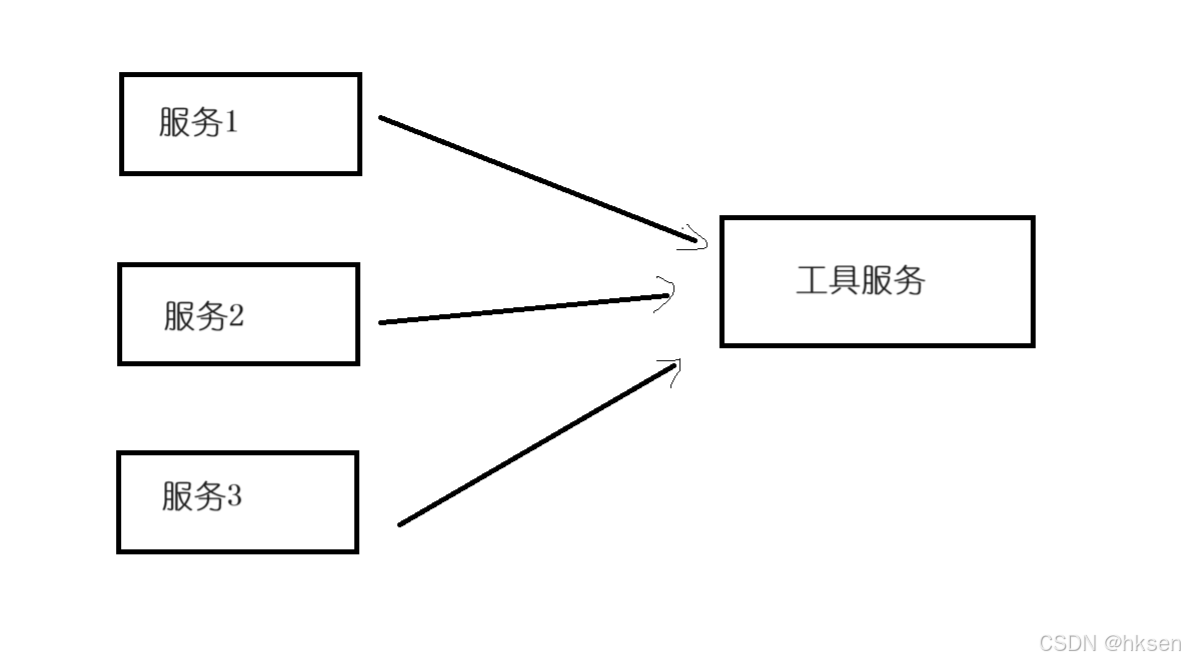
- 在我们分布式开发中有许多的微服务,一些具备普遍性的代码,希望其他服务都去调用它使用,那么我们就可以把这些具备普遍性的代码抽取为一个工具服务,当其他服务需要调用它的时候,直接引入工具服务的starter就可以调用对应的内容,我们也可以修改对应的配置去实现对底层代码的参数修改
二、自定义starter
场景:聊天机器人打招呼场景
目的:使得任何项目都能够导入该自定义的starter具备打招呼的功能,并且问候语中的用户名需要的话可以在配置文件中修改
1.通用代码
- 该代码的功能是前端请求接口,会从配置文件中获取对应的数据返回给前端
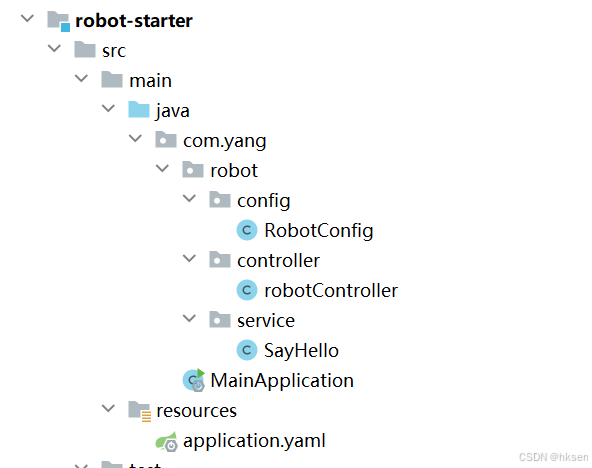
(1)Controller
import com.yang.robot.service.SayHello;
import org.springframework.beans.factory.annotation.Autowired;
import org.springframework.web.bind.annotation.GetMapping;
import org.springframework.web.bind.annotation.RestController;

@RestController
public class robotController {
    @Autowired
    private SayHello sayHello;

    @GetMapping("/robot")
    public String robot(){
        return sayHello.sayHello();
    }

}
(2)Service
import com.yang.robot.config.RobotConfig;
import org.springframework.beans.factory.annotation.Autowired;
import org.springframework.stereotype.Service;

@Service
public class SayHello {
    @Autowired
    private RobotConfig robotConfig;

    public String sayHello(){
        return "hello:" + robotConfig.getName();
    }
}
(3)Config
import lombok.Data;
import org.springframework.boot.context.properties.ConfigurationProperties;
import org.springframework.stereotype.Component;

@ConfigurationProperties(prefix = "robot")
@Component
@Data
public class RobotConfig {
    private String name;
    private String age;
    private String address;

}
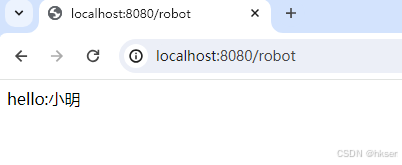
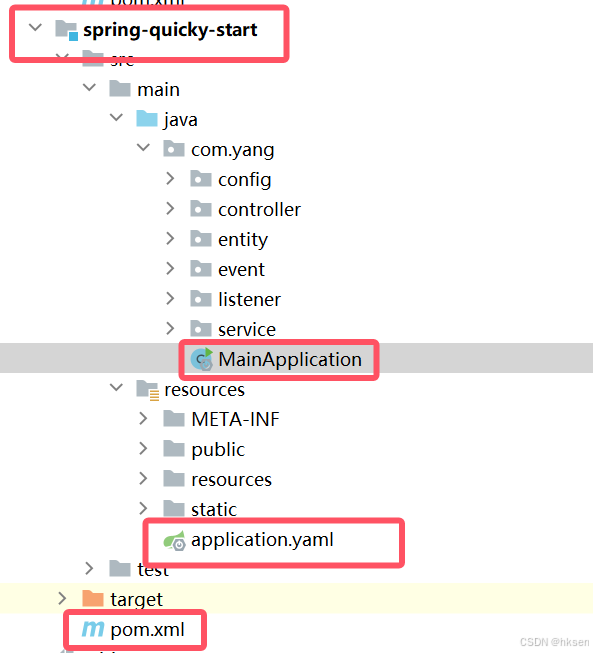
(4)application.yaml
robot:
  name: 小明
  age: 18
  address: 北京
(5)结果
2.抽取代码(基本)
(1)改造starter
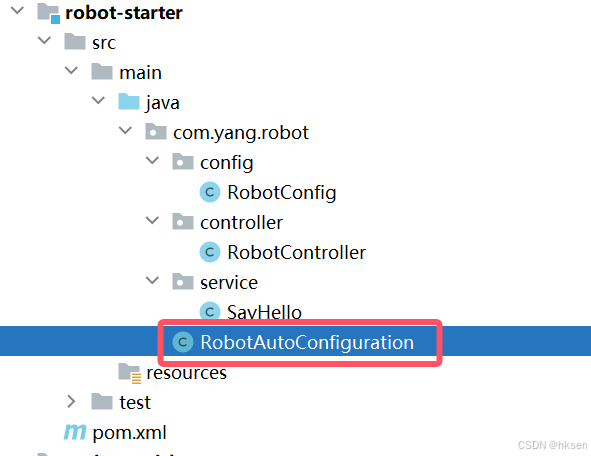
(2)RobotAutoConfiguration
- 需要导入robot业务涉及的组件:RobotConfig.class, RobotConfig.class, SayHello.class
import com.yang.robot.config.RobotConfig;
import com.yang.robot.service.SayHello;
import org.springframework.context.annotation.Configuration;
import org.springframework.context.annotation.Import;

@Configuration
@Import({RobotConfig.class, RobotConfig.class, SayHello.class})
public class RobotAutoConfiguration {
}
(3)在quickly服务中引入该starter的依赖
        <!--自定义robot-starter-->
        <dependency>
            <groupId>com.yang</groupId>
            <artifactId>robot-starter</artifactId>
            <version>1.0-SNAPSHOT</version>
        </dependency>
(4)在quickly服务中的配置中写入robot相关信息
server:
  port: 8899
robot:
  name: quickly信息
(5)在quickly服务的启动类中添加@Import(RobotAutoConfiguration.class)
- 注:如果不添加(404),那么springBoot只能扫描到本包及其子包的组件,robot-starter肯定扫描不到,而在RobotAutoConfiguration中又导入了RobotConfig.class, RobotConfig.class, SayHello.class
import com.yang.listener.MyApplication;
import com.yang.robot.RobotAutoConfiguration;
import org.springframework.boot.SpringApplication;
import org.springframework.boot.autoconfigure.SpringBootApplication;
import org.springframework.context.annotation.Import;

@SpringBootApplication
@Import(RobotAutoConfiguration.class)
public class MainApplication {
    public static void main(String[] args) {
        SpringApplication springApplication = new SpringApplication(MainApplication.class);
        springApplication.run(args);

    }
}
(6)运行结果
- quickly服务中除了配置文件,不存在于robot相关的代码
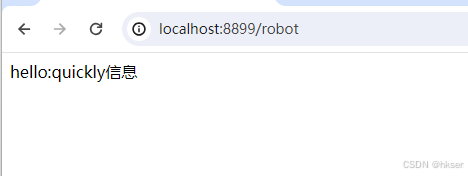
- 注:robot配置信息是以当前服务中的配置类为准,就算robot-satrter服务的配置中配置了对应的信息,其信息也不会生效
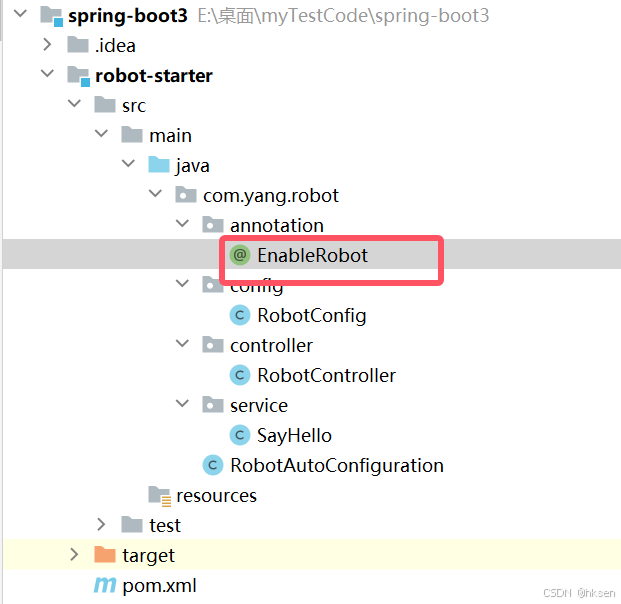
3.抽取代码(使用enable机制)
- 使用基本的抽取代码方法,我们需要在调用的该robot-starter服务的主启动类上面标注:@Import(RobotAutoConfiguration.class),使用起来就比较麻烦,那么我们可以在robot-starter中给用户也预留一个@EnableRobot自定义注解,用来替换@Import(RobotAutoConfiguration.class)
(1)robot相关代码修改:
- 参考@EnableWebMvc
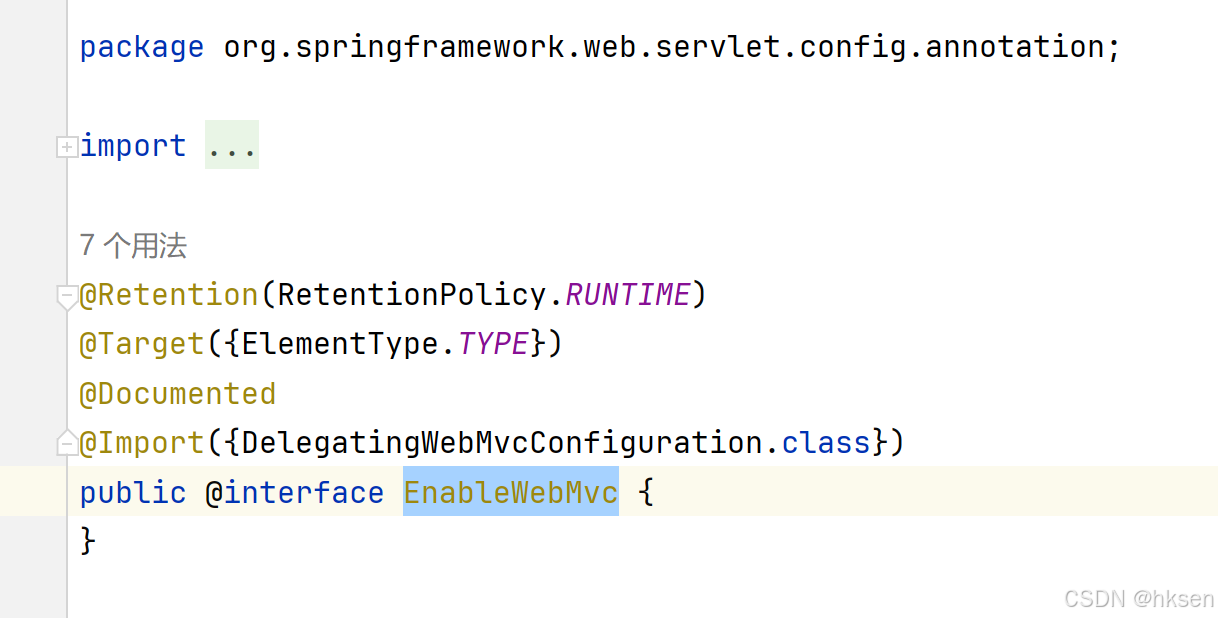
- robot自定义@EnableRobot
package com.yang.robot.annotation;

import com.yang.robot.RobotAutoConfiguration;
import org.springframework.context.annotation.Import;

import java.lang.annotation.*;

@Retention(RetentionPolicy.RUNTIME)
@Target({ElementType.TYPE})
@Documented
@Import({RobotAutoConfiguration.class})
public @interface EnableRobot {
}
(2)调用robot的服务,主启动类添加@EnableRobot即可生效
package com.yang;

import com.yang.robot.annotation.EnableRobot;
import org.springframework.boot.SpringApplication;
import org.springframework.boot.autoconfigure.SpringBootApplication;

@SpringBootApplication
@EnableRobot
public class MainApplication {
    public static void main(String[] args) {
        SpringApplication springApplication = new SpringApplication(MainApplication.class);
        springApplication.run(args);

    }
}
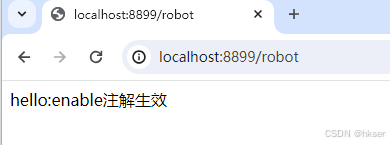
(3)运行结果
4.抽取代码(完全机制)
- 调用robot-starter的时候,我们不需要标任何注解,导入依赖就可以生效使用
(1)原理:依赖springboot的SPI机制(寻找并加载.imports文件中的组件)
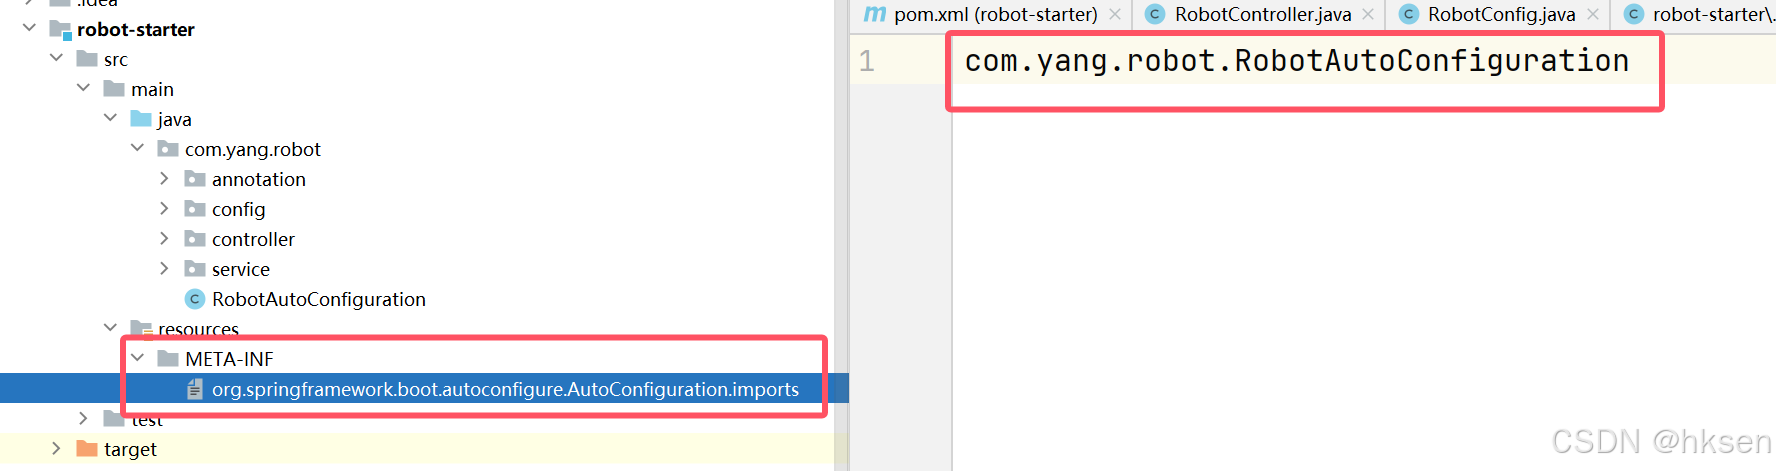
(2)在robot-starter中的resource中创建一个文件夹META-INF,创建文件:org.springframework.boot.autoconfigure.AutoConfiguration.imports,并且在里面配置RobotAutoConfiguration的全类名
(3)调用robot-starter的主启动类无需添加注解
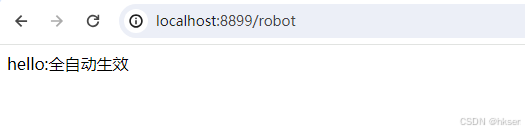
(4)运行结果


 1116
1116

 被折叠的 条评论
为什么被折叠?
被折叠的 条评论
为什么被折叠?
 到【灌水乐园】发言


