


 本文详细介绍了Spring Cloud Stream在RabbitMQ环境下的应用,从Stream的基本概念、实现原理,到生产者和消费者的创建,以及如何避免消息重复消费的问题。通过实例展示了配置YAML文件、编写启动类和业务代码,实现了消息的发送和接收。同时,讨论了如何将消费者分组以解决重复消费,并探讨了消息持久化的解决方案。
文章目录
一、关于Stream
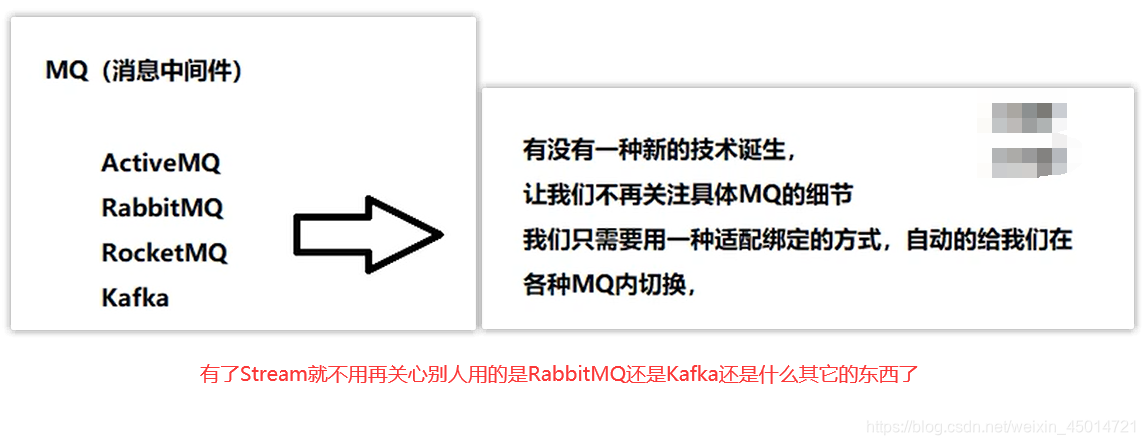
1.Stream概述
如果你的公司同时存在这RabbitMQ和Kafka两种中间件,那么你就可以使用Spring Cloud Stream来在这两种中间件之间灵活切换
1.官网
2.Spring Cloud Stream中文指导手册
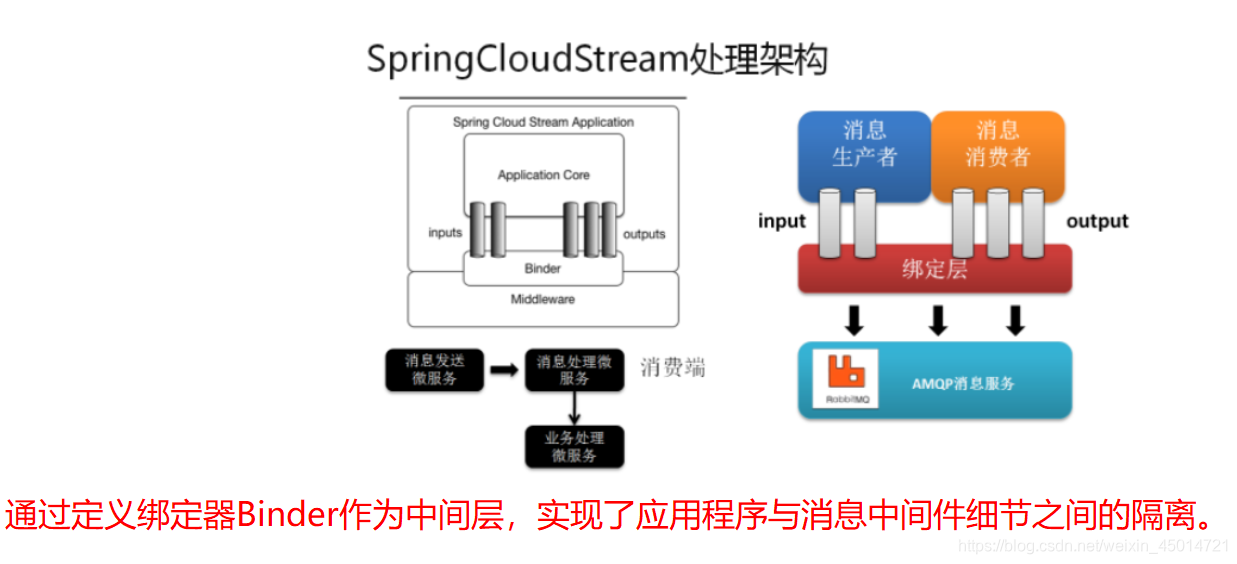
2.Stream实现的原理

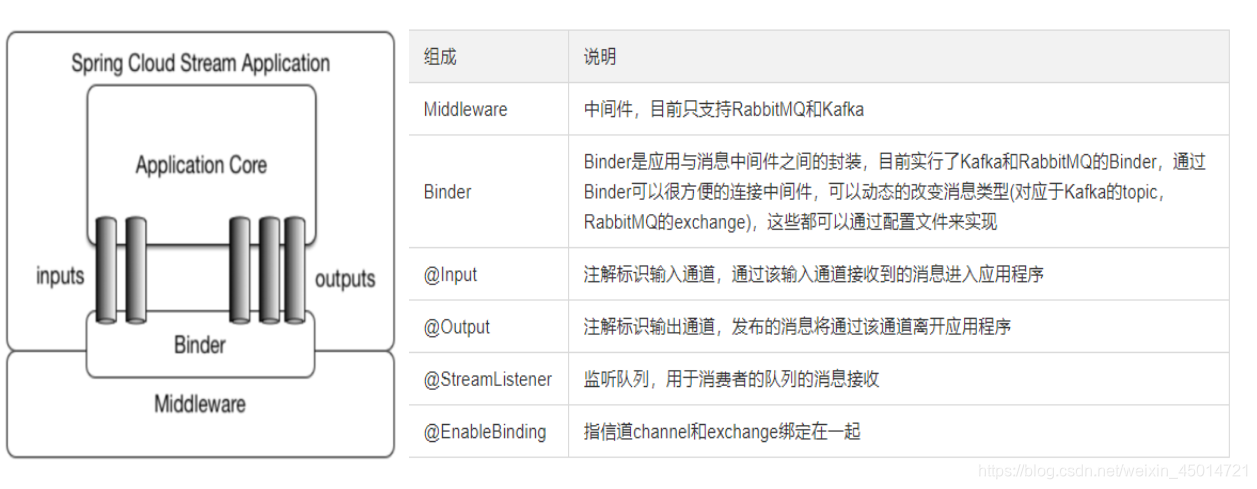
3.常用的API和常用的注解
4.要求

二、Stream搭建
1.Stream消息驱动之生产者
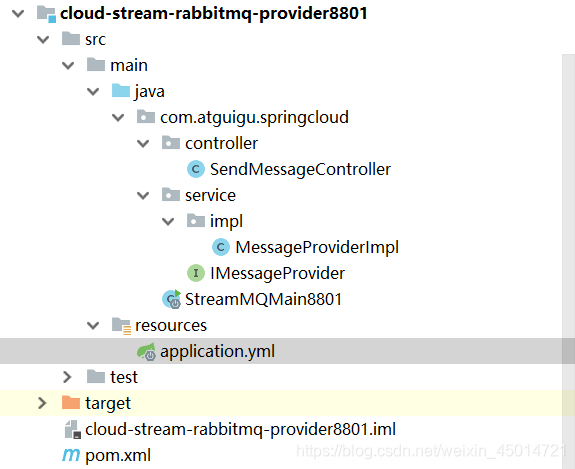
1.新建Module
2.修改pom

    <dependencies>
        <dependency>
            <groupId>org.springframework.boot</groupId>
            <artifactId>spring-boot-starter-web</artifactId>
        </dependency>
        <dependency>
            <groupId>org.springframework.boot</groupId>
            <artifactId>spring-boot-starter-actuator</artifactId>
        </dependency>
        <dependency>
            <groupId>org.springframework.cloud</groupId>
            <artifactId>spring-cloud-starter-netflix-eureka-client</artifactId>
        </dependency>
        <dependency>
            <groupId>org.springframework.cloud</groupId>
            <artifactId>spring-cloud-starter-stream-rabbit</artifactId>
        </dependency>
        <!--基础配置-->
        <dependency>
            <groupId>org.springframework.boot</groupId>
            <artifactId>spring-boot-devtools</artifactId>
            <scope>runtime</scope>
            <optional>true</optional>
        </dependency>
        <dependency>
            <groupId>org.projectlombok</groupId>
            <artifactId>lombok</artifactId>
            <optional>true</optional>
        </dependency>
        <dependency>
            <groupId>org.springframework.boot</groupId>
            <artifactId>spring-boot-starter-test</artifactId>
            <scope>test</scope>
        </dependency>
    </dependencies>
3.yml
server:
port: 8801
spring:
application:
name: cloud-stream-provider
cloud:
stream:
binders: # 在此处配置要绑定的rabbitmq的服务信息;
defaultRabbit: # 表示定义的名称,用于于binding整合
type: rabbit # 消息组件类型(告诉它我们用的是rabbit)
environment: # 设置rabbitmq的相关的环境配置
spring:
rabbitmq:
host: 192.168.56.103
port: 5672
username: heima
password: 111111
virtual-host: /itcast
bindings: # 服务的整合处理
output: # 这个名字是一个通道的名称
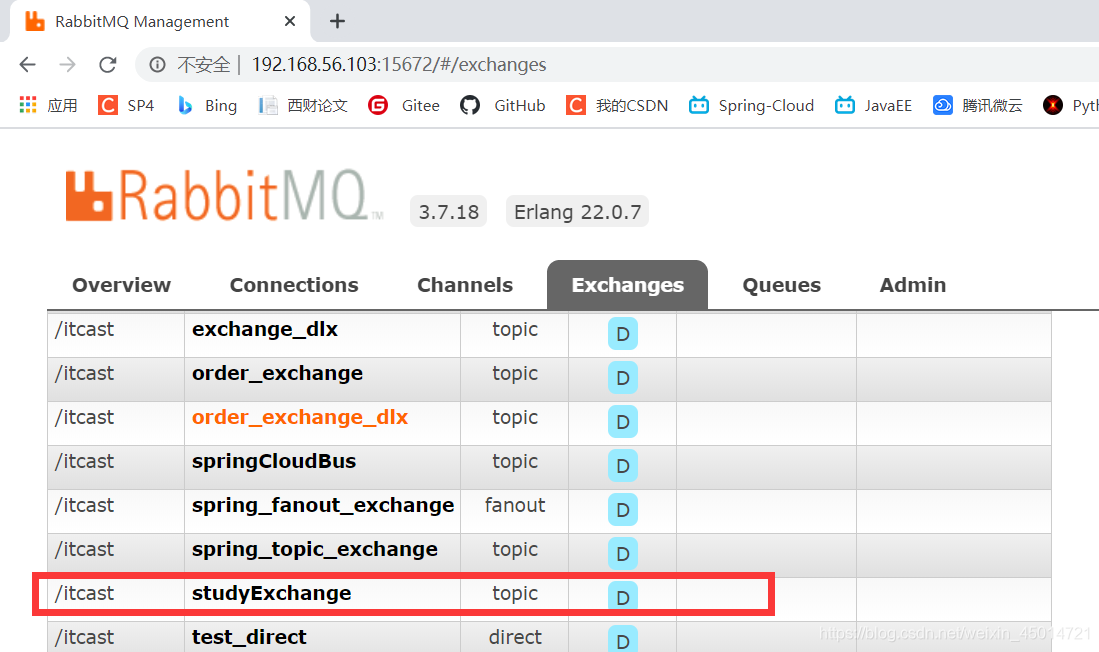
destination: studyExchange # 表示要使用的Exchange名称定义
content-type: application/json # 设置消息类型,本次为json,文本则设置“text/plain”
binder: defaultRabbit # 设置要绑定的消息服务的具体设置
eureka:
client: # 客户端进行Eureka注册的配置
service-url:
defaultZone: http://localhost:7001/eureka
instance:
lease-renewal-interval-in-seconds: 2 # 设置心跳的时间间隔(默认是30秒)
lease-expiration-duration-in-seconds: 5 # 如果现在超过了5秒的间隔(默认是90秒)
instance-id: send-8801.com # 在信息列表时显示主机名称
prefer-ip-address: true # 访问的路径变为IP地址
4.启动类
@SpringBootApplication
public class StreamMQMain8801
{
    public static void main(String[] args)
    {
        SpringApplication.run(StreamMQMain8801.class,args);
    }
}
5.业务类
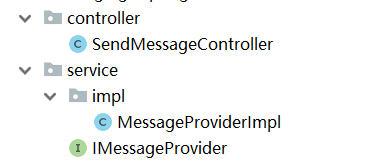
接口类:
public interface IMessageProvider
{
    public String send() ;
}
接口实现类:
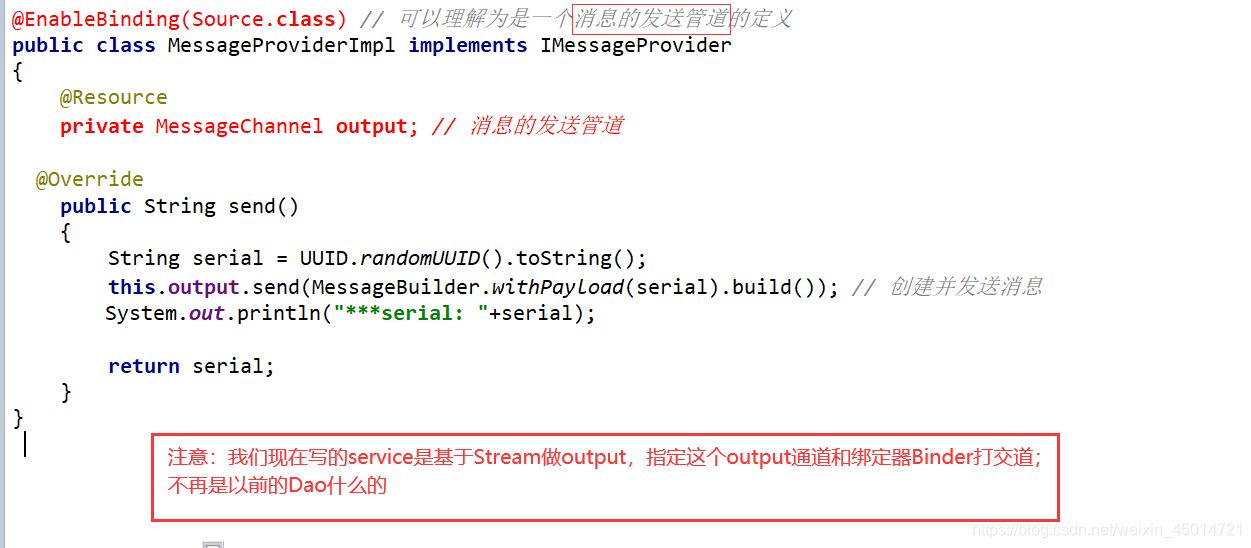
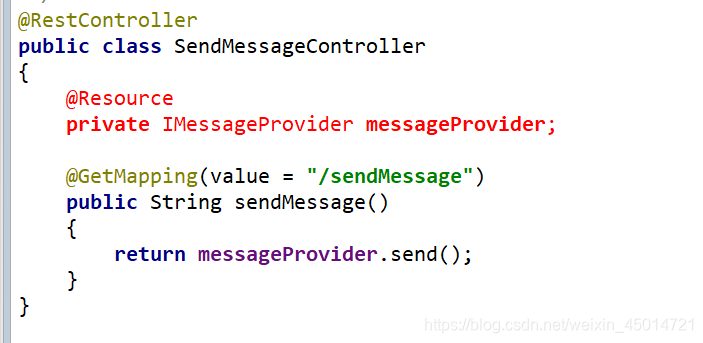
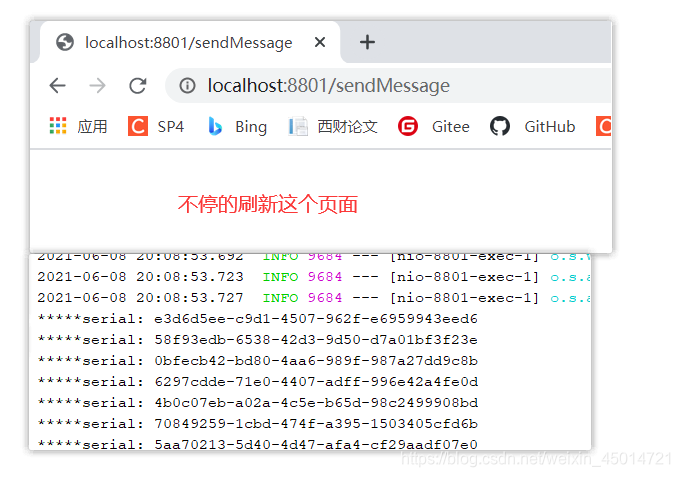
Controller类:
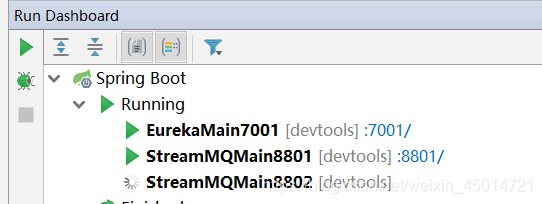
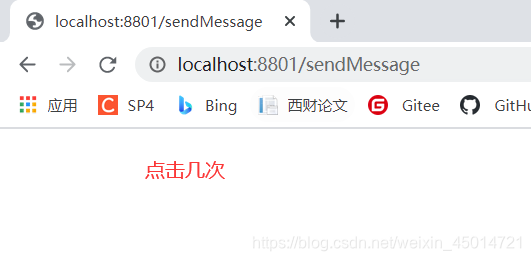
6.测试
启动rabbitmq: ①到Linux环境下运行
"cd /root"
②访问192.168.56.103:15672,登录名admin,密码111111,


2.Stream消息驱动之消费者1
1.新建Module
2.修改pom
    <dependencies>
        <dependency>
            <groupId>org.springframework.boot</groupId>
            <artifactId>spring-boot-starter-web</artifactId>
        </dependency>
        <dependency>
            <groupId>org.springframework.cloud</groupId>
            <artifactId>spring-cloud-starter-netflix-eureka-client</artifactId>
        </dependency>
        <dependency>
            <groupId>org.springframework.cloud</groupId>
            <artifactId>spring-cloud-starter-stream-rabbit</artifactId>
        </dependency>
        <dependency>
            <groupId>org.springframework.boot</groupId>
            <artifactId>spring-boot-starter-actuator</artifactId>
        </dependency>
        <!--基础配置-->
        <dependency>
            <groupId>org.springframework.boot</groupId>
            <artifactId>spring-boot-devtools</artifactId>
            <scope>runtime</scope>
            <optional>true</optional>
        </dependency>
        <dependency>
            <groupId>org.projectlombok</groupId>
            <artifactId>lombok</artifactId>
            <optional>true</optional>
        </dependency>
        <dependency>
            <groupId>org.springframework.boot</groupId>
            <artifactId>spring-boot-starter-test</artifactId>
            <scope>test</scope>
        </dependency>
    </dependencies>
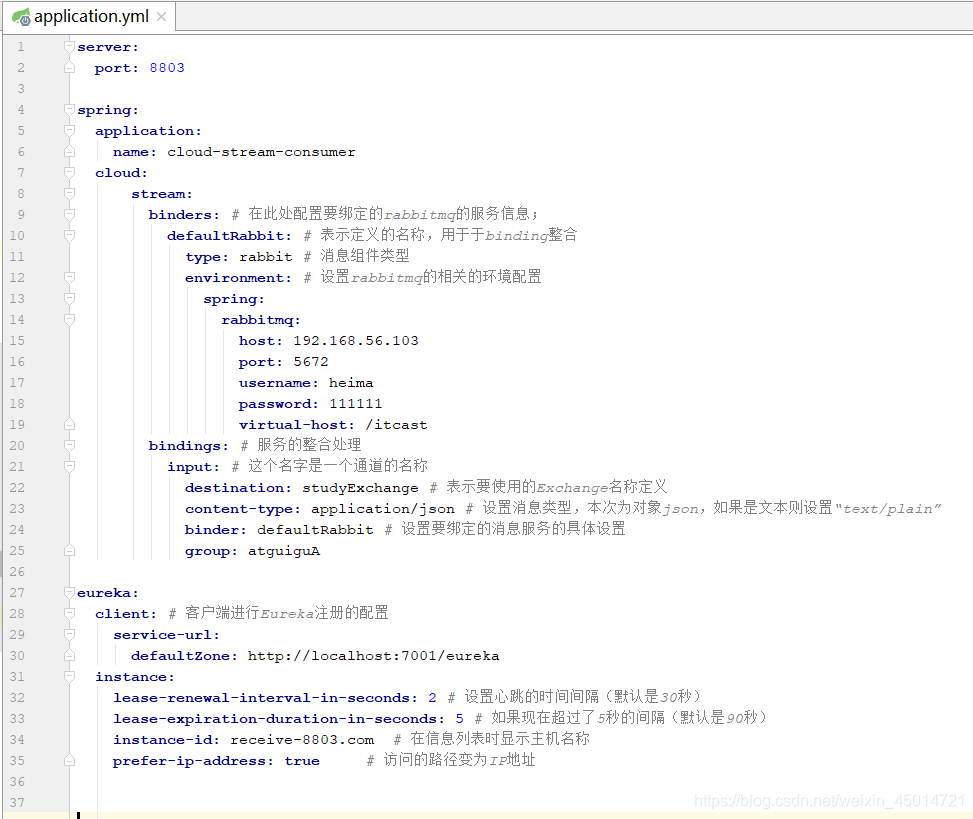
3.yml

4.启动类
@SpringBootApplication
public class StreamMQMain8802
{
    public static void main(String[] args)
    {
        SpringApplication.run(StreamMQMain8802.class,args);
    }
}
5.业务类
6.测试
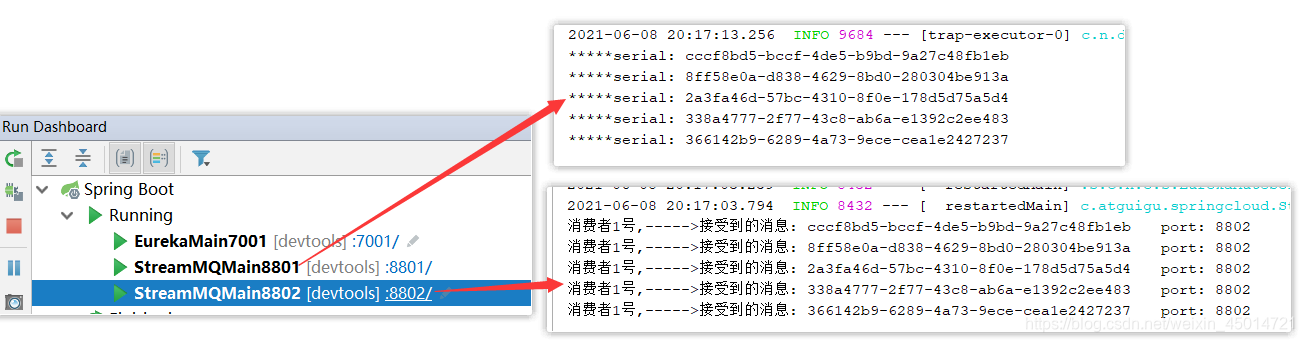
你可以看到,迄今为止我们没有写一行和RabbitMQ相关的代码
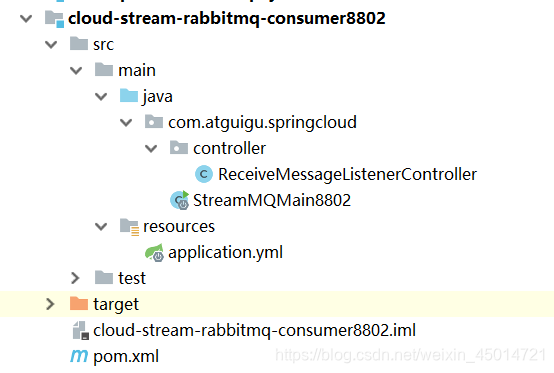
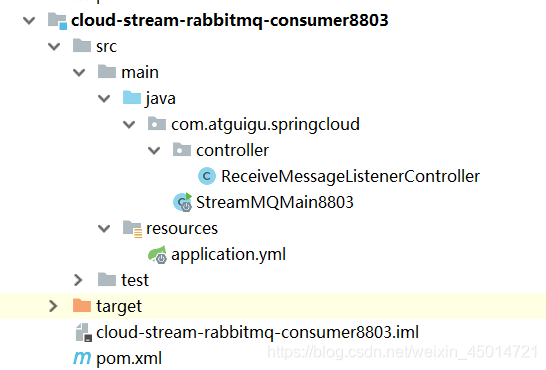
3.Stream消息驱动之消费者2
1.新建Module
2.修改pom
    <dependencies>
        <dependency>
            <groupId>org.springframework.boot</groupId>
            <artifactId>spring-boot-starter-web</artifactId>
        </dependency>
        <dependency>
            <groupId>org.springframework.cloud</groupId>
            <artifactId>spring-cloud-starter-netflix-eureka-client</artifactId>
        </dependency>
        <dependency>
            <groupId>org.springframework.cloud</groupId>
            <artifactId>spring-cloud-starter-stream-rabbit</artifactId>
        </dependency>
        <dependency>
            <groupId>org.springframework.boot</groupId>
            <artifactId>spring-boot-starter-actuator</artifactId>
        </dependency>
        <!--基础配置-->
        <dependency>
            <groupId>org.springframework.boot</groupId>
            <artifactId>spring-boot-devtools</artifactId>
            <scope>runtime</scope>
            <optional>true</optional>
        </dependency>
        <dependency>
            <groupId>org.projectlombok</groupId>
            <artifactId>lombok</artifactId>
            <optional>true</optional>
        </dependency>
        <dependency>
            <groupId>org.springframework.boot</groupId>
            <artifactId>spring-boot-starter-test</artifactId>
            <scope>test</scope>
        </dependency>
    </dependencies>
3.yml
4.启动类
@SpringBootApplication
public class StreamMQMain8803
{
    public static void main(String[] args)
    {
        SpringApplication.run(StreamMQMain8803.class,args);
    }
}
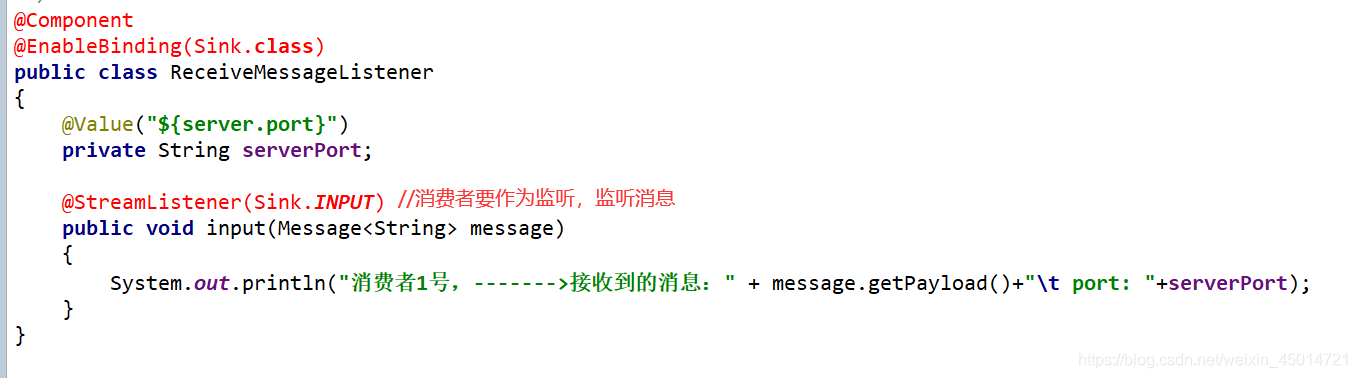
5.业务类
@Component
@EnableBinding(Sink.class)
public class ReceiveMessageListenerController
{
    @Value("${server.port}")
    private String serverPort;


    @StreamListener(Sink.INPUT)
    public void input(Message<String> message)
    {
        System.out.println("消费者2号,----->接受到的消息: "+message.getPayload()+"\t  port: "+serverPort);
    }
}
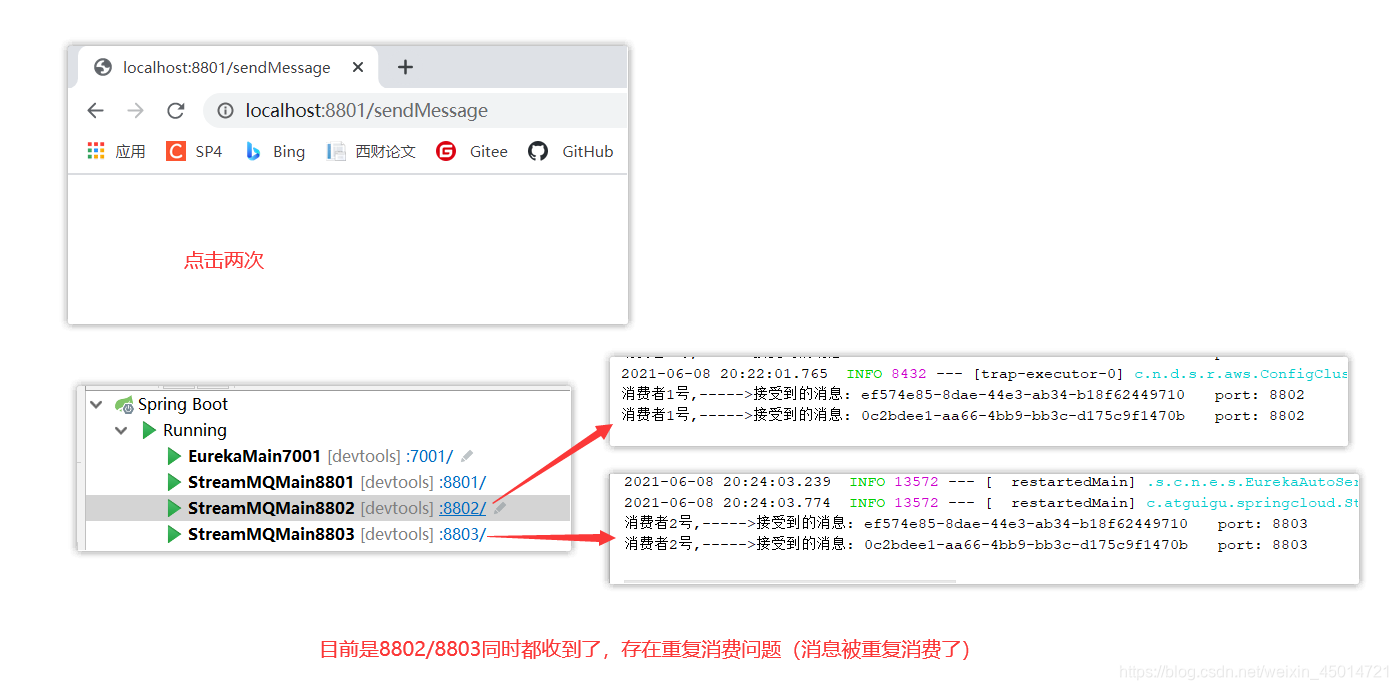
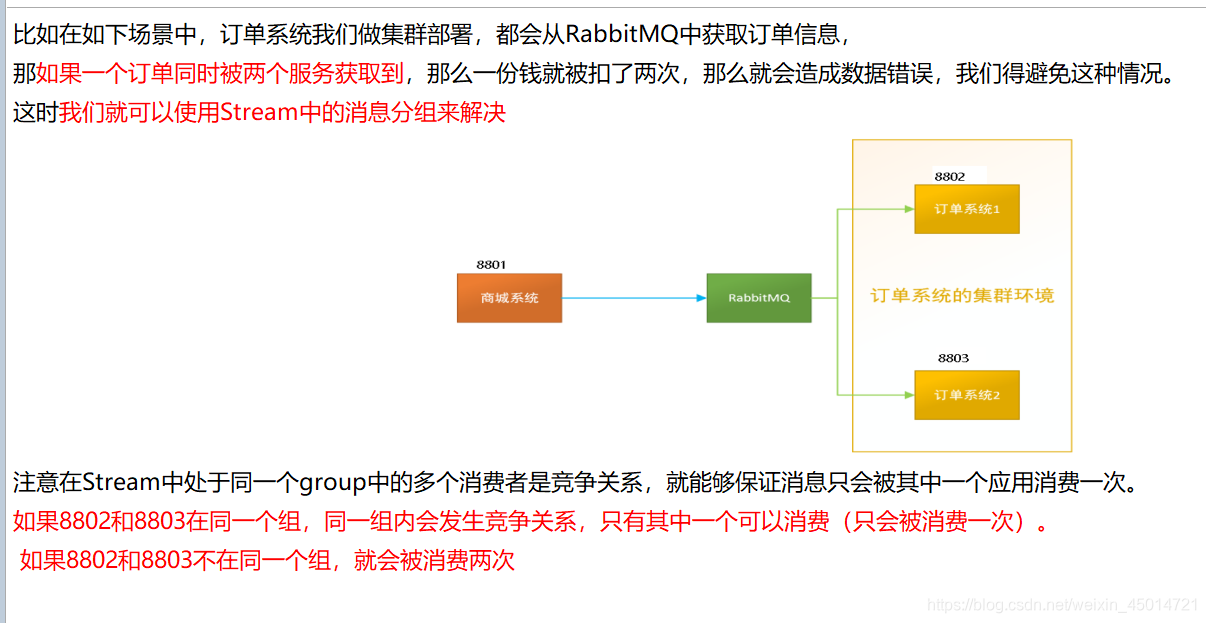
三、Stream消息重复消费
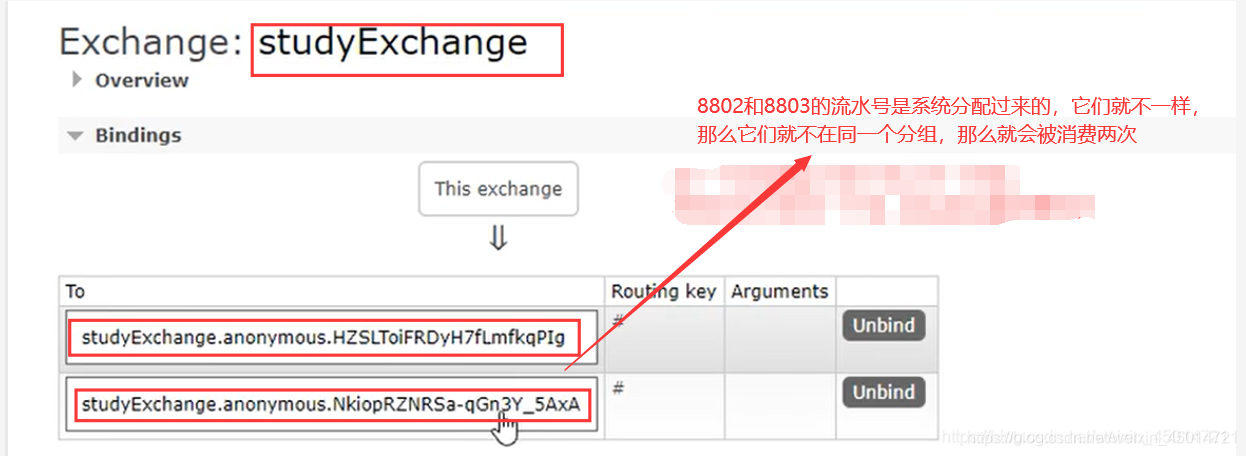
1.存在的问题
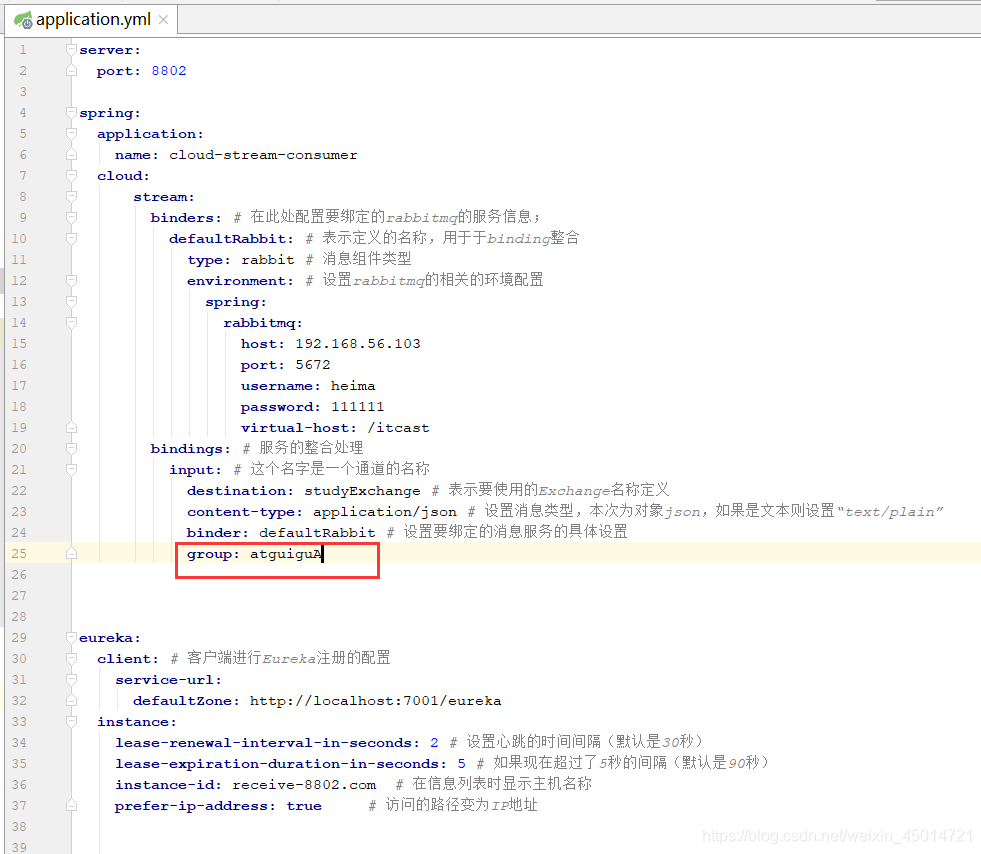
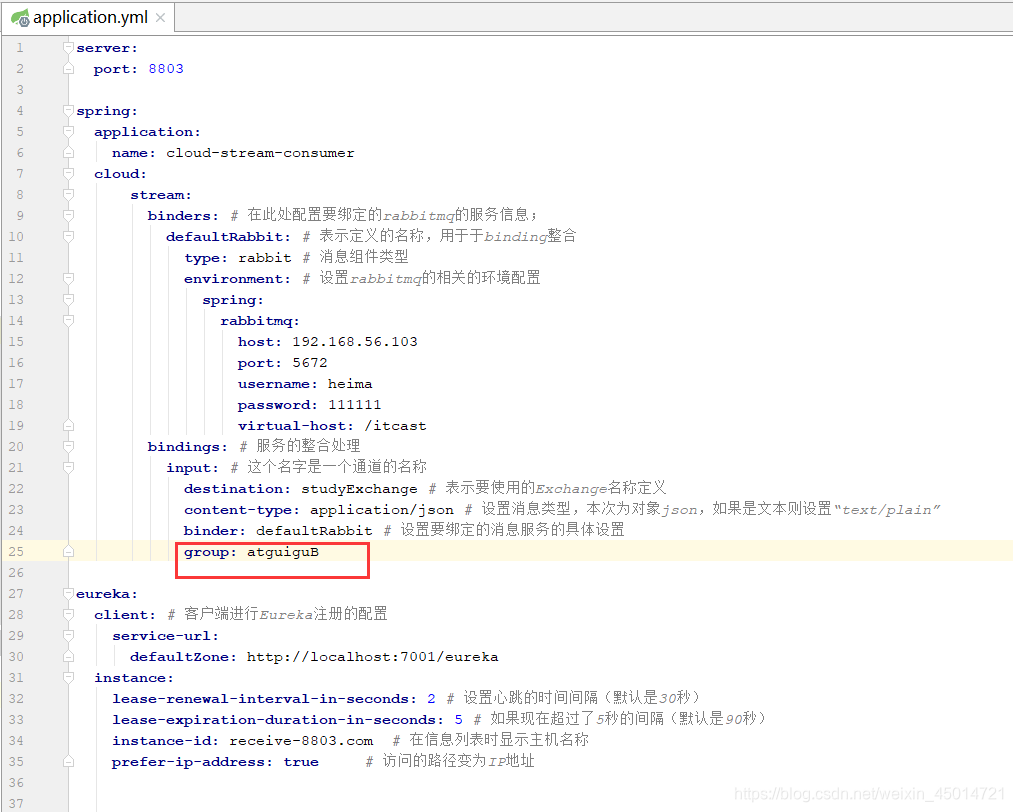
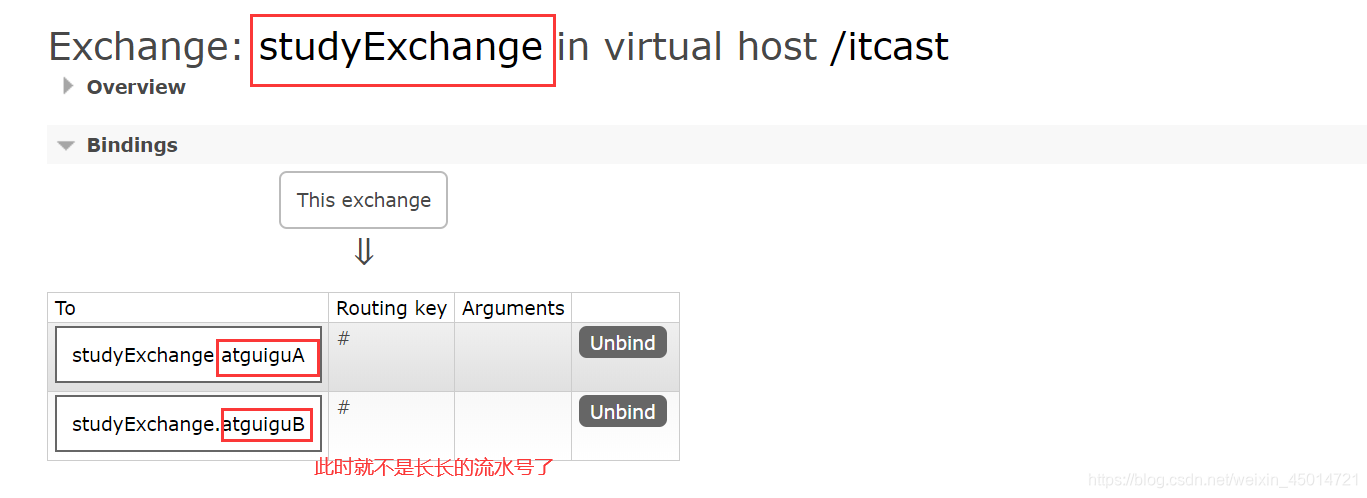
2.实现8802分到A组,8803分到B组
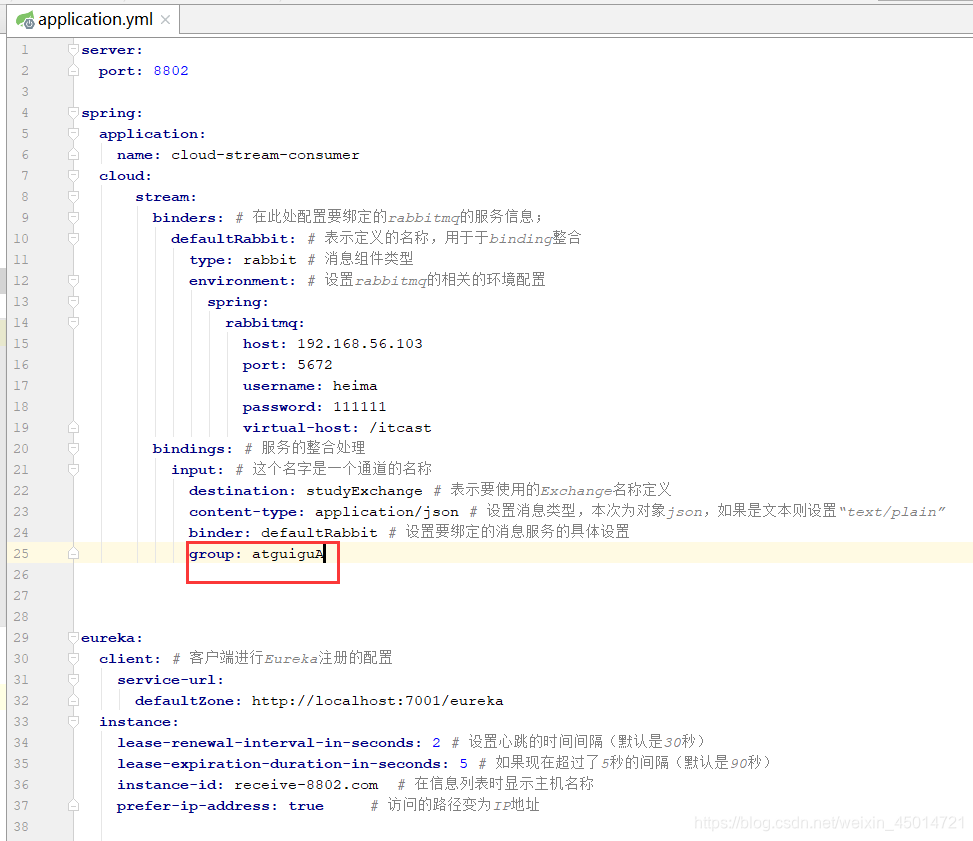
1.修改8802的yml
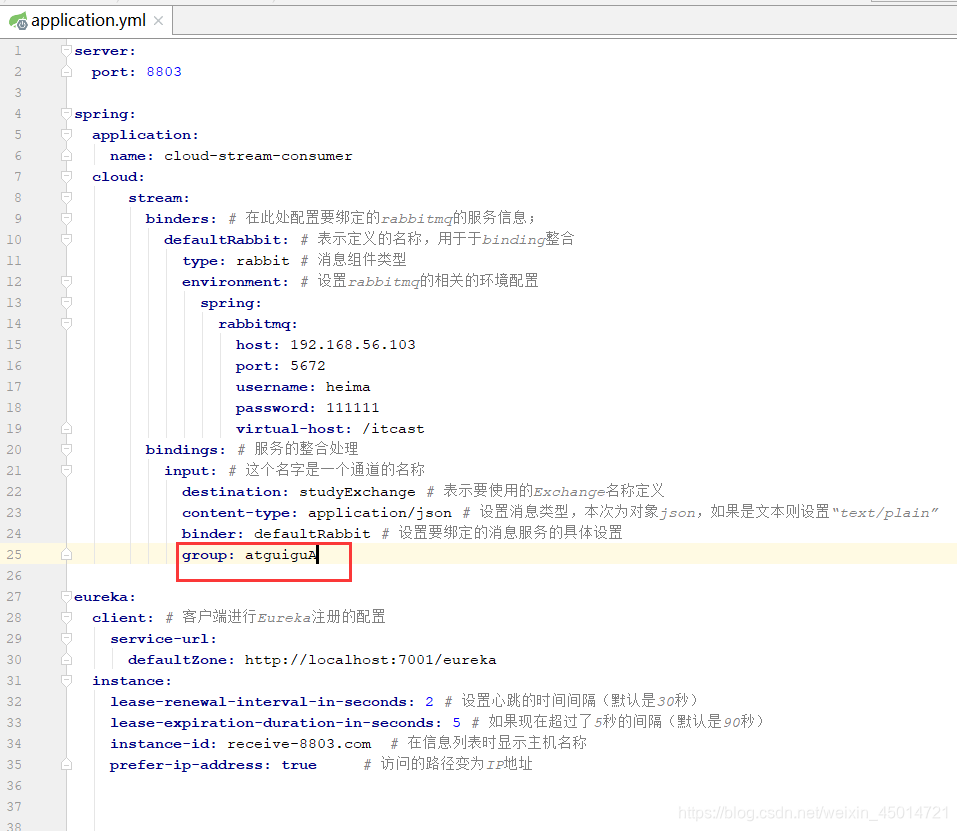
2.修改8803的yml
3.测试
因为是不同分组所以由重复消费问题
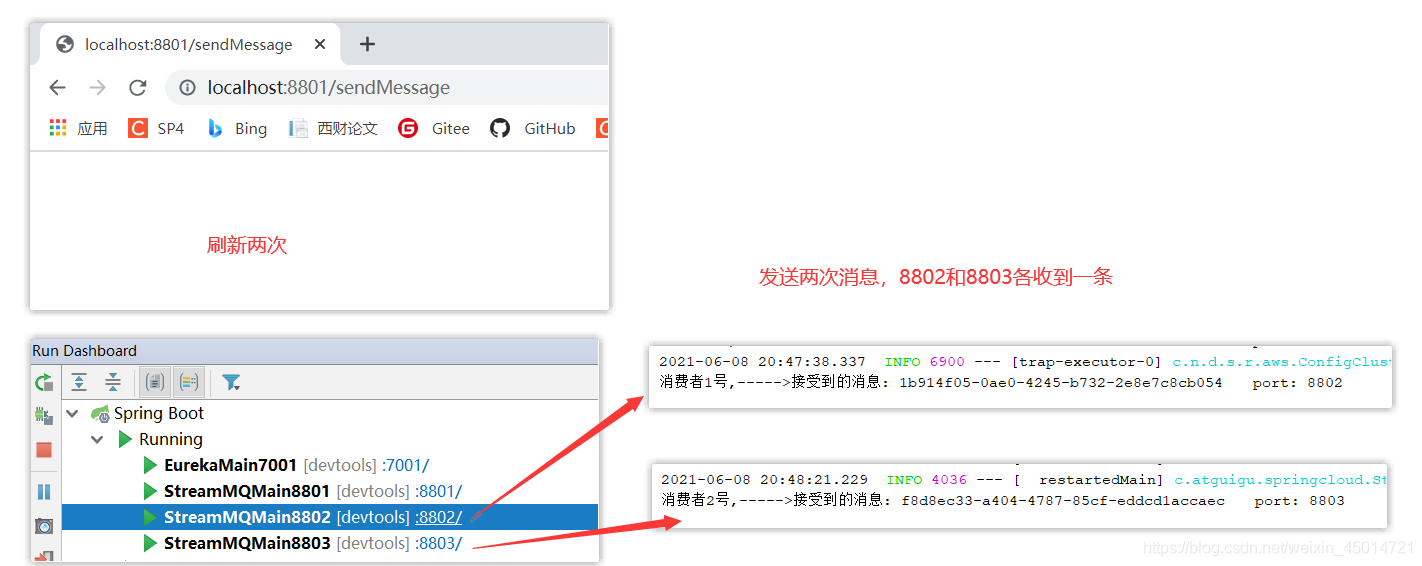
3.实现8802和8803分到同一个组
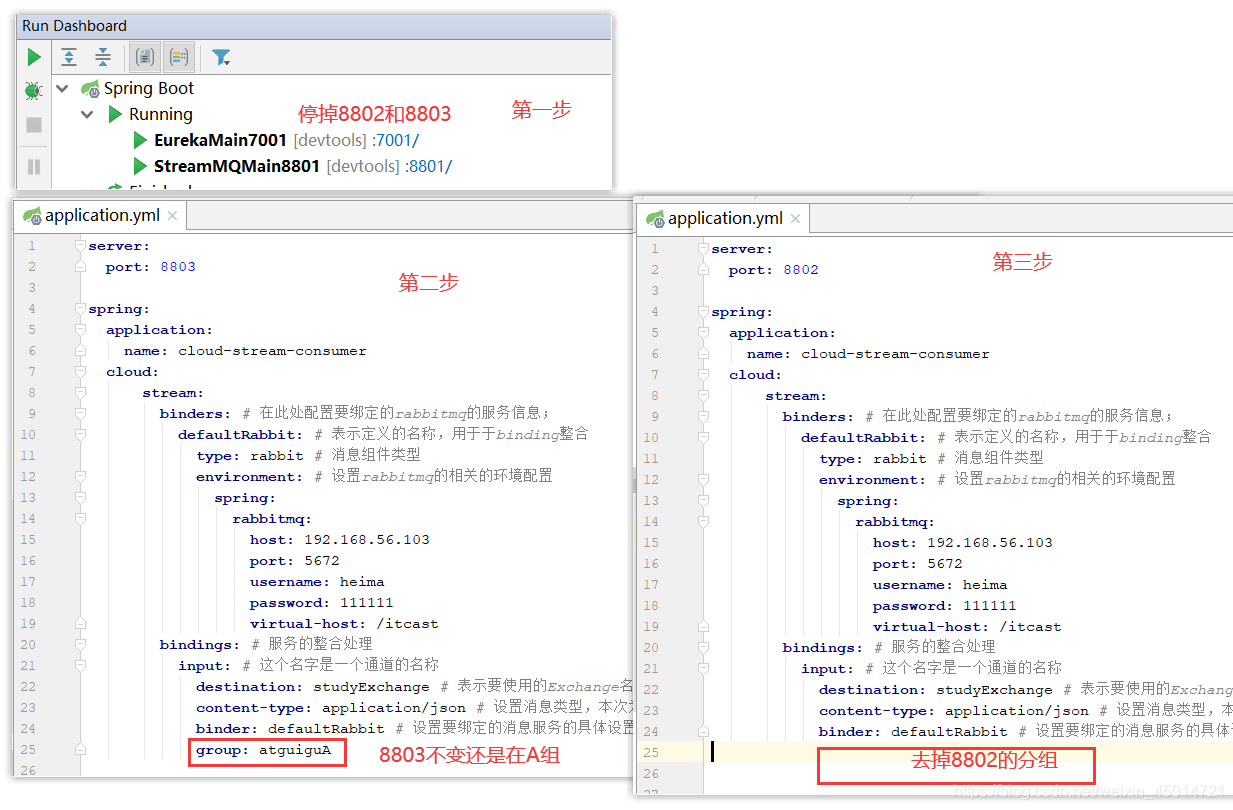
1.修改8802的yml
2.修改8803的yml
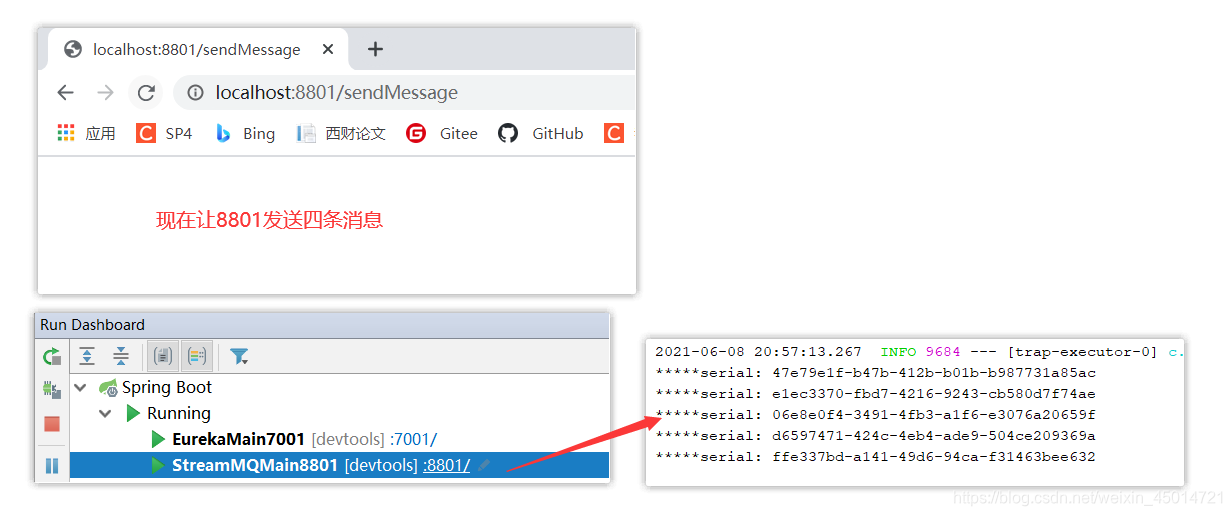
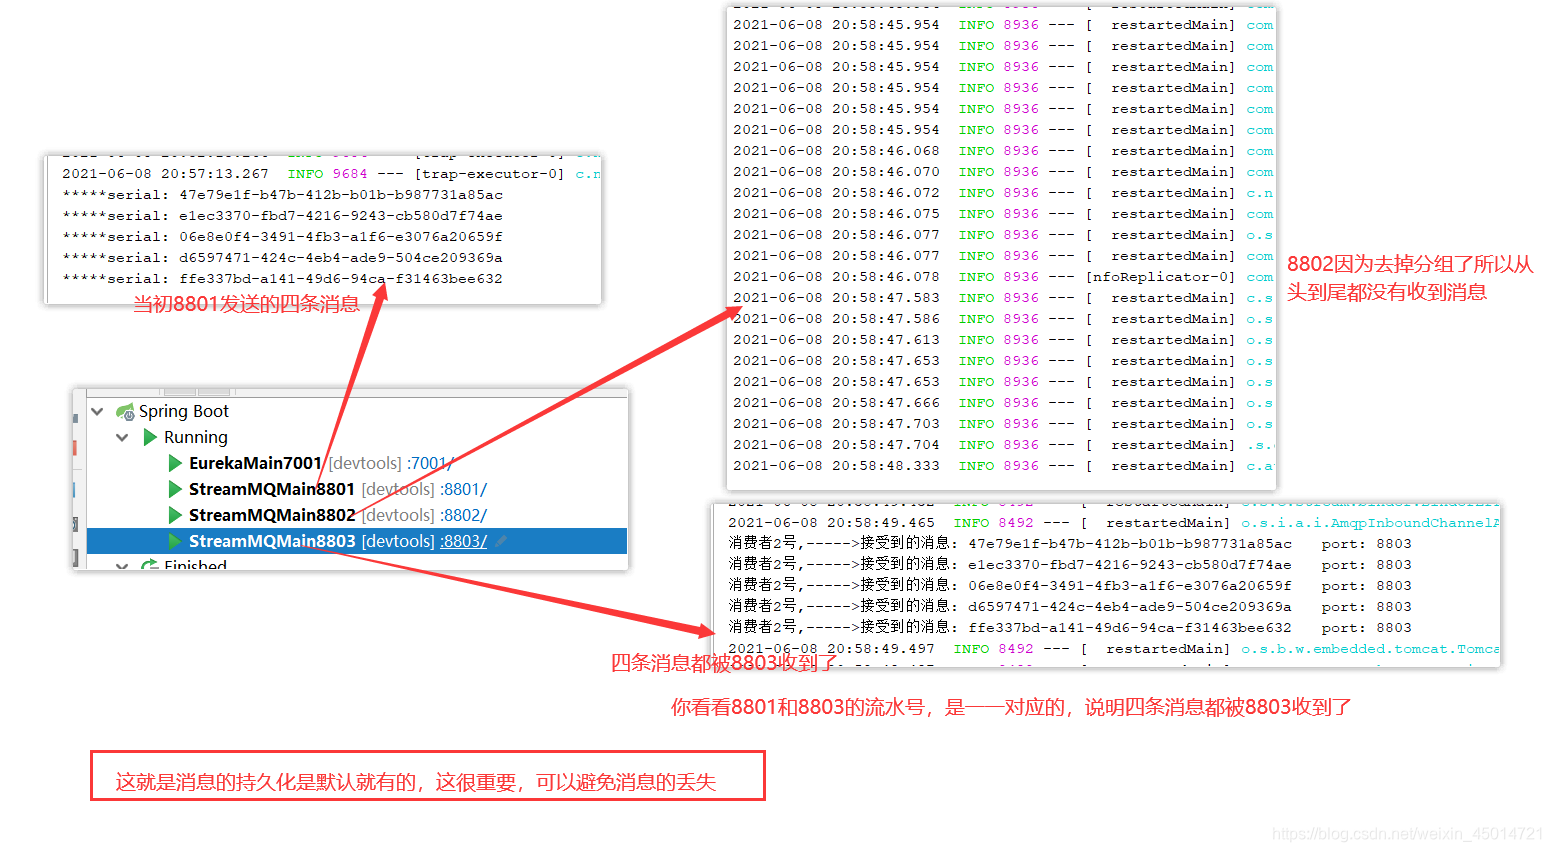
3.测试


 8529
8529

 被折叠的 条评论
为什么被折叠?
被折叠的 条评论
为什么被折叠?
 到【灌水乐园】发言


