


 本文详细介绍如何搭建本地和网络yum源,包括配置步骤、验证方法及常用yum命令。涵盖镜像挂载、httpd服务安装、配置文件编辑等关键操作。
##############* 配置本地yum源(yum源/软件仓库的搭建** #########
小科普:用名称查找文件所在位置:find / -name *.iso
【1】本地yum源的搭建
1:获得一个与本机系统版本一致的系统镜像

2:挂载镜像
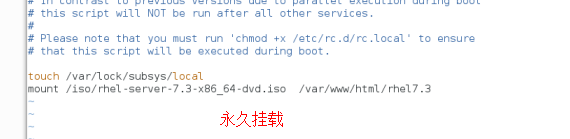
mount /iso/rhel-server-7.3-x86_64-dvd.iso /rhel7.3 ##挂载/iso/rhel-server-7.3-x86_64-dvd.iso镜像文件到/rhel7.3/中


配置内容:
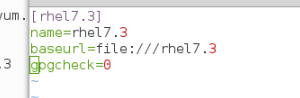
 [rhel7.3]          ##软件仓库的名称,(最好根据用途加以说明)
 name=rhel7.3       ##软件仓库的名称,最好根据环境和用途决定
 baseurl=file:///rhel7.3/   ##yum源的志向路径信息,和访问方式
 pgpcheck=0            ##表示调用信息时不对程序扫描
 baseurl base底层信息 url (Unifrom Resource Locater)全球资源定位器
说明:厂商软件一般会有加密的认证/授权信息,安装时一般会做扫描对比,如果认证授权信息正确才会执行安装,如果认证信息错误会拒绝安装
pgpcheck=0: 不做扫描对比执行安装,可以安装第三方软件;
pgpcheck=1: 不可以安装第三方或未经授权的软件。
pgpcheck  pgp 加密软体 check 检查,核对 :在此处表示不对所有安装的程序
【2】网络yum源的搭建
1、安装httpd服务
yum install httpd -y
2、更改挂载至/var/www/html/dir
注:/var/www/html/路径为http服务的默认根
3、更改配置文件
vim /etc/yum.repos.d/yum.repo 文件名称必须以repo结尾
[rhel7.3]
##软件仓库的id,可以随便写,最好根据用途加以说明,但不可以 其他名字重复
name=rhel7.3
##软件仓库的名称,可以随便写,最好根据环境和用途决定,但不能不写
baseurl=file:///var/www/html/dir | http://ip/dir ##yum源的指向路径信息,和访问方式 两种任意一种在本地都可以使用,本地外的主机只 能用http://ip/dir方式访问
pgpcheck=0 ##表示调用信息时不对程序扫描
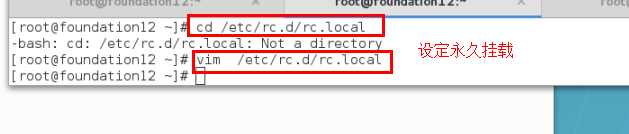
另外:如果设定开机自动挂载
1):vim /etc/rc.d/rc.local
2):mount /xxx/xxxx.iso /rhel7.3
3):chmod 755 /etc/rc.d/rc.local 在系统开机时会自动执行此脚本

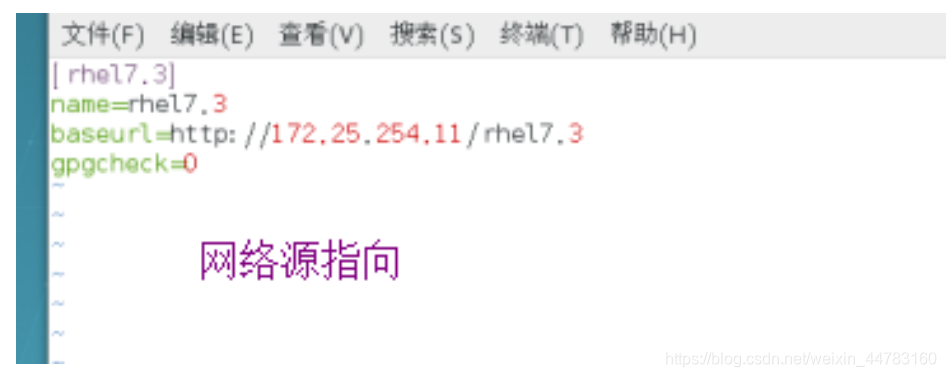
【3】配置yum源指向文件
vim /etc/yum.repos.d/xxx.repo ##此文件必须为.repo格式且必须再此目录中,次目录中不能有无效文件
内容:
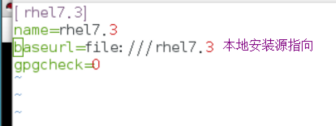
[rhel7.3]
name=rhel7.3
baseurl=file:///rhel7.3
gpgcheck=0
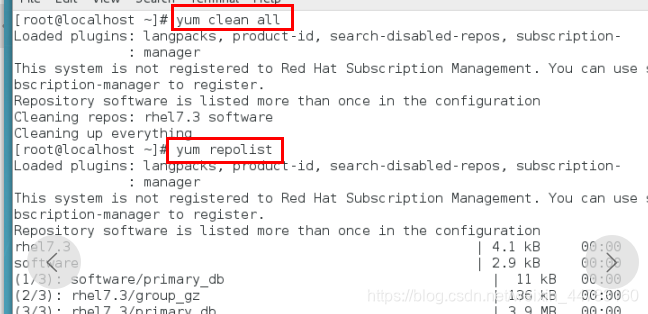
yum clean all ##清除缓存
yum repolist ##重载
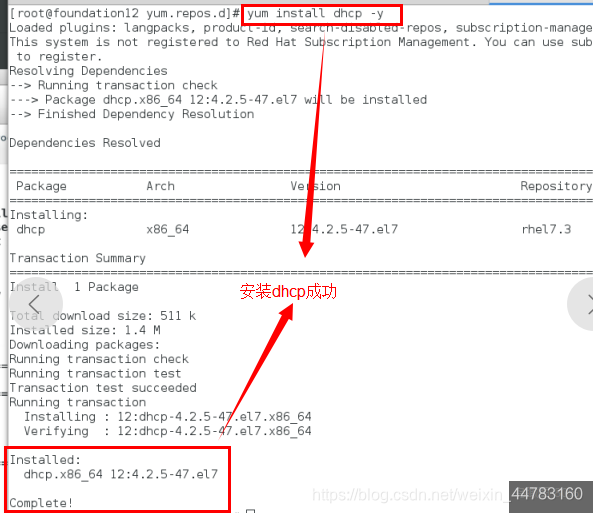
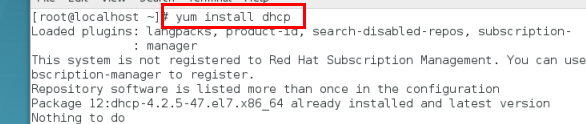
验证:yum install dhcp -y##动态分配ip,以此验证yum命令是否安装成功
**(1) 1: su - ##切换超级用户
2:cd /home/kiosk/ ##切换目录
3:ls ##查看
4:mkdir /iso ##创建目录iso
5:mv /home/kiosk/rhel-server-7.3-x86_64-dvd.iso /iso/ 将/iso/rhel-server-7.3-x86_64-dvd.iso 移入iso
6:mkdir /rhel7.3 ##创建rhel7.3目录(名字随意)
7:mount /iso/rhel-server-7.3-x86_64-dvd.iso /rhel7.3/ ##将/iso/rhel-server-7.3-x86_64-dvd.iso(镜像 )挂载到/rhel7.3
8:ls
cd Packages
ls (查看到的内容会有很多)
ls | grep dhcp (过滤后只剩dhcp)
9:ls /rhel7.3/ ##查看所有/rhel7.3/下的所有内容
(2) 更为简单:
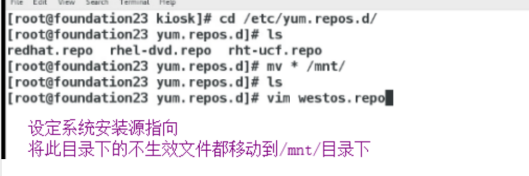
10:cd /etc/yum.repos.d/ ##切换路径
11:ls ##查看内容
12:mv * /mnt/ ##将查看到的里面的内容移到/mnt/下
13:ls ##再查看就没有内容
14:vim westos.repo ##编辑内容 (westos(名字随意),后面必须跟“.repo”(以repo结尾))
[rhel7.3] ##仓库名称
name=rhel7.3 ##对软件的描述
baseurl=file:///rhel7.3 (注意/rhel7.3) ##本地安装源路径
gpgcheck=0 (是否检测gpggen;1:检测;0:不检测)
15:测试:yum install dhcp -y ##开始安装dhcp,安装成功,则yum安装成功
【4】共享型yum源的部署
1:在一台已经配置好本地yum源的主机中安装httpd
yum install httpd -y
2:配置网络yum源
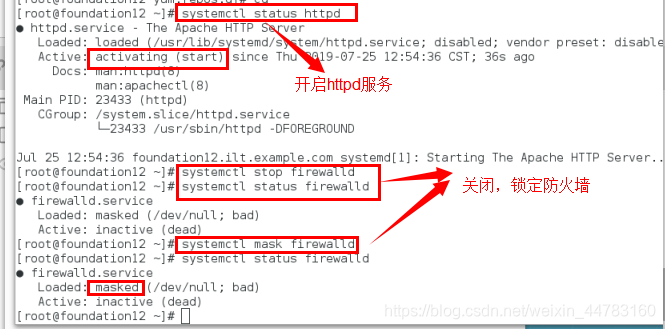
systemctl start httpd ##开启服务
systemctl stop firewalld## 关闭火墙
systemctl enable httpd ##开机开启
systemctl disable firewalld##开机关闭
systemctl mask firewalld**##锁定火墙
mkdir /var/www/html/westos
mount /xxx/xxxx.iso /var/www/html/westos
在这里插入图片描述
测试:
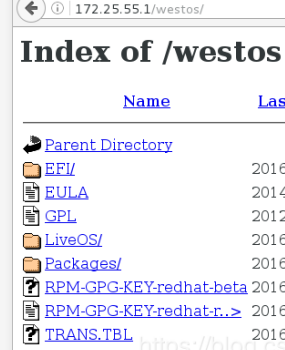
在虚拟机浏览器中输入地址:
--------- http://ip/file
(或) http://172.25.254.12/westos
在虚拟机中编写文件
vim /etc/yum.repos.d/westos.repo
[rhel7.3]
name=rhel7.3
baseurl=http://172.25.254.12/westo ##网络安装(例如:现在真机中安装dhcp,使用yum源共享出去,再在虚拟机中安装dhcp进行测试)
gpgcheck=0
在虚拟机中测试:
在虚拟机中安装dhcp 测试是否成功
yum install dhcp -y (使用yum命令的前提就是成功安装yum源)
yum命令
yum命令的使用必须是在yum源搭建成功后才能正常运行
yum - Yellowdog Updater Modified
(黄狗) (更新器)(改进,修改,改良)
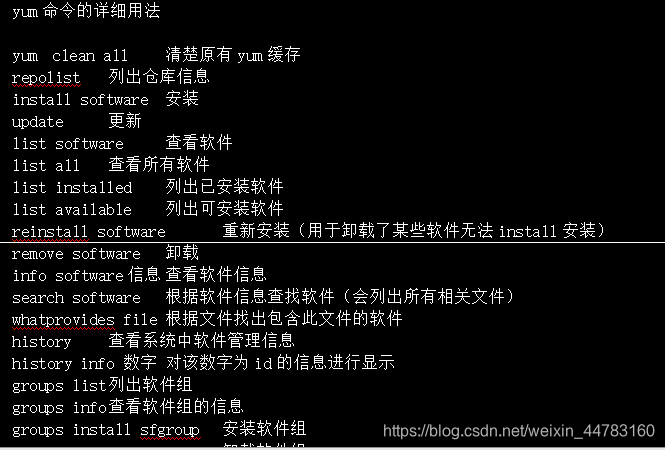
yum clean all 清除原有yum缓存
yum repolist 列出仓库信息
yum install software 安装
yum update 更新
yum list all 查看所有软件

yum list installed 列出已安装软件


yum list available 列出可安装软件
yum list software 查看软件

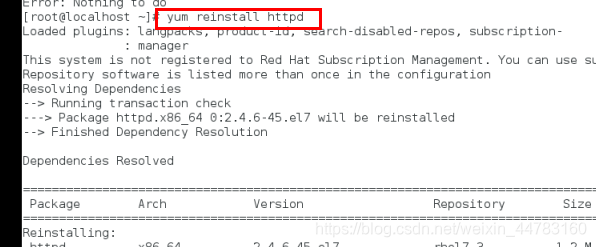
yum reinstall software 重新安装(用于卸载了某些软件无法install安装)
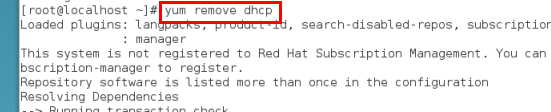
yum remove software 卸载
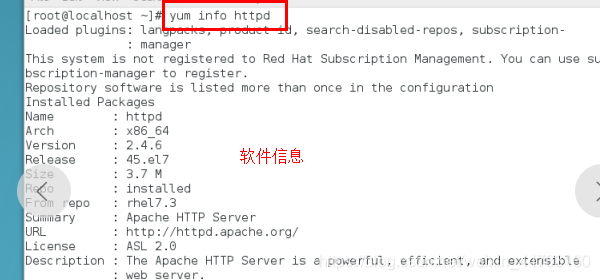
yum info software 查看软件信息
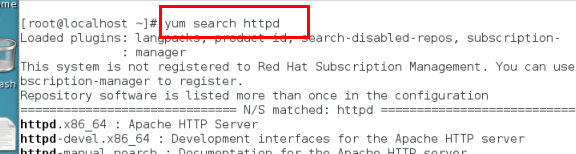
yum search software 根据软件信息查找软件(会列出所有相关文件)
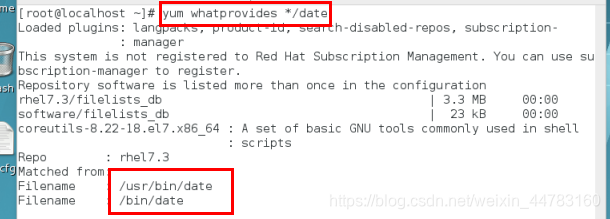
yum whatprovides file 根据文件找出包含此文件的软件

yum history 查看系统中软件管理信息
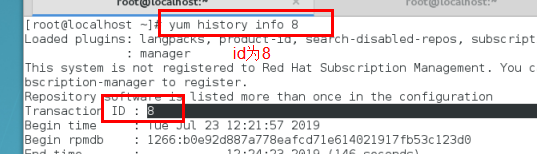
yum history info 数字 对该数字为id的信息进行显示
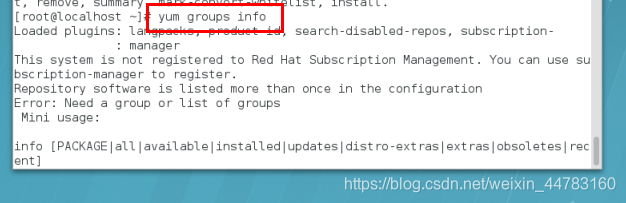
yum groups list 列出软件组
yum groups info 查看软件组的信息
yum groups install sfgroup 安装软件组
yum groups remove sfgroup 卸载软件组


 1959
1959

 被折叠的 条评论
为什么被折叠?
被折叠的 条评论
为什么被折叠?
 到【灌水乐园】发言


