


 本文详细介绍Solr的安装步骤,包括配置Tomcat、解压war包、添加jar包、配置solrhome及核心配置文件,同时讲解如何使用IKAnalyzer进行中文分词,以及如何配置Solr以检索PDF、TXT、Word等文件。
1.把\solr-4.10.3\dist\solr-4.10.3.war复制到安装的tomcat的webapps文件夹下面,本次是安装在
D:\temp\apache-tomcat-7.0.53\webapps下,并且改名为solr.war;
2.solr.war解压.使用压缩工具解压或者启动tomcat自动解压.解压之后删除solr.war;
3.把\solr-4.10.3\example\lib\ext目录下的所有的jar包添加到solr工程中WEB-INF/lib的目录中,这些都是日志的jar包,必须要有,否则运行的时候会报错;
4.solr的配置重要的有三个:solr.xml、solrConfig.xml、schema.xml
其中,solr.xml改动不多,是整个solr节点的配置,是定义关于core的管理,collection分片,solr云和http请求处理;
solrConfig.xml是关于core或collection的主要配置信息;
schema.xml用来定义索引中的文档结构,包括字段名,字段类型,字段处理方法等.
5.配置solrhome,创建solrhome文件夹,这个文件夹是用来存放所有配置文件的一个文件夹,把\solr-4.10.3\example\solr文件夹复制到D:\temp路径下,为了便于理解改名为solrhome,但改名不是必须的.在solrhome下有一个文件夹叫做collection1这就是一个solrcore.就是一个solr的实例.一个solrcore相当于mysql中一个数据库.Solrcore之间是相互隔离.(一个solrcore就是一个索引库)
其中:
(1).在solrcore中有一个文件夹叫做conf,包含了索引solr实例的配置信息。
(2).在conf文件夹下有一个solrconfig.xml。配置实例的相关信息。如果使用默认配置可以不用做任何修改。
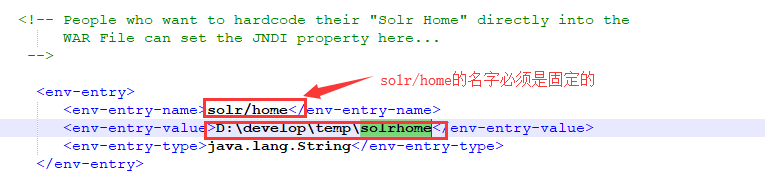
6.告诉solr服务器配置文件即solrhome的位置:修改D:\develop\Tomcat8-8122\webapps\solr\WEB-INF\web.xml,
使用jndi的方式告诉solr服务器
7.启动tomcat

然后访问http://localhost:8122/solr ,访问成功的界面如下:
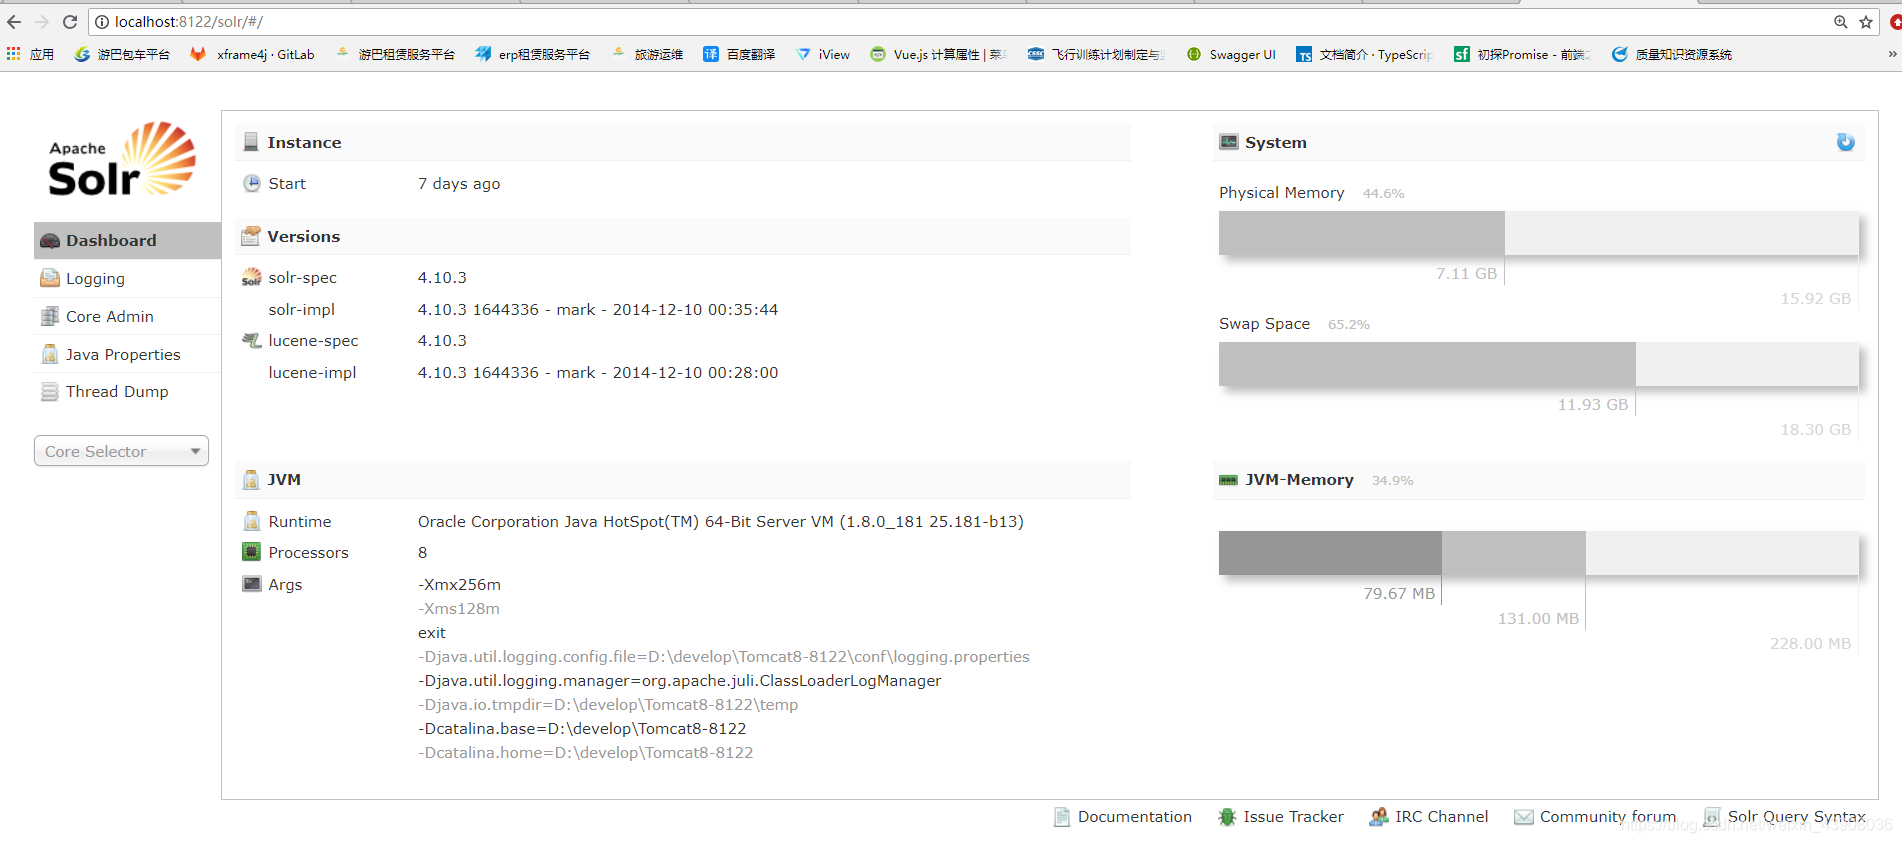
solr界面介绍:
(1).Dashboard仪表盘,显示了该solr实例开始启动运行的时间,版本,系统资源,jvm等信息.右边Instance的具体内容:
1.Start:查看solar的启动时间
2.Versions:包含了solr和lucene的版本
3.JVM:Runtime:java虚拟机的版本信息
Processors:CPU是4核
4.System:Physical Memory:solr所占的物理内存
Swap Space:交换空间就是虚拟内存,内存不够了,在使用硬盘作为虚拟内存,一旦使用虚拟内存,速度就慢了
(2)Logging:Solr运行日志信息
(3)Cloud,即SolrCloud,即Solr云(集群),当使用Solr Cloud模式运行时会显示此菜单
(4)Core Admin:Solr Core的管理界面。Solr Core 是Solr的一个独立运行实例单位,它可以对外提供索引和搜索服务,一个Solr工程可以运行多个SolrCore(Solr实例),一个Core对应一个索引目录。
附:
一.安装中文分词器(使用IKAnalyzer中文分析器):
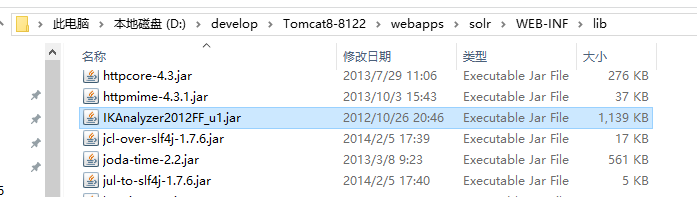
1.将IKAnalyzer2012FF_u1.jar添加到solr/WEB-INF/lib目录下
2.在solr/WEB-INF下新建一个名为classes的文件夹,将IKAnalyzer的配置文件,自定义词典和停用词词典放到classes下面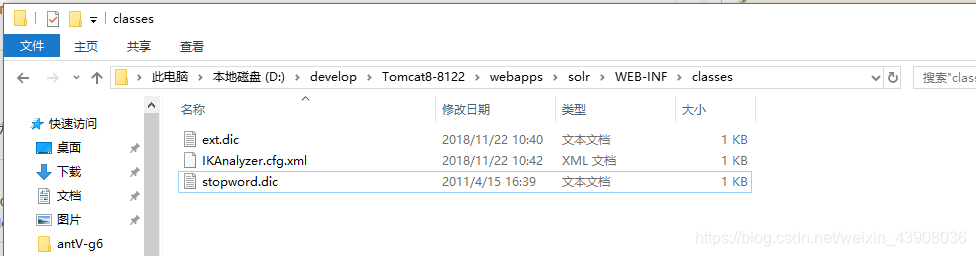
其中,自定义词典ext.dic是可以告诉分词器哪些词不要拆开,停用词词典stopword.dic是告诉分词器哪些词可以忽略
3.在schema.xml中添加一个自定义的fileType,从而可以使用中文分词器
<fieldType name="text_ik" class="solr.TextField">
      <analyzer class="org.wltea.analyzer.lucene.IKAnalyzer"/>
 </fieldType>
4.定义field,指定field的type属性为text_ik
<field name="title_ik" type="text_ik" indexed="true" stored="true" />
 <field name="content_ik" type="text_ik" indexed="true" stored="false" multiValued="true"/>
二.solr检索pdf,txt,word等文件
1.新建一个SolrCore
下载的solr完整包里面solr-4.10.3\example\multicore这个文件夹下面有2个示例core;分别是core0和core1;如下图
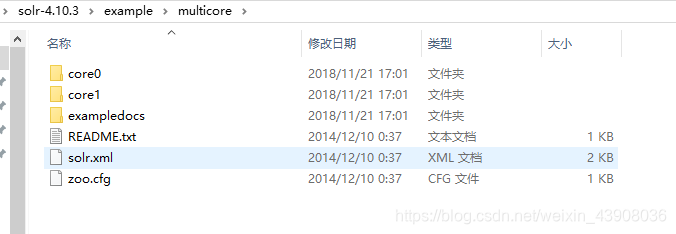
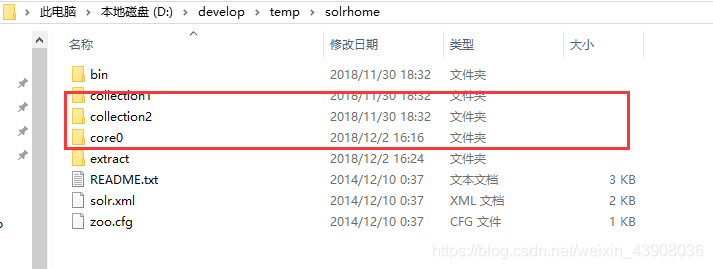
随便拷贝一个到solrhome下,即与collection1同一个文件夹下
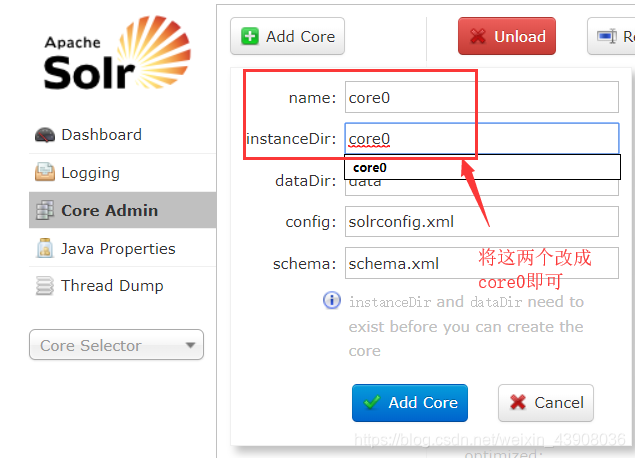
2.启动solr服务,进入solr的管理界面,选中core Admin,点击 " Add Core"如下图
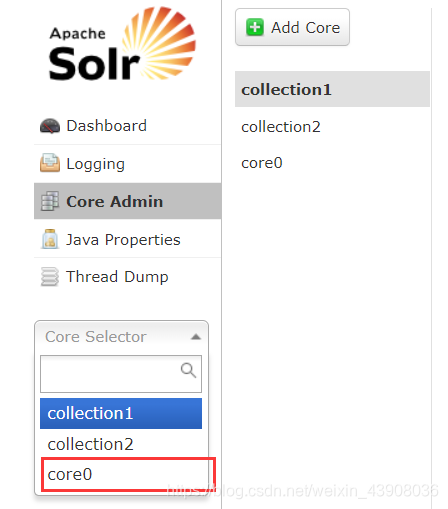
这样就成功的添加了一个新的solrcore:
3.修改core0里面的xml
schema.xml加入
 <fieldType name="text_general" class="solr.TextField" positionIncrementGap="100">
      <analyzer type="index">
        <tokenizer class="solr.StandardTokenizerFactory"/>
        <filter class="solr.StopFilterFactory" ignoreCase="true" words="stopwords.txt" />
        <filter class="solr.LowerCaseFilterFactory"/>
      </analyzer>
      <analyzer type="query">
        <tokenizer class="solr.StandardTokenizerFactory"/>
        <filter class="solr.StopFilterFactory" ignoreCase="true" words="stopwords.txt" />
        <filter class="solr.SynonymFilterFactory" synonyms="synonyms.txt" ignoreCase="true" expand="true"/>
        <filter class="solr.LowerCaseFilterFactory"/>
      </analyzer>
    </fieldType>

  <field name="text"      type="text_general" indexed="true"  stored="true"/>
  <field name="_version_" type="long"         indexed="true"  stored="true"/>
  <dynamicField name="attr_*" type="text_general" indexed="true" stored="true" multiValued="true"/>


  <!-- general -->
  <field name="id"        type="string"   indexed="true"  stored="true"  multiValued="false" required="true"/>
  <field name="type"      type="string"   indexed="true"  stored="true"  multiValued="false" />
  <field name="name"      type="string"   indexed="true"  stored="true"  multiValued="false" />
  <field name="fileName"      type="string"   indexed="true"  stored="true"  multiValued="false" />
  <field name="path"      type="string"   indexed="true"  stored="true"  multiValued="false" />
修改solrconfig.xml
<requestHandler name="/update/extract" class="solr.extraction.ExtractingRequestHandler" >
   <lst name="defaults">
    <str name="fmap.content">text</str>
    <str name="lowernames">true</str>
    <str name="uprefix">attr_</str>
    <str name="captureAttr">true</str>
   </lst>
  </requestHandler>
4.加入相应的jar包:
在core0同一级目录下新建一个名为extract的文件夹,将solr-4.10.3\dist的solr-cell-4.10.3.jar和solr-4.10.3\contrib\extraction\lib下的所有jar包复制到extract文件夹下,然后在在solrconfig.xml文件中引入
<lib dir="../extract" regex=".*\.jar" />
重新启动tomcat
5.准备数据,将需要的各种文件放到一个文件夹里面,该文件夹的路径在下面代码中指定即可:
public static void main(String[] args) {
		File parentFile = new File("G:/document/");
		if (parentFile.exists()) {
			File[] files = parentFile.listFiles();
			for (File file : files) {
				try {
					indexFilesSolrCell(file.getName(), file.getPath());
				} catch (IOException e) {
					e.printStackTrace();
				} catch (SolrServerException e) {
					e.printStackTrace();
				}
			}
		}
	}

	/**
	 * 从文件创建索引 <功能详细描述>
	 *
	 * @param fileName
	 * @param solrId
	 * @see [类、类#方法、类#成员]
	 */
	public static void indexFilesSolrCell(String fileName, String path)
			throws IOException, SolrServerException {
		//连接solr服务
		String urlString = "http://localhost:8080/solr/core0";
		SolrServer solr = new HttpSolrServer(urlString);

		ContentStreamUpdateRequest up = new ContentStreamUpdateRequest(
				"/update/extract");

		String contentType = getFileContentType(fileName);
		up.addFile(new File(path), contentType);
		up.setParam("literal.id", fileName);
		up.setParam("literal.path", path);
		up.setParam("literal.fileName", fileName);
		up.setParam("fmap.content", "attr_content");
		up.setAction(AbstractUpdateRequest.ACTION.COMMIT, true, true);

		/*
		 * up.addFile(file, contenttype); up.setParam("literal.id", id);
		 * up.setParam("literal.mytitle", mytitle);
		 * up.setParam("literal.mytime", dataTurntoLong(savetime));
		 * up.setParam("literal.myindextype", myindextype);
		 * up.setParam("literal.myyears", myyears); up.setParam("fmap.content",
		 * "content");
		 */
		solr.request(up);

		QueryResponse rsp = solr.query(new SolrQuery("*:*"));

		SolrDocumentList solrDocumentList = rsp.getResults();

		ListIterator<SolrDocument> listIterator = solrDocumentList
				.listIterator();
		while (listIterator.hasNext()) {
			SolrDocument solrDocument = listIterator.next();
			System.out.println(solrDocument.getFieldValue("attr_filename"));
		}

	}

	/**
	 * 根据文件名获取文件的ContentType类型
	 *
	 * @param filename
	 * @return
	 */
	public static String getFileContentType(String filename) {
		String contentType = "";
		String prefix = filename.substring(filename.lastIndexOf(".") + 1);
		if (prefix.equals("xlsx")) {
			contentType = "application/vnd.openxmlformats-officedocument.spreadsheetml.sheet";
		} else if (prefix.equals("pdf")) {
			contentType = "application/pdf";
		} else if (prefix.equals("doc")) {
			contentType = "application/msword";
		} else if (prefix.equals("txt")) {
			contentType = "text/plain";
		} else if (prefix.equals("xls")) {
			contentType = "application/vnd.ms-excel";
		} else if (prefix.equals("docx")) {
			contentType = "application/vnd.openxmlformats-officedocument.wordprocessingml.document";
		} else if (prefix.equals("ppt")) {
			contentType = "application/vnd.ms-powerpoint";
		} else if (prefix.equals("pptx")) {
			contentType = "application/vnd.openxmlformats-officedocument.presentationml.presentation";
		}

		else {
			contentType = "othertype";
		}

		return contentType;
	}
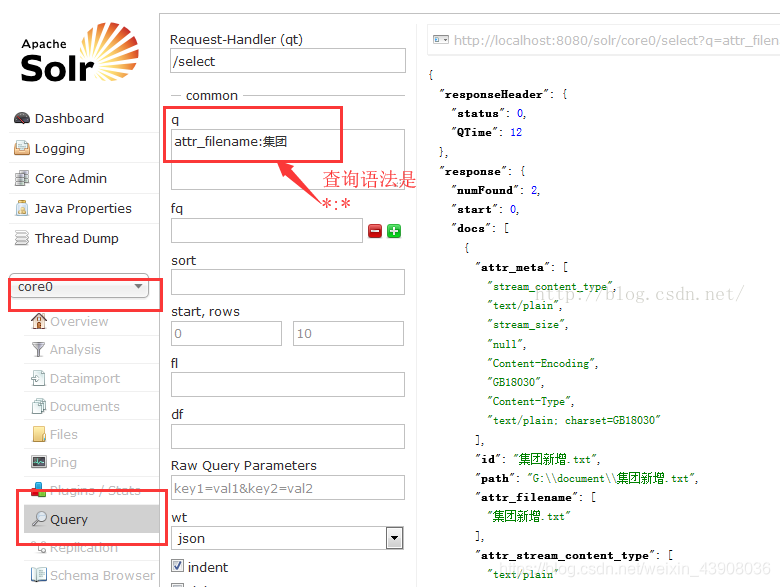
6.solr操作:


 293
293

 被折叠的 条评论
为什么被折叠?
被折叠的 条评论
为什么被折叠?
 到【灌水乐园】发言


