


 本文详细介绍如何在SpringBoot项目中配置热部署,包括pom.xml的依赖引入、Maven插件配置、IDEA自动编译设置及配置文件调整。通过具体步骤指导,实现代码修改后项目的自动重启和页面缓存更新。
一、pom.xml配置
1、引入下列依赖
 <dependency>
            <groupId>org.springframework.boot</groupId>
            <artifactId>spring-boot-devtools</artifactId>
            <!-- optional=true,依赖不会传递,该项目依赖devtools;之后依赖myboot项目的项目如果想要使用devtools,需要重新引入 -->
            <optional>true</optional>
        </dependency>
- 注意optional的值必须为true,否则热部署将无法生效
2、在plugins标签里配置下列项
<plugin>
                <groupId>org.springframework.boot</groupId>
                <artifactId>spring-boot-maven-plugin</artifactId>
                <configuration>
                    <fork>true</fork>
                </configuration>
            </plugin>
- 注意fork必须赋值为true才能使热部署生效
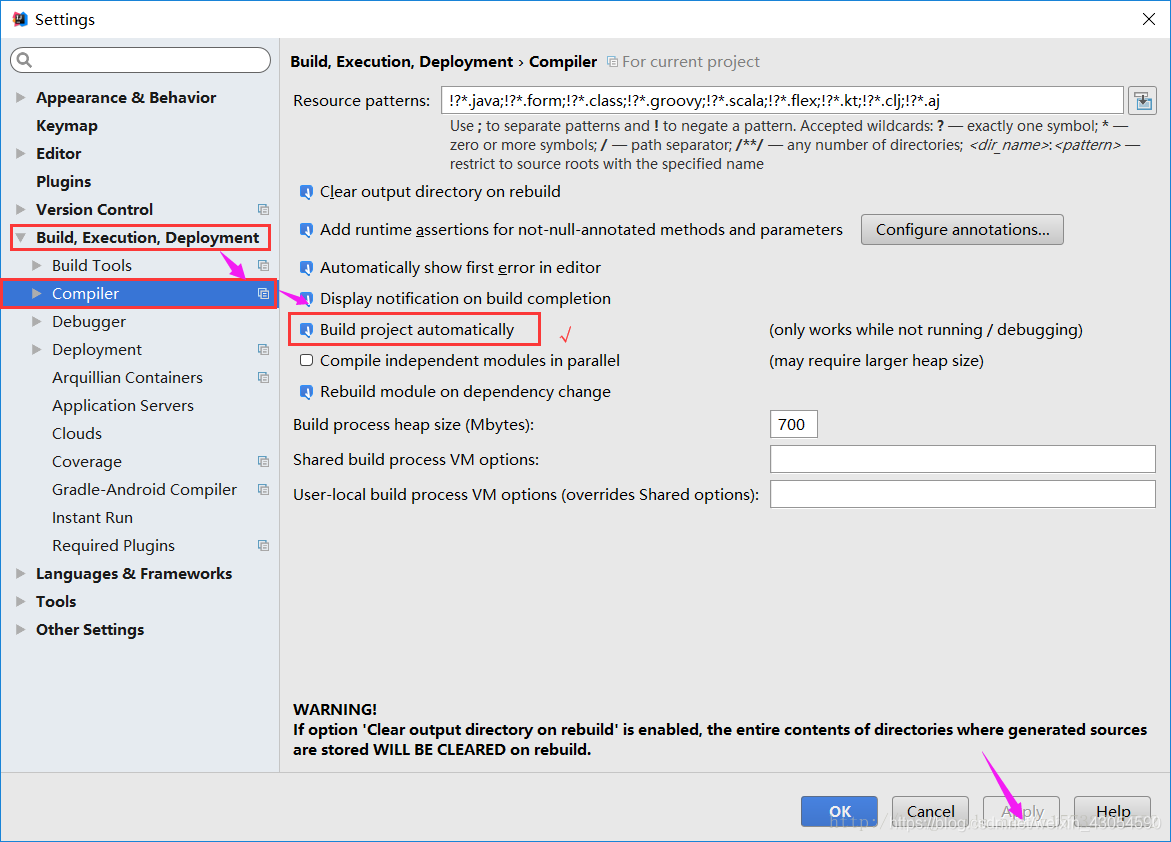
二、idea打开自动编译
1、*进入设置setting,Build,Execut, Deployment -> Compiler 勾选右侧的Build Project automatically
2、开启项目运行时自动build,打开setting-》搜索registry,然后设置一组快捷键(比如:ctrl + shift + s)
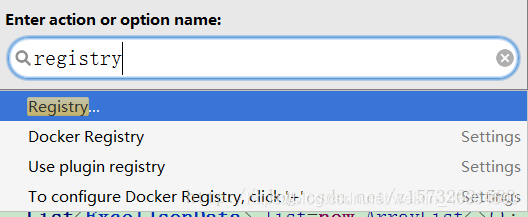
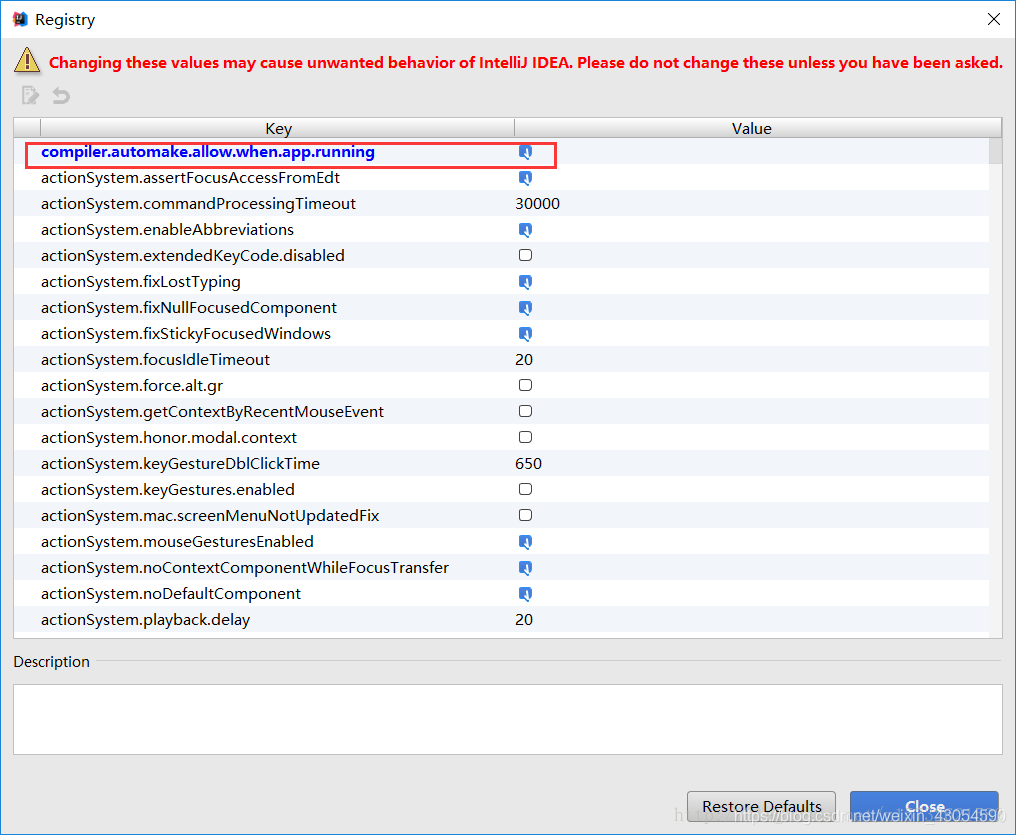
3、ctrl + shift + s打开registry,然后勾选勾选compiler.automake.allow.when.app.running*
4、重启idea,热部署正式生效
- springboot配置文件配置热部署相关属性
spring:
  devtools:
    remote:
      restart:
        enabled: true
        # 设置开启热部署,java代码修改后项目会立即重启,无需手动操作
  freemarker:
    cache: false
    # 页面不加载缓存,修改时就生效,且不会重启项目
5、打开自动编译的第二种方式
-
File-Settings-Compiler-Build Project automatically
-
ctrl + shift + alt + /,选择Registry,勾上 Compiler autoMake allow when app running
-
最后重启idea即可


 3万+
3万+

 被折叠的 条评论
为什么被折叠?
被折叠的 条评论
为什么被折叠?
 到【灌水乐园】发言


