


 本文详细介绍了如何整合Mybatis与Spring框架,包括搭建项目环境、配置Spring XML及mybatis.xml文件,设置log4j.properties,以及在web.xml中的配置。接着通过创建IAreaDao接口、Test类和配置area.xml文件,展示了具体的实例操作。
整合Mybatis与Spring框架
整合Mybatis与Spring框架步骤:
一、搭建项目环境
1、创建web工程,如图1-1所示
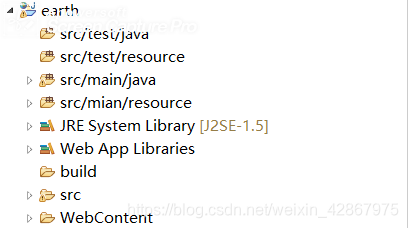
web工程 1-1
2、在lib文件夹导入所需jar包,如图2-1所示
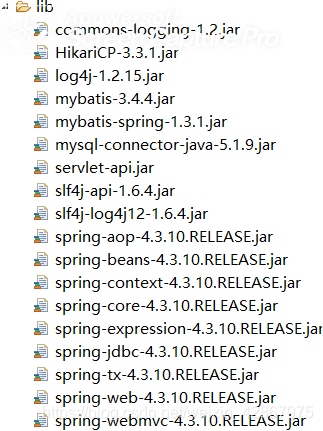
导入jar包 2-1
3、在src/mian/resource下配置Spring XML文件以及mybatis.xml文件,和log4j.properties文件,如图3-1所示:
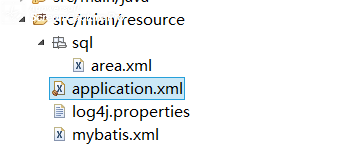
配置文件 3-1
area.xml文件用来配置sql语句;
application.xml文件中的配置如下:
<?xml version="1.0" encoding="UTF-8"?>
<beans xmlns="http://www.springframework.org/schema/beans"
	xmlns:xsi="http://www.w3.org/2001/XMLSchema-instance"
	xmlns:mvc="http://www.springframework.org/schema/mvc"
	xmlns:tx="http://www.springframework.org/schema/tx"
	xmlns:mybatis-spring="http://mybatis.org/schema/mybatis-spring"
	xmlns:context="http://www.springframework.org/schema/context"
	xmlns:p="http://www.springframework.org/schema/p"
	xsi:schemaLocation="http://www.springframework.org/schema/mvc http://www.springframework.org/schema/mvc/spring-mvc-4.3.xsd
		http://mybatis.org/schema/mybatis-spring http://mybatis.org/schema/mybatis-spring-1.2.xsd
		http://www.springframework.org/schema/beans http://www.springframework.org/schema/beans/spring-beans.xsd
		http://www.springframework.org/schema/context http://www.springframework.org/schema/context/spring-context-4.3.xsd
		http://www.springframework.org/schema/tx http://www.springframework.org/schema/tx/spring-tx-4.3.xsd">

	<!--配置数据库信息-->
	<bean id="dataSource"  class="com.zaxxer.hikari.HikariDataSource">
		<property name="driverClassName" value="com.mysql.jdbc.Driver"></property>
		<property name="jdbcUrl" value="jdbc:mysql://39.106.122.229/venus"></property>
		<property name="username" value="root"></property>
		<property name="password" value="root"></property>
	</bean>

	<bean class="org.mybatis.spring.SqlSessionFactoryBean">
		<!--注意:dataSource属性必须配置,用来指定数据源,此时mybatis-config.xml中environments标签将不再起作用,即不用mybatis配置数据库信息-->
		<property name="dataSource" value="#{dataSource}"></property>
		<!-- configLocation指定全局配置文件位置 -->
		<property name="configLocation" value="classpath:mybatis.xml"></property>
		<!--mapperLocations: 指定XML 映射文件位置,此时就不需要再mybatis.xml文件中进行配置,即将mappers标签删掉-->
		<property name="mapperLocations" value="classpath:sql/*.xml"></property>
	</bean>

	<!-- 扫描指定包及其子包下的mapper接口并生成响应代理对象;base-package:指定mapper接口的包名 注意:该标签只对接口感冒! -->
	<mybatis-spring:scan base-package="com.jd"/>

	<!--
	    context:component-scan标签作用如下:
	        扫描其base-package标签属性值指定的包内的类、实例化被@Component、@Repository、@Service或@Controller等类注解所注解的类;
	        为这些类中有@Autowired、 @Resource 或@Inject注解的属性赋值。
	 -->
	<context:component-scan base-package="com.jd"></context:component-scan>

	<!-- 配置视图解析器 -->
	<bean class="org.springframework.web.servlet.view.InternalResourceViewResolver" p:prefix="/WEB-INF/views/" p:suffix=".jsp"></bean>

</beans>
4、配置web.xml文件:
<?xml version="1.0" encoding="UTF-8"?>
<web-app xmlns:xsi="http://www.w3.org/2001/XMLSchema-instance" xmlns="http://java.sun.com/xml/ns/javaee" xsi:schemaLocation="http://java.sun.com/xml/ns/javaee http://java.sun.com/xml/ns/javaee/web-app_2_5.xsd" id="WebApp_ID" version="2.5">
  <display-name>earth</display-name>
  <welcome-file-list>
    <welcome-file>index.jsp</welcome-file>
  </welcome-file-list>

  <!-- 配置Servlet,每个请求都会到达这里 -->
  <servlet>
  	<servlet-name>DispatcherServlet</servlet-name>
  	<servlet-class>org.springframework.web.servlet.DispatcherServlet</servlet-class>
  	<init-param>
  		<param-name>contextConfigLocation</param-name>
  		<param-value>classpath:application.xml</param-value>
  	</init-param>
  	<load-on-startup>1</load-on-startup>
  </servlet>
  <servlet-mapping>
  	<servlet-name>DispatcherServlet</servlet-name>
  	<url-pattern>*.do</url-pattern>
  </servlet-mapping>

  <!-- 过滤器,防止乱码 -->
  <filter>
  	<filter-name>CharacterEncodingFilter</filter-name>
  	<filter-class>org.springframework.web.filter.CharacterEncodingFilter</filter-class>
  	<init-param>
  		<param-name>encoding</param-name>
  		<param-value>UTF-8</param-value>
  	</init-param>
  	<init-param>
  		<param-name>forceEncoding</param-name>
  		<param-value>true</param-value>
  	</init-param>
  </filter>
  <filter-mapping>
  	<filter-name>CharacterEncodingFilter</filter-name>
  	<url-pattern>/</url-pattern>
  </filter-mapping>
</web-app>
二、实例
在该工程下创建一个com.jd.area以及com.jd.test模块,创建一个IAreaDao接口和Test类,在area.xml文件中添加sql语句
area.xml代码
<?xml version="1.0" encoding="UTF-8"?>
<!DOCTYPE mapper PUBLIC "-//mybatis.org//DTD Mapper 3.0//EN" "http://mybatis.org/dtd/mybatis-3-mapper.dtd">

<!--只声明了接口,没有Dao层,由动态代理类创建的对象去实现接口里面的方法,并执行sql语句 -->
<mapper namespace="com.jd.area.IAreaDao">

	<!-- 唯一的的标识,方法名;resultType:返回值类型  -->
	<select id="getNames" resultType="java.lang.String">
		select name from area where code=#{code}
	</select>

</mapper>
IAreaDao代码
package com.jd.area;

public interface IAreaDao {

	String getNames(String code);

}
Test类代码
package com.jd.test;

import java.io.IOException;
import java.io.InputStream;

import org.apache.ibatis.io.Resources;
import org.apache.ibatis.session.SqlSession;
import org.apache.ibatis.session.SqlSessionFactory;
import org.apache.ibatis.session.SqlSessionFactoryBuilder;
import org.springframework.context.support.ClassPathXmlApplicationContext;

import com.jd.area.IAreaDao;

public class Test {
	public static void main(String[] args) throws IOException {

        //创建IOC容器,并实例化被@Component、@Repository、@Service或@Controller等类注解所注解的类;为类中有@Autowired、 @Resource 或@Inject注解的属性赋值
		ClassPathXmlApplicationContext applicationContext = new ClassPathXmlApplicationContext("application.xml");

        //得到动态代理对象,接口回调
		IAreaDao areaDao = applicationContext.getBean(IAreaDao.class);

        //查看是否为动态代理
		System.out.println(areaDao.getClass().getName());

        //输出结果
		System.out.println(areaDao.getNames("370982"));

	}
}
输出结果:


 1127
1127

 被折叠的 条评论
为什么被折叠?
被折叠的 条评论
为什么被折叠?
 到【灌水乐园】发言


