


 本文详细介绍了如何在项目中整合Spring和Hibernate框架,包括数据库配置、Spring与Hibernate的配置、JUnit4单元测试等内容。通过阅读本文,你可以了解如何设置数据库连接、配置Spring的ApplicationContext、实现Hibernate的SessionFactory以及进行事务管理。
新建包含Spring和Hibernate的工程
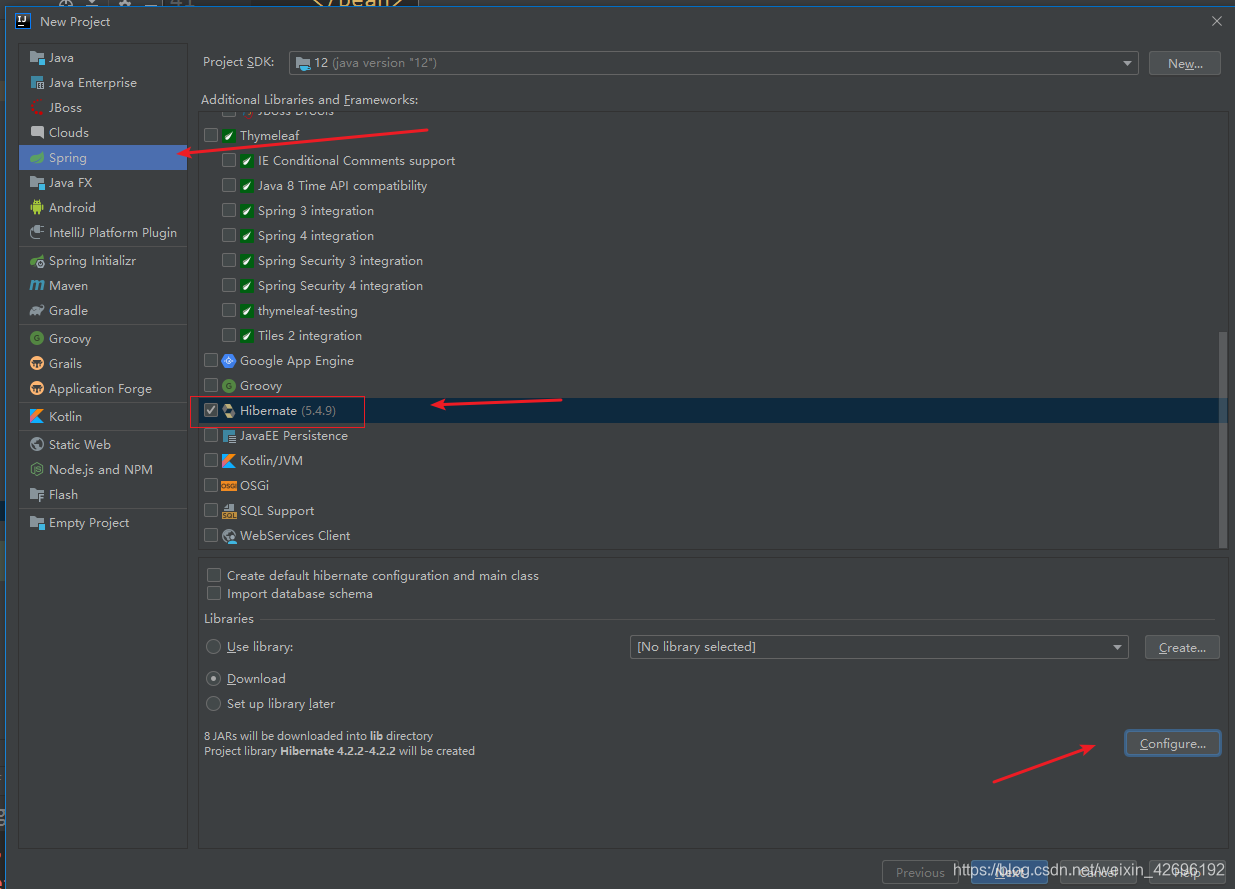
注意版本选择
配置数据库
数据库连接测试配置,参见我之前写的博客 传送门
数据库属性配置文件
db.properties
jdbc.user=root
jdbc.password=123456
jdbc.driverClass=com.mysql.jdbc.Driver
jdbc.jdbcUrl=jdbc:mysql://localhost:3306/spring4
jdbc.initPoolSize=5
jdbc.maxPoolSize=10
Spring和Hibernate配置
ApplicationContext.xml
<?xml version="1.0" encoding="UTF-8"?>
<beans xmlns="http://www.springframework.org/schema/beans"
       xmlns:xsi="http://www.w3.org/2001/XMLSchema-instance"
       xmlns:context="http://www.springframework.org/schema/context" xmlns:tx="http://www.springframework.org/schema/tx"
       xmlns:aop="http://www.springframework.org/schema/aop"
       xsi:schemaLocation="http://www.springframework.org/schema/beans http://www.springframework.org/schema/beans/spring-beans.xsd http://www.springframework.org/schema/context http://www.springframework.org/schema/context/spring-context.xsd http://www.springframework.org/schema/tx http://www.springframework.org/schema/tx/spring-tx.xsd http://www.springframework.org/schema/aop http://www.springframework.org/schema/aop/spring-aop.xsd">
    <!--配置自动扫描的包-->
    <context:component-scan base-package="hibernate">

    </context:component-scan>
    <!--    配置数据源-->
    <!--    导入资源文件-->
    <context:property-placeholder location="db.properties"/>
    <bean id="dataSource" class="com.mchange.v2.c3p0.ComboPooledDataSource">
        <property name="user" value="${jdbc.user}"></property>
        <property name="password" value="${jdbc.password}"></property>
        <property name="jdbcUrl" value="${jdbc.jdbcUrl}"></property>
        <property name="driverClass" value="${jdbc.driverClass}"></property>
        <property name="initialPoolSize" value="${jdbc.initPoolSize}"></property>
        <property name="maxPoolSize" value="${jdbc.maxPoolSize}"></property>
    </bean>
    <!--    配置Hiberate的SessionFactory  实例:通过Spring提供的LocalSessionFactory-->
    <bean id="sessionFactory"
          class="org.springframework.orm.hibernate4.LocalSessionFactoryBean">
        <!-- 配置数据源属性       -->
        <property name="dataSource" ref="dataSource"/>
        <!--  配置Hiberate配置文件的位置名称      -->
        <!--        <property name="configLocation" value="hibernate.cfg.xml"/>-->
        <!-- 使用 hibernateProperties 属相来配置 Hibernate 原生的属性 -->
        <property name="hibernateProperties">
            <props>
                <prop key="hibernate.dialect">org.hibernate.dialect.MySQL5InnoDBDialect</prop>
                <prop key="hibernate.show_sql">true</prop>
                <prop key="hibernate.format_sql">true</prop>
                <prop key="hibernate.hbm2ddl.auto">update</prop>
            </props>
        </property>
        <!--  配置Hiberate映射文件的位置和名称,可以使用通配符-->
        <property name="mappingLocations" value="hibernate/entities/*.hbm.xml"/>
    </bean>

<!--        配置Spring的声明事务-->
<!--     1、配置事务管理器-->
        <bean id="transactionManager" class="org.springframework.orm.hibernate4.HibernateTransactionManager">
            <property name="sessionFactory" ref="sessionFactory"/>
        </bean>
<!--         2、配置事务属性,需要事务管理器-->
        <tx:advice id="txAdvice" transaction-manager="transactionManager">
            <tx:attributes>
                <tx:method name="get*" read-only="true"/>
<!--事务传播行为-->
                <tx:method name="purchase" propagation="REQUIRES_NEW"/>
                <tx:method name="*"></tx:method>
            </tx:attributes>
        </tx:advice>
<!--         3、配置事务切点,并把切点和事务属性关联起来-->
        <aop:config>
            <aop:pointcut expression="execution(* hibernate.services.*.*(..))" id="txPointcut"/>       <!--关联起来-->
            <aop:advisor advice-ref="txAdvice" pointcut-ref="txPointcut"/>
        </aop:config>
</beans>
JUnit4单元测试
工程目录下,右键新建Test目录,如下
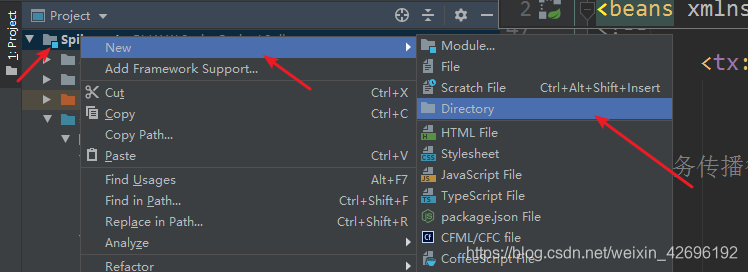
右键Test目录,-> Mark Directory as -> Test Resources Root

然后就可以新建JunitTest类进行测试,测试代码如下:
import hibernate.services.BookShopServices;
import hibernate.services.Cashier;
import org.junit.Test;
import org.springframework.context.ApplicationContext;
import org.springframework.context.support.ClassPathXmlApplicationContext;

import javax.sql.DataSource;

import java.sql.SQLException;
import java.util.Arrays;

import static myprint.Print.println;

public class JunitTest {
    private ApplicationContext ctx = null;
    private BookShopServices bookShopServices = null;
    private Cashier cashier = null;
    {
        ctx = new ClassPathXmlApplicationContext("ApplicationContext.xml");
        bookShopServices = ctx.getBean(BookShopServices.class);
        cashier = ctx.getBean(Cashier.class);
    }

    @Test
    public void testCashier(){
        cashier.checkout("aa", Arrays.asList("1001","1002"));
    }

    @Test
    public void testBookShopServices(){
        bookShopServices.purchase("aa","1001");
    }


    @Test
    public void testDataSource() {
        DataSource dataSource = ctx.getBean(DataSource.class);
        try {
            println(dataSource.getConnection());
        } catch (SQLException e) {
            e.printStackTrace();
        }
    }
}


 3703
3703

 被折叠的 条评论
为什么被折叠?
被折叠的 条评论
为什么被折叠?
 到【灌水乐园】发言


