


 本文介绍如何使用Spring Boot框架结合MyBatis实现数据库操作,包括创建项目、配置pom.xml、搭建环境、编写Controller、Service、DAO层代码及Bean类等步骤。
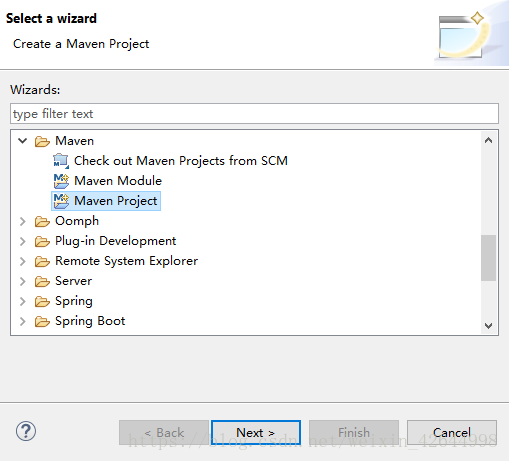
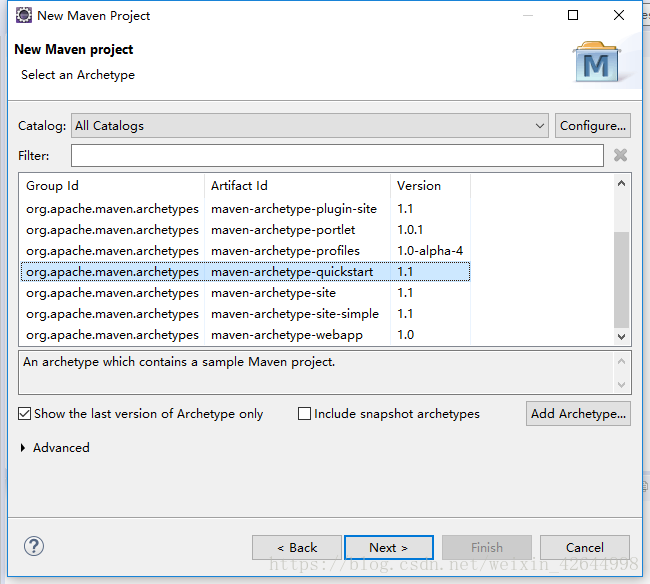
1、创建Maven项目
2、配置pom.xml文件的代码
<project xmlns="http://maven.apache.org/POM/4.0.0" xmlns:xsi="http://www.w3.org/2001/XMLSchema-instance"
  xsi:schemaLocation="http://maven.apache.org/POM/4.0.0 http://maven.apache.org/xsd/maven-4.0.0.xsd">
  <modelVersion>4.0.0</modelVersion>

  <groupId>com</groupId>
  <artifactId>springboot</artifactId>
  <version>1.0.0-SNAPSHOT</version>
  <packaging>jar</packaging>

  <name>springboot</name>
  <url>http://maven.apache.org</url>

  <properties>
    <project.build.sourceEncoding>UTF-8</project.build.sourceEncoding>
  </properties>
  <parent>
      <groupId>org.springframework.boot</groupId>
      <artifactId>spring-boot-starter-parent</artifactId>
      <version>1.4.0.RELEASE</version>
  </parent>
  <dependencies>
    <dependency>
      <groupId>junit</groupId>
      <artifactId>junit</artifactId>
      <scope>test</scope>
    </dependency>
    <dependency>
        <groupId>org.springframework.boot</groupId>
        <artifactId>spring-boot-starter-web</artifactId>
    </dependency>
    <!--日志-->
    <dependency>
        <groupId>org.springframework.boot</groupId>
        <artifactId>spring-boot-starter-logging</artifactId>
    </dependency>
    <!--Mybatics-->
    <dependency>
        <groupId>org.mybatis.spring.boot</groupId>
        <artifactId>mybatis-spring-boot-starter</artifactId>
        <version>1.1.1</version>
    </dependency>
    <dependency>
        <groupId>mysql</groupId>
        <artifactId>mysql-connector-java</artifactId>
    </dependency>
    <!--分页插件-->
    <dependency>
        <groupId>com.github.pagehelper</groupId>
        <artifactId>pagehelper</artifactId>
        <version>4.2.1</version>
    </dependency>
    <!--通用Mapper-->
    <dependency>
        <groupId>tk.mybatis</groupId>
        <artifactId>mapper</artifactId>
        <version>3.3.9</version>
    </dependency>
  </dependencies>
</project>
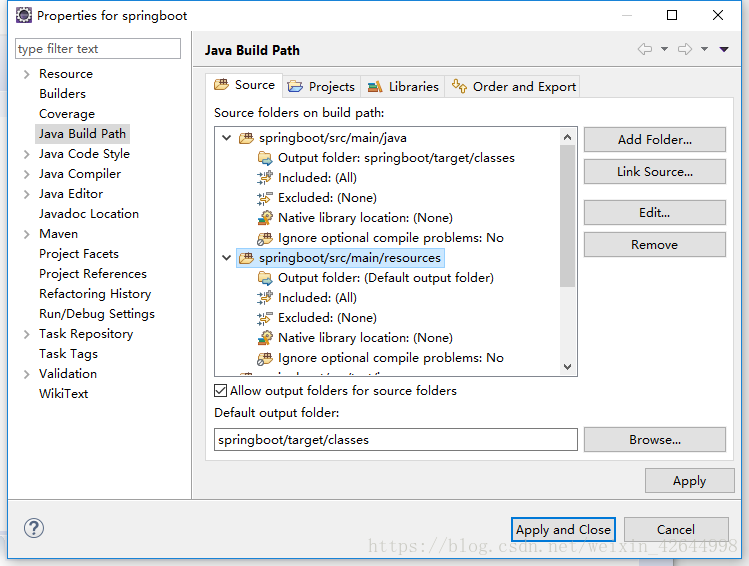
3、项目没有resource包的项目右击Build Path ——>source 里Add一个src/main/resources
4、然后在resource下new个file文件application.properties,配置如下
spring.datasource.url=jdbc:mysql://localhost:3306/bootsql
spring.datasource.username=root
spring.datasource.password=******
spring.datasource.driver-class-name=com.mysql.jdbc.Driver
5、创建Applicationl类Aplication.java用于启动项目
package com.springboot;

import org.springframework.boot.SpringApplication;
import org.springframework.boot.autoconfigure.EnableAutoConfiguration;
import org.springframework.context.annotation.ComponentScan;
import org.springframework.stereotype.Controller;

@Controller
@EnableAutoConfiguration
@ComponentScan(basePackages= {"com.springboot"}) //设置扫描区间的注解
public class Aplication
{
    public static void main(String[] args) throws Exception {
    SpringApplication.run(Aplication.class, args);
    }
}
6、创建Controller类UserController.java
package com.springboot.controller;

import org.springframework.beans.factory.annotation.Autowired;
import org.springframework.stereotype.Controller;
import org.springframework.web.bind.annotation.RequestMapping;
import org.springframework.web.bind.annotation.ResponseBody;

import com.springboot.bean.User;
import com.springboot.service.UserInterface;

@Controller
@RequestMapping("/user")
public class UserController
{
	@Autowired
	private UserInterface userService;
	@RequestMapping("/get")
	@ResponseBody
	User getUserInfo()
	{
		return userService.getUserInfo();
	}
	@RequestMapping("/add")
	@ResponseBody
	String add()
	{
		userService.insertUser("打瞌睡", "123456");
		return "success";
	}
	@RequestMapping("/select")
	@ResponseBody
	String select()
	{
		userService.select("name");
		return "success";
	}
}
7、创建Mapper接口UserDao.java(和Dao一样)
package com.springboot.dao;

import org.apache.ibatis.annotations.Insert;
import org.apache.ibatis.annotations.Mapper;
import org.apache.ibatis.annotations.Param;
import org.apache.ibatis.annotations.Select;

import com.springboot.bean.User;

@Mapper
public interface UserDao {
    @Select("SELECT * FROM USERINFO WHERE username = #{username}")
    User findByName(@Param("username") String username);

    @Insert("INSERT INTO USERINFO(username, password) VALUES(#{username}, #{password})")
    int insert(@Param("username") String name, @Param("password") String password);

}
8、创建Service的类UserService.java与接口UserInterface.java
package com.springboot.service;

import org.springframework.beans.factory.annotation.Autowired;
import org.springframework.stereotype.Service;

import com.springboot.bean.User;
import com.springboot.dao.UserDao;
import com.springboot.service.UserInterface;

@Service
public class UserService implements UserInterface
{
	@Autowired UserDao userDao;
	public int userInterface() {
		return 0;
	}

	public User getUserInfo() {
		return new User();
	}
	public int insertUser(String username,String password)
	{
		return userDao.insert(username, password);
	}
	public User select(String username)
	{
		return userDao.findByName(username);
	}
}
service接口UserInterface.java
package com.springboot.service;

import com.springboot.bean.User;

public interface UserInterface
{
	public int userInterface();

	public User getUserInfo();

	public int insertUser(String username,String password);
	public User select(String username);

}
9、创建bean类User.java
package com.springboot.bean;

public class User
{
	private int id;
	private String username;
	private String password;
	public int getId() {
		return id;
	}
	public void setId(int id) {
		this.id = id;
	}
	public String getUsername() {
		return username;
	}
	public void setUsername(String username) {
		this.username = username;
	}
	public String getPassword() {
		return password;
	}
	public void setPassword(String password) {
		this.password = password;
	}


}
10、整体目录结构如下
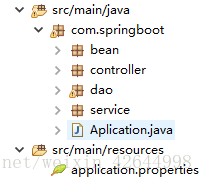
运行Aplication.java即可启动程序


 4155
4155

 被折叠的 条评论
为什么被折叠?
被折叠的 条评论
为什么被折叠?
 到【灌水乐园】发言


