


 本文详细介绍了在Windows 10家庭版环境中安装和使用Docker的过程,包括解决Hyper-V冲突、安装Docker Toolbox、配置Docker Quickstart Terminal、启动和管理容器、修改容器内的Nginx配置等关键步骤。
2019-2-8 Win10家庭版下使用docker
1.参考资料
docker学习可以参见
2.安装过程
如果要安装Docker Desktop for Windows,需要以下条件:
- Windows 10 64bit: Pro, Enterprise or Education (1607 Anniversary Update, Build 14393 or later).
- Virtualization is enabled in BIOS. Typically, virtualization is enabled by default. This is different from having Hyper-V enabled.
- CPU SLAT-capable feature.
- At least 4GB of RAM.
显然家庭版不支持,那就需要安装Docker Toolbox for Windows。
Docker Toolbox包括以下Docker工具:
- Docker CLI客户端,用于运行Docker Engine以创建映像和容器
- Docker Machine,可以从Windows终端运行Docker Engine命令
- Docker Compose用于运行docker-compose命令
- Kitematic,Docker GUI
- 为Docker命令行环境预配置的Docker QuickStart shell
- Oracle VM VirtualBox
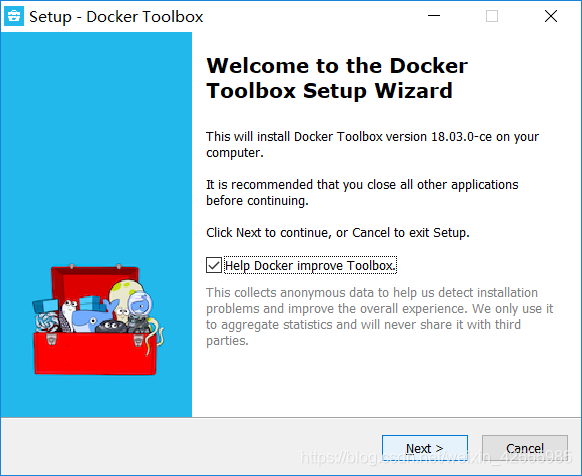
下载安装程序后运行如下
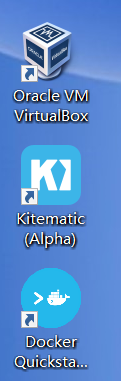
我选择安装所有内容。安装完后桌面上会增加3个图标如下
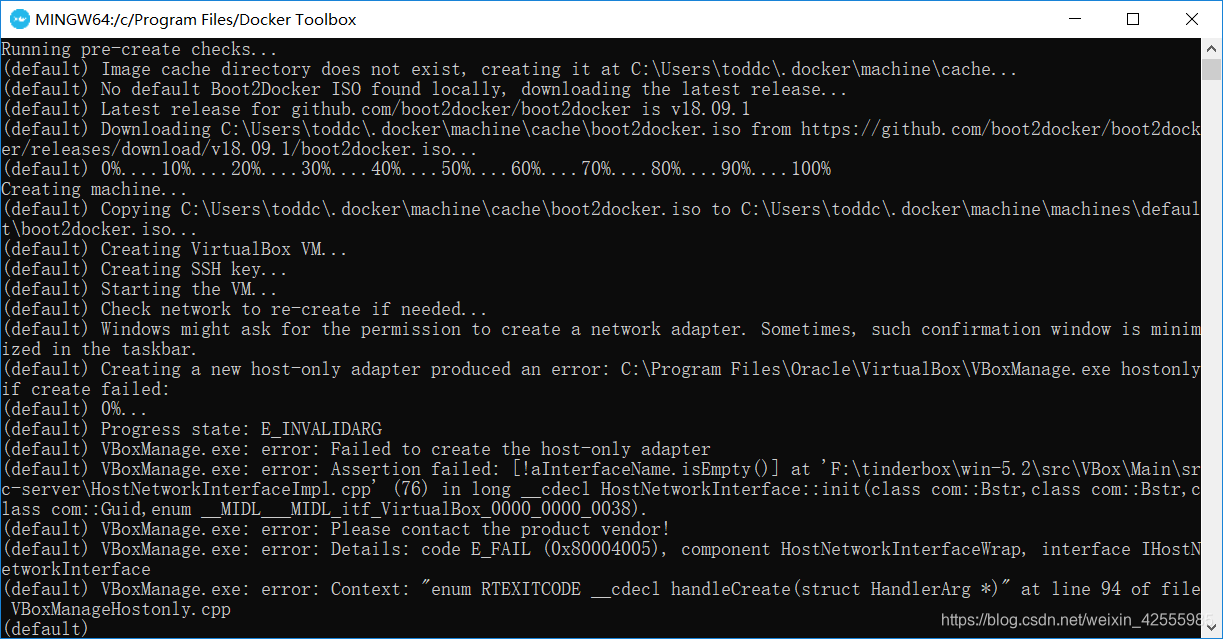
运行Docker Quickstart Terminal,报错
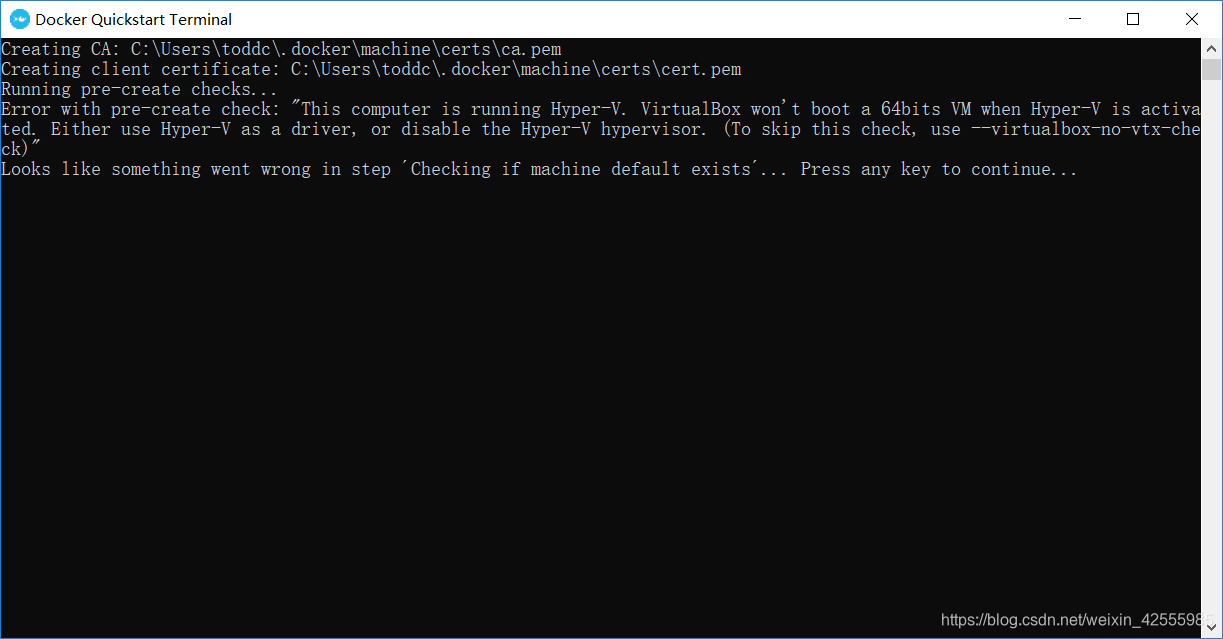 意思是Virtualbox和hyper-V冲突。我选择关闭hyper-V来解决。
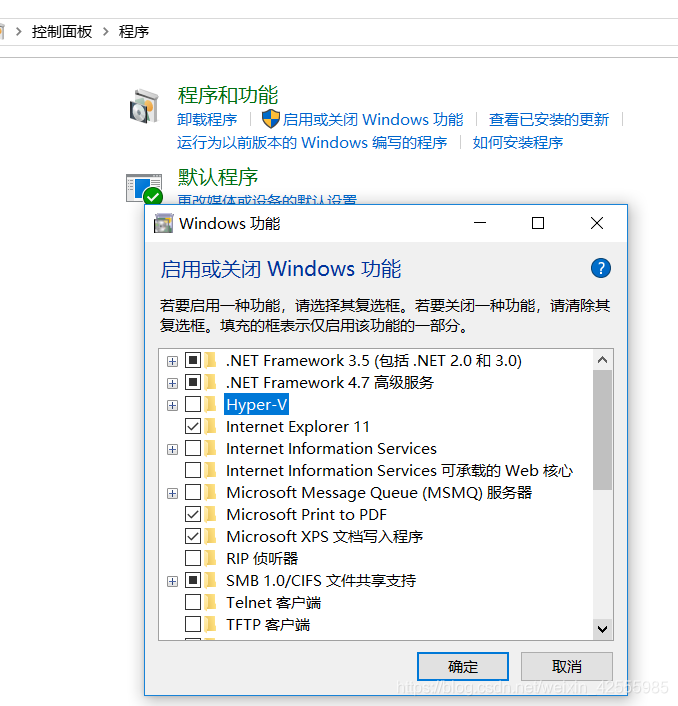
重启动以后,报错依旧。估计是因为我是用特别的方法在Win10家庭版中安装的Hyper-V。
查了网上,尝试用以下命令来关闭hyper-v
使用管理员权限运行命令:bcdedit /set hypervisorlaunchtype off。
重启动后,成功了。注意:如果要重新打开hyper-v,用以下命令
bcdedit /set hypervisorlaunchtype auto
正常运行Docker Quickstart Terminal的界面如下
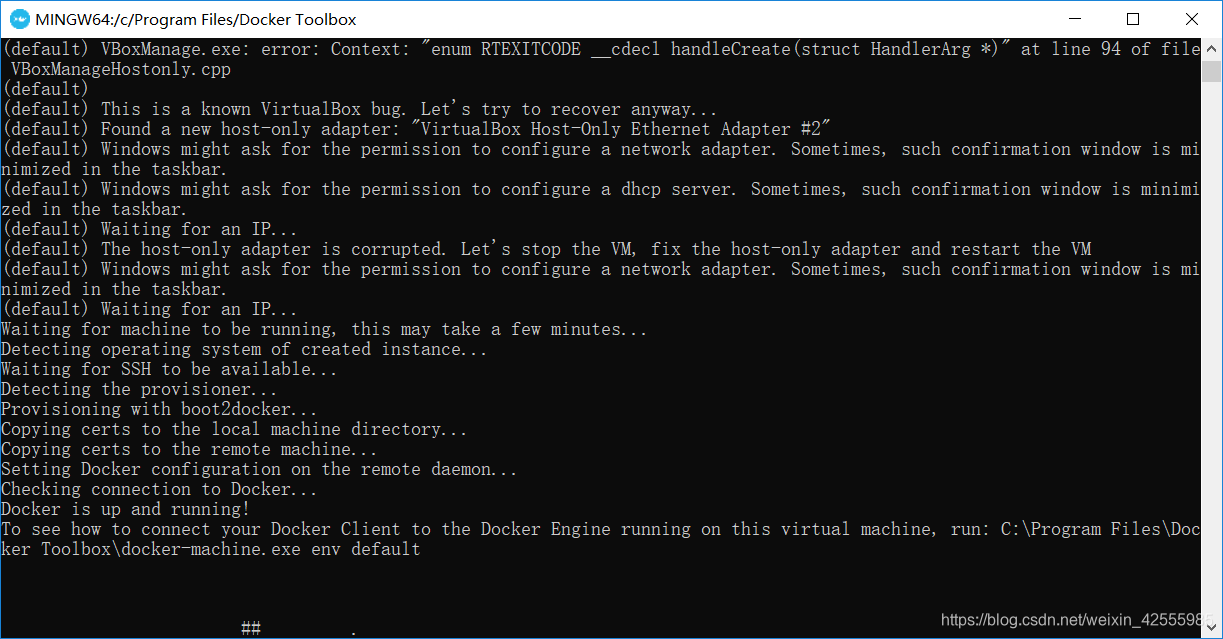
 这其实就是启动了一个linux内核的虚拟机,用于运行docker相关程序,具体在后面分析。
3.docker使用
- 查看docker版本
$ docker version
Client:
 Version:       18.03.0-ce
 API version:   1.37
 Go version:    go1.9.4
 Git commit:    0520e24302
 Built: Fri Mar 23 08:31:36 2018
 OS/Arch:       windows/amd64
 Experimental:  false
 Orchestrator:  swarm

Server: Docker Engine - Community
 Engine:
  Version:      18.09.1
  API version:  1.39 (minimum version 1.12)
  Go version:   go1.10.6
  Git commit:   4c52b90
  Built:        Wed Jan  9 19:41:57 2019
  OS/Arch:      linux/amd64
  Experimental: false
- 查看容器
$ docker ps
CONTAINER ID        IMAGE               COMMAND             CREATED             STATUS              PORTS               NAMES
- 查看安装的镜像
$ docker image ls
REPOSITORY          TAG                 IMAGE ID            CREATED             SIZE
- 拉取镜像
我拉取的是nginx,版本就用最新版本
$ docker pull nginx
Using default tag: latest
Error response from daemon: pull access denied for nginx, repository does not exist or may require 'docker login'
报错了,意思是需要先登陆docker
- 登陆docker
$ docker login
Login with your Docker ID to push and pull images from Docker Hub. If you don't have a Docker ID, head over to https://hub.docker.com to create one.
Username: aaa
Password:
Login Succeeded
然后再尝试拉取nginx,成功了。
$ docker pull nginx
Using default tag: latest
latest: Pulling from library/nginx
6ae821421a7d: Pull complete
da4474e5966c: Pull complete
eb2aec2b9c9f: Pull complete
Digest: sha256:dd2d0ac3fff2f007d99e033b64854be0941e19a2ad51f174d9240dda20d9f534
Status: Downloaded newer image for nginx:latest
由于镜像是由多层存储所构成,所以可以看到这里下载过程也是一层层的去下载,并非单一文件。
下载过程中给出了每一层的 ID 的前 12 位。并且下载结束后,给出该镜像完整的 sha256 的摘要,以确保下载一致性。
- 启动镜像
$ docker run --name webserver -p 8080:80 -d nginx
d78df848b5d4911795ec7926528e5435216ebfba63d57ced2f89afff04b553a9
命名空间webserver,映射宿主机端口8080
此时查看镜像和容器信息如下
toddc@DESKTOP-U0EUJB2 MINGW64 /c/Program Files/Docker Toolbox
$ docker image ls
REPOSITORY          TAG                 IMAGE ID            CREATED             SIZE
nginx               latest              f09fe80eb0e7        43 hours ago        109MB

toddc@DESKTOP-U0EUJB2 MINGW64 /c/Program Files/Docker Toolbox
$ docker ps
CONTAINER ID        IMAGE               COMMAND                  CREATED             STATUS              PORTS                  NAMES
d78df848b5d4        nginx               "nginx -g 'daemon of…"   2 minutes ago       Up 2 minutes        0.0.0.0:8080->80/tcp   webserver
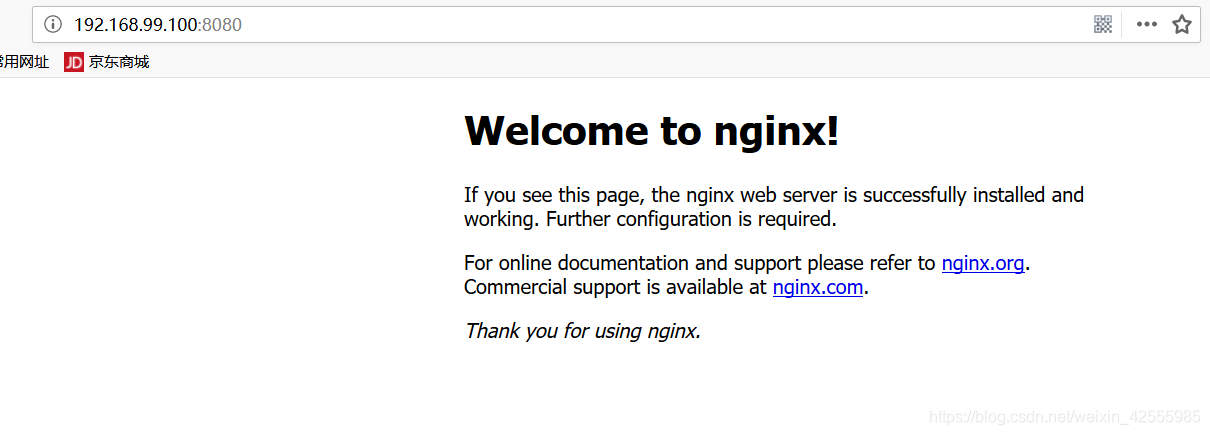
打开浏览器输入192.168.99.100:8080,可以出现nginx的默认网页。8080端口就是刚才映射的宿主机端口。至于地址为什么是192.168.99.100,后面分析。
- 停止容器运行
$ docker kill d78
d78
d78是容器ID的前3位。
注意:此时如果要再次启动nginx镜像是会失败的
$ docker run --name webserver -p 8080:80 -d nginx
C:\Program Files\Docker Toolbox\docker.exe: Error response from daemon: Conflict. The container name "/webserver" is already in use by container "d78df848b5d4911795ec7926528e5435216ebfba63d57ced2f89afff04b553a9". You have to remove (or rename) that container to be able to reuse that name.
See 'C:\Program Files\Docker Toolbox\docker.exe run --help'.
查看一下容器,webserver还是存在的,必须移除
$ docker ps -a
CONTAINER ID        IMAGE               COMMAND                  CREATED             STATUS                            PORTS               NAMES
d78df848b5d4        nginx               "nginx -g 'daemon of…"   4 hours ago         Exited (137) 11 minutes ago                           webserver
- 移除容器
$ docker rm d78
d78
移除后再启动镜像就能成功了。
$ docker run --name webserver -p 8080:80 -d nginx
5781f44ac04a77aafd90f79da32b6c132a7c395b5f8825661e0ef7ae7d4fbc34

toddc@DESKTOP-U0EUJB2 MINGW64 /c/Program Files/Docker Toolbox
$ docker ps -a
CONTAINER ID        IMAGE               COMMAND                  CREATED             STATUS                         PORTS                  NAMES
5781f44ac04a        nginx               "nginx -g 'daemon of…"   4 seconds ago       Up 4 seconds                   0.0.0.0:8080->80/tcp   webserver
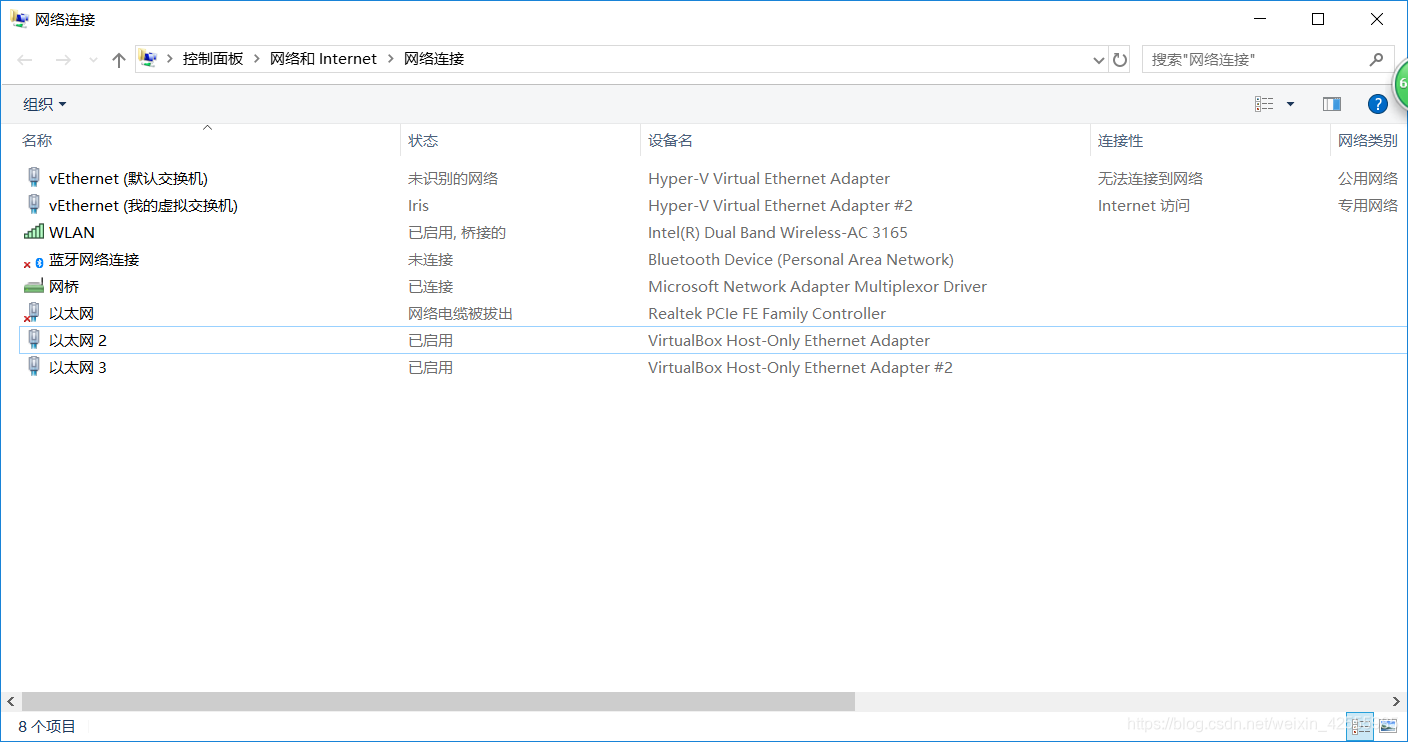
4.docker使用过程中IP地址分析
Docker Toolbox for Windows安装过程中,给PC上安装上了Oracle VM VirtualBox。而VirtualBox给PC添加了虚拟网卡,设置的ip地址是192.168.99.1。
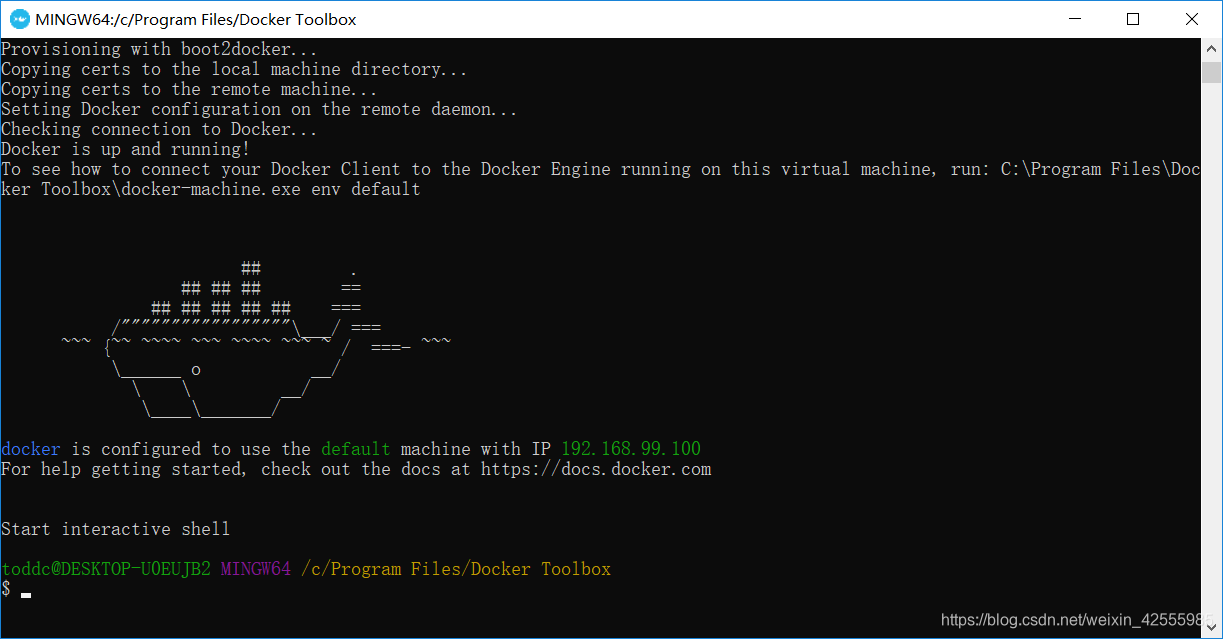
 同时,Docker Quickstart Terminal启动后,给docker machine(docker管理工具)配置的地址是192.168.99.100。这个可以在docker启动完成后界面上看到
docker is configured to use the default machine with IP 192.168.99.100
也可以用下面命令查看
$ docker-machine ls
NAME      ACTIVE   DRIVER       STATE     URL                         SWARM   DOCKER     ERRORS
default   *        virtualbox   Running   tcp://192.168.99.100:2376           v18.09.1
我们可以尝试从PC上ping一下docker宿主机。
C:\>ping 192.168.99.100

正在 Ping 192.168.99.100 具有 32 字节的数据:
来自 192.168.99.100 的回复: 字节=32 时间<1ms TTL=64
来自 192.168.99.100 的回复: 字节=32 时间<1ms TTL=64
来自 192.168.99.100 的回复: 字节=32 时间<1ms TTL=64
来自 192.168.99.100 的回复: 字节=32 时间<1ms TTL=64

192.168.99.100 的 Ping 统计信息:
    数据包: 已发送 = 4,已接收 = 4,丢失 = 0 (0% 丢失),
往返行程的估计时间(以毫秒为单位):
    最短 = 0ms,最长 = 0ms,平均 = 0ms
这也就是为什么docker中启动nginx后,浏览器中输入的地址是192.168.99.100可以显示nginx页面的原因了。
5.docker终端分析
查看了网上关于docker toolbox介绍:
早期在Windows环境下使用Docker主要利用的是Boot2Docker这个命令行工具,而现在Toolbox可以安装你在开发中运行Docker时所需要的一切:Docker客户端、Compose(仅Mac需要)、Kitematic、Machine以及VirtualBox。
Toolbox使用Machine和VirtualBox在虚拟机中创建了一个引擎来运行容器。在该虚拟机上,你可以使用Docker客户端、Compose以及Kitematic来运行容器。而Toolbox本身已经可以取代了Boot2Docker的作用。
在linux系统中安装docker环境,docker客户端、Docker守护进程以及所有的容器都是直接运行在linux本地环境中的。
但是在windows环境下,Docker的相关的程序是运行在一个内置的小型的Linux虚拟机中的。也就是Docker Quickstart Terminal程序启动的终端。它的启动配置信息在安装目录的start.sh文件中,那条小鲸鱼也在其中。
在这个终端里可以使用dos命令,也可以使用linux命令。例如:
toddc@DESKTOP-U0EUJB2 MINGW64 /etc
$ cd /

toddc@DESKTOP-U0EUJB2 MINGW64 /
$ pwd
/

toddc@DESKTOP-U0EUJB2 MINGW64 /
$ ls
bin/  dev/  git-bash.exe*  LICENSE.txt  proc/              tmp/          unins000.exe*  usr/
cmd/  etc/  git-cmd.exe*   mingw64/     ReleaseNotes.html  unins000.dat  unins000.msg

toddc@DESKTOP-U0EUJB2 MINGW64 /
$ dir
bin  dev  git-bash.exe  LICENSE.txt  proc               tmp           unins000.exe  usr
cmd  etc  git-cmd.exe   mingw64      ReleaseNotes.html  unins000.dat  unins000.msg
6.修改nginx配置
了解了docker终端特性后,我们可以尝试对nginx镜像做一些修改。
首先用以下命令进入nginx容器
$ docker exec -it webserver /bin/bash
root@5781f44ac04a:/#
以上命令表示以交互式命令行方式进入容器。
-i,interactive交互式
-t,tty终端
webserver,启动nginx时候的命名空间名称
/bin/bash, 表示命令行模式
然后找到nginx的配置文件
root@5781f44ac04a:/# whereis nginx
nginx: /usr/sbin/nginx /usr/lib/nginx /etc/nginx /usr/share/nginx
root@5781f44ac04a:/# cd /etc/nginx
root@5781f44ac04a:/etc/nginx# ls
conf.d fastcgi_params koi-utf  koi-win  mime.types  modules  nginx.conf  scgi_params   uwsgi_params  win-utf
root@5781f44ac04a:/etc/nginx# cd conf.d/
root@5781f44ac04a:/etc/nginx/conf.d# ls
default.conf
root@5781f44ac04a:/etc/nginx/conf.d# cat default.conf
server {
    listen       80;
    server_name  localhost;

    #charset koi8-r;
    #access_log  /var/log/nginx/host.access.log  main;

    location / {
        root   /usr/share/nginx/html;
        index  index.html index.htm;
    }

    #error_page  404              /404.html;

    # redirect server error pages to the static page /50x.html
    #
    error_page   500 502 503 504  /50x.html;
    location = /50x.html {
        root   /usr/share/nginx/html;
    }

    # proxy the PHP scripts to Apache listening on 127.0.0.1:80
    #
    #location ~ \.php$ {
    #    proxy_pass   http://127.0.0.1;
    #}

    # pass the PHP scripts to FastCGI server listening on 127.0.0.1:9000
    #
    #location ~ \.php$ {
    #    root           html;
    #    fastcgi_pass   127.0.0.1:9000;
    #    fastcgi_index  index.php;
    #    fastcgi_param  SCRIPT_FILENAME  /scripts$fastcgi_script_name;
    #    include        fastcgi_params;
    #}

    # deny access to .htaccess files, if Apache's document root
    # concurs with nginx's one
    #
    #location ~ /\.ht {
    #    deny  all;
    #}
}

root@5781f44ac04a:/etc/nginx/conf.d#
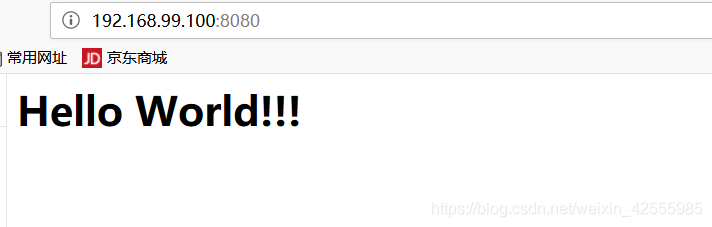
根据配置文件,现在就可以修改/usr/share/nginx/html/index.html的内容
root@5781f44ac04a:/etc/nginx/conf.d# echo '<h1>Hello World!!!</h1>' > /usr/share/nginx/html/index.html
刷新一下页面,可以发现内容变为刚才修改的hello world
继续修改。新建一个目录/var/www/html,然后创建一个index.html
root@5781f44ac04a:/# mkdir -p /var/www/html
root@5781f44ac04a:/# echo '<h1>====New Homepage====</h1>' > /var/www/html/index.html
编辑nginx的配置文件,报错。
root@5781f44ac04a:/etc/nginx/conf.d# vim default.conf
bash: vim: command not found
docker中默认没有vim命令,需要自己安装。
先运行apt-get update,同步 /etc/apt/sources.list 和 /etc/apt/sources.list.d 中列出的源的索引,这样才能获取到最新的软件包。
root@5781f44ac04a:/etc/nginx/conf.d# apt-get update
Ign:2 http://cdn-fastly.deb.debian.org/debian stretch InRelease
Get:3 http://cdn-fastly.deb.debian.org/debian stretch-updates InRelease [91.0 kB]
Get:4 http://cdn-fastly.deb.debian.org/debian stretch Release [118 kB]
Get:1 http://security-cdn.debian.org/debian-security stretch/updates InRelease [94.3 kB]
Get:5 http://cdn-fastly.deb.debian.org/debian stretch-updates/main amd64 Packages [7748 B]
Get:6 http://cdn-fastly.deb.debian.org/debian stretch Release.gpg [2434 B]
Get:7 http://security-cdn.debian.org/debian-security stretch/updates/main amd64 Packages [475 kB]
Get:8 http://cdn-fastly.deb.debian.org/debian stretch/main amd64 Packages [7090 kB]
Fetched 7878 kB in 9s (825 kB/s)
Reading package lists... Done
然后安装vim
root@5781f44ac04a:/etc/nginx/conf.d# apt-get install vim
Reading package lists... Done
Building dependency tree
Reading state information... Done
The following additional packages will be installed:
  libgpm2 vim-common vim-runtime xxd
Suggested packages:
  gpm ctags vim-doc vim-scripts
The following NEW packages will be installed:
  libgpm2 vim vim-common vim-runtime xxd
0 upgraded, 5 newly installed, 0 to remove and 0 not upgraded.
Need to get 6766 kB of archives.
After this operation, 31.2 MB of additional disk space will be used.
Do you want to continue? [Y/n] y
Get:1 http://cdn-fastly.deb.debian.org/debian stretch/main amd64 xxd amd64 2:8.0.0197-4+deb9u1 [132 kB]
Get:2 http://cdn-fastly.deb.debian.org/debian stretch/main amd64 vim-common all 2:8.0.0197-4+deb9u1 [159 kB]
Get:3 http://cdn-fastly.deb.debian.org/debian stretch/main amd64 libgpm2 amd64 1.20.4-6.2+b1 [34.2 kB]
Get:4 http://cdn-fastly.deb.debian.org/debian stretch/main amd64 vim-runtime all 2:8.0.0197-4+deb9u1 [5407 kB]
Get:5 http://cdn-fastly.deb.debian.org/debian stretch/main amd64 vim amd64 2:8.0.0197-4+deb9u1 [1034 kB]
Fetched 6766 kB in 19min 10s (5879 B/s)
debconf: delaying package configuration, since apt-utils is not installed
Selecting previously unselected package xxd.
(Reading database ... 7029 files and directories currently installed.)
Preparing to unpack .../xxd_2%3a8.0.0197-4+deb9u1_amd64.deb ...
Unpacking xxd (2:8.0.0197-4+deb9u1) ...
Selecting previously unselected package vim-common.
Preparing to unpack .../vim-common_2%3a8.0.0197-4+deb9u1_all.deb ...
Unpacking vim-common (2:8.0.0197-4+deb9u1) ...
Selecting previously unselected package libgpm2:amd64.
Preparing to unpack .../libgpm2_1.20.4-6.2+b1_amd64.deb ...
Unpacking libgpm2:amd64 (1.20.4-6.2+b1) ...
Selecting previously unselected package vim-runtime.
Preparing to unpack .../vim-runtime_2%3a8.0.0197-4+deb9u1_all.deb ...
Adding 'diversion of /usr/share/vim/vim80/doc/help.txt to /usr/share/vim/vim80/doc/help.txt.vim-tiny by vim-runtime'
Adding 'diversion of /usr/share/vim/vim80/doc/tags to /usr/share/vim/vim80/doc/tags.vim-tiny by vim-runtime'
Unpacking vim-runtime (2:8.0.0197-4+deb9u1) ...
Selecting previously unselected package vim.
Preparing to unpack .../vim_2%3a8.0.0197-4+deb9u1_amd64.deb ...
Unpacking vim (2:8.0.0197-4+deb9u1) ...
Setting up xxd (2:8.0.0197-4+deb9u1) ...
Setting up libgpm2:amd64 (1.20.4-6.2+b1) ...
Processing triggers for libc-bin (2.24-11+deb9u3) ...
Setting up vim-common (2:8.0.0197-4+deb9u1) ...
Setting up vim-runtime (2:8.0.0197-4+deb9u1) ...
Setting up vim (2:8.0.0197-4+deb9u1) ...
update-alternatives: using /usr/bin/vim.basic to provide /usr/bin/vim (vim) in auto mode
update-alternatives: using /usr/bin/vim.basic to provide /usr/bin/vimdiff (vimdiff) in auto mode
update-alternatives: using /usr/bin/vim.basic to provide /usr/bin/rvim (rvim) in auto mode
update-alternatives: using /usr/bin/vim.basic to provide /usr/bin/rview (rview) in auto mode
update-alternatives: using /usr/bin/vim.basic to provide /usr/bin/vi (vi) in auto mode
update-alternatives: warning: skip creation of /usr/share/man/fr/man1/vi.1.gz because associated file /usr/share/man/fr/man1/vim.1.gz (of link group vi) doesn't exist
update-alternatives: warning: skip creation of /usr/share/man/it/man1/vi.1.gz because associated file /usr/share/man/it/man1/vim.1.gz (of link group vi) doesn't exist
update-alternatives: warning: skip creation of /usr/share/man/pl/man1/vi.1.gz because associated file /usr/share/man/pl/man1/vim.1.gz (of link group vi) doesn't exist
update-alternatives: warning: skip creation of /usr/share/man/ru/man1/vi.1.gz because associated file /usr/share/man/ru/man1/vim.1.gz (of link group vi) doesn't exist
update-alternatives: warning: skip creation of /usr/share/man/ja/man1/vi.1.gz because associated file /usr/share/man/ja/man1/vim.1.gz (of link group vi) doesn't exist
update-alternatives: warning: skip creation of /usr/share/man/man1/vi.1.gz because associated file /usr/share/man/man1/vim.1.gz (of link group vi) doesn't exist
update-alternatives: using /usr/bin/vim.basic to provide /usr/bin/view (view) in auto mode
update-alternatives: warning: skip creation of /usr/share/man/fr/man1/view.1.gz because associated file /usr/share/man/fr/man1/vim.1.gz (of link group view) doesn't exist
update-alternatives: warning: skip creation of /usr/share/man/it/man1/view.1.gz because associated file /usr/share/man/it/man1/vim.1.gz (of link group view) doesn't exist
update-alternatives: warning: skip creation of /usr/share/man/pl/man1/view.1.gz because associated file /usr/share/man/pl/man1/vim.1.gz (of link group view) doesn't exist
update-alternatives: warning: skip creation of /usr/share/man/ru/man1/view.1.gz because associated file /usr/share/man/ru/man1/vim.1.gz (of link group view) doesn't exist
update-alternatives: warning: skip creation of /usr/share/man/ja/man1/view.1.gz because associated file /usr/share/man/ja/man1/vim.1.gz (of link group view) doesn't exist
update-alternatives: warning: skip creation of /usr/share/man/man1/view.1.gz because associated file /usr/share/man/man1/vim.1.gz (of link group view) doesn't exist
update-alternatives: using /usr/bin/vim.basic to provide /usr/bin/ex (ex) in auto mode
update-alternatives: warning: skip creation of /usr/share/man/fr/man1/ex.1.gz because associated file /usr/share/man/fr/man1/vim.1.gz (of link group ex) doesn't exist
update-alternatives: warning: skip creation of /usr/share/man/it/man1/ex.1.gz because associated file /usr/share/man/it/man1/vim.1.gz (of link group ex) doesn't exist
update-alternatives: warning: skip creation of /usr/share/man/pl/man1/ex.1.gz because associated file /usr/share/man/pl/man1/vim.1.gz (of link group ex) doesn't exist
update-alternatives: warning: skip creation of /usr/share/man/ru/man1/ex.1.gz because associated file /usr/share/man/ru/man1/vim.1.gz (of link group ex) doesn't exist
update-alternatives: warning: skip creation of /usr/share/man/ja/man1/ex.1.gz because associated file /usr/share/man/ja/man1/vim.1.gz (of link group ex) doesn't exist
update-alternatives: warning: skip creation of /usr/share/man/man1/ex.1.gz because associated file /usr/share/man/man1/vim.1.gz (of link group ex) doesn't exist
update-alternatives: using /usr/bin/vim.basic to provide /usr/bin/editor (editor) in auto mode
update-alternatives: warning: skip creation of /usr/share/man/fr/man1/editor.1.gz because associated file /usr/share/man/fr/man1/vim.1.gz (of link group editor) doesn't exist
update-alternatives: warning: skip creation of /usr/share/man/it/man1/editor.1.gz because associated file /usr/share/man/it/man1/vim.1.gz (of link group editor) doesn't exist
update-alternatives: warning: skip creation of /usr/share/man/pl/man1/editor.1.gz because associated file /usr/share/man/pl/man1/vim.1.gz (of link group editor) doesn't exist
update-alternatives: warning: skip creation of /usr/share/man/ru/man1/editor.1.gz because associated file /usr/share/man/ru/man1/vim.1.gz (of link group editor) doesn't exist
update-alternatives: warning: skip creation of /usr/share/man/ja/man1/editor.1.gz because associated file /usr/share/man/ja/man1/vim.1.gz (of link group editor) doesn't exist
update-alternatives: warning: skip creation of /usr/share/man/man1/editor.1.gz because associated file /usr/share/man/man1/vim.1.gz (of link group editor) doesn't exist
成功后编辑配置文件
root@5781f44ac04a:/etc/nginx/conf.d# vim default.conf
修改内容如下
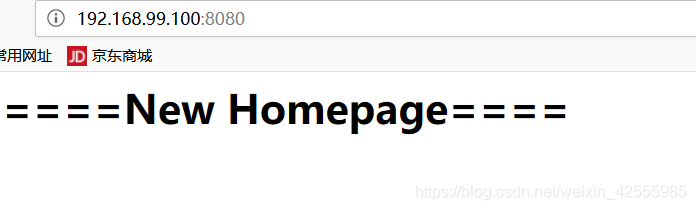
location / {
        root   /var/www/html;
        index  index.html index.htm;
    }
重新启动nginx服务
root@5781f44ac04a:/usr/sbin# ./nginx -s reload
2019/02/08 09:37:16 [notice] 546#546: signal process started
root@5781f44ac04a:/usr/sbin#
刷新一下页面,可以发现内容变为刚才修改的new homepage


 3589
3589

 被折叠的 条评论
为什么被折叠?
被折叠的 条评论
为什么被折叠?
 到【灌水乐园】发言


