


 本文介绍了如何将Python程序封装成HTTP接口,通过使用FastAPI和Tornado框架来创建get和post接口服务。并提供了接口测试的相关内容,鼓励读者继续学习和进步。


一、安装需要的包
pip install fastapipip install uvicornpip install tornado二、FastAPI的get/post接口服务
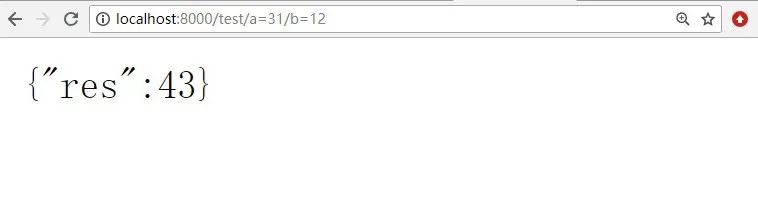
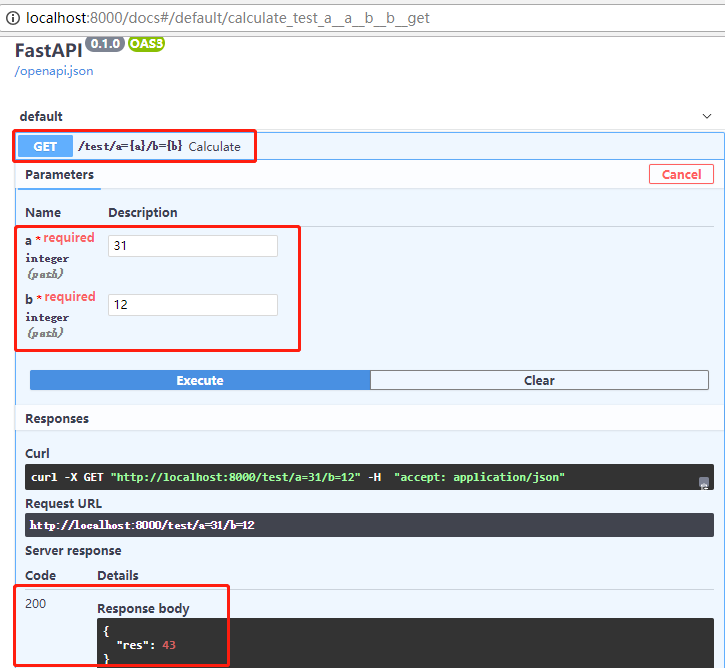
get/post接口# -*- coding: utf-8 -*-from fastapi import FastAPIfrom pydantic import BaseModel app = FastAPI()class Item(BaseModel): a: int = None b: int = None @app.get('/test/a={a}/b={b}')def calculate(a: int=None, b: int=None): c = a + b res = {"res":c} return res@app.post('/test')def calculate(request_data: Item): a = request_data.a b = request_data.b c = a + b res = {"res":c} return res if __name__ == '__main__': import uvicorn uvicorn.run(app=app, host="localhost", port=8000, workers=1)
三、Tornado的get/post接口服务
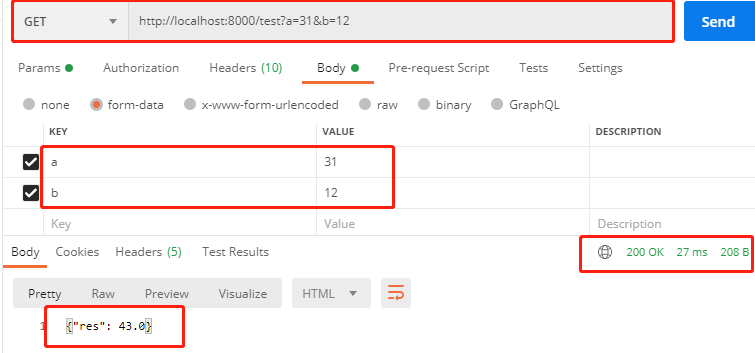
据称,Tornado比FastAPI更能承受高并发。get/post接口import tornado.httpserverimport tornado.ioloopimport tornado.optionsimport tornado.webfrom tornado import genfrom tornado.concurrent import run_on_executorfrom concurrent.futures import ThreadPoolExecutorimport timefrom tornado.options import define, optionsfrom tornado.platform.asyncio import to_asyncio_future,AsyncIOMainLoopfrom tornado.httpclient import AsyncHTTPClientimport asynciodefine("port", default=8000, help="just run", type=int)class MainHandler(tornado.web.RequestHandler): def main(self,a,b): c = float(a) + float(b) res = {"res":c} return res # get接口 def get(self): a = self.get_body_argument('a') b = self.get_body_argument('b') res = self.main(a,b) # 主程序计算 self.write(json.dumps(res,ensure_ascii=False)) # post接口 def post(self): a = self.get_body_argument('a') b = self.get_body_argument('b') res = int(a) * int(b) #主程序计算 self.write(json.dumps(res,ensure_ascii=False)) if __name__ == "__main__": #运行程序 application = tornado.web.Application([(r"/test", MainHandler),]) application.listen(8000,'localhost') tornado.ioloop.IOLoop.instance().start()get接口测试:
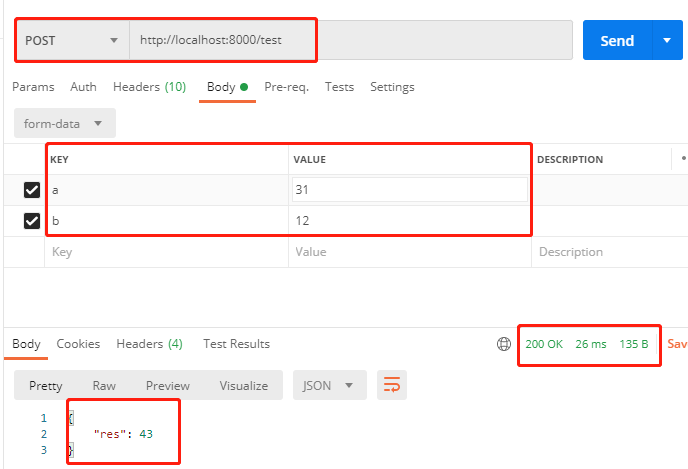
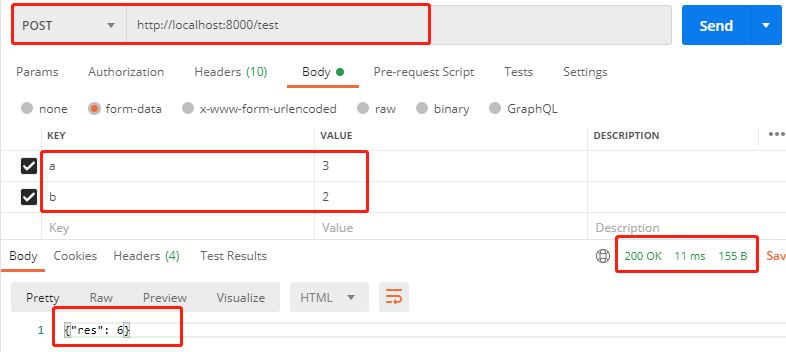
post接口测试:
今天也要
加油鸭!


 5100
5100

 被折叠的 条评论
为什么被折叠?
被折叠的 条评论
为什么被折叠?
 到【灌水乐园】发言


