一、安装DNS相关软件
bind、bind-utils、bind-libs(后两个包系统已经安装好了)
例:主DNS服务器
[root@ns1 ~]# rpm -qa | grep ^bind
bind-utils-9.9.4-18.el7.x86_64
bind-license-9.9.4-18.el7.noarch
bind-libs-9.9.4-18.el7.x86_64
bind-libs-lite-9.9.4-18.el7.x86_64
[root@ns1 ~]# yum -y install bind
从DNS服务器
[root@ns2 ~]# rpm -qa | grep ^bind
bind-utils-9.8.2-0.17.rc1.el6_4.6.x86_64
bind-libs-9.8.2-0.17.rc1.el6_4.6.x86_64
[root@ns2 ~]# yum -y install bind
二、修改配置文件
/etc/named.conf
例:[root@ns1 ~]# vim /etc/named.conf
	[root@ns1 ~]# cat /etc/named.conf
	options {
		listen-on port 53 { 192.168.148.111; };
		directory 	"/var/named";
		forwarders	{ 202.106.0.20; };  #查找的DNSIP地址(北京网通)
		recursion yes;  #允许递归查找

	};
	#以下“=====”内部分是搭建主服务器配置,不需要设置
	================================================================================
	zone "study.com" IN {
		type master;
		file "study.com.zone";
		allow-transfer { 192.168.148.112; };
	};

	zone "148.168.192.in-addr.arpa" IN {
		type master;
		file "192.168.148.arpa";
		allow-transfer { 192.168.148.112; };
	};
====================================================================================
	zone "." IN {  #根区域
		type hint;  #根
		file "named.ca";  #根配置文件
	};
[root@ns1 ~]# named-checkconf /etc/named.conf   #检查语法是否有错
#开启对应防火墙端口(tcp 53,udp 53)
[root@ns1 ~]# firewall-cmd --zone=public --add-port=53/tcp --permanent
success
[root@ns1 ~]# firewall-cmd --zone=public --add-port=53/udp --permanent
success
[root@ns1 ~]# systemctl restart firewalld    #重启防火墙
[root@ns1 ~]# systemctl restart named   #重启named服务
三、测试
例:例:[root@ceshi ~]# vim /etc/sysconfig/network-scripts/ifcfg-eth0   #修改网络配置文件(主要修改DNS)
[root@ceshi ~]# cat /etc/sysconfig/network-scripts/ifcfg-eth0
DEVICE=eth0
TYPE=Ethernet
UUID=735e12e2-0813-4507-aaa4-c8074be09be5
ONBOOT=yes
NM_CONTROLLED=yes
BOOTPROTO=static
HWADDR=00:0C:29:A3:5E:18
DEFROUTE=yes
PEERDNS=yes
PEERROUTES=yes
IPV4_FAILURE_FATAL=yes
IPV6INIT=no
NAME="System eth0"
IPADDR=192.168.148.10
NETMASK=255.255.255.0
GATEWAY=192.168.148.2
DNS1=192.168.148.111    #修改为主服务器IP地址
DNS2=192.168.148.112   #修改为从服务器IP地址
#重启服务
[root@ceshi ~]# /etc/init.d/network restart   #重启网络服务
Shutting down interface eth0:                              [  OK  ]
Shutting down loopback interface:                          [  OK  ]
Bringing up loopback interface:                            [  OK  ]
Bringing up interface eth0:  Determining if ip address 192.168.148.10 is already in use for device eth0...
                                                           [  OK  ]
	[root@ceshi ~]# nslookup www.jd.com  #测试京东网址
	Server:		192.168.148.111
	Address:	192.168.148.111#53

	Non-authoritative answer:
	www.jd.com	canonical name = www.jd.com.gslb.qianxun.com.
	www.jd.com.gslb.qianxun.com	canonical name = www.jdcdn.com.
	Name:	www.jdcdn.com
	Address: 124.200.55.1
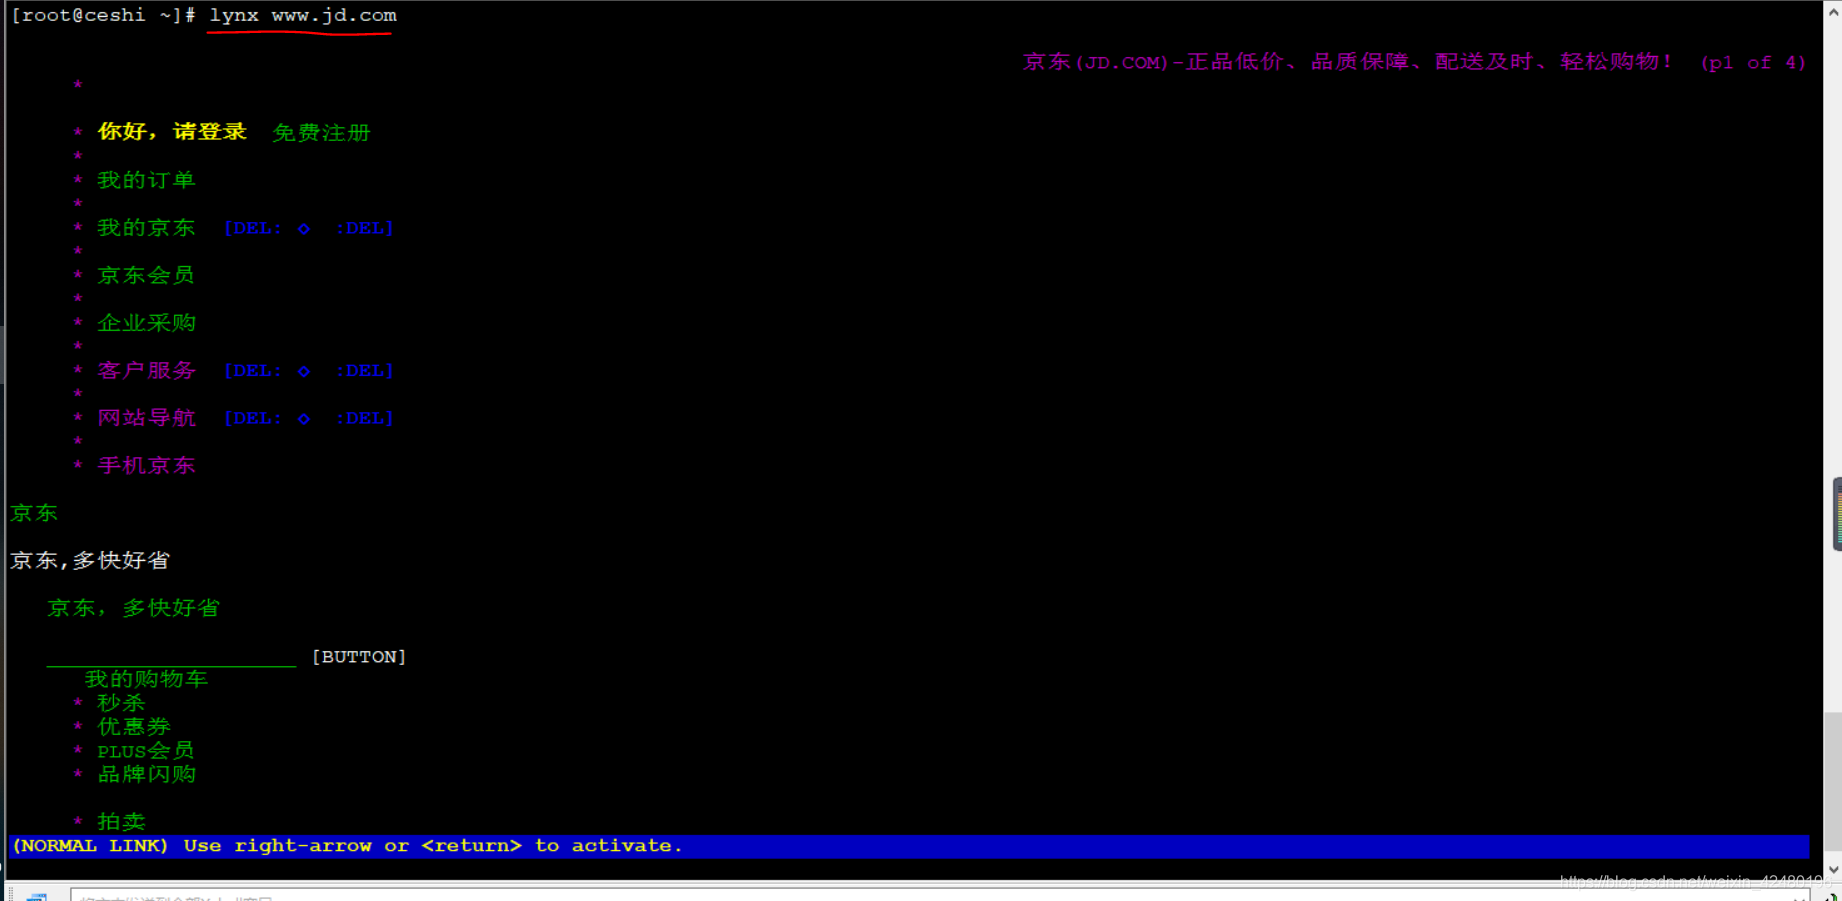
安装:lynx
例:[root@ceshi ~]# yum -y install lynx #用来查看网页
可以正常访问京东


 本文介绍了如何构建DNS缓存服务器。首先,分别在主DNS服务器和从DNS服务器上安装必要的bind软件包,接着详细说明了如何修改配置文件`/etc/named.conf`。最后,通过安装lynx进行测试,确保服务器能够正常访问京东等网站。


 1万+
1万+

 被折叠的 条评论
为什么被折叠?


