


一、rocky安装
需要注意在设置root用户密码时,勾选ssh远程连接
安装完成后直接用root登录
1. 网络配置
输入nmtui 进入网络配置界面
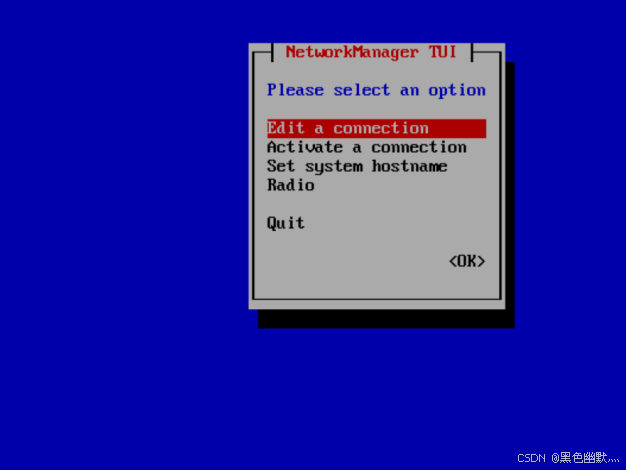
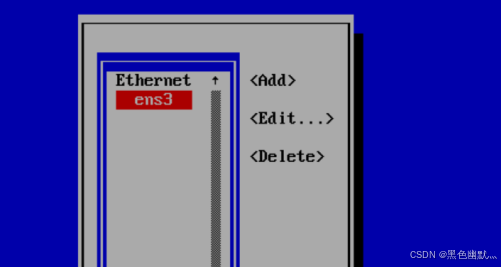
选择 Edit a connection,再选择接口 ens3
IPV4更改为Maual 手动模式
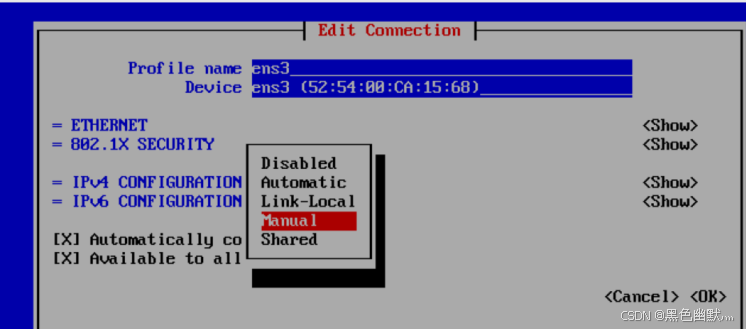
根据实际环境配置IP地址
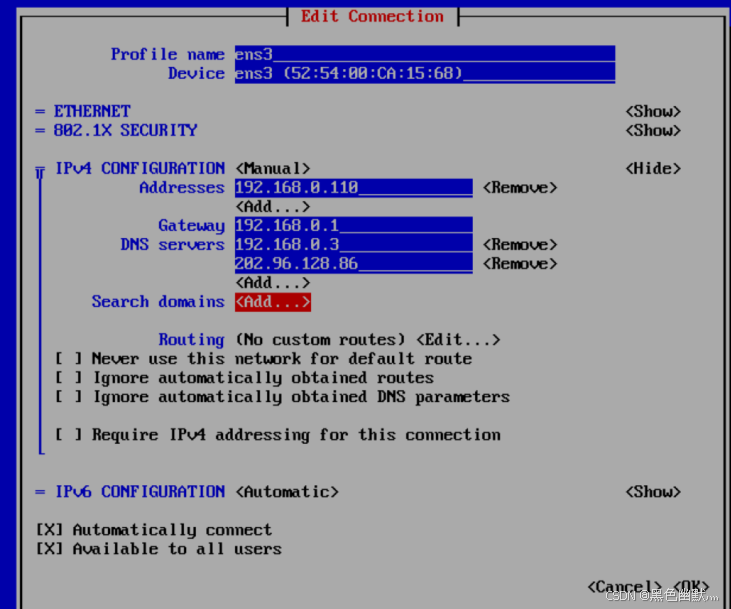
重启网络
systemctl restart NetworkManager
之后就可以通过工具远程操作了
2. 关闭防火墙和selinux
-- 关闭防火墙

systemctl stop firewalld

systemctl disable firewalld

-- 关闭selinux

setenforce 0

sed -i 's/SELINUX=enforcing/SELINUX=disabled/g' /etc/selinux/config
二、部署zabbix系统
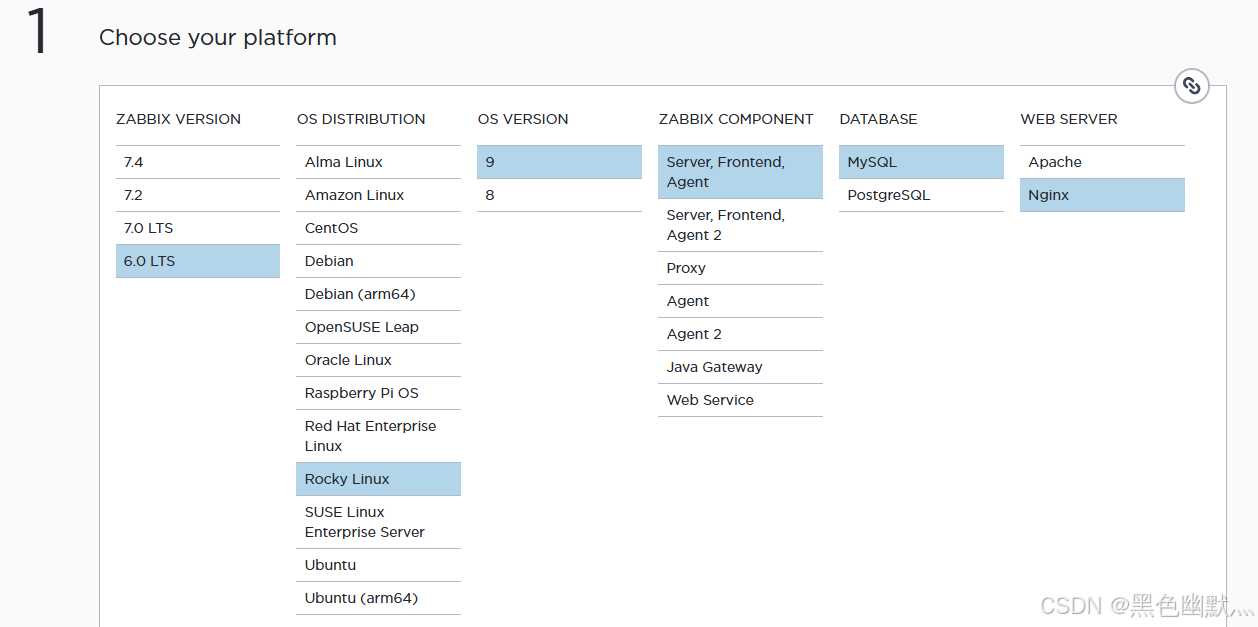
Download and install Zabbix 6.0 LTS for Rocky Linux 9, MySQL, Nginx
1. 安装zabbix软件库
rpm -Uvh https://repo.zabbix.com/zabbix/6.4/rhel/9/x86_64/zabbix-release-6.4-2.el9.noarch.rpm
dnf clean all

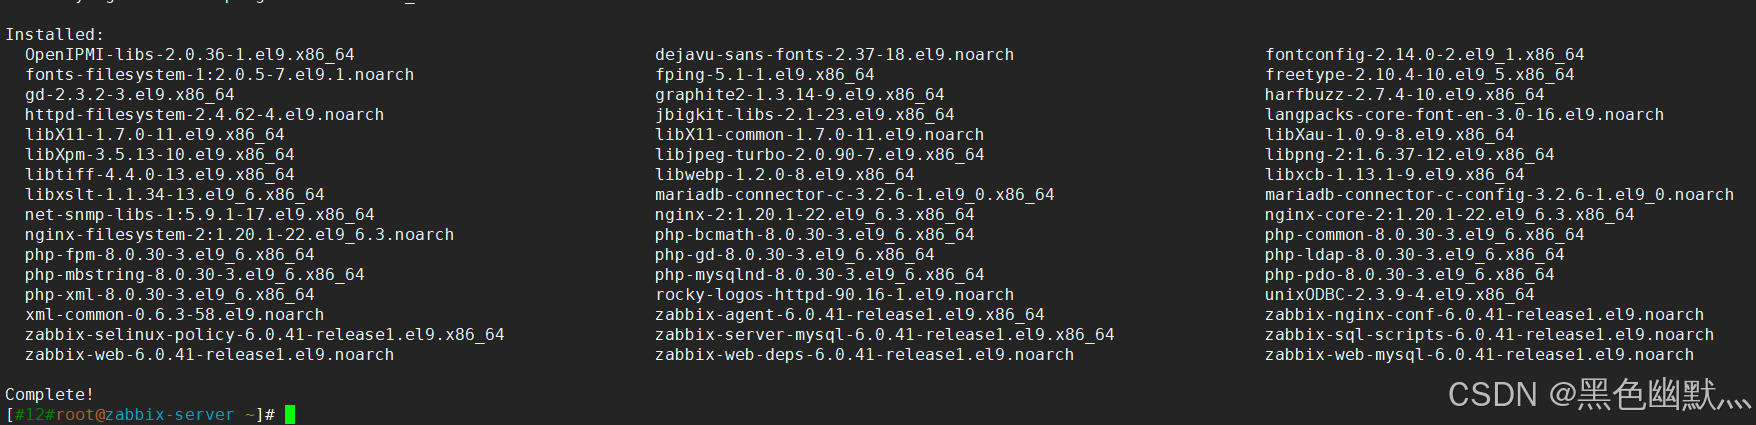
2.下载软件并安装
安装zabbix服务端、前端、nginx和客户端
dnf install zabbix-server-mysql zabbix-web-mysql zabbix-nginx-conf zabbix-sql-scripts zabbix-selinux-policy zabbix-agent langpacks-zh_CN
dnf install net-snmp-utils -y
三、安装数据库
1. 获取软件
访问MySQL

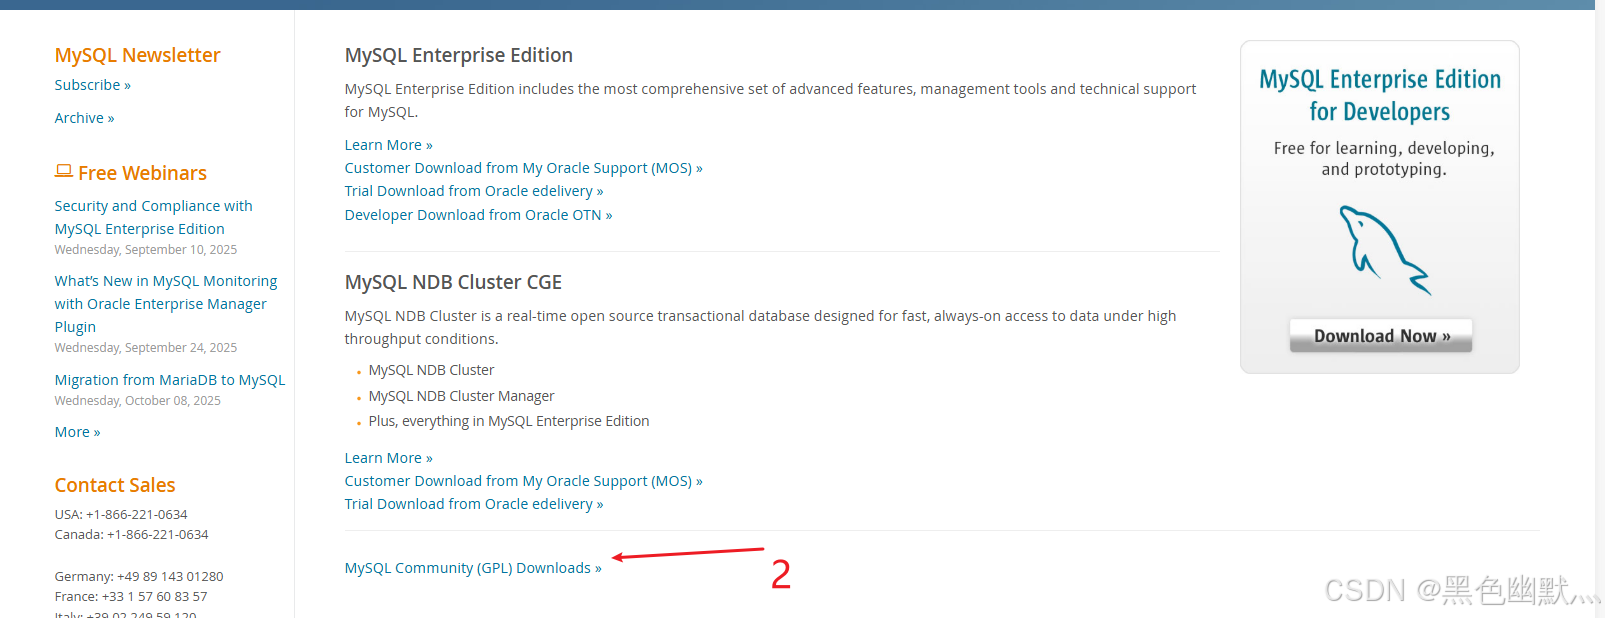
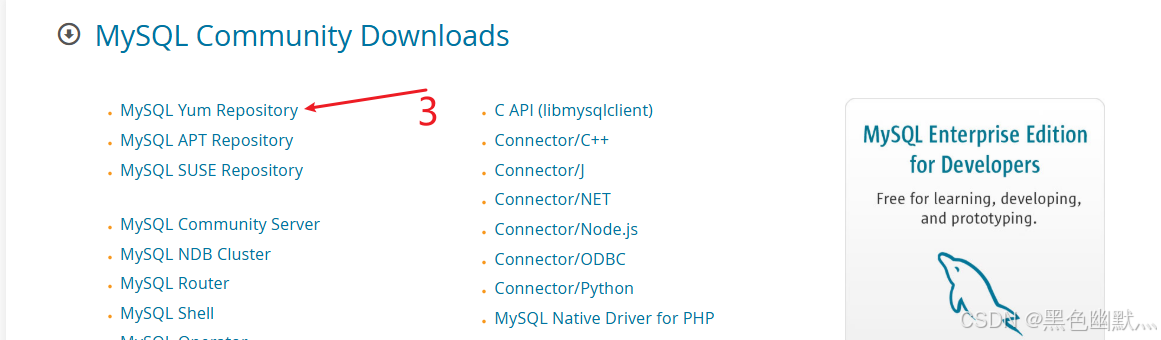
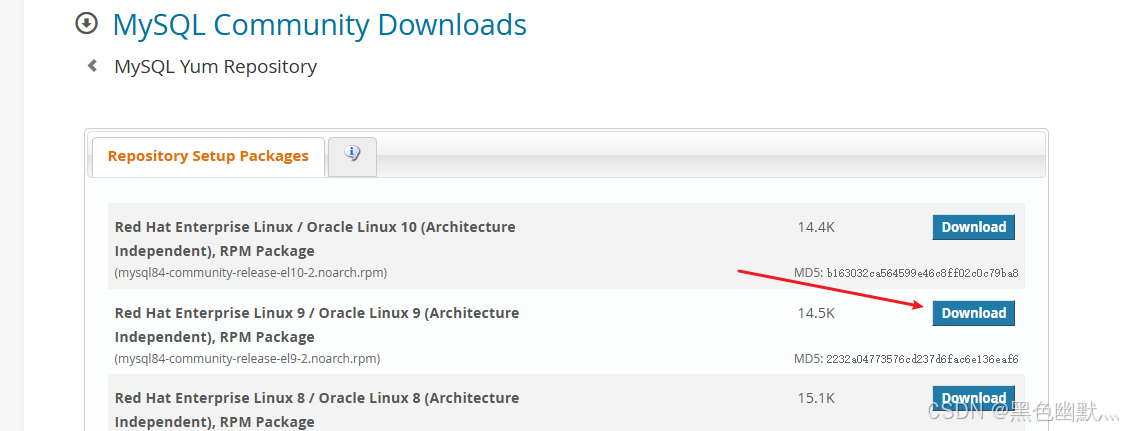
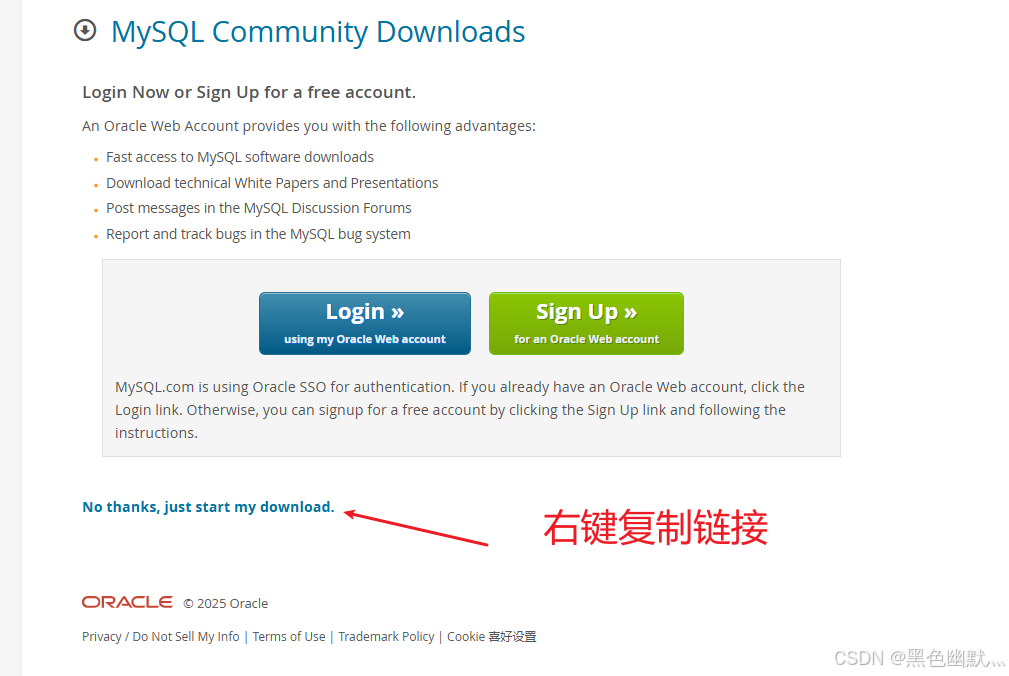

yum install https://dev.mysql.com/get/mysql84-community-release-el9-2.noarch.rpm
2. 修改下载版本
vim /etc/yum.repos.d/mysql-community.repo
![]()
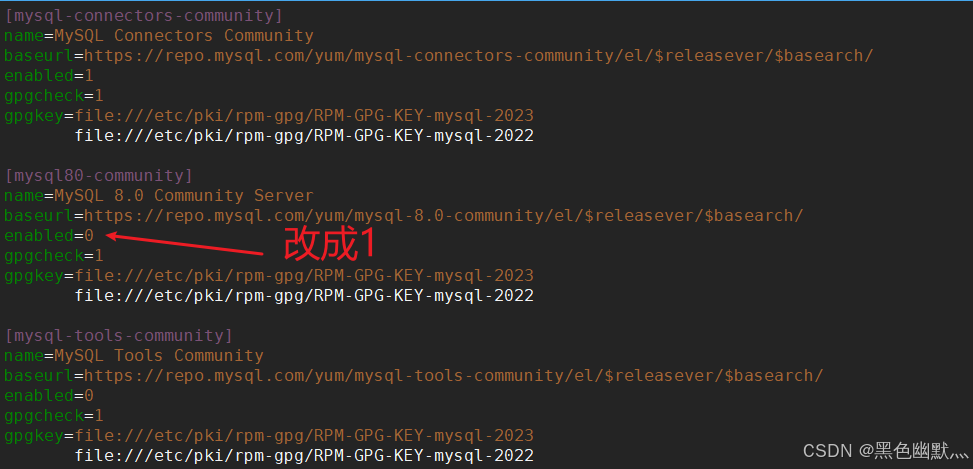
选择80版本和tools,其他版本都不用了,保存退出
3. 安装MySQL
yum install mysql-server

开启MySQL
systemctl start mysqld
获取数据库临时密码
grep password /var/log/mysqld.log

修改数据库密码
mysqladmin -uroot -p'4Yr7q,q/4?d<' password 'Lyu123!@#'

4. 导入zabbix数据
-- 先登录数据库
mysql -u root -p

create database zabbix character set utf8mb4 collate utf8mb4_bin;

create user zabbix@'%' identified by 'Lyu123!@#';

grant all privileges on zabbix.* to zabbix@'%';

SET GLOBAL log_bin_trust_function_creators = 1;

FLUSH PRIVILEGES;
导入数据,这个要等上一会
zcat /usr/share/zabbix-sql-scripts/mysql/server.sql.gz | mysql -uzabbix -p zabbix
四、修改配置文件
1. zabbix配置
vim /etc/zabbix/zabbix_server.conf
ListenPort=10051
DBHost=127.0.0.1
DBUser=zabbix
DBPassword=Lyu123!@#
DBName=zabbix
SourceIP=192.168.0.110
vim /etc/zabbix/zabbix_agentd.conf
SourceIP= 192.168.0.110

Server=192.168.0.110

ServerActive=192.168.0.110

Hostname=Zabbix-server

EnableRemoteCommands=1

LogRemoteCommands=1
2. nginx配置
vim /etc/nginx/nginx.conf
server内容 全部注释,直接复制即可
  # For more information on configuration, see:
#   * Official English Documentation: http://nginx.org/en/docs/
#   * Official Russian Documentation: http://nginx.org/ru/docs/

user nginx;
worker_processes auto;
error_log /var/log/nginx/error.log;
pid /run/nginx.pid;

# Load dynamic modules. See /usr/share/doc/nginx/README.dynamic.
include /usr/share/nginx/modules/*.conf;

events {
    worker_connections 1024;
}

http {
    log_format  main  '$remote_addr - $remote_user [$time_local] "$request" '
                      '$status $body_bytes_sent "$http_referer" '
                      '"$http_user_agent" "$http_x_forwarded_for"';

    access_log  /var/log/nginx/access.log  main;

    sendfile            on;
    tcp_nopush          on;
    tcp_nodelay         on;
    keepalive_timeout   65;
    types_hash_max_size 4096;

    include             /etc/nginx/mime.types;
    default_type        application/octet-stream;

    # Load modular configuration files from the /etc/nginx/conf.d directory.
    # See http://nginx.org/en/docs/ngx_core_module.html#include
    # for more information.
    include /etc/nginx/conf.d/*.conf;

#    server {
#        listen       80;
#        listen       [::]:80;
#        server_name  _;
#        root         /usr/share/nginx/html;
#
#        # Load configuration files for the default server block.
#        include /etc/nginx/default.d/*.conf;
#
#        error_page 404 /404.html;
#        location = /404.html {
#        }
#
#        error_page 500 502 503 504 /50x.html;
#        location = /50x.html {
#        }
#    }

# Settings for a TLS enabled server.
#
#    server {
#        listen       443 ssl http2;
#        listen       [::]:443 ssl http2;
#        server_name  _;
#        root         /usr/share/nginx/html;
#
#        ssl_certificate "/etc/pki/nginx/server.crt";
#        ssl_certificate_key "/etc/pki/nginx/private/server.key";
#        ssl_session_cache shared:SSL:1m;
#        ssl_session_timeout  10m;
#        ssl_ciphers PROFILE=SYSTEM;
#        ssl_prefer_server_ciphers on;
#
#        # Load configuration files for the default server block.
#        include /etc/nginx/default.d/*.conf;
#
#        error_page 404 /404.html;
#            location = /40x.html {
#        }
#
#        error_page 500 502 503 504 /50x.html;
#            location = /50x.html {
#        }
#    }

}
vim /etc/nginx/conf.d/zabbix.conf
修改监听为80
server {
        listen          80;
        server_name     _;

        root    /usr/share/zabbix;

        index   index.php;

        location = /favicon.ico {
                log_not_found   off;
        }

        location / {
                try_files       $uri $uri/ =404;
        }

        location /assets {
                access_log      off;
                expires         10d;
        }

        location ~ /\.ht {
                deny            all;
        }

        location ~ /(api\/|conf[^\.]|include|locale) {
                deny            all;
                return          404;
        }

        location /vendor {
                deny            all;
                return          404;
        }

        location ~ [^/]\.php(/|$) {
                fastcgi_pass    unix:/run/php-fpm/zabbix.sock;
                fastcgi_split_path_info ^(.+\.php)(/.+)$;
                fastcgi_index   index.php;

                fastcgi_param   DOCUMENT_ROOT   /usr/share/zabbix;
                fastcgi_param   SCRIPT_FILENAME /usr/share/zabbix$fastcgi_script_name;
                fastcgi_param   PATH_TRANSLATED /usr/share/zabbix$fastcgi_script_name;

                include fastcgi_params;
                fastcgi_param   QUERY_STRING    $query_string;
                fastcgi_param   REQUEST_METHOD  $request_method;
                fastcgi_param   CONTENT_TYPE    $content_type;
                fastcgi_param   CONTENT_LENGTH  $content_length;

                fastcgi_intercept_errors        on;
                fastcgi_ignore_client_abort     off;
                fastcgi_connect_timeout         60;
                fastcgi_send_timeout            180;
                fastcgi_read_timeout            180;
                fastcgi_buffer_size             128k;
                fastcgi_buffers                 4 256k;
                fastcgi_busy_buffers_size       256k;
                fastcgi_temp_file_write_size    256k;
        }
}
五、启动服务
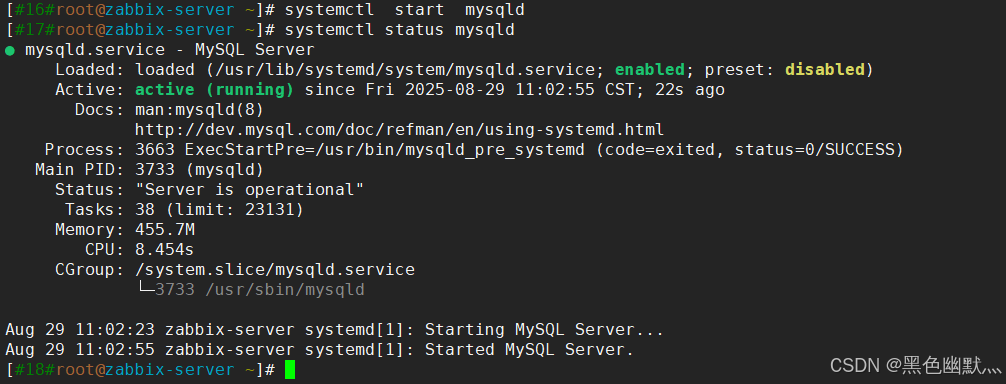
systemctl start zabbix-server zabbix-agent nginx php-fpm
systemctl enable zabbix-server zabbix-agent nginx php-fpm

开启agent服务
systemctl start zabbix-agent
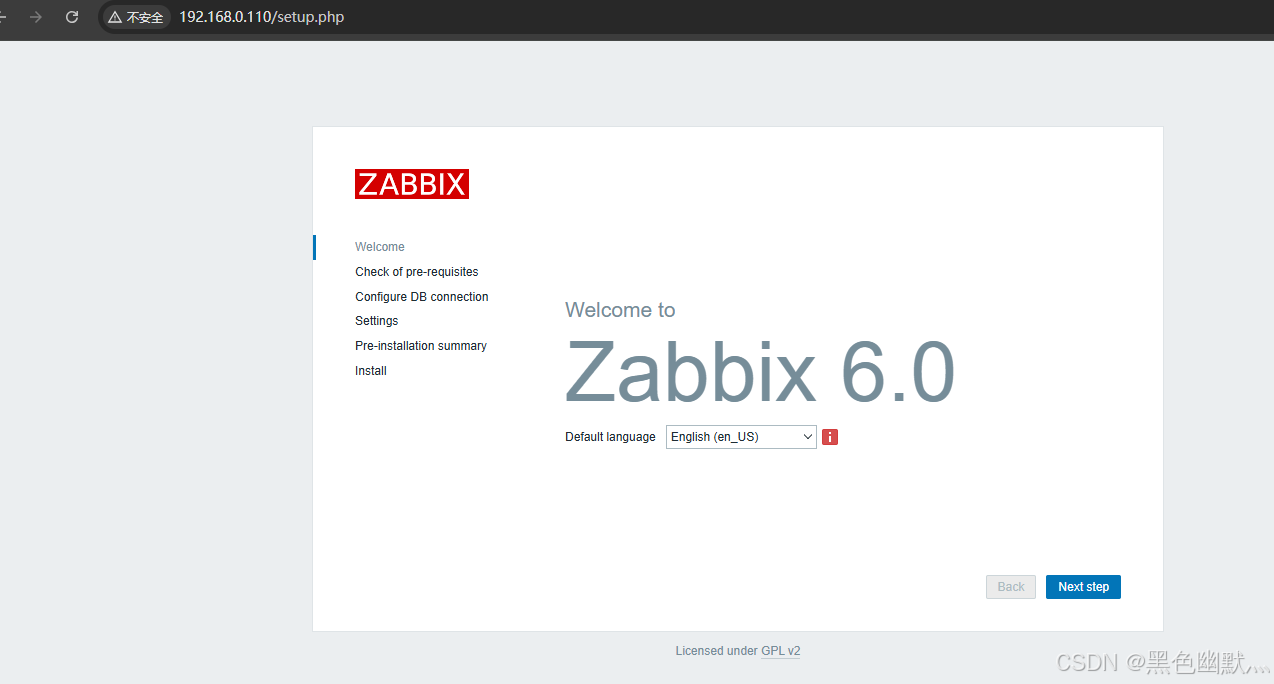
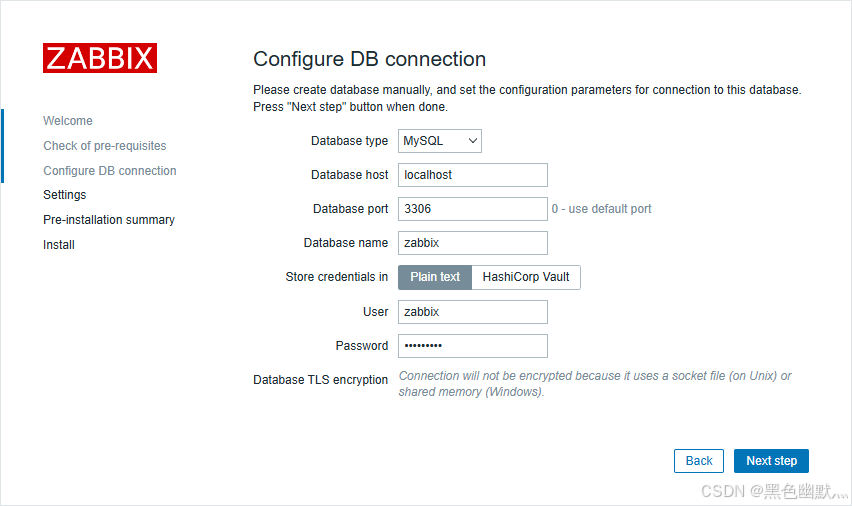
六、Web页面配置
访问192.168.0.110
填写数据库信息
使用管理员账户(默认用户名为 Admin,密码为 zabbix)登录
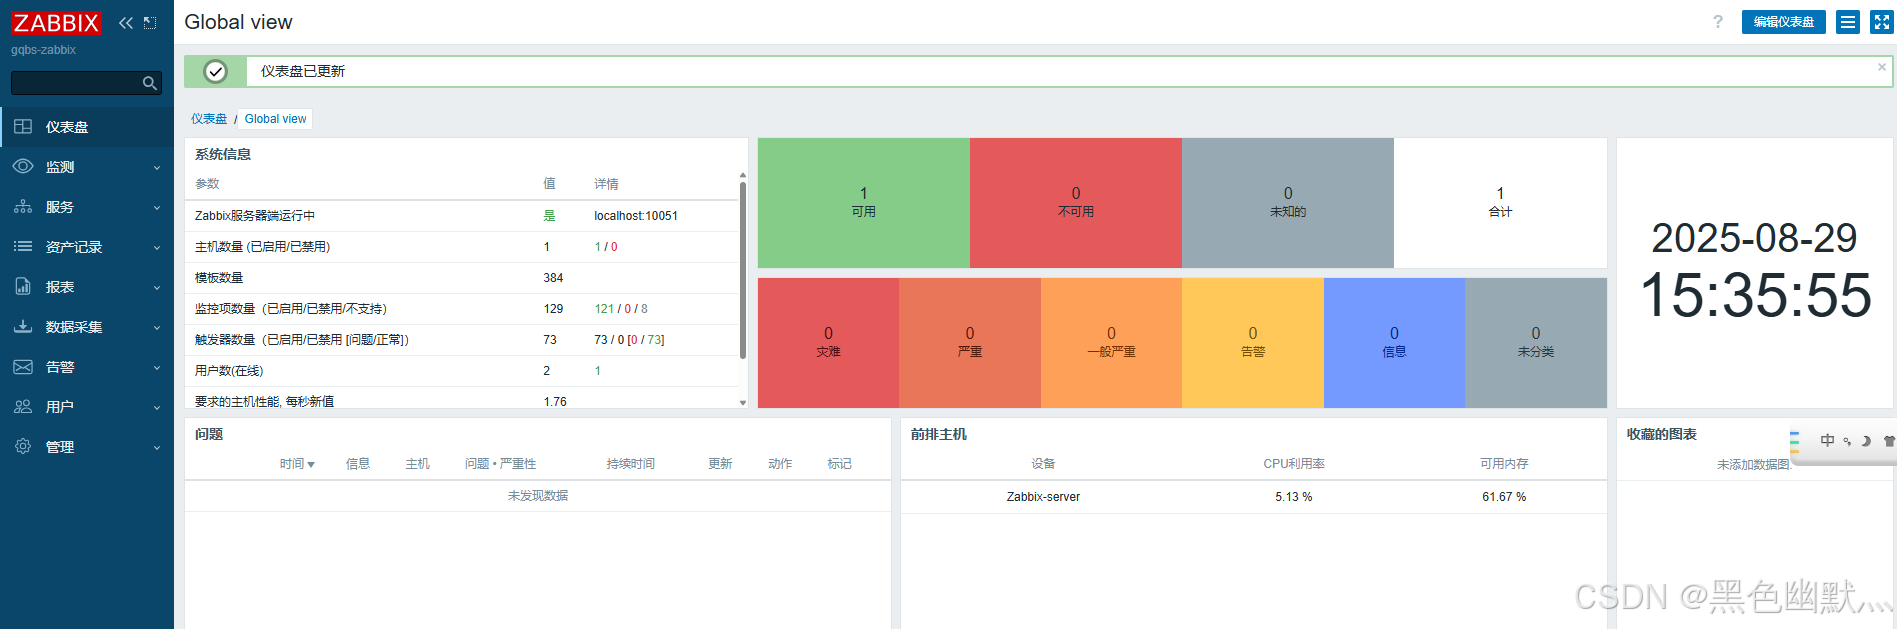
至此zabbix6.4 就部署好啦
扩展:
因为我也是刚刚接触zabbix的新手小白
这次安装完之后 选不到中文。具体原因不明,解决方法如下:
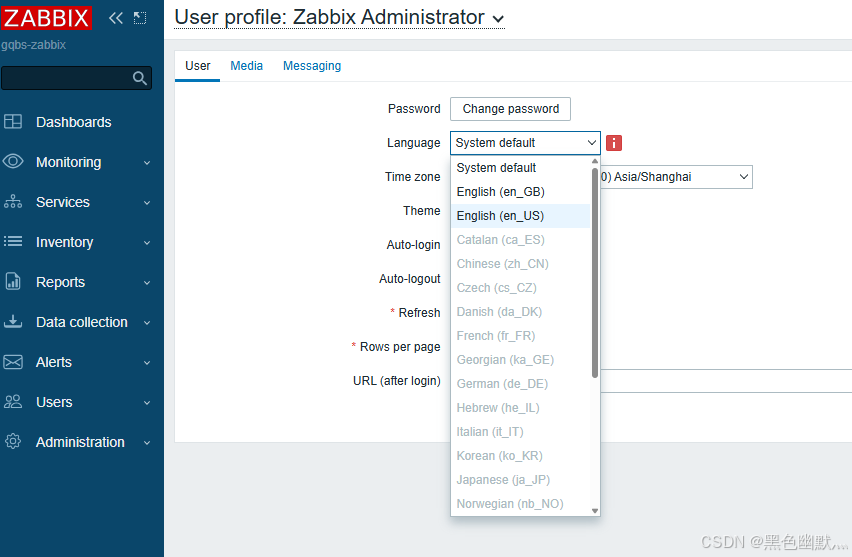
确认安装语言包
yum install langpacks-zh_CN.noarch
dnf install glibc-langpack-zh -y
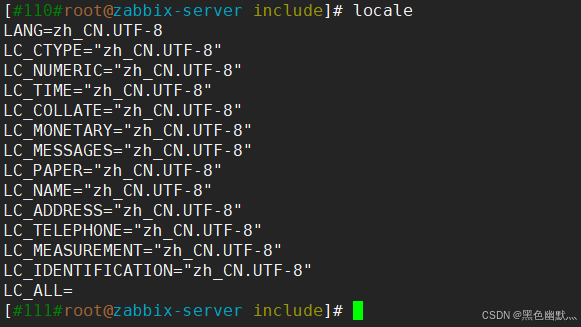
检查系统中 可用的语言环境
locale -a | grep "zh_CN"

有zh_CN.UTF-8代表系统已存在中文环境
如果没有,则手动生成
localedef -c -f UTF-8 -i zh_CN zh_CN.UTF-8
验证生成结果
locale -a | grep "zh_CN"
编辑
vi /etc/locale.conf
内容:
LANG=zh_CN.UTF-8
LC_ALL=zh_CN.UTF-8
生效:
source /etc/locale.conf
验证:
locale
七、添加agent客户端
1. 获取anget软件源
rpm -Uvh https://mirrors.aliyun.com/zabbix/zabbix/6.4/rhel/7/x86_64/zabbix-agent-6.4.10-release1.el7.x86_64.rpm
yum clean all
yum makecache
2. 安装&启用
yum install zabbix-agent
systemctl restart zabbix-agent
systemctl enable zabbix-agent
3. 调整配置
编辑 /etc/sudoers
visudo
文档内添加zabbix记录,用于免密
root  ALL=(ALL)   ALL
zabbix  ALL=(ALL)   NOPASSWD:ALL
vim /etc/zabbix/zabbix_agentd.conf
--用于被动模式,server会来找agent拿数据
Server=192.168.0.110

--用于主动模式,agent会主动向这个地址发数据
ServerActive=192.168.0.110

Hostname=192.168.0.16
-- 这个填agent的

ListenPort=10050

LogFileSize=5
--设置单个日志文件的最大值为5M
主动模式更适合监控设备较多的场景,减轻server的压力
如果不采取主动模式,则无需配置ServerActive,否则agent日志会一直报错
防火墙放行
firewall-cmd --add-port=10050/tcp --permanent
firewall-cmd --reload
检查端口监听情况
netstat -tuln | grep 10050
检查两端服务状态
systemctl status zabbix-server
systemctl status zabbix-agent
4.server端测试
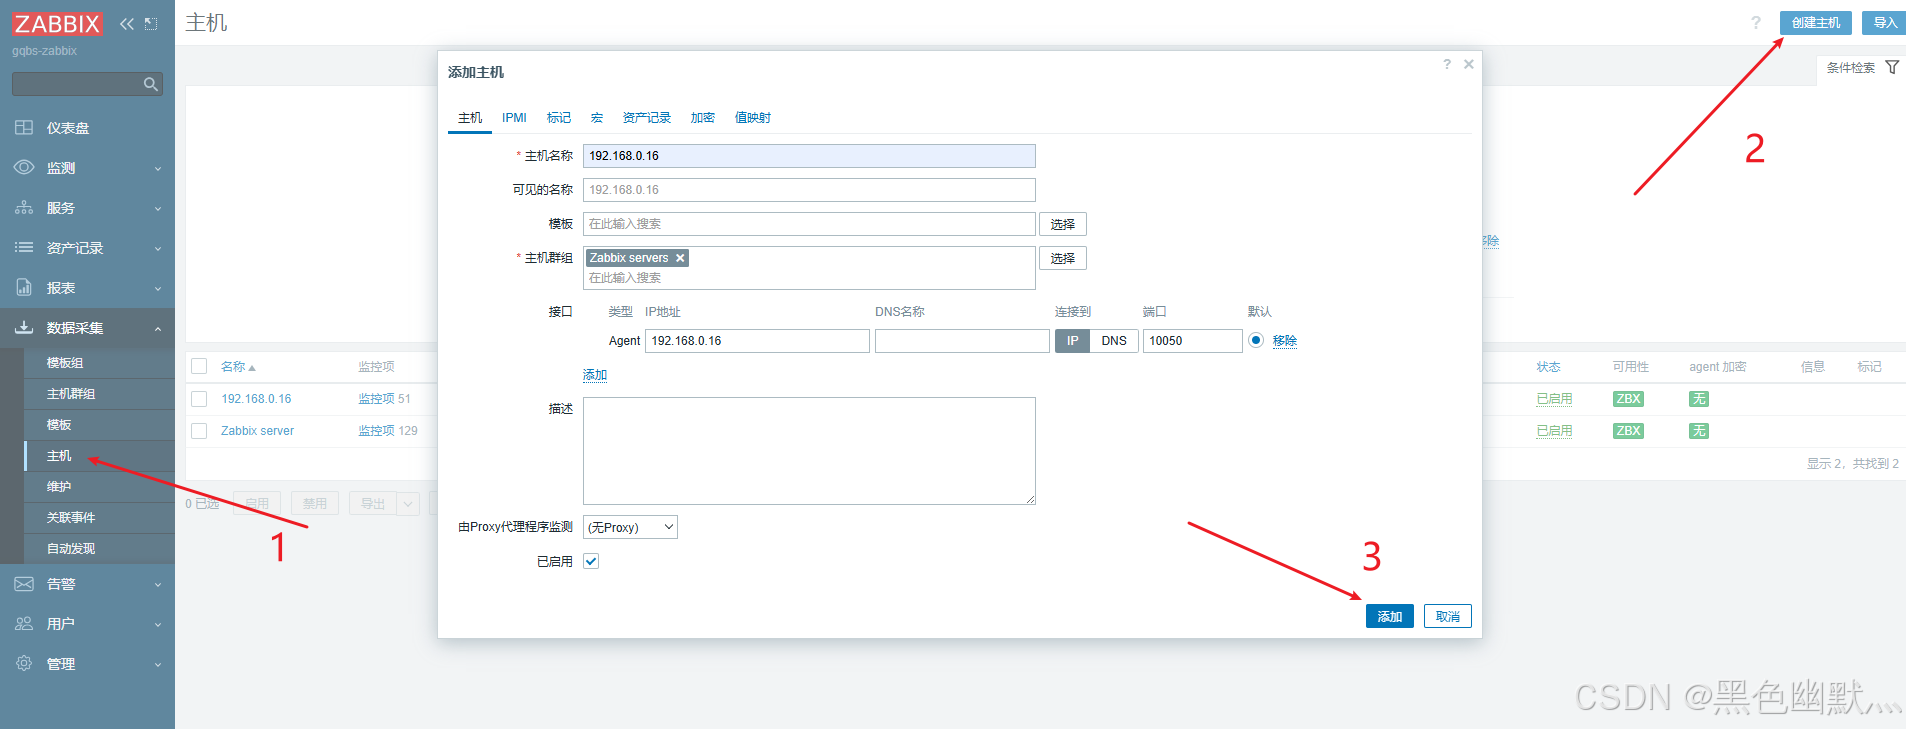
Web页面添加主机、主机群组、选择模板
安装调试工具
yum install zabbix-get
zabbix_get -s 192.168.0.16 -k "agent.ping"
输出结果为1 为连接成功

若连接异常,可检查一下日志
tail -f /var/log/zabbix/zabbix_agentd.log
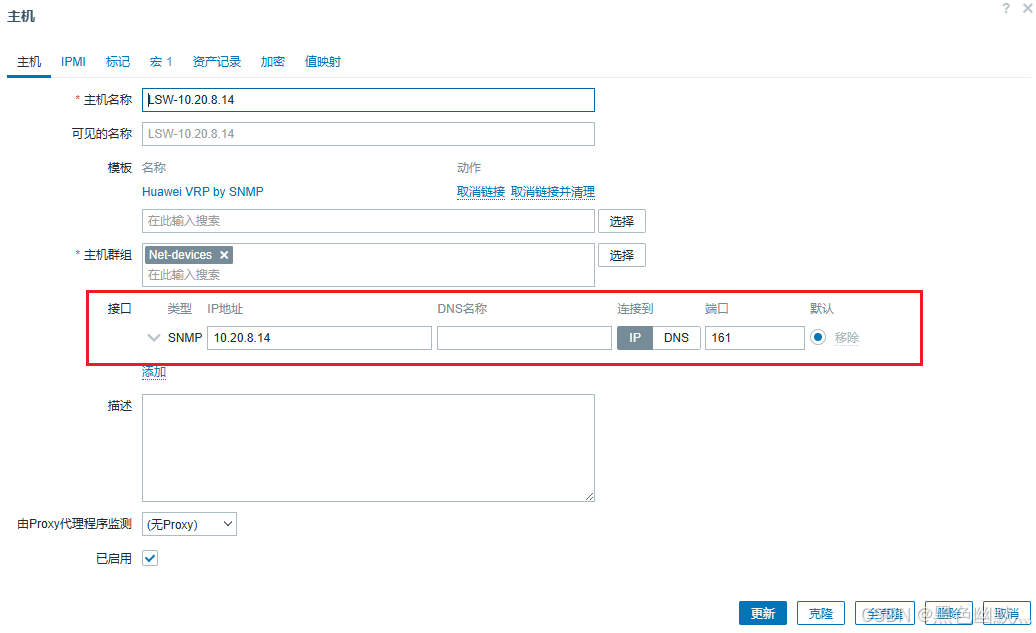
5. 添加华为交换机
以下场景安全性低,仅用于内网环境
华为交换机配置:
snmp-agent                              //开启SNMP,默认开启V3
snmp-agent community write  huawei14      //配置写入团体属性
snmp-agent community read huawei14       //配置读取团体属性
snmp-agent sys-info version all        //注意SNMP版本,这里打开全部版本
交换机配置以上命令即可,NMS可以从Agent读取告警信息。


display snmp-agent sys-info        //查看SNMP版本
display snmp-agent target-host     //查看网管配置信息
之后在web端,正常添加主机,注意接口和宏

2025-9-15更新
今天在添加一台华为的AC设备时,怎么都连不上
后来把华为设备的端口全部对SNMP开放就行了
[AC6507S]snmp-agent protocol source-interface all
SERVER端测试:
[#15#root@zabbix-server ~]# snmpwalk -v 2c -c huawei14 10.20.101.3 sysLocation.0
SNMPv2-MIB::sysLocation.0 = STRING: Shenzhen China
6.添加Windows设备
在这个地址下载Windows版本的agent
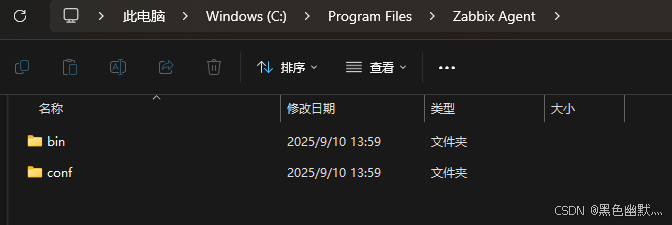
解压后会得到bin与conf两个文件夹,把他移动到 C:\Program Files\Zabbix Agent\
进入bin文件夹注册服务
C:\Program Files\Zabbix Agent\bin>zabbix_agentd.exe --install --config "C:\Program Files\Zabbix Agent\conf\zabbix_agentd.conf"

启动服务
net start "Zabbix Agent"
查看监听情况
netstat -an | findstr 10050

八、回顾
现在zabbix已经安装部署完成,回顾一下操作
1.准备工作,安装rocky系统
2.查找并添加软件仓库,如果本文中的链接已失效,可到网址中查找
3.安装zabbix相关的组件,server、agent、mysql、nginx、web和中文包
4.配置数据库、导入zabbix数据、启用zabbix服务
5.配置Web页面、登录、添加监控主机
希望本文能够对我们有所帮助。


 832
832

 被折叠的 条评论
为什么被折叠?
被折叠的 条评论
为什么被折叠?
 到【灌水乐园】发言


