


关于在centos7中设置Nginx开机自启动,我们可以通过编写开机自启动shell脚本来解决。
测试环境
操作系统:centos7 64位 1611
Nginx版本: 1.11.10
本机Nginx安装时的配置参数
./configure \
--prefix=/usr/local/nginx \
--pid-path=/usr/local/nginx/logs/nginx.pid \
--lock-path=/var/lock/nginx.lock \
--error-log-path=/var/log/nginx/error.log \
--http-log-path=/var/log/nginx/access.log \
--with-http_gzip_static_module \
--http-client-body-temp-path=/var/temp/nginx/client \
--http-proxy-temp-path=/var/temp/nginx/proxy \
--http-fastcgi-temp-path=/var/temp/nginx/fastcgi \
--http-uwsgi-temp-path=/var/temp/nginx/uwsgi \
--http-scgi-temp-path=/var/temp/nginx/scgi
编写脚本
[root@localhost]# vim /etc/init.d/nginx
以下是脚本内容
#!/bin/bash
# nginx Startup script for the Nginx HTTP Server
# it is v.0.0.2 version.
# chkconfig: - 85 15
# description: Nginx is a high-performance web and proxy server.
# It has a lot of features, but it's not for everyone.
# processname: nginx
# pidfile: /usr/local/nginx/logs/nginx.pid
# config: /usr/local/nginx/conf/nginx.conf
nginxd=/usr/local/nginx/sbin/nginx
nginx_config=/usr/local/nginx/conf/nginx.conf
nginx_pid=/usr/local/nginx/logs/nginx.pid
RETVAL=0
prog="nginx"
# Source function library.
. /etc/rc.d/init.d/functions
# Source networking configuration.
. /etc/sysconfig/network
# Check that networking is up.
[ "${NETWORKING}" = "no" ] && exit 0
[ -x $nginxd ] || exit 0
# Start nginx daemons functions.
start() {
if [ -e $nginx_pid ];then
echo "nginx already running...."
exit 1
fi
echo -n $"Starting $prog: "
daemon $nginxd -c ${nginx_config}
RETVAL=$?
echo
[ $RETVAL = 0 ] && touch /var/lock/subsys/nginx
return $RETVAL
}
# Stop nginx daemons functions.
stop() {
echo -n $"Stopping $prog: "
killproc $nginxd
RETVAL=$?
echo
[ $RETVAL = 0 ] && rm -f /var/lock/subsys/nginx /usr/local/nginx/logs/nginx.pid
}
# reload nginx service functions.
reload() {
echo -n $"Reloading $prog: "
#kill -HUP `cat ${nginx_pid}`
killproc $nginxd -HUP
RETVAL=$?
echo
}
# See how we were called.
case "$1" in
start)
start
;;
stop)
stop
;;
reload)
reload
;;
restart)
stop
start
;;
status)
status $prog
RETVAL=$?
;;
*)
echo $"Usage: $prog {start|stop|restart|reload|status|help}"
exit 1
esac
exit $RETVAL
:wq 保存并退出
*对于shell脚本中的部分文件路径请修改成你主机上nginx的相应路径,例如: nginxd=/usr/local/nginx/sbin/nginx nginx_config=/usr/local/nginx/conf/nginx.conf nginx_pid=/usr/local/nginx/logs/nginx.pid 以上都是本测试机nginx的相应路径 还有nginx的pid默认路径是nginx安装目录的logs/nginx.pid里。
设置文件的访问权限
[root@localhost]# chmod a+x /etc/init.d/nginx
(a+x ==> all user can execute 所有用户可执行)
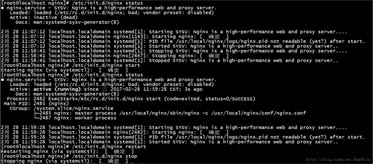
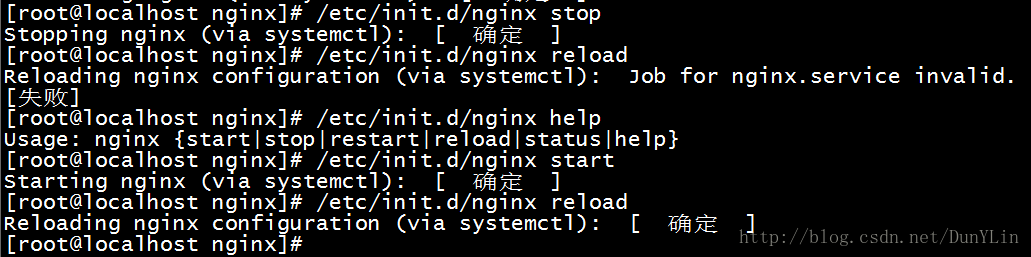
这样在控制台就很容易的操作nginx了:查看Nginx当前状态、启动Nginx、停止Nginx、重启Nginx…
usage : nginx {start|stop|restart|reload|status|help}
如果修改了nginx的配置文件nginx.conf,也可以使用上面的命令重新加载新的配置文件并运行,可以将此命令加入到rc.local文件中,这样开机的时候nginx就默认启动了
加入到rc.local文件中
[root@localhost]# vi /etc/rc.local
加入一行 /etc/init.d/nginx start 保存并退出,下次重启会生效。
注意
如果开机后发现自启动脚本没有执行,你要去确认一下rc.local这个文件的访问权限是否是可执行的,因为rc.local默认是不可执行的。
修改rc.local访问权限,增加可执行权限
[root@localhost]# chmod +x /etc/rc.d/rc.local
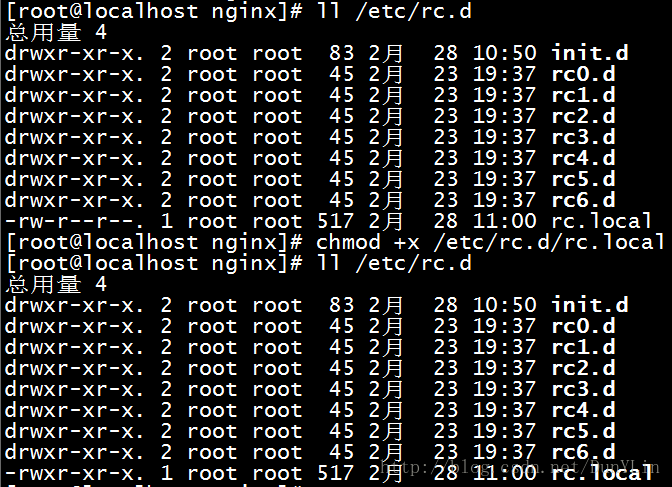
现在重启后,自启动脚本就能正常执行了。
可以通过以下命令来查看nginx进行的运行情况
[root@localhost]# ps aux | grep nginx

以上就是本文的全部内容,希望对大家的学习有所帮助,也希望大家多多支持脚本之家。


 被折叠的 条评论
为什么被折叠?
被折叠的 条评论
为什么被折叠?
 到【灌水乐园】发言


