


 文章介绍了如何在Qt中利用QGraphicsBlurEffect实现图形的模糊效果,以及通过源码分析了解到其实现原理,主要是通过QImage进行模糊处理。作者还探讨了不能直接使用QPainter进行模糊的原因,并提供了从Qt源码中提取模糊算法的代码示例。
引言
发光效果通常是通过在原图层后面叠加原始一层高亮的模糊图层实现,常用的模式方式则是高斯模糊。对图片的处理第一个想到的就是OpenCV,但是为了当初的模糊效果给工程中加入OpenCV似乎并不合适,当然也是因为本人的OpenCV并不熟悉。
那么Qt是否有现成的类可以去实现模糊效果呢?很庆幸,答案是有的。可以通过QGraphicsBlurEffect去实现,效果如下图所示:
原图:

模糊后的效果图:
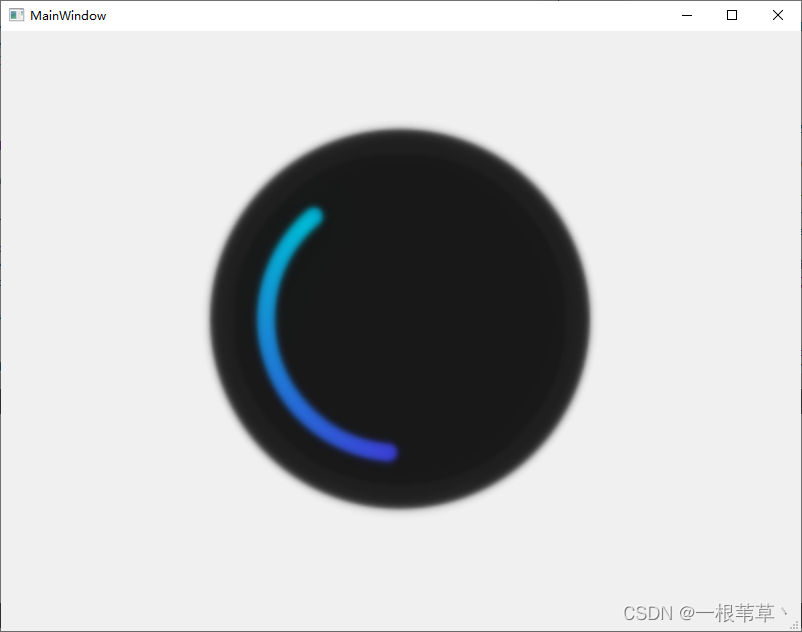
调用代码也很简单,如下所示:
    auto blur_effect = new QGraphicsBlurEffect();
    blur_effect->setBlurRadius(5);
    ui->label->setGraphicsEffect(blur_effect);
构造QGraphicsBlurEffect,设置模糊的半径,再为需要模糊效果的组件设置效果。那么问题来了,既然模糊实现这么简单,那为什么会有这一篇博文呢?
第一个问题就是QGraphicsBlurEffect的模糊效果是对整个Widget生效,也就是如上图中展示的一样,但圆弧和背景圆写在同一个Widget中,就不能对单个圆弧进行模糊。
这里当然可以将上面的Widget拆分成两个,通过reszieEvent的方式实时调整两个组件的布局,但迫使我无法使用这个类的另一个另一个,就是Qt的封装实在是太好了,用户不用考虑什么样的Widget的都能够适配,且不需要关心什么时候去触发刷新,QGraphicsBlurEffect在设计模式上是一个装饰者,它并不能脱离QWidget存在,也就是它并不能在QPainter中调用,在需要导出的场景下它的使用是受限的。
那么如果我们现在QPainter中实现部分图形的模糊,那是不是还得使用OpenCV,倔强如我给出的答案当然是不。回到QGraphicsBlurEffect这个类,让我们相信一下Qt是怎么实现适配所有Widget的模糊的,有没有可能它是通过Widget截图的方式生成了一张模糊图,再去绘制在其装饰的组件上的。
为了确认这个猜想,我们需要去阅读Qt源码。在翻看说明文档的过程中,发现QGraphicsBlurEffect的父类QGraphicsEffect有一个纯函数draw,如下所示:
void QGraphicsEffect::draw(QPainter *painter)
This pure virtual function draws the effect and is called whenever the source needs to be drawn.
Reimplement this function in a QGraphicsEffect subclass to provide the effect’s drawing implementation, using painter.
那么顾名思义,这里必定是模糊效果的关键,那么我们调试一下源码,跟踪调用堆栈:
void QGraphicsBlurEffect::draw(QPainter *painter)
{


    // 省略
    d->filter->draw(painter, offset, pixmap);
}
看的d指针中有滤波类filter,那十有八九应该是这里实现的,进行往下跟:
void QPixmapBlurFilter::draw(QPainter *painter, const QPointF &p, const QPixmap &src, const QRectF &rect) const
{


    // 省略
    qt_blurImage(painter, srcImage, scaledRadius, (d->hints & QGraphicsBlurEffect::QualityHint), false);
    // 省略
}
这里面看到有一个模糊函数qt_blurImage,入参是painter和srcImage,那应该就是这个函数实现的模糊,源码如下:
Q_WIDGETS_EXPORT void qt_blurImage(QPainter *p, QImage &blurImage, qreal radius, bool quality, bool alphaOnly, int transposed = 0)
{


    if (blurImage.format() != QImage::Format_ARGB32_Premultiplied
        && blurImage.format() != QImage::Format_RGB32)
    {


        blurImage = blurImage.convertToFormat(QImage::Format_ARGB32_Premultiplied);
    }

    qreal scale = 1;
    if (radius >= 4 && blurImage.width() >= 2 && blurImage.height() >= 2) {


        blurImage = qt_halfScaled(blurImage);
        scale = 2;
        radius *= qreal(0.5);
    }

    if (alphaOnly)
        expblur<12, 10, true>(blurImage, radius, quality, transposed);
    else
        expblur<12, 10, false>(blurImage, radius, quality, transposed);

    if (p) {


        p->scale(scale, scale);
        p->setRenderHint(QPainter::SmoothPixmapTransform);
        p->drawImage(QRect(QPoint(0, 0), blurImage.size() / blurImage.devicePixelRatioF()), blurImage);
    }
}
可以看到,这个就是我们需要的代码,QPainter作为入参对于我们来说并不需要,我们只需要能把原始图像转换成模糊图就可以,也就是只关心QImage,需要模糊的图层通过QPainter绘制在QImage中,调用该函数进行模糊,再将模糊图通过drawImage绘制出来就完成图形的模糊效果。
代码实现
上面的原理我们已经知道,由于QPixmapBlurFilter并未对外开发,那么我们接下来要做的就是将qt_blurImage相关代码从Qt源码中摘出来,代码如下:
// qt source code, from qmemrotate.cpp & qpixmapfilter.cpp
static const int tileSize = 32;

template <class T>
static inline void qt_memrotate270_tiled_unpacked(const T *src, int w, int h, int sstride, T *dest, int dstride) {


    const int numTilesX = (w + tileSize - 1) / tileSize;
    const int numTilesY = (h + tileSize - 1) / tileSize;

    for (int tx = 0; tx < numTilesX; ++tx) {


        const int startx = tx * tileSize;
        const int stopx  = qMin(startx + tileSize, w);

        for (int ty = 0; ty < numTilesY; ++ty) {


            const int starty = h - 1 - ty * tileSize;
            const int stopy  = qMax(starty - tileSize, 0);

            for (int x = startx; x < stopx; ++x) {


                T *d          = (T *)((char *)dest + x * dstride) + h - 1 - starty;
                const char *s = (const char *)(src + x) + starty * sstride;
                for (int y = starty; y >= stopy; --y) {


                    *d++ = *(const T *)s;
                    s -= sstride;
                }
            }
        }
    }
}

template <class T>
static inline void qt_memrotate270_template(const T *src, int srcWidth, int srcHeight, int srcStride, T *dest, int dstStride) {


    //#if Q_BYTE_ORDER == Q_LITTLE_ENDIAN
    //    // packed algorithm assumes little endian and that sizeof(quint32)/sizeof(T) is an integer
    //    if (sizeof(quint32) % sizeof(T) == 0)
    //        qt_memrotate270_tiled<T>(src, srcWidth, srcHeight, srcStride, dest, dstStride);
    //    else
    //#endif
    qt_memrotate270_tiled_unpacked<T>(src, srcWidth, srcHeight, srcStride, dest, dstStride);
}

template <>
inline void qt_memrotate270_template<quint32>(const quint32 *src, int w, int h, int sstride, quint32 *dest, int dstride) {


    // packed algorithm doesn't have any benefit for quint32
    qt_memrotate270_tiled_unpacked(src, w, h, sstride, dest, dstride);
}

template <>
inline void qt_memrotate270_template<quint64>(const quint64 *src, int w, int h, int sstride, quint64 *dest, int dstride) {


    qt_memrotate270_tiled_unpacked(src, w, h, sstride, dest, dstride);
}

template <class T>
static inline void qt_memrotate90_tiled_unpacked(const T *src, int w, int h, int sstride, T *dest, int dstride) {


    const int numTilesX = (w + tileSize - 1) / tileSize;
    const int numTilesY = (h + tileSize - 1) / tileSize;

    for (int tx = 0; tx < numTilesX; ++tx) {


        const int startx = w - tx * tileSize - 1;
        const int stopx  = qMax(startx - tileSize, 0);

        for (int ty = 0; ty < numTilesY;
最低0.47元/天 解锁文章


 357
357

 被折叠的 条评论
为什么被折叠?
被折叠的 条评论
为什么被折叠?
 到【灌水乐园】发言


