


 本文详细介绍了AngularJS中指令的scope特性,包括继承、隔离及其绑定策略,如@、=和&。通过实例展示了如何通过scope实现父子作用域之间的数据交互,以及如何通过transclude、compile、link和controller等功能控制指令内容和行为。内容涵盖AngularJS的高级用法,适合进阶学习。
1
2
3
4
5
6
7
8
9
10
11
12
13
14
15
16
17
18
19
20
21
22
23
24
25
AngularJS入门学习var app = angular.module('myApp', []);
app.directive('helloWorld', function() {
return {
restrict: 'E',
templateUrl: 'hello.html',
replace: true
};
});
app.run(["$templateCache", function($templateCache) {
$templateCache.put("hello.html",
"
Hi 我是林炳文~~~
}]);
7.scope
(1)默认值false。表示继承父作用域;
(2)true。表示继承父作用域,并创建自己的作用域(子作用域);
(3){}。表示创建一个全新的隔离作用域;
7.1首先我们先来了解下scope的继承机制。我们用ng-controller这个指令举例,
1
2
3
4
5
6
7
8
9
10
11
12
13
14
15
16
17
18
19
20
21
22
23
24
25
26
27
AngularJS入门学习父亲:{{name}}
var app = angular.module('myApp', []);
app.controller('MainController', function ($scope) {
$scope.name = '林炳文';
});
app.directive('myDirective', function () {
return {
restrict: 'EA',
scope:false,
template: '
};
});
接下来我们通过一个简单明了的例子来说明scope取值不同的差别:
scope:false
scope:true
scope:{}
当为false时候,儿子继承父亲的值,改变父亲的值,儿子的值也随之变化,反之亦如此。(继承不隔离)
当为true时候,儿子继承父亲的值,改变父亲的值,儿子的值随之变化,但是改变儿子的值,父亲的值不变。(继承隔离)
当为{}时候,没有继承父亲的值,所以儿子的值为空,改变任何一方的值均不能影响另一方的值。(不继承隔离)
tip:当你想要创建一个可重用的组件时隔离作用域是一个很好的选择,通过隔离作用域我们确保指令是‘独立'的,并可以轻松地插入到任何HTML app中,并且这种做法防止了父作用域被污染;
7.2隔离作用域可以通过绑定策略来访问父作用域的属性。
directive 在使用隔离 scope 的时候,提供了三种方法同隔离之外的地方交互。这三种分别是
@ 绑定一个局部 scope 属性到当前 dom 节点的属性值。结果总是一个字符串,因为 dom 属性是字符串。
& 提供一种方式执行一个表达式在父 scope 的上下文中。如果没有指定 attr 名称,则属性名称为相同的本地名称。
= 通过 directive 的 attr 属性的值在局部 scope 的属性和父 scope 属性名之间建立双向绑定。
@ 局部 scope 属性
@ 方式局部属性用来访问 directive 外部环境定义的字符串值,主要是通过 directive 所在的标签属性绑定外部字符串值。这种绑定是单向的,即父 scope 的绑定变化,directive 中的 scope 的属性会同步变化,而隔离 scope 中的绑定变化,父 scope 是不知道的。
如下示例:directive 声明未隔离 scope 类型,并且使用@绑定 name 属性,在 directive 中使用 name 属性绑定父 scope 中的属性。当改变父 scope 中属性的值的时候,directive 会同步更新值,当改变 directive 的 scope 的属性值时,父 scope 无法同步更新值。
js 代码:
1
2
3
4
5
6
7
8
9
10
11
12
13
14
15
16
17
18
19
20
21
22
23
24
25
26
27
28
29
30
31
32
33
34
35
AngularJS入门学习改变父scope的name:
var app = angular.module('myApp', []);
app.controller("myController", function ($scope) {
$scope.name = "hello world";
}).directive("isolatedDirective", function () {
return {
scope: {
name: "@"
},
template: 'Say:{{name}}
改变隔离scope的name:'
};
});
结果:页面初始效果
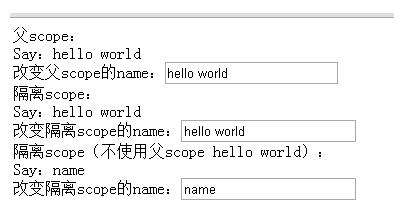
动画效果:
可以看到父scope上的内容发生改变,子scope同时发生改变。而子scope上的内容发生改变。不影响父scope上的内容!
= 局部 scope 属性
= 通过 directive 的 attr 属性的值在局部 scope 的属性和父 scope 属性名之间建立双向绑定。
意思是,当你想要一个双向绑定的属性的时候,你可以使用=来引入外部属性。无论是改变父 scope 还是隔离 scope 里的属性,父 scope 和隔离 scope 都会同时更新属性值,因为它们是双向绑定的关系。
示例代码:
1
2
3
4
5
6
7
8
9
10
11
12
13
14
15
16
17
18
19
20
21
22
23
24
25
26
27
28
29
30
31
32
33
34
AngularJS入门学习改变父scope的name:
var app = angular.module('myApp', []);
app.controller("myController", function ($scope) {
$scope.userBase = {
name: 'hello',
id: 1
};
}).directive("isolatedDirective", function () {
return {
scope: {
user: "="
},
template: 'Say:{{user.name}}
改变隔离scope的name:'
}
})
效果:
可以看到父scope和子scope上的内容一直都是一样的!
& 局部 scope 属性
& 方式提供一种途经是 directive 能在父 scope 的上下文中执行一个表达式。此表达式可以是一个 function。
比如当你写了一个 directive,当用户点击按钮时,directive 想要通知 controller,controller 无法知道 directive 中发生了什么,也许你可以通过使用 angular 中的 event 广播来做到,但是必须要在 controller 中增加一个事件监听方法。
最好的方法就是让 directive 可以通过一个父 scope 中的 function,当 directive 中有什么动作需要更新到父 scope 中的时候,可以在父 scope 上下文中执行一段代码或者一个函数。
如下示例在 directive 中执行父 scope 的 function。
1
2
3
4
5
6
7
8
9
10
11
12
13
14
15
16
17
18
19
20
21
22
23
24
25
26
27
28
29
30
31
32
33
34
AngularJS入门学习var app = angular.module('myApp', []);
app.controller("myController", function ($scope) {
$scope.value = "hello world";
$scope.click = function () {
$scope.value = Math.random();
};
}).directive("isolatedDirective", function () {
return {
scope: {
action: "&"
},
template: ''
}
})
效果:
指令的内容比较多,下面再来讲讲transclude、compline、link、contrller
8.transclude
如果不想让指令内部的内容被模板替换,可以设置这个值为true。一般情况下需要和ngTransclude指令一起使用。 比如:template:"
1
2
3
4
5
6
7
8
9
10
11
12
13
14
15
16
17
18
19
20
21
22
23
24
25
26
27
28
29
30
31
32
33
34
AngularJS入门学习- First link
- Second link
var app = angular.module('myApp', []);
app.directive('sidebox', function() {
return {
restrict: 'EA',
scope: {
title: '@'
},
transclude: true,
template: '
{{ title }}
\\
\
};
});


 被折叠的 条评论
为什么被折叠?
被折叠的 条评论
为什么被折叠?
 到【灌水乐园】发言


