


自学的wysiwyg
如存在问题 或有更好建议 请联系 作者QQ:2940500
注意:
本文已经整理完毕 是从开发环境拿出来的 较为简单0基础 只要跟着步骤会复制粘贴就可以使用
第一步: 引入资源
引入wysiwyg 相关css和js
[2019-05-17 已经更新百度云失效资源]
百度云链接链接:https://pan.baidu.com/s/1idAr-SvoWfiZ0QGQgN8UeA
提取码:ztce
这里有一点需要注意 就是项目中已经引入BootStarp的css的可以使用原Bootstarp的css 但是有一个版本的Bootstarp的css和wysiwyg 有些不兼容会导致font小图标不显示或者显示的不是本身的小图标 具体是哪个版本由于时间太久也记不清楚了
解决办法: 使用我给的那个压缩包 里边有版本符合的css 和js 直接解压放到项目中即可
目录结构:
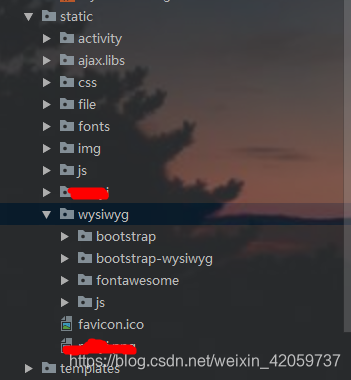
(我项目中用的是Thymeleaf模板引擎 所以这样引入资源,自行替换成自己的模板引擎引入资源的方式即可)
<link th:href="@{/wysiwyg/bootstrap/css/bootstrap.min.css}" rel="stylesheet"/>
<link th:href="@{/wysiwyg/fontawesome/css/font-awesome.min.css}" rel="stylesheet"/>
<script th:src="@{/wysiwyg/bootstrap-wysiwyg/external/jquery.hotkeys.js}"></script>
<script th:src="@{/wysiwyg/bootstrap/js/bootstrap.min.js}"></script>
<script th:src="@{/wysiwyg/bootstrap-wysiwyg/bootstrap-wysiwyg.js}"></script>
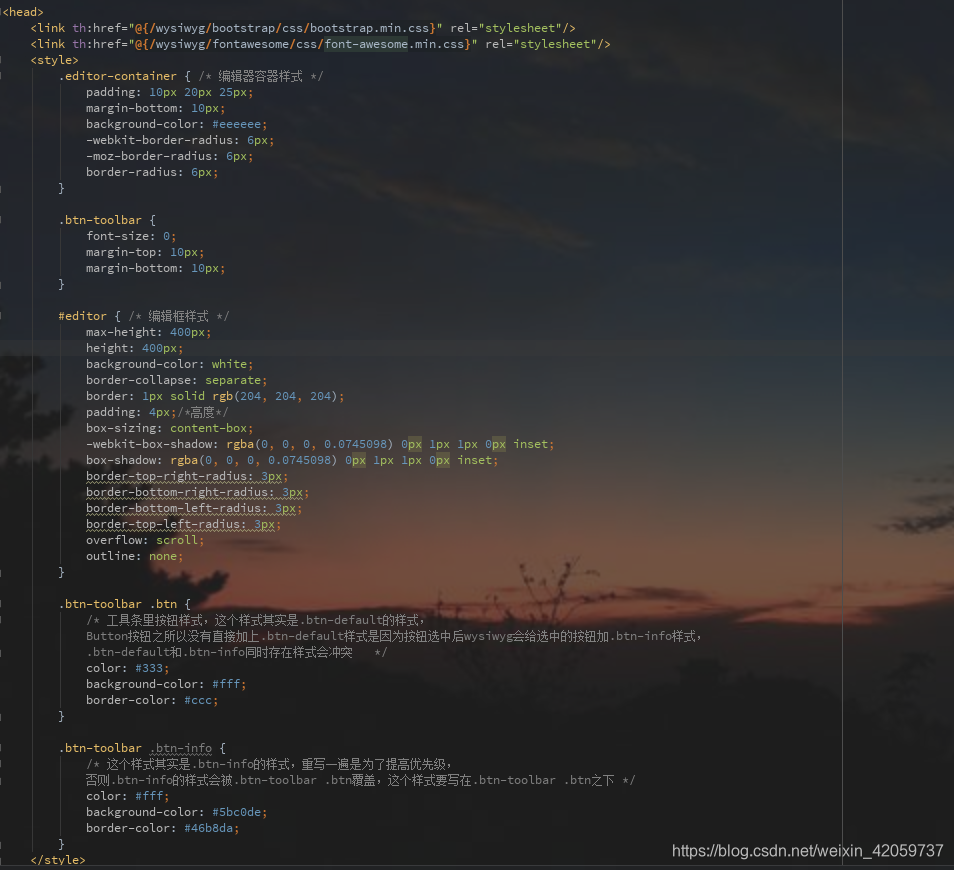
第二步: 调样式
wysiwyg插件体积本身就比较小 所以有一些样式扩展和JS并没有直接弄好所以要我们自己写样式 默认高度是4 也可以调成自己想要的默认高度 调高度的位置我也已经写下注释了 直接调就可以了
	<style>
		.editor-container { /* 编辑器容器样式 */
			padding: 10px 20px 25px;
			margin-bottom: 10px;
			background-color: #eeeeee;
			-webkit-border-radius: 6px;
			-moz-border-radius: 6px;
			border-radius: 6px;
		}

		.btn-toolbar {
			font-size: 0;
			margin-top: 10px;
			margin-bottom: 10px;
		}

		#editor { /* 编辑框样式 */
			max-height: 400px;
			height: 400px;
			background-color: white;
			border-collapse: separate;
			border: 1px solid rgb(204, 204, 204);
			padding: 4px;/*高度*/
			box-sizing: content-box;
			-webkit-box-shadow: rgba(0, 0, 0, 0.0745098) 0px 1px 1px 0px inset;
			box-shadow: rgba(0, 0, 0, 0.0745098) 0px 1px 1px 0px inset;
			border-top-right-radius: 3px;
			border-bottom-right-radius: 3px;
			border-bottom-left-radius: 3px;
			border-top-left-radius: 3px;
			overflow: scroll;
			outline: none;
		}

		.btn-toolbar .btn {
			/* 工具条里按钮样式,这个样式其实是.btn-default的样式,
            Button按钮之所以没有直接加上.btn-default样式是因为按钮选中后wysiwyg会给选中的按钮加.btn-info样式,
            .btn-default和.btn-info同时存在样式会冲突   */
			color: #333;
			background-color: #fff;
			border-color: #ccc;
		}

		.btn-toolbar .btn-info {
			/* 这个样式其实是.btn-info的样式,重写一遍是为了提高优先级,
            否则.btn-info的样式会被.btn-toolbar .btn覆盖,这个样式要写在.btn-toolbar .btn之下 */
			color: #fff;
			background-color: #5bc0de;
			border-color: #46b8da;
		}
	</style>
第三步:Js事件
<script>
        $(function() {
            // 初始化工具条
            initToolbarBootstrapBindings();
            $('#editor').wysiwyg();
        });

        // 初始化工具条
        function initToolbarBootstrapBindings() {
            // 字体样式
            var fonts = [ 'Serif', 'Sans', 'Arial', 'Arial Black', 'Courier',
                    'Courier New', 'Comic Sans MS', 'Helvetica', 'Impact',
                    'Lucida Grande', 'Lucida Sans', 'Tahoma', 'Times',
                    'Times New Roman', 'Verdana' ],
                fontTarget = $('[title=Font]').siblings('.dropdown-menu');
            $.each(fonts,function(idx, fontName) {
                fontTarget.append($('<li><a href="#" data-edit="fontName ' + fontName
                    +'" style="font-family:\''+ fontName +'\'">' + fontName + '</a></li>'));
            });

            $('button[title]').tooltip({
                container : 'body'
            });

            // .dropdown-menu下的input事件
            $('.dropdown-menu input').click(function() {
                return false;
            })
                .change(function() {
                    $(this).parent('.dropdown-menu').siblings('.dropdown-toggle').dropdown('toggle');
                })
                .keydown('esc', function() {
                    this.value = '';
                    $(this).change();
                });

            // [data-role=magic-overlay]的样式
            $('[data-role=magic-overlay]').each(function() {
                var overlay = $(this), target = $(overlay.data('target'));
                overlay.css('opacity', 0).css('position', 'absolute')
                    .offset(target.offset()).width(target.outerWidth())
                    .height(target.outerHeight());
            });
        };
	</script>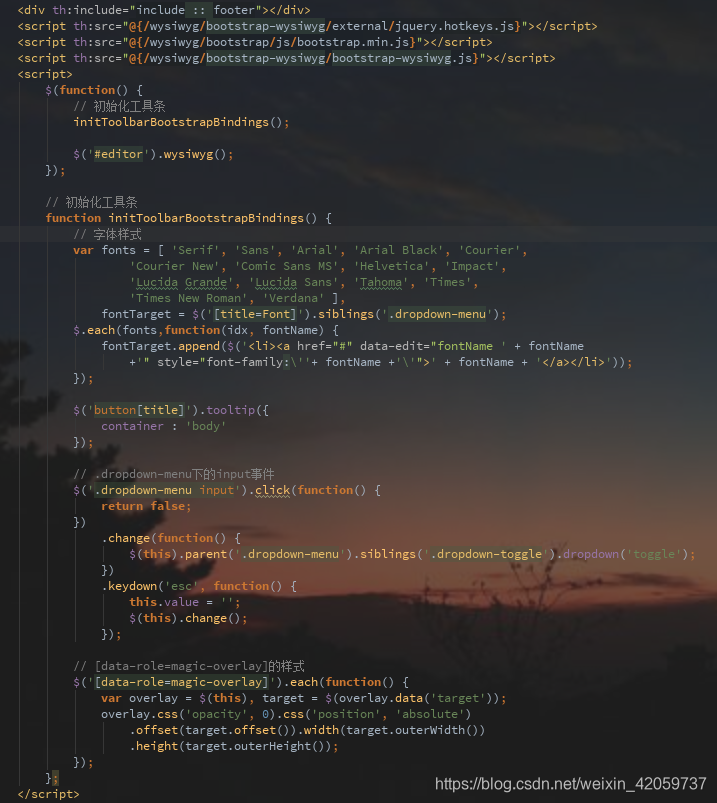
第四步: 添加富文本的Html
<div class="form-group">
<label class="col-sm-3 control-label">内容:</label>
<div class="col-sm-8">
<!-- <textarea class="form-control" id="content" name="content" rows="3"></textarea>-->
<input type="hidden" id="content" name="content">
<div class="editor-container">
<div class="btn-toolbar" role="toolbar" data-role="editor-toolbar"
data-target="#editor">
<div class="btn-group" role="group">
<button type="button" class="btn dropdown-toggle"
data-toggle="dropdown" title="Font">
<i class="icon-font"></i><b class="caret"></b>
</button>
<ul class="dropdown-menu">
</ul>
</div>
<div class="btn-group" role="group">
<button type="button" class="btn dropdown-toggle"
data-toggle="dropdown" title="Font Size">
<i class="icon-text-height"></i> <b class="caret"></b>
</button>
<ul class="dropdown-menu">
<li><a data-edit="fontSize 5"><font size="5">Huge</font></a></li>
<li><a data-edit="fontSize 3"><font size="3">Normal</font></a></li>
<li><a data-edit="fontSize 1"><font size="1">Small</font></a></li>
</ul>
</div>
<div class="btn-group" role="group">
<button type="button" class="btn" data-edit="bold"
title="Bold (Ctrl/Cmd+B)">
<i class="icon-bold"></i>
</button>
<button type="button" class="btn" data-edit="italic"
title="Italic (Ctrl/Cmd+I)">
<i class="icon-italic"></i>
</button>
<button type="button" class="btn" data-edit="strikethrough"
title="Strikethrough">
<i class="icon-strikethrough"></i>
</button>
<button type="button" class="btn" data-edit="underline"
title="Underline (Ctrl/Cmd+U)">
<i class="icon-underline"></i>
</button>
</div>
<div class="btn-group" role="group">
<button type="button" class="btn" data-edit="insertunorderedlist"
title="Bullet list">
<i class="icon-list-ul"></i>
</button>
<button type="button" class="btn" data-edit="insertorderedlist"
title="Number list">
<i class="icon-list-ol"></i>
</button>
<button type="button" class="btn" data-edit="outdent"
title="Reduce indent (Shift+Tab)">
<i class="icon-indent-left"></i>
</button>
<button type="button" class="btn" data-edit="indent"
title="Indent (Tab)">
<i class="icon-indent-right"></i>
</button>
</div>
<div class="btn-group" role="group">
<button type="button" class="btn" data-edit="justifyleft"
title="Align Left (Ctrl/Cmd+L)">
<i class="icon-align-left"></i>
</button>
<button type="button" class="btn" data-edit="justifycenter"
title="Center (Ctrl/Cmd+E)">
<i class="icon-align-center"></i>
</button>
<button type="button" class="btn" data-edit="justifyright"
title="Align Right (Ctrl/Cmd+R)">
<i class="icon-align-right"></i>
</button>
<button type="button" class="btn" data-edit="justifyfull"
title="Justify (Ctrl/Cmd+J)">
<i class="icon-align-justify"></i>
</button>
</div>
<div class="btn-group" role="group">
<div class="btn-group" role="group">
<button type="button" class="btn dropdown-toggle"
data-toggle="dropdown" title="Hyperlink">
<i class="icon-link"></i>
</button>
<div class="dropdown-menu">
<div class="input-group" style="margin: 0 5px; min-width: 200px;">
<input class="form-control" placeholder="URL" type="text"
data-edit="createLink"/> <span class="input-group-btn">
<button class="btn" type="button">Add</button>
</span>
</div>
</div>
</div>
<button type="button" class="btn" data-edit="unlink"
title="Remove Hyperlink">
<i class="icon-cut"></i>
</button>
</div>
<div class="btn-group" role="group">
<button type="button" class="btn"
title="Insert picture (or just drag & drop)" id="pictureBtn">
<i class="icon-picture"></i>
</button>
<input type="file" data-role="magic-overlay"
data-target="#pictureBtn" data-edit="insertImage"/>
</div>
<div class="btn-group" role="group">
<button type="button" class="btn" data-edit="undo"
title="Undo (Ctrl/Cmd+Z)">
<i class="icon-undo"></i>
</button>
<button type="button" class="btn" data-edit="redo"
title="Redo (Ctrl/Cmd+Y)">
<i class="icon-repeat"></i>
</button>
</div>
</div>
<!--该id=editor的div才是你的富文本内容 上边的那些是富文本的一些按钮-->
<div id="editor"></div>
</div>
</div>
</div>这里的内容太多就不上传图片演示了
第五步:上传图片处理(最重要的一步很多人卡在这一步)
1.打开bootstrap-wysiwyg.js
js位置:
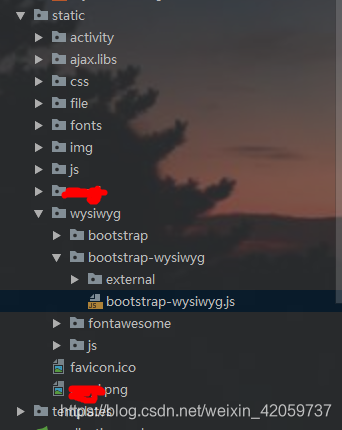
打开后将这一行代码放入:(如果是用的我提供的静态资源 里边已经有了)
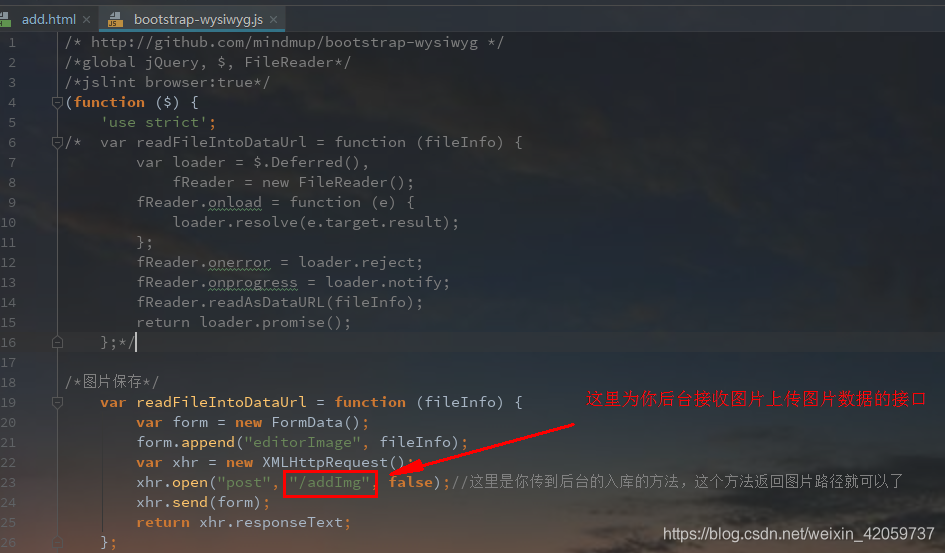
/*图片保存*/
    var readFileIntoDataUrl = function (fileInfo) {
        var form = new FormData();
        form.append("editorImage", fileInfo);
        var xhr = new XMLHttpRequest();
        xhr.open("post", "/addImg", false);//这里是你传到后台的入库的方法,这个方法返回图片路径就可以了
        xhr.send(form);
        return xhr.responseText;
    };
然后修改里边的上传图片地址 看图:
后台: 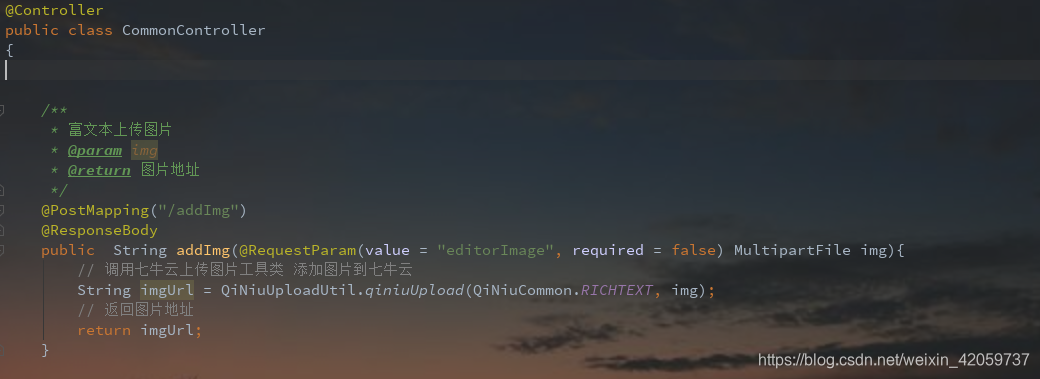
第六步:存数据库(完成)
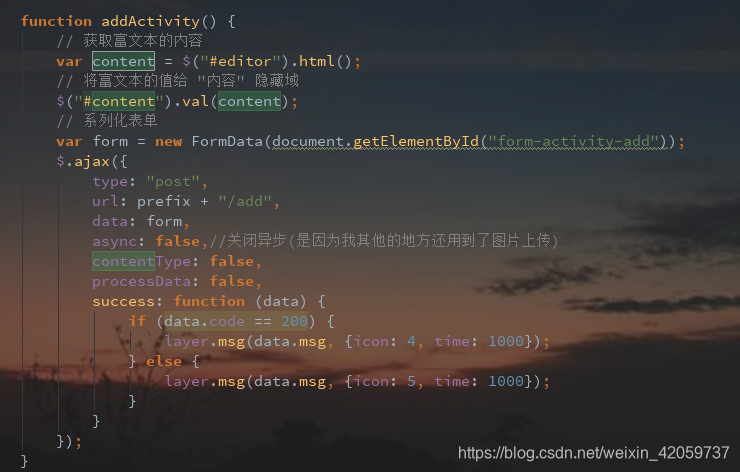
    function addActivity() {
        // 获取富文本的内容
        var content = $("#editor").html();
        // 将富文本的值给 "内容" 隐藏域
        $("#content").val(content);
        // 序列化表单
        var form = new FormData(document.getElementById("form-activity-add"));
        $.ajax({
            type: "post",
            url: prefix + "/add",
            data: form,
            async: false,//关闭异步(是因为我其他的地方还用到了图片上传)
            contentType: false,
            processData: false,
            success: function (data) {
                if (data.code == 200) {
                    layer.msg(data.msg, {icon: 4, time: 1000});
                } else {
                    layer.msg(data.msg, {icon: 5, time: 1000});
                }
            }
        });
    }


 被折叠的 条评论
为什么被折叠?
被折叠的 条评论
为什么被折叠?
 到【灌水乐园】发言


