


导入所SSM框架所需要的pom依赖
<!--Junit-->
    <dependency>
      <groupId>junit</groupId>
      <artifactId>junit</artifactId>
      <version>4.12</version>
      <scope>test</scope>
    </dependency>

   <!--MyBatis-->
    <dependency>
      <groupId>org.mybatis</groupId>
      <artifactId>mybatis</artifactId>
      <version>3.4.5</version>
    </dependency>

    <!--MySQL-->
    <dependency>
      <groupId>mysql</groupId>
      <artifactId>mysql-connector-java</artifactId>
      <version>5.1.43</version>
    </dependency>

    <!--Spring-->
    <!--SpringMVC-->
    <dependency>
      <groupId>org.springframework</groupId>
      <artifactId>spring-webmvc</artifactId>
      <version>4.3.10.RELEASE</version>
    </dependency>

    <dependency>
      <groupId>org.springframework</groupId>
      <artifactId>spring-jdbc</artifactId>
      <version>4.3.10.RELEASE</version>
    </dependency>

    <dependency>
      <groupId>org.springframework</groupId>
      <artifactId>spring-aspects</artifactId>
      <version>4.3.10.RELEASE</version>
    </dependency>

    <dependency>
      <groupId>org.springframework</groupId>
      <artifactId>spring-context</artifactId>
      <version>4.3.10.RELEASE</version>
    </dependency>

    <!--MyBatis和Spring整合-->
    <dependency>
      <groupId>org.mybatis</groupId>
      <artifactId>mybatis-spring</artifactId>
      <version>1.3.1</version>
    </dependency>

    <!--C3p0-->
    <dependency>
      <groupId>com.mchange</groupId>
      <artifactId>c3p0</artifactId>
      <version>0.9.5.1</version>
    </dependency>

    <dependency>
      <groupId>javax.servlet</groupId>
      <artifactId>javax.servlet-api</artifactId>
      <version>4.0.0</version>
      <scope>provided</scope>
    </dependency>
搭建springMvc的配置文件
<?xml version="1.0" encoding="UTF-8"?>
<beans xmlns="http://www.springframework.org/schema/beans"
       xmlns:context="http://www.springframework.org/schema/context"
       xmlns:mvc="http://www.springframework.org/schema/mvc"
       xmlns:xsi="http://www.w3.org/2001/XMLSchema-instance"
       xsi:schemaLocation="http://www.springframework.org/schema/beans http://www.springframework.org/schema/beans/spring-beans.xsd
                           http://www.springframework.org/schema/context http://www.springframework.org/schema/context/spring-context.xsd
                              http://www.springframework.org/schema/mvc http://www.springframework.org/schema/mvc/spring-mvc.xsd">


    <!--开启注解驱动-->
    <mvc:annotation-driven></mvc:annotation-driven>
    <!--注解扫描-->
    <context:component-scan base-package="com.ssm"></context:component-scan>
    <!--配置视图解析-->
    <bean class="org.springframework.web.servlet.view.InternalResourceViewResolver">
        <property name="prefix" value="/"></property>
        <property name="suffix" value=".jsp"></property>
    </bean>


</beans>
这里注意扫描的配置 ssm搭建好之后bean找不到 大部分原因那就是没扫描到
配置web xml
<!DOCTYPE web-app PUBLIC
 "-//Sun Microsystems, Inc.//DTD Web Application 2.3//EN"
 "http://java.sun.com/dtd/web-app_2_3.dtd" >

<web-app>
  <display-name>Archetype Created Web Application</display-name>
    <context-param>
        <param-name>**contextConfigLocation**</param-name>
        <param-value>classpath:applicationContext-common</param-value>
    </context-param>
    <!--配置监听器-->
    <listener>
        <listener-class>**org.springframework.web.context.ContextLoaderListener**</listener-class>
    </listener>

    <servlet>
        <servlet-name>springmvc</servlet-name>
        <servlet-class>org.springframework.web.servlet.DispatcherServlet</servlet-class>
        <init-param>
            <param-name>contextConfigLocation</param-name>
            <param-value>classpath:springmvc-config.xml</param-value>
        </init-param>
    </servlet>
    <servlet-mapping>
        <servlet-name>springmvc</servlet-name>
        <url-pattern>*.action</url-pattern>
    </servlet-mapping>
</web-app>
加粗字体是配置spirng的xml文件
下面是
写个测试 测试一下 看springmvc是否搭建成功
package com.ssm.controller;
import com.ssm.services.UsersService;
import org.springframework.stereotype.Controller;
import org.springframework.web.bind.annotation.RequestMapping;
import org.springframework.stereotype.Service;

import javax.annotation.Resource;
import javax.annotation.Resources;

@Controller
public class MainController {
    @RequestMapping("test")
    public String test(){
        System.out.println("涮");
        return  "index";
    }
}
搭建好之后
因为pom依赖有连接池的加人 mybatis自带的就改换连接池连接数据库
把连接池交给spring配置管理
配置一下db.properties连接的配置
这里的一定要配置连接数据库的数据 确保正确
user=root
pwd=tiger
url=jdbc:mysql://localhost:3306/ct?characterEncoding=utf-8
driverClass=com.mysql.jdbc.Driver
initPoolSize=3
maxPoolSize=20
配置spring applicationContext- common xml文件
<?xml version="1.0" encoding="UTF-8"?>
<beans xmlns="http://www.springframework.org/schema/beans"
       xmlns:context="http://www.springframework.org/schema/context"
       xmlns:tx="http://www.springframework.org/schema/tx"
       xmlns:aop="http://www.springframework.org/schema/aop"
       xmlns:xsi="http://www.w3.org/2001/XMLSchema-instance"
       xsi:schemaLocation="http://www.springframework.org/schema/beans http://www.springframework.org/schema/beans/spring-beans.xsd
                              http://www.springframework.org/schema/context http://www.springframework.org/schema/context/spring-context.xsd
                              http://www.springframework.org/schema/tx http://www.springframework.org/schema/tx/spring-tx.xsd
                              http://www.springframework.org/schema/aop http://www.springframework.org/schema/aop/spring-aop.xsd">

<!--引入数据库的配置文件-->
    <context:property-placeholder location="classpath:db.properties"></context:property-placeholder>
    <!--数据库的连接池 连接源-->
    <bean id="dataSource" class="com.mchange.v2.c3p0.ComboPooledDataSource">
        <property name="user" value="${user}"></property>
        <property name="password" value="${pwd}"></property>
        <property name="jdbcUrl" value="${url}"></property>
        <property name="driverClass" value="${driverClass}"></property>
        <property name="initialPoolSize" value="${initPoolSize}"></property>
        <property name="maxPoolSize" value="${maxPoolSize}"></property>
     </bean>
      </beans>
spring搭配连接池连接数据
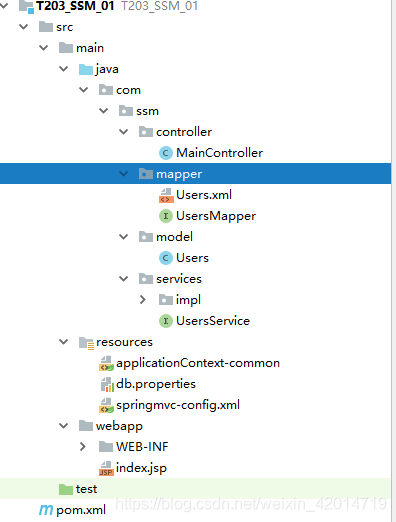
在java里面创建com.ssm.model 就是创建实体包 实体类
我这里是User
package com.ssm.model;

public class Users {
    private int uid;
    private String uname;
    private String usex;
    private String birthday;
    private String address;

    public Users(String uname, String usex, String birthday, String address) {
        this.uname = uname;
        this.usex = usex;
        this.birthday = birthday;
        this.address = address;
    }

    public Users() {
    }

    public int getUid() {
        return uid;
    }

    public void setUid(int uid) {
        this.uid = uid;
    }

    public String getUname() {
        return uname;
    }

    public void setUname(String uname) {
        this.uname = uname;
    }

    public String getUsex() {
        return usex;
    }

    public void setUsex(String usex) {
        this.usex = usex;
    }

    public String getBirthday() {
        return birthday;
    }

    public void setBirthday(String birthday) {
        this.birthday = birthday;
    }

    public String getAddress() {
        return address;
    }

    public void setAddress(String address) {
        this.address = address;
    }
}
我们写点方法实现一下
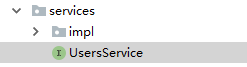
com.ssm.services
代碼
package com.ssm.services;

import com.ssm.model.Users;

import java.util.List;

public interface UsersService {
    public List<Users> findUsers();
    public void addUsers(Users users);
}
代码
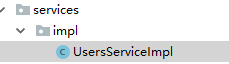
package com.ssm.services.impl;

import com.ssm.mapper.UsersMapper;
import com.ssm.model.Users;
import com.ssm.services.UsersService;
import org.springframework.beans.factory.annotation.Autowired;
import org.springframework.stereotype.Service;

import java.util.List;


@Service("usersService")
public class UsersServiceImpl  implements UsersService {
    //使用UsersMapper
    //自动注入(依赖注入 根据注解的类型自动注入该类型的对象)
    @Autowired
    private UsersMapper mapper;
    @Override
    public List<Users> findUsers() {
        return mapper.findUsers();
    }
    @Override
    public void addUsers(Users users) {

    }
}
写完services之后 写一些dao方法使用

代码
package com.ssm.controller;

import com.ssm.services.UsersService;
import org.springframework.stereotype.Controller;
import org.springframework.web.bind.annotation.RequestMapping;
import org.springframework.stereotype.Service;

import javax.annotation.Resource;
import javax.annotation.Resources;

@Controller
public class MainController {
    @Resource(name = "usersService",type = com.ssm.services.impl.UsersServiceImpl.class)
    private UsersService usersService;
    @RequestMapping("test")
    public String test(){
        System.out.println("你好啊");
        System.out.println(usersService.findUsers().size());
        return  "index";
    }
}
写完之后写spring配置spring文件
<?xml version="1.0" encoding="UTF-8"?>
<beans xmlns="http://www.springframework.org/schema/beans"
       xmlns:context="http://www.springframework.org/schema/context"
       xmlns:tx="http://www.springframework.org/schema/tx"
       xmlns:aop="http://www.springframework.org/schema/aop"
       xmlns:xsi="http://www.w3.org/2001/XMLSchema-instance"
       xsi:schemaLocation="http://www.springframework.org/schema/beans http://www.springframework.org/schema/beans/spring-beans.xsd
                              http://www.springframework.org/schema/context http://www.springframework.org/schema/context/spring-context.xsd
                              http://www.springframework.org/schema/tx http://www.springframework.org/schema/tx/spring-tx.xsd
                              http://www.springframework.org/schema/aop http://www.springframework.org/schema/aop/spring-aop.xsd">

<!--引入数据库的配置文件-->
    <context:property-placeholder location="classpath:db.properties"></context:property-placeholder>


    <!--数据库的连接池 连接源-->
    <bean id="dataSource" class="com.mchange.v2.c3p0.ComboPooledDataSource">
        <property name="user" value="${user}"></property>
        <property name="password" value="${pwd}"></property>
        <property name="jdbcUrl" value="${url}"></property>
        <property name="driverClass" value="${driverClass}"></property>
        <property name="initialPoolSize" value="${initPoolSize}"></property>
        <property name="maxPoolSize" value="${maxPoolSize}"></property>
     </bean>


    <!--sqlSessionFactory配置  由spring工厂代理产生-->
    <bean id="sqlSessionFactory" class="org.mybatis.spring.SqlSessionFactoryBean">
        <property name="dataSource" ref="dataSource"></property>
        <property name="typeAliasesPackage" value="com.ssm.model"></property>
        <property name="mapperLocations" value="classpath:com/ssm/mapper/*.xml"></property>
    </bean>


    <!--扫描Mapper包下映射文件的配置-->
    <bean id="mapperScannerConfigurer" class="org.mybatis.spring.mapper.MapperScannerConfigurer">
        <property name="basePackage" value="com.ssm.mapper"></property>
    </bean>

    <!--配置事务管理器-->
    <bean id="transactionManager" class="org.springframework.jdbc.datasource.DataSourceTransactionManager">
    <property name="dataSource" ref="dataSource"></property>
    </bean>


    <!--配置切面-->
    <tx:advice id="txAdvice" transaction-manager="transactionManager">
        <tx:attributes>
            <tx:method name="add*" propagation="REQUIRED"/>
            <tx:method name="delete*" propagation="REQUIRED"/>
            <tx:method name="update*" propagation="REQUIRED"/>
            <tx:method name="*" read-only="true"></tx:method>
        </tx:attributes>
    </tx:advice>


    <aop:config>
        <aop:pointcut id="pointCut" expression="execution(* com.ssm.services.*.*(..))"></aop:pointcut>
        <aop:advisor advice-ref="txAdvice" pointcut-ref="pointCut"></aop:advisor>
    </aop:config>
</beans>
一步一步来
成功之后控制台
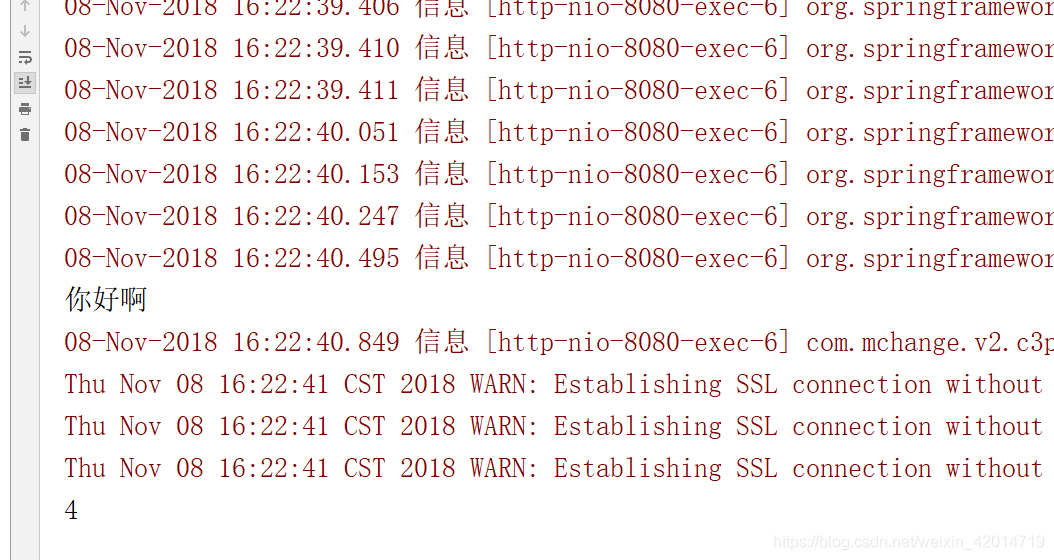


 931
931

 被折叠的 条评论
为什么被折叠?
被折叠的 条评论
为什么被折叠?
 到【灌水乐园】发言


