


 本文详细介绍了使用Spring框架通过XML配置实现IoC控制反转的过程。从Maven工程搭建开始,逐步讲解了实体类、持久层及业务层接口的创建,再到配置文件的编写与项目测试,全面覆盖了Spring XML IoC的实践应用。
一、前期准备
1、创建Maven工程
打开IDEA,新建一个Maven工程,命名为Spring_xml_IoC
数据库代码:
create table account(
	id int primary key auto_increment,
	name varchar(40),
	money float
)character set utf8 collate utf8_general_ci;

insert into account(name,money) values('aaa',1000);
insert into account(name,money) values('bbb',1000);
insert into account(name,money) values('ccc',1000);
2、在pom.xml中配置相关坐标
<?xml version="1.0" encoding="UTF-8"?>
<project xmlns="http://maven.apache.org/POM/4.0.0"
         xmlns:xsi="http://www.w3.org/2001/XMLSchema-instance"
         xsi:schemaLocation="http://maven.apache.org/POM/4.0.0 http://maven.apache.org/xsd/maven-4.0.0.xsd">
<modelVersion>4.0.0</modelVersion>

<groupId>org.example</groupId>
<artifactId>Spring01_xml_IOC</artifactId>
<version>1.0-SNAPSHOT</version>
    <build>
        <plugins>
            <plugin>
                <groupId>org.apache.maven.plugins</groupId>
                <artifactId>maven-compiler-plugin</artifactId>
                <configuration>
                    <source>6</source>
                    <target>6</target>
                </configuration>
            </plugin>
        </plugins>
    </build>
    <packaging>jar</packaging>
<dependencies>
    <!-- spring -->
    <dependency>
        <groupId>org.springframework</groupId>
        <artifactId>spring-context</artifactId>
        <version>5.2.5.RELEASE</version>
    </dependency>
    <!-- dbutils -->
    <dependency>
        <groupId>commons-dbutils</groupId>
        <artifactId>commons-dbutils</artifactId>
        <version>1.4</version>
    </dependency>
    <!-- mysql -->
    <dependency>
        <groupId>mysql</groupId>
        <artifactId>mysql-connector-java</artifactId>
        <version>8.0.19</version>
    </dependency>
    <!-- 连接池 -->
    <dependency>
        <groupId>com.mchange</groupId>
        <artifactId>c3p0</artifactId>
        <version>0.9.5.5</version>
    </dependency>
    <!-- 单元测试 -->
    <dependency>
        <groupId>junit</groupId>
        <artifactId>junit</artifactId>
        <version>4.13</version>
        <scope>test</scope>
    </dependency>
</dependencies>
</project>
3、创建实体类
账户实体类,并且实现序列化接口
import java.io.Serializable;
import java.math.BigInteger;
/**
 * 账户实体类,并且实现序列化接口
 */
public class Account implements Serializable {
    private Integer id;
    private String name;
    private float money;

    public Integer getId() {
        return id;
    }

    public void setId(Integer id) {
        this.id = id;
    }

    public String getName() {
        return name;
    }

    public void setName(String name) {
        this.name = name;
    }

    public float getMoney() {
        return money;
    }

    public void setMoney(float money) {
        this.money = money;
    }

    @Override
    public String toString() {
        return "Account{" +
                "id=" + id +
                ", name='" + name + '\'' +
                ", money=" + money +
                '}';
    }
}
4、创建持久层接口
/**
 * 账户的持久层接口
 */
public interface IAccountDao {

    /**
     * 查询所有
     */
    List<Account> findAll();

    /**
     * 查询一个
     */
    List<Account> findById(Integer id);

    /**
     * 保存账户
     */
    void saveAccount(Account account);

    /**
     * 更新
     */
    void updateAccount(Account account);

    /**
     *删除
     */
    void deleteAccount(Integer id);
}
编写持久层接口实现类
/**
 * 账户的持久层实现类
 */
public class AccountDaoImpl implements IAccountDao {
    private QueryRunner queryRunner;
    @Override
    public List<Account> findAll() {
        try {
            return queryRunner.query("select * from account",new BeanListHandler<Account>(Account.class));
        } catch (SQLException e) {
            throw new RuntimeException(e);
        }
    }

    @Override
    public Account findById(Integer id) {
        try {
            return queryRunner.query("select * from account where id = ?",new BeanHandler<Account>(Account.class),id);
        } catch (SQLException e) {
            throw new RuntimeException(e);
        }
    }

    @Override
    public void saveAccount(Account account) {
        try {
            queryRunner.update("insert into account(name,money)values(?,?)",account.getName(),account.getMoney());
        } catch (SQLException e) {
            throw new RuntimeException(e);
        }
    }

    @Override
    public void updateAccount(Account account) {
        try {
            queryRunner.update("update account set name=?,money=? where id=?",account.getName(),account.getMoney(),account.getId());
        } catch (SQLException e) {
            throw new RuntimeException(e);
        }
    }

    @Override
    public void deleteAccount(Integer id) {
        try {
            queryRunner.update("delete from account where id=?",id);
        } catch (SQLException e) {
            throw new RuntimeException(e);
        }
    }

    public void setQueryRunner(QueryRunner queryRunner) {
        this.queryRunner = queryRunner;
    }
}
5、创建业务层接口
/**
 * 账户业务层的接口
 */
public interface IAccountService {

    /**
     * 查询所有
     */
    List<Account> findAll();

    /**
     * 查询一个
     */
    List<Account> findById(Integer id);

    /**
     * 保存账户
     */
    void saveAccount(Account account);

    /**
     * 更新
     */
    void updateAccount(Account account);

    /**
     *删除
     */
    void deleteAccount(Integer id);
}
编写业务层实现类
/**
 * 账户的业务层实现类
 */
public class AccountServiceImpl implements IAccountService {
    private IAccountDao accountDao;

    public void setAccountDao(IAccountDao accountDao) {
        this.accountDao = accountDao;
    }
    @Override
    public List<Account> findAll() {

        return accountDao.findAll();
    }

    @Override
    public Account findById(Integer id) {

        return accountDao.findById(id);
    }

    @Override
    public void saveAccount(Account account) {
        accountDao.saveAccount(account);
    }

    @Override
    public void updateAccount(Account account) {
        accountDao.updateAccount(account);
    }

    @Override
    public void deleteAccount(Integer id) {
        accountDao.deleteAccount(id);
    }
}
二、编写配置文件
class路径需要根据实际情况更改
<?xml version="1.0" encoding="UTF-8"?>
<beans xmlns="http://www.springframework.org/schema/beans"
       xmlns:xsi="http://www.w3.org/2001/XMLSchema-instance"
       xsi:schemaLocation="http://www.springframework.org/schema/beans
http://www.springframework.org/schema/beans/spring-beans.xsd">
    <!-- 配置 service -->
    <bean id="accountService" class="com.Answer.service.impl.AccountServiceImpl">
    <!-- set方法注入 -->
        <property name="accountDao" ref="accountDao"></property>
    </bean>
    <!-- 配置 dao -->
    <bean id="accountDao" class="com.Answer.dao.impl.AccountDaoImpl">
        <property name="queryRunner" ref="queryRunner"></property>
    </bean>
    <!-- 配置QueryRunner-->
    <bean id="queryRunner" class="org.apache.commons.dbutils.QueryRunner">
    <!-- 构造函数注入 -->
     <constructor-arg name="ds" ref="dataSource"></constructor-arg>
    </bean>
    <!-- 配置数据源 -->
    <bean id="dataSource" class="com.mchange.v2.c3p0.ComboPooledDataSource">
        <property name="driverClass" value="com.mysql.cj.jdbc.Driver"></property>
        <property name="jdbcUrl" value="jdbc:mysql:///sTest"></property>
        <property name="user" value="root"></property>
        <property name="password" value="123456"></property>
    </bean>
</beans>
三、项目测试
编写测试类
public class AccountServiceTest {
    /**
     * 测试保存
     */
    @Test
    public void testSaveAccount() {
        Account account = new Account();
        account.setName("aaa");
        account.setMoney(100000f);
        ApplicationContext ac = new ClassPathXmlApplicationContext("bean.xml");
        IAccountService as = ac.getBean("accountService", IAccountService.class);
        as.saveAccount(account);
    }
    /**
     * 测试查询一个
     */
    @Test
    public void testFindAccountById() {
        ApplicationContext ac = new ClassPathXmlApplicationContext("bean.xml");
        IAccountService as = ac.getBean("accountService",IAccountService.class);
        Account account = as.findById(2);
        System.out.println(account);
    }
    /**
     * 测试更新
     */
    @Test
    public void testUpdateAccount() {
        ApplicationContext ac = new ClassPathXmlApplicationContext("bean.xml");
        IAccountService as = ac.getBean("accountService",IAccountService.class);
        Account account = as.findById(4);
        account.setMoney(20301050f);
        as.updateAccount(account);
    }
    /**
     * 测试删除
     */
    @Test
    public void testDeleteAccount() {
        ApplicationContext ac = new ClassPathXmlApplicationContext("bean.xml");
        IAccountService as = ac.getBean("accountService",IAccountService.class);
        as.deleteAccount(1);
    }
    /**
     * 测试查询所有
     */
    @Test
    public void testFindAllAccount() {
        ApplicationContext ac = new ClassPathXmlApplicationContext("bean.xml");
        IAccountService as = ac.getBean("accountService",IAccountService.class);
        List<Account> list = as.findAll();
        for(Account account : list) {
            System.out.println(account);
        }
    }
}
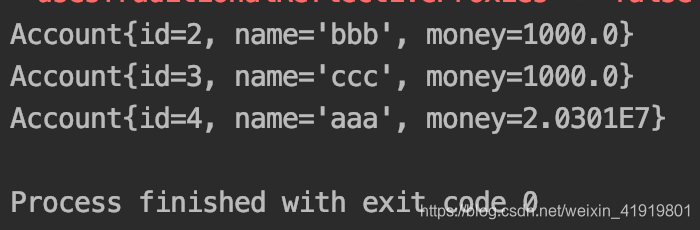
查询所有测试结果:


 被折叠的 条评论
为什么被折叠?
被折叠的 条评论
为什么被折叠?
 到【灌水乐园】发言


