


 本文介绍如何使用VGG16模型去除最后的全连接层来提取图像的瓶颈特征。通过具体步骤演示了从加载预处理图像到利用修改后的VGG16模型进行预测的过程。
一、bottleneck特征说明
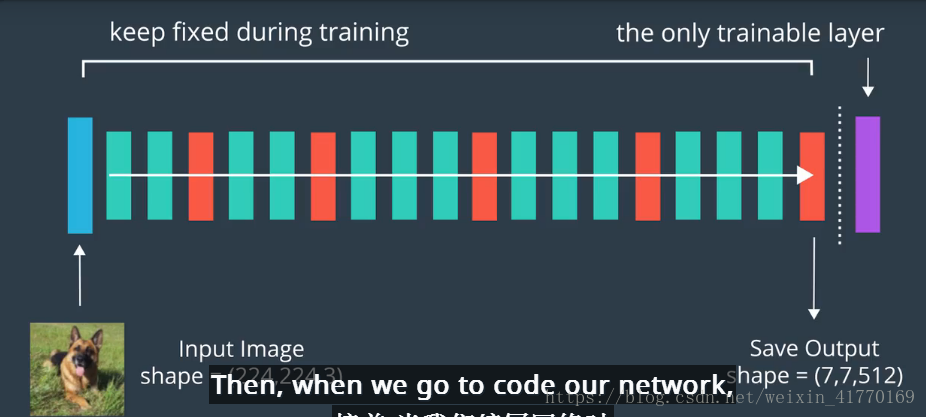
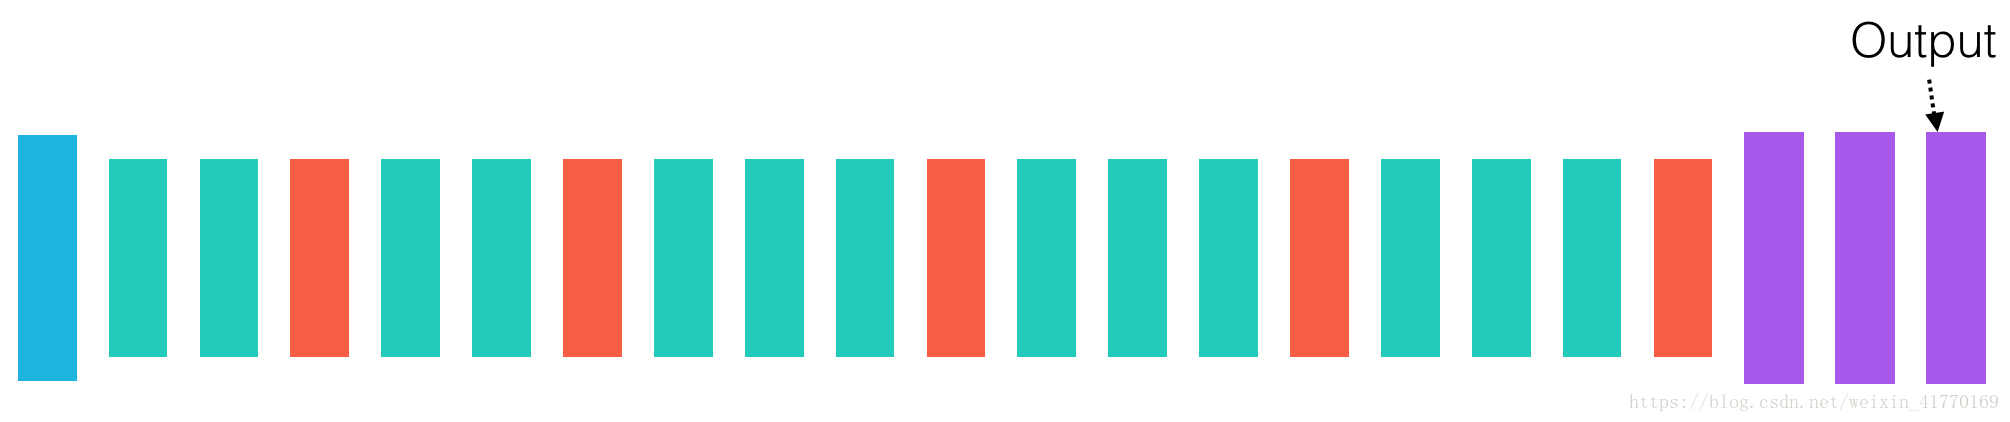
将所有图像穿过(VGG16去掉最后全连接层)得到输出,作为新的输入。
二、bottleneck特征提取代码
1、加载预处理图像库
from keras.applications.vgg16 import preprocess_input
from keras.preprocessing import image
import numpy as np
import glob

img_paths = glob.glob("images-bottleneck/*.jpg")

def path_to_tensor(img_path):
    # loads RGB image as PIL.Image.Image type
    img = image.load_img(img_path, target_size=(224, 224))
    # convert PIL.Image.Image type to 3D tensor with shape (224, 224, 3)
    x = image.img_to_array(img)
    # convert 3D tensor to 4D tensor with shape (1, 224, 224, 3) and return 4D tensor
    return np.expand_dims(x, axis=0)

def paths_to_tensor(img_paths):
    list_of_tensors = [path_to_tensor(img_path) for img_path in img_paths]
    return np.vstack(list_of_tensors)

# calculate the image input. you will learn more about how this works the project!
img_input = preprocess_input(paths_to_tensor(img_paths))

print(img_input.shape)

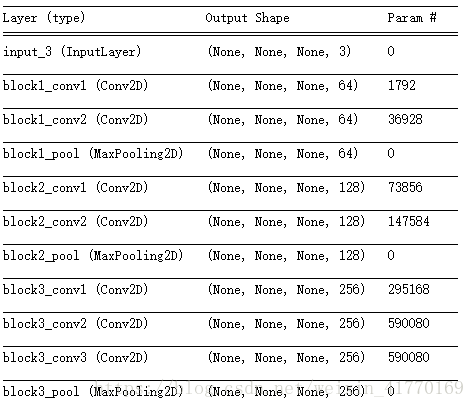
2、导入VGG16
from keras.applications.vgg16 import VGG16
model = VGG16()
model.summary()
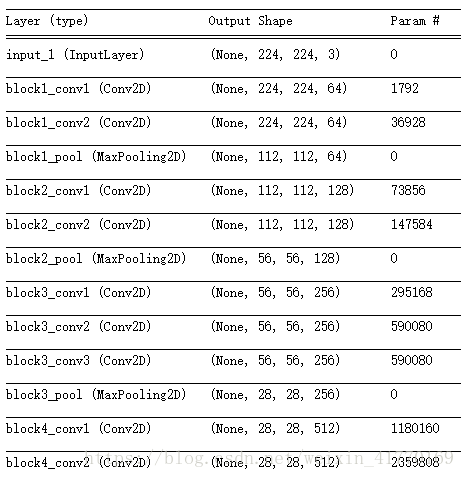
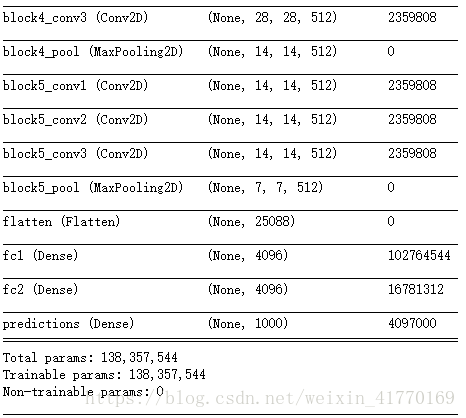
model.predict(img_input).shape

3、导入VGG16,但去掉最后3个全连接层
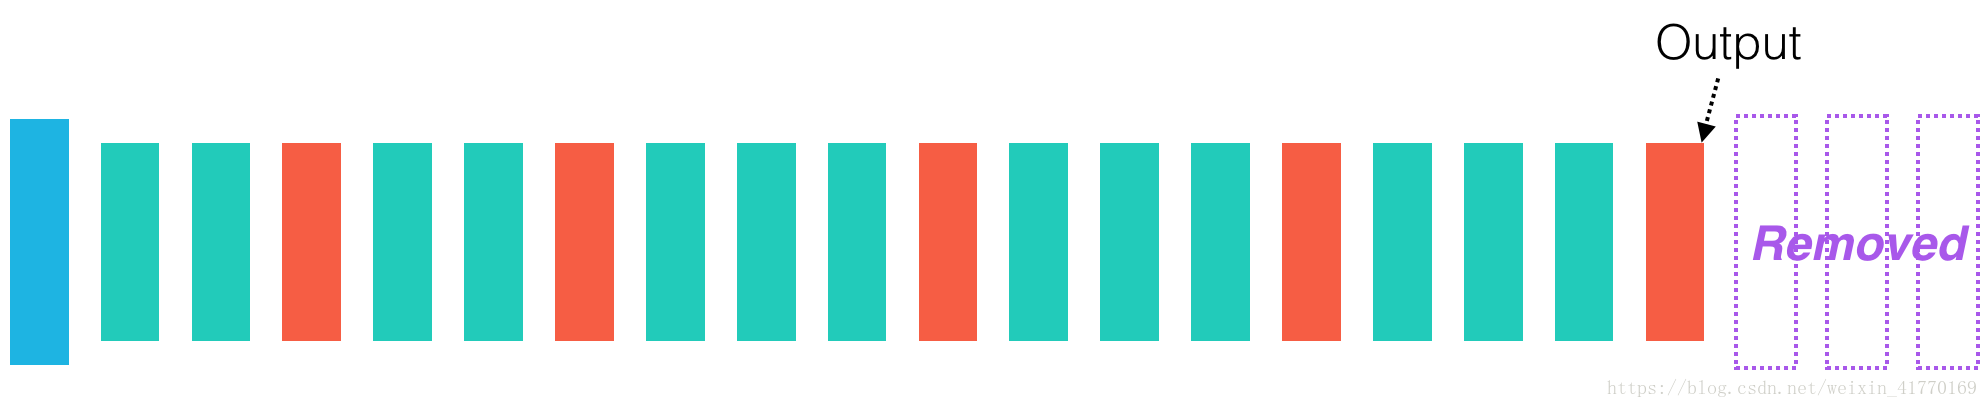
fromfrom  keras.applications.vgg16keras.a  import VGG16
model = VGG16(include_top=False)
model.summary()

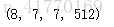
4、最大池化层的输出
print(model.predict(img_input).shape)


 被折叠的 条评论
为什么被折叠?
被折叠的 条评论
为什么被折叠?
 到【灌水乐园】发言


