


 本文详细介绍了如何在SpringBoot项目中整合Thymeleaf模板引擎,包括配置默认参数、创建控制器、视图文件及静态资源访问等关键步骤。
SpringBoot整合Thymeleaf模板引擎静态资源访问的配置
Thymeleaf是一个现代服务器端Java模板引擎,适用于Web和独立环境,能够处理HTML,XML,JavaScript,CSS甚至纯文本。Thymeleaf的主要目标是提供一种优雅且高度可维护的模板创建方式。为实现这一目标,它以自然模板的概念为基础,将其逻辑注入模板文件,其方式不会影响模板被用作设计原型。这改善了设计沟通,缩小了设计和开发团队之间的差距。Thymeleaf也从一开始就设计了Web标准 - 特别是HTML5 - 允许您创建完全验证的模板,Thymeleaf最大的特点是能够直接在浏览器中打开并正确显示模板页面,而不需要启动整个Web应用。它的功能特性如下:
Spring MVC中@Controller中的方法可以直接返回模板名称,接下来Thymeleaf模板引擎会自动进行渲染模板中的表达式支 持Spring表达式语言(Spring EL)表单支持,并兼容Spring MVC的数据绑定与验证机制国际化支持spring-boot 对于 Thymeleaf很多配置都有默认配置,比如查看一下thymeleaf的源码可以看到:
@ConfigurationProperties(
    prefix = "spring.thymeleaf"
)
public class ThymeleafProperties {
    private static final Charset DEFAULT_ENCODING;
    public static final String DEFAULT_PREFIX = "classpath:/templates/";
    public static final String DEFAULT_SUFFIX = ".html";
    private boolean checkTemplate = true;
    private boolean checkTemplateLocation = true;
    private String prefix = "classpath:/templates/";
    private String suffix = ".html";
    private String mode = "HTML";
    private Charset encoding;
    private boolean cache;
    private Integer templateResolverOrder;
    private String[] viewNames;
    private String[] excludedViewNames;
    private boolean enableSpringElCompiler;
    private boolean renderHiddenMarkersBeforeCheckboxes;
    private boolean enabled;
    private final ThymeleafProperties.Servlet servlet;
    private final ThymeleafProperties.Reactive reactive;
而对于spring-boot 对于 Thymeleaf很多配置都有默认配置,比如:
默认页面映射路径为: classpath:/templates/
默认的文件后缀为: .html
默认的编码是: UTF-8
默认是开启页面缓存的:private boolean cache = true;
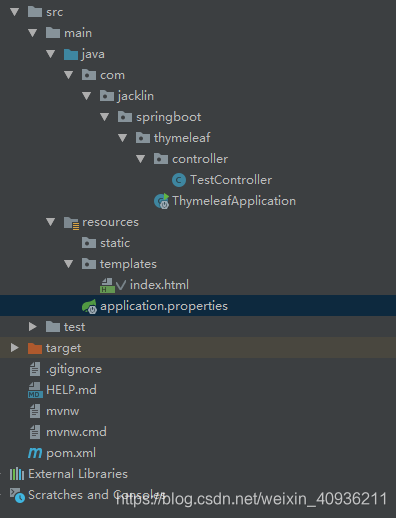
注意:只在开发环境的时候,把cache设置为false,避免看不到实时页面。在application.properties中可以配置thymeleaf模板解析器属性.就像使用springMVC的JSP解析器配置一样,Thymeleaf模板属性使用前缀是 spring.thymeleaf 具体的配置参数可以查看org.springframework.boot.autoconfigure.thymeleaf这个类。项目文件的路径如下:
步骤1:创建maven项目并导入相应的jar包
<dependencies>
    <dependency>
        <groupId>org.springframework.boot</groupId>
        <artifactId>spring-boot-starter-web</artifactId>
    </dependency>

    <dependency>
        <groupId>org.springframework.boot</groupId>
        <artifactId>spring-boot-starter-test</artifactId>
        <scope>test</scope>
    </dependency>

    <dependency>
        <groupId>org.springframework.boot</groupId>
        <artifactId>spring-boot-starter-thymeleaf</artifactId>
        <version>2.1.2.RELEASE</version>
    </dependency>

    <dependency>
        <groupId>javax.servlet</groupId>
        <artifactId>javax.servlet-api</artifactId>
        <version>4.0.0</version>
        <scope>provided</scope>
    </dependency>

</dependencies>
步骤2:创建控制器TestController
@Controller
public class TestController {
    @RequestMapping("/thymeleaf")
    public String index(Model model){
        model.addAttribute("message","Hello Spring-Thymeleaf!");
        return "index";
    }
}
步骤3:在src/main/resources/templates路径下创建视图文件index.html
<!DOCTYPE html>
<html lang="en" xmlns:th="http://www.w3.org/1999/xhtml">
<head>
    <meta charset="UTF-8">
    <title>SpringMVC5+ Thymeleaf Hello world example</title>
</head>
<body>
    <h1>SpringMVC + Thymeleaf Hello World example</h1>
    <p th:text="${message}"></p> <!-- ${...}变量表达式 -->
</body>
</html>
步骤4:在application.properties中可以配置thymeleaf模板解析器属性:
spring.thymeleaf.prefix=classpath:/templates/
spring.thymeleaf.suffix=.html
spring.thymeleaf.encoding=UTF-8
spring.thymeleaf.mode=HTML5
步骤5:启动ThymeleafApplication类
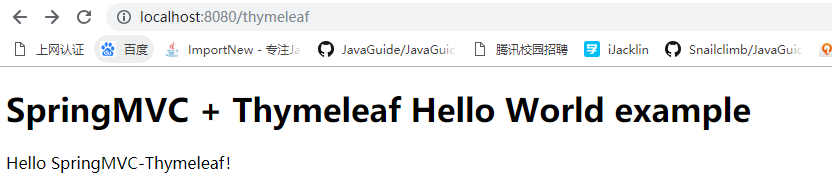
启动完成后在浏览器上访问路径:http://localhost:8080/thymeleaf,返回视图结果:


 21万+
21万+

 被折叠的 条评论
为什么被折叠?
被折叠的 条评论
为什么被折叠?
 到【灌水乐园】发言


