


 本文详细介绍如何在Spring Boot项目中配置并使用MyBatis框架,包括设置数据库连接、引入依赖、配置MyBatis参数及定义DAO接口。
第一步:application.properties增加spring配置数据库链接地址
具体配置如下:
spring.datasource.url=jdbc:mysql://localhost:3306/数据库名?useUnicode=true&characterEncoding=utf8&useSSL=false
spring.datasource.username=root
spring.datasource.password=*******
mybatis.config-location=classpath:mybatis-config.xml
第二步:pom.xml引入mybatis-spring-boot-starter和mysql-connector-java
具体配置如下:
  <!-- https://mvnrepository.com/artifact/org.mybatis.spring.boot/mybatis-spring-boot-starter -->
        <dependency>
            <groupId>org.mybatis.spring.boot</groupId>
            <artifactId>mybatis-spring-boot-starter</artifactId>
            <version>1.3.1</version>
        </dependency>
        <!-- https://mvnrepository.com/artifact/mysql/mysql-connector-java -->
        <dependency>
            <groupId>mysql</groupId>
            <artifactId>mysql-connector-java</artifactId>
            <version>5.1.38</version>
            <scope>runtime</scope>
        </dependency>
第三步:导入mybatis配置文件
导入之后的目录结构如下:
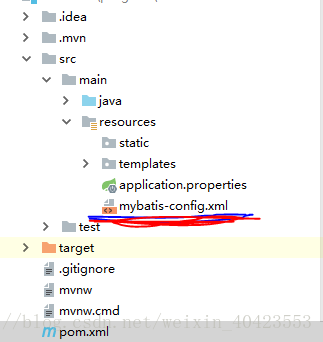
配置内容大致如下:
<?xml version="1.0" encoding="UTF-8"?>
<!DOCTYPE configuration
        PUBLIC "-//mybatis.org//DTD Config 3.0//EN"
        "http://mybatis.org/dtd/mybatis-3-config.dtd">
<configuration>

    <settings>
        <!-- Globally enables or disables any caches configured in any mapper under this configuration -->
        <setting name="cacheEnabled" value="true"/>
        <!-- Sets the number of seconds the driver will wait for a response from the database -->
        <setting name="defaultStatementTimeout" value="3000"/>
        <!-- Enables automatic mapping from classic database column names A_COLUMN to camel case classic Java property names aColumn -->
        <setting name="mapUnderscoreToCamelCase" value="true"/>
        <!-- Allows JDBC support for generated keys. A compatible driver is required.
        This setting forces generated keys to be used if set to true,
         as some drivers deny compatibility but still work -->
        <setting name="useGeneratedKeys" value="true"/>
    </settings>

    <!-- Continue going here -->

</configuration>
配置完成,使用方法如下
import com.nowcoder.model.User;
import org.apache.ibatis.annotations.Insert;
import org.apache.ibatis.annotations.Mapper;

@Mapper
public interface UserDAO {

    String TABLE_NAME="user";
    String INSERT_FIELDS=" name,password,salt,head_url ";
    String SELECT_FIELDS="id ,"+INSERT_FIELDS;
    @Insert({"insert into", TABLE_NAME,  " (",INSERT_FIELDS,
            ") values(#{name},#{password},#{salt},#{head_url})"})
    int addUser(User user);
}
加入 @Mapper 注解
在方法前加入 @insert 或者其他CRUD操作


 430
430

 被折叠的 条评论
为什么被折叠?
被折叠的 条评论
为什么被折叠?
 到【灌水乐园】发言


