


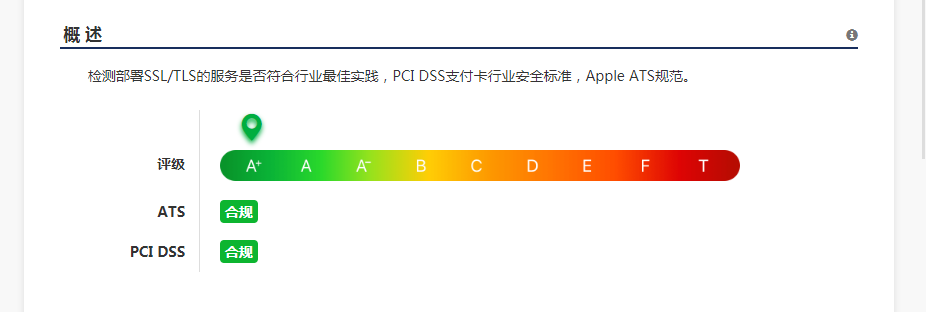
 本文介绍了如何在服务器上启用TLSv1.2协议,以及如何重新编译Nginx以支持TLSv1.3和HTTP/2。首先,需要安装最新版本的openssl,然后更新Nginx的编译参数,并添加相应的配置项以支持新协议。完成编译和安装后,可以通过Chrome浏览器进行HTTP/2和TLSv1.3的验证。
安装最新的openssl:https://www.openssl.org/source/,版本:openssl-1.1.1。
安装命令:
#下载解压
tar -zxvf openssl-1.1.1.tar.gz
cd openssl-1.1.1
#编译安装
./config shared zlib
make
make install
#版本替换
rm -rf /usr/bin/openssl
rm -rf /usr/include/openssl
ln -s /usr/local/bin/openssl /usr/bin/openssl
ln -s /usr/local/include/openssl /usr/include/openssl
#注意下面是>>追加内容
echo "/usr/local/lib64/" >> /etc/ld.so.conf
ldconfig -v
如果使用yum安装的Nginx,编译的openssl版本不对,所以配置对了也没有效果。
可以先用yum安装试试,如果openssl版本没问题,可以直接配置。
nginx -V
nginx version: nginx/1.14.0
built by gcc 4.4.7 20120313 (Red Hat 4.4.7-18) (GCC)
built with OpenSSL 1.0.1e-fips 11 Feb 2013
TLS SNI support enabled
需要下载Nginx代码重新编译。
编译的参数,我直接获取的yum安装的参数,然后加上--with-openssl参数。
可以通过nginx -V来获取yum安装的参数,注意是大写的V。
#下载解压省略
#首先要修改openssl的配置,原来的没了,所以直接上已经修改后的配置
vi auto/lib/openssl/conf
CORE_INCS="$CORE_INCS /usr/local/include/openssl/"
CORE_DEPS="$CORE_DEPS /usr/local/include/openssl/ssl.h"
CORE_LIBS="$CORE_LIBS /usr/local/lib64/libssl.a"
CORE_LIBS="$CORE_LIBS /usr/local/lib64/libcrypto.a"
#编译
./configure --with-openssl=/home/soft/openssl-1.1.1/ --prefix=/etc/nginx --sbin-path=/usr/sbin/nginx --modules-path=/usr/lib64/nginx/modules --conf-path=/etc/nginx/nginx.conf --error-log-path=/var/log/nginx/error.log --http-log-path=/var/log/nginx/access.log --pid-path=/var/run/nginx.pid --lock-path=/var/run/nginx.lock --http-client-body-temp-path=/var/cache/nginx/client_temp --http-proxy-temp-path=/var/cache/nginx/proxy_temp --http-fastcgi-temp-path=/var/cache/nginx/fastcgi_temp --http-uwsgi-temp-path=/var/cache/nginx/uwsgi_temp --http-scgi-temp-path=/var/cache/nginx/scgi_temp --user=nginx --group=nginx --with-compat --with-file-aio --with-threads --with-http_addition_module --with-http_auth_request_module --with-http_dav_module --with-http_flv_module --with-http_gunzip_module --with-http_gzip_static_module --with-http_mp4_module --with-http_random_index_module --with-http_realip_module --with-http_secure_link_module --with-http_slice_module --with-http_ssl_module --with-http_stub_status_module --with-http_sub_module --with-http_v2_module --with-mail --with-mail_ssl_module --with-stream --with-stream_realip_module --with-stream_ssl_module --with-stream_ssl_preread_module --with-cc-opt='-O2 -g -pipe -Wall -Wp,-D_FORTIFY_SOURCE=2 -fexceptions -fstack-protector --param=ssp-buffer-size=4 -m64 -mtune=generic -fPIC' --with-ld-opt='-Wl,-z,relro -Wl,-z,now -pie'
make
make install
安装完成的效果:
nginx -V
nginx version: nginx/1.14.0
built by gcc 4.4.7 20120313 (Red Hat 4.4.7-3) (GCC)
built with OpenSSL 1.1.1 11 Sep 2018
Nginx开启TLSv1.3:
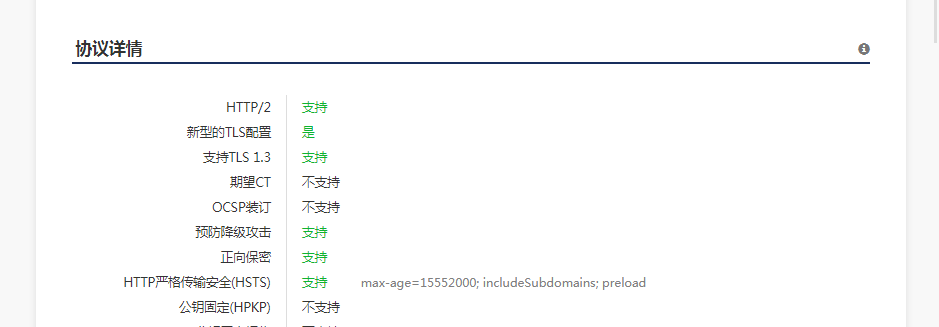
#HTTP/2添加配置
listen 443 ssl http2;
#TLSv1.3添加配置
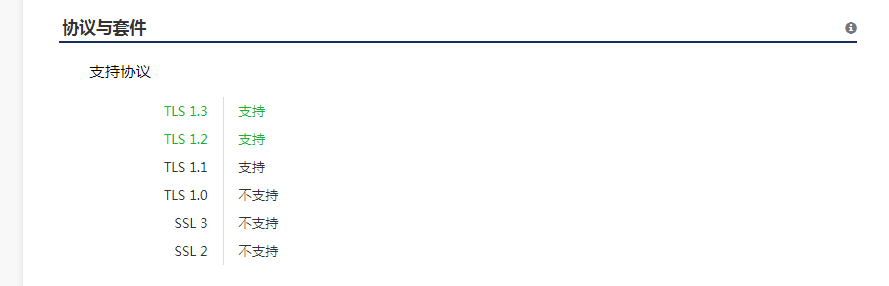
ssl_protocols TLSv1.1 TLSv1.2 TLSv1.3;
ssl_ciphers TLS13-AES-128-GCM-SHA256:ECDHE-RSA-AES128-GCM-SHA256:ECDHE:ECDH:AES:HIGH:!NULL:!aNULL:!MD5:!ADH:!RC4;
新增的加密套件:
TLS13-AES-256-GCM-SHA384
TLS13-CHACHA20-POLY1305-SHA256
TLS13-AES-128-GCM-SHA256
TLS13-AES-128-CCM-8-SHA256
TLS13-AES-128-CCM-SHA256
查看HTTP/2:Chrome浏览器:chrome://net-internals/#http2、控制台、查看Nginx日志。
查看TLSv1.3:Chrome浏览器:chrome://flags/#tls13-variant修改后重启。
最后要说明一下的是安装完成后Nginx的日志不会自动切割,需要自己添加日志切割任务,创建文件/etc/logrotate.d/nginx,配置:
/var/log/nginx/*.log {
daily
missingok
rotate 52
compress
delaycompress
notifempty
create 640 nginx adm
sharedscripts
postrotate
if [ -f /var/run/nginx.pid ]; then
kill -USR1 `cat /var/run/nginx.pid`
fi
endscript
}


 2万+
2万+

 被折叠的 条评论
为什么被折叠?
被折叠的 条评论
为什么被折叠?
 到【灌水乐园】发言


