


在此文章中,我们将使用Tensorflow对象检测API构建自定义对象检测器。我将选择检测苹果果实。但是您可以选择要检测自己的自定义对象的任何图像。
步骤:
- Installation
- Gathering data
- Labeling data
- Generating TFRecords for training
- Configuring training
- Training model
- Exporting inference graph
- Testing object detector
一、Installation
- Python 3.6或更高版本。
- Ubuntu 18.04/google colab
- Tensorflow/Tensorflow-gpu
- 克隆Tensorflow模型存储库:
git clone https://github.com/tensorflow/models.git
#从这一点开始,此目录将被称为 TFmodels 目录。- 搭建环境
- Protobuf编译:Tensorflow对象检测API使用Protobufs配置模型和训练参数。在使用该框架之前,必须先编译Protobuf库。这应该通过从tensorflow / models / research /目录运行以下命令来完成:
#From TFmodels/research/
- 将库添加到PYTHONPATH
在google colab运行时,应将TFmodels / research /和slim目录附加到PYTHONPATH。
- Object Detection Installation
- Testing the Installation
使用google colab的配置阅读下方即可:
好好先生:使用Google Colab配置Tensorflow对象检测APIzhuanlan.zhihu.com
二、Gathering data
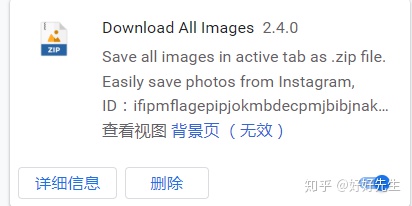
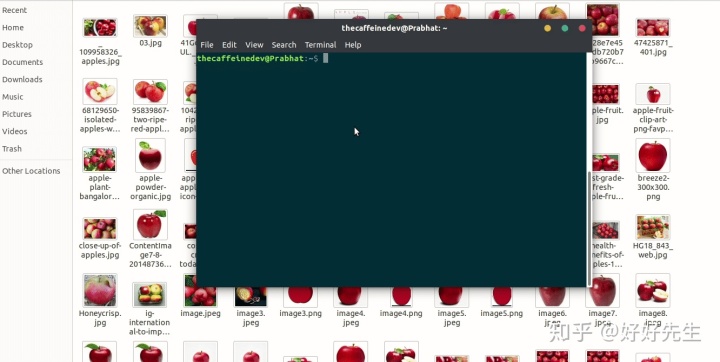
2.1打开您的google chrome浏览器并安装一个名为Download All Images的扩展程序。
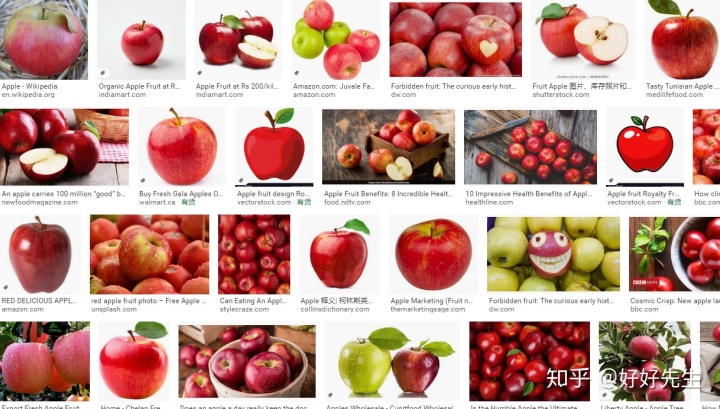
2.2。现在在Google图片中搜索所需的图片选择,在我的例子中是“ Apple”。现在,单击“下载所有图像”扩展按钮,该按钮将位于浏览器的右上角。您将获得一个包含图像的zip文件。然后将其提取。
三、 Labeling data
打开您的终端并通过以下方式安装LabelImg
LabelImg是图形图像注释工具。
安装labelImg后,通过键入将其打开
pip3 install labelImg在不同的环境中安装labelImag方法不同,可以参照如下:
zjgulai/labelImggithub.com
上面的内容。并对所有图片执行此操作。它正在做的是,它正在生成一个XML文件,其中包含带有其标签的对象坐标。
我标记了约100张图片。
现在克隆我的存储库
zjgulai/Tensorflow-Object-Detection-API-With-Custom-Datasetgithub.com
!git clone https://github.com/zjgulai/Tensorflow-Object-Detection-API-With-Custom-Dataset.git克隆之后进入目录:
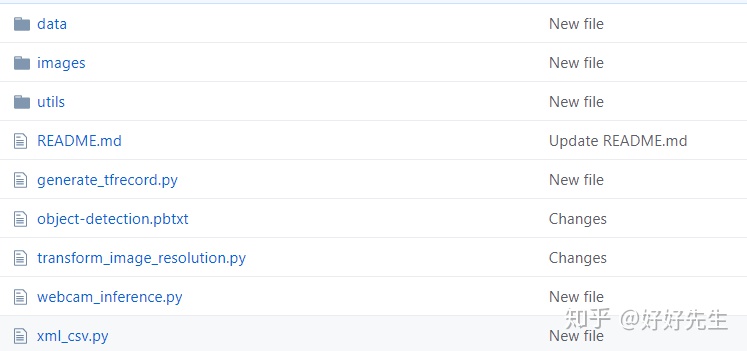
├── ...
    ├── data
    ├── images
    │   ├── train
    │   ├── test
    ├── utils
    │	├── label_map_util.py
    │	├── visualization_utils.py
    ├── generate_tfrecord.py
    └── object-detection.pbtxt
    └── transform_image_resolution.py
    └── xml_csv.py
    └── webcam_inference.py
四、Generating TFRecords for training
现在,将图像文件的70%复制到训练文件夹图像/训练中,其余30%复制到测试文件夹中。
在标记了图像的情况下,我们需要创建TFRecords用作输入数据以训练对象检测器。为了创建TFRecords,我们将使用
datitran/raccoon_datasetgithub.com
两个脚本。即xml_to_csv.py和generate_tfrecord.py文件。
!git clone https://github.com/zjgulai/Tensorflow-Object-Detection-API-With-Custom-Dataset.git目录:
├── ...
├── data
├── images
│   ├── train
│		├── image1.jpg
│		├── image1.xml ..
│   ├── test
│		├── image5.jpg
│		├── image5.xml ..
├── generate_tfrecord.py
└── object-detection.pbtxt
└── transform_image_resolution.py
└── xml_csv.py
└── webcam_inference.py
现在在该文件夹中,我们可以通过打开命令行并键入以下内容,将XML文件转换为train_label.csv和test_label.csv:
!python xml_to_csv.py它们在数据目录中创建两个文件。一个叫做test_labels.csv,另一个叫做train_labels.csv。
在将新创建的文件转换为TFRecords之前,我们需要更改generate_tfrecords.py文件中的几行。
# TO-DO replace this with label map , replace with your own classes
def class_text_to_int(row_label):
    if row_label == 'apple':
        return 1
    else:
        return 0
如果你有多类标记:
# TO-DO replace this with label map
def class_text_to_int(row_label):
    if row_label == 'apple':
        return 1
    elif row_label == 'banana':
        return 2
    elif row_label == 'orange':
        return 3
    else:
        return None
现在,您可以通过键入以下内容来生成TFRecords:
python3 generate_tfrecord.py --csv_input=data/train_labels.csv  --output_path=train.record --image_dir=images/train
python3 generate_tfrecord.py --csv_input=data/test_labels.csv --output_path=test.record --image_dir=images/test这两个命令生成一个train.record和一个test.record文件,可用于训练我们的对象检测器。
五、Configuring training
训练之前,我们要做的最后一件事是create a label map and a training configuration file.
六、Creating a label map
The label map maps: an id to a name.
I have already created a label map file for my training. It looks like this:
编辑:object-detection.pbtxt
 item{
  id:1
  name:"apple"
}
如果您使用多个类,请遵循此模式。
item {
    id: 1
    name: 'apple'
}
item {
    id: 2
    name: 'banana'
}
item {
    id: 3
    name: 'orange'
}
item {
    id: 4
    name: 'etc'
}每个类别的ID号应与generate_tfrecord.py文件中指定的ID相匹配。
七、Creating a training configuration
我们将在Google Colab中训练我们的模型。
I am using “SSD_MOBILENET_V2” for training and with the batch size of 4.
You can change the number of steps, which pre-trained model to use & the batch and size.
然后,您需要运行以下单元格。将有一个Upload TF Record提示。
在此之下,您需要上传生成的
- train.record
- test.record
- object-detection.pbtxt
八、Training model
现在,在上传所有这些文件之后,运行下面的所有单元格。它将得到训练。
九、Exporting inference graph
如果已运行所有单元,则最后将下载一个名为Frozen_inference_graph.pb的文件。
十、Testing Object Detector
现在,将Frozen_inference_graph.pb文件复制到我的GitHub克隆文件夹中。然后,您需要在该webcam_inference.py中进行一些编辑,以测试您自己的对象检测器。打开该文件并检查代码。
如果您正确执行了上述所有步骤,则可以通过网络摄像头测试模型。
十一、Conclusion
Tensorflow对象检测API允许您使用转移学习技术创建自己的对象检测器。
代码链接:
https://github.com/zjgulai/Tensorflow-Object-Detection-API-With-Custom-Datasetgithub.com参考文献和链接:
- https://github.com/tensorflow/models/tree/master/research/object_detection
- https://medium.com/@WuStangDan/step-by-step-tensorflow-object-detection-api-tutorial-part-1-selecting-a-model-a02b6aabe39e
- https://pythonprogramming.net/introduction-use-tensorflow-object-detection-api-tutorial/
- https://towardsdatascience.com/creating-your-own-object-detector-ad69dda69c85
https://medium.com/analytics-vidhya/custom-object-detection-with-tensorflow-using-google-colab-7cbc484f83d7
http://weixin.qq.com/r/5TqGnkTEZhkZrQD992-3 (二维码自动识别)


 85
85

 被折叠的 条评论
为什么被折叠?
被折叠的 条评论
为什么被折叠?
 到【灌水乐园】发言


