


 本文介绍了如何为程序员自定义一个FlowLayout,用于动态显示数量和大小不确定的标签。在实现过程中,详细讲解了从获取布局参数、测量、布局到监听适配器刷新的整个流程,特别强调了在测量阶段计算子View的行列位置和换行条件,以及在布局阶段如何确定每个子View的位置。此外,还提到了适配器刷新时的响应机制。

8种机械键盘轴体对比
本人程序员,要买一个写代码的键盘,请问红轴和茶轴怎么选?
我为什么要实现流式布局?
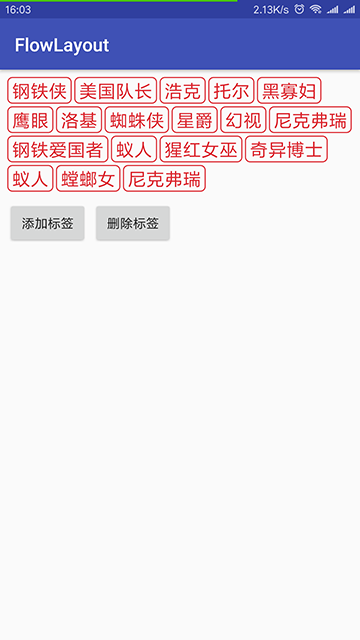
源于工作的需要,最近要做这么一个需求,有这么一些标签(数组,数量不确定,字数不确定),他们需要一个一个的往一个容器里边装,每个标签宽度不确定,如果标签在这一排放不下(剩余宽度不够),那么就要放到下一排。而且因为是数组,所以首先联想到的就是Adapter。
我也试着找寻官方提供的控件和第三方的开源框架,发现都没有完全满足我的需求的:FlexBoxLayout,很强大的控件,但不支持适配器
FlowLayout,大神写的控件,但是定制得太多
还有一些其他的,我就不细说了
我需要的是一个容器控件,能够支持适配器,负责它所有的ChildView的布局(不需要ChildView的缓存),ChildView的宽高不定,不能限定每一行放多少个ChildView,不需要任何方向的滚动。所以,综上,我还是自己定义吧,与此同时,也能在自己实现的过程中提高自己的开发能力。
那么开始吧
自定义ViewGroup是老生常谈的话题,一个自定义ViewGroup的基本流程就是获取布局参数->测量->布局
框架搭建
FlowLayout我使用Kotlin来实现,基础框架搭建如下:
1
2
3
4
5
6
7
8
9class : ViewGroup {
constructor(context: Context, attrs: AttributeSet?, defStyleAttr: Int) : super(context, attrs, defStyleAttr) {
getParams(context, attrs, defStyleAttr)
}
constructor(context: Context, attrs: AttributeSet?) : this(context, attrs, 0)
constructor(context: Context) : this(context, null)
}
获取布局参数
这里不需要过多的参数,只要两个,水平和竖直两个方向的边距:
1
2
3
4
5
6
7private fun (context: Context, attrs: AttributeSet?, defStyleAttr: Int) {
context.obtainStyledAttributes(attrs, R.styleable.FlowLayout, defStyleAttr, 0).apply {
columnSpace = getDimensionPixelSize(R.styleable.FlowLayout_fl_columnSpace, 0)
rowSpace = getDimensionPixelSize(R.styleable.FlowLayout_fl_rowSpace, 0)
recycle()
}
}
测量
测量的主要目的是告诉FlowLayout的父级容器,我FlowLayout要占多大的空间。首先父级会告诉我们,我的测量模式和预设宽高:
1
2
3
4val widthMode = View.MeasureSpec.getMode(widthMeasureSpec)
val heightMode = View.MeasureSpec.getMode(heightMeasureSpec)
val widthSize = View.MeasureSpec.getSize(widthMeasureSpec)
val heightSize = View.MeasureSpec.getSize(heightMeasureSpec)
测量模式有且仅有三种:EXACTLY,“定了就这么多”,父级告诉自己一个确定的值
AT_MOST,“最多就这么多了”,父级给定一个最大值
UNSPECIFIED,“要多少有多少”,这种情况很少见
那么是不是在EXACTLY模式下,就不用测量了呢?当然不是,这里测量之后,还要给每个子View设置参数,方便在布局的时候计算每个子View放置的位置。
在测量时,需要考虑左右的padding:
1val availableWidth = widthSize - paddingStart - paddingEnd
测量子View时的基本方法是循环,在每次循环时判断是否需要换行,参考的依据就是,当前行已经占有的宽度加上当前ChildView要占据的宽度:
1
2
3
4
5
6
7val childWidth = childView.measuredWidth + layoutParams.marginStart + layoutParams.marginEnd
val predictLineWidth = lineWidth + (if (lineWidth == 0) childWidth else (columnSpace + childWidth))
if (predictLineWidth <= availableWidth) {
} else {
}
为了便于布局,要在测量时,计算出每一个ChildView的行列号并赋值给相应的LayoutParams。因此我们需要自定义一个LayoutParams类:1
2
3
4
5
6
7
8
9
10open class LayoutParams : MarginLayoutParams {
constructor(context: Context, attrs: AttributeSet) : super(context, attrs)
constructor(width: Int, height: Int) : super(width, height)
constructor(source: ViewGroup.LayoutParams) : super(source)
var layoutColumn = 0
var layoutRow = 0
}
循环计算时,需要几个变量:1
2
3
4
5
6var maxLineWidth = 0
var maxLineHeight = 0
var lineWidth = 0 //行宽
var totalHeight = 0 //所有行占用的总高度
var columnIndex = 0 //列顺序
var rowIndex = 0 //行顺序
循环计算的完整代码如下:1
2
3
4
5
6
7
8
9
10
11
12
13
14
15
16
17
18
19
20
21
22
23
24
25
26
27
28
29
30
31
32
33
34
35
36
37
38
39(0 until childCount).forEach {
val childView = getChildAt(it)
measureChildWithMargins(childView, widthMeasureSpec, 0, heightMeasureSpec, 0)
val layoutParams = childView.layoutParams as FlowLayout.LayoutParams
val childWidth = childView.measuredWidth + layoutParams.marginStart + layoutParams.marginEnd
val childHeight = childView.measuredHeight + layoutParams.topMargin + layoutParams.bottomMargin
val predictLineWidth = lineWidth + (if (lineWidth == 0) childWidth else (columnSpace + childWidth))
if (predictLineWidth <= availableWidth) {
//不换行
lineWidth = predictLineWidth
maxLineHeight = Math.max(maxLineHeight, childHeight)
layoutParams.layoutColumn = columnIndex
layoutParams.layoutRow = rowIndex
columnIndex++
} else {
//换行
columnIndex = 0
rowIndex++
maxLineWidth = Math.max(lineWidth, maxLineWidth)
totalHeight += (maxLineHeight + rowSpace)
lineHeightList.add(maxLineHeight)
layoutParams.layoutColumn = columnIndex
layoutParams.layoutRow = rowIndex
//如果恰好是最后一行,最大行高值不应该置0,在循环完成之后补上最后一行的行高
maxLineHeight = if (it == childCount - 1) maxLineHeight else 0
lineWidth = childWidth
columnIndex++
}
}
totalHeight += maxLineHeight
lineHeightList.add(maxLineHeight)
其中有几个要点如下:循环完成之后要补上最后一行的行高
换行时将columnIndex置0,rowIndex加1,然后赋值给对应的LayoutParams,赋值完成之后一定要给columnIndex加1
布局
布局相对简单,因为大多数的工作前边测量时已经完成了:
1
2
3
4
5
6
7
8
9
10
11(0 until childCount).forEach {
val childView = getChildAt(it)
val layoutParams = childView.layoutParams as FlowLayout.LayoutParams
val cLeft = paddingStart + layoutParams.marginStart + calculateLeftPosition(it, layoutParams.layoutColumn)
val cTop = paddingTop + calculateTopPosition(it, layoutParams.layoutRow)
val cRight = cLeft + childView.measuredWidth
val cBottom = cTop + childView.measuredHeight
childView.layout(cLeft, cTop, cRight, cBottom)
}
在计算childView的左边的距离时,使用递归来计算,不要算上本身的左边距:
1
2
3
4
5
6
7
8
9
10private fun calculateLeftPosition(layoutIndex: Int, colIndex: Int): Int {
return if (colIndex > 0) {
val previousChild = getChildAt(layoutIndex - 1)
val previousLayoutParams = previousChild.layoutParams as FlowLayout.LayoutParams
val previousWidth = previousChild.measuredWidth + previousLayoutParams.marginStart + previousLayoutParams.marginEnd
columnSpace + previousWidth + calculateLeftPosition(layoutIndex - 1, colIndex - 1)
} else {
0
}
}
上边的距离则相对简单,原理同计算左边距:
1
2
3
4
5
6
7private fun calculateTopPosition(layoutIndex: Int, rowIndex: Int): Int {
return if (rowIndex > 0) {
rowSpace + lineHeightList[rowIndex] + calculateTopPosition(layoutIndex - 1, rowIndex - 1)
} else {
0
}
}
监听适配器刷新
当我们在调用适配器的notifyDataSetChanged方法的时候,FlowLayout需要作出响应,刷新布局,因此,需要一个DataSetObserver:
1
2
3
4
5
6
7
8
9
10
11inner class AdapterDataSetObserver : DataSetObserver() {
override fun onChanged() {
resetData()
requestLayout()
}
override fun onInvalidated() {
resetData()
requestLayout()
}
}
调用notifyDataSetChanged()会触发这里的onChanged()方法,调用notifyDataSetInvalidated()会触发这里的onInvalidated()方法,但是还没完,写好了之后还要“注册”:
1
2
3
4
5
6
7override fun onAttachedToWindow() {
super.onAttachedToWindow()
if ((adapter != null) and (adapterDataSetObserver == null)) {
adapterDataSetObserver = AdapterDataSetObserver()
adapter?.registerDataSetObserver(adapterDataSetObserver)
}
}
在重设适配器时也需要重新“绑定”:
1
2
3
4
5
6
7
8
9
10
11
12
13
14
15
16
17
18
19
20
21
22
23
24
25fun setAdapter(adapter: BaseAdapter?) {
if (this.adapter !== adapter) {
this.adapter?.let { a ->
adapterDataSetObserver?.let { o ->
a.unregisterDataSetObserver(o)
}
}
adapter?.let {
adapterDataSetObserver = AdapterDataSetObserver()
it.registerDataSetObserver(adapterDataSetObserver)
this.adapter = it.apply {
(0 until this@apply.count).forEach {
val childView = this@apply.getView(it, null, this@FlowLayout)
addView(childView,generateLayoutParams(childView.layoutParams))
}
}
requestLayout()
} ?: let {
this.adapter = null
removeAllViews()
}
}
}
剩下的就没什么可说的了,当然这个FlowLayout设计肯定还是有缺陷的,以后会逐渐的改进


 1503
1503

 被折叠的 条评论
为什么被折叠?
被折叠的 条评论
为什么被折叠?
 到【灌水乐园】发言


