


因为微服务项目一般涉及的工程较多,所以在开发环境会把这些工程部署到虚拟机中,方便测试。
首先给出微服务开发虚拟机环境相关软件清单:
- Vagrant 2.2.10
- VirtualBox 6.1.16
- Windows PowerShell(windows 10 自带)
我们的目标是在 windows 10 下,构建出 Vagrant 管控的、 底层基于 VirtualBox 虚拟机技术的 CentOS 环境。
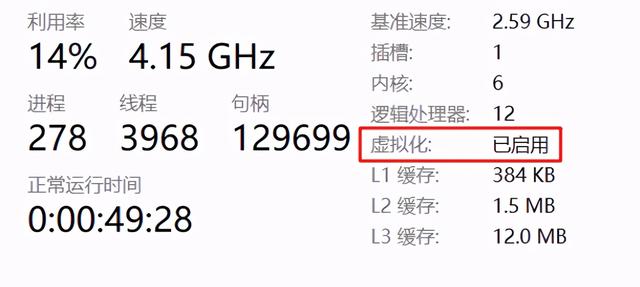
因为会用到底层虚拟化技术,所以我们需要首先在任务管理器的"性能"页签下,确认是否已启用虚拟化技术,如果没有需要在主板 Bios 中开启。
1、Vagrant
Vagrant 是一个虚拟机管理工具,通过它,我们可以快速实现虚拟机镜像分发和使用。
Vagrant 官网地址:https://www.vagrantup.com/
vagrant /ˈveɪɡrənt/
One who wanders from place to place without a permanent home or a means of livelihood.
(1)下载与安装
从 Vagrant 的下载页 找到对应操作系统版本的 msi 安装程序。
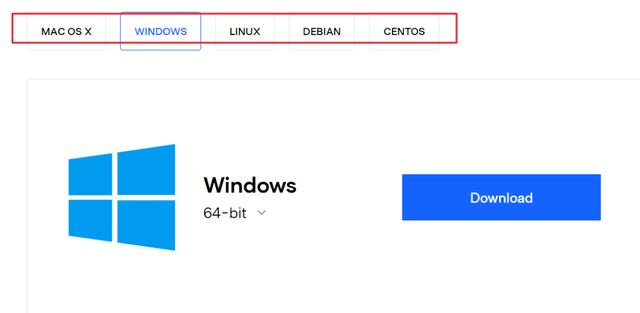
下载之后,双击 msi 即可进行安装。
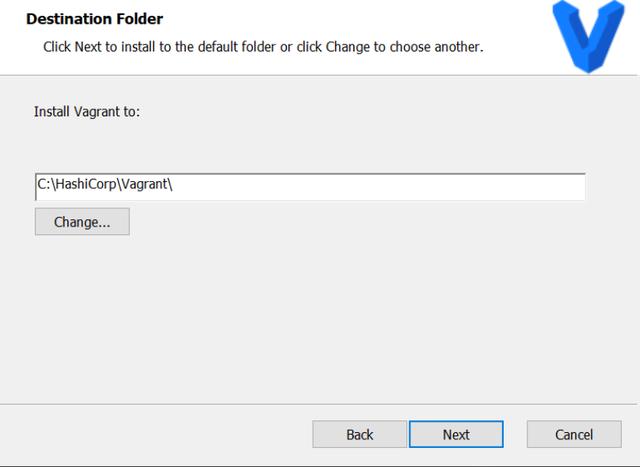
安装过程中,我们可以选择 Vagrant 的安装路径:
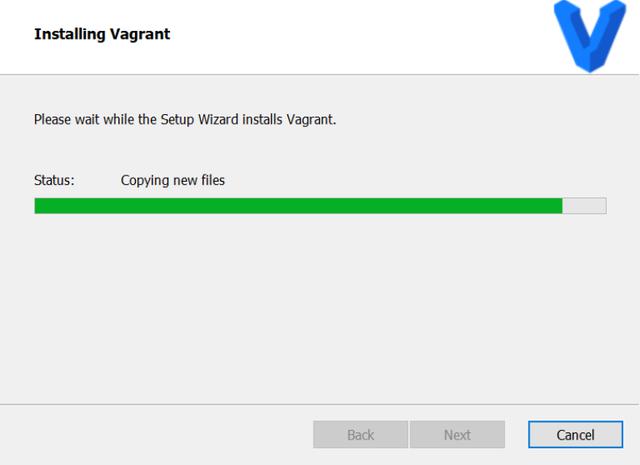
其它没有什么特别的注意点,就是 Copying new files 过程会稍微久一些:
(2)验证
Vagrant 安装成功后,在命令行输入 vagrant version,就可以看到如下输出:

也可以使用 vagrant -v命令来查看版本号。
2、VirtualBox
VirtualBox 是一款功能强大的虚拟机软件,由于安装过程较简单,所以这里就不赘述咯。
因为镜像文件占用很大的存储空间,所以最好放在非系统盘中。
在 VirtualBox 中点击管理 -》全局设定
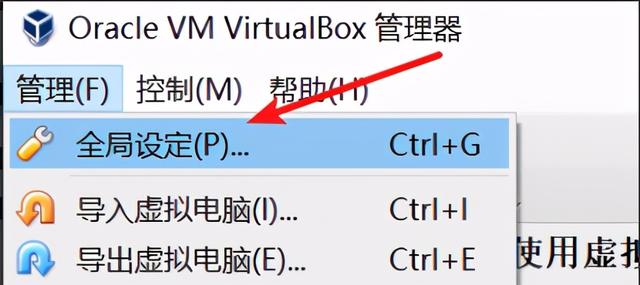
进入“常规”设置选项卡,在此可配置虚拟电脑位置:

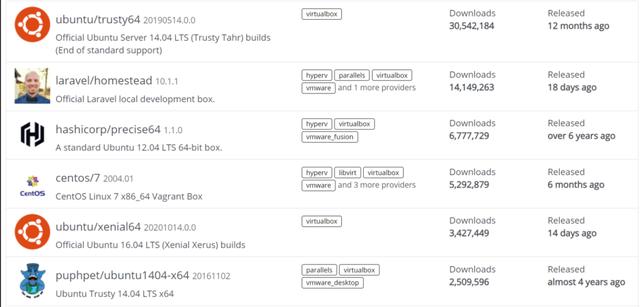
3、安装 Vagrant Box
Vagrant中有两个重要概念:Box和Machine。Box指的是虚拟机应用镜像文件,比如 CentOS 应用。Machine指的是处于运行状态的虚拟机。
这里用到的 CentOS 来源于 app.vagrantup.com/boxes/searc…
安装 box: vagrant box add [box_name] file:///[box_path]
形如:vagrant box add --force --name centos7 C:甥敳獲86135Documentsdeniro-softMSA-CentOS7.box
注意:box 所在的 URI 必须是ascii 码,所以 box 所在的文件夹不能出现中文名。
如果需要覆盖已存在的 box,可以在之前的命令中加入 --force。

Vagrant2.x 的vagrant box add 命令说明摘录如下:
Usage: vagrant box add [options] Options: -c, --clean Clean any temporary download files -f, --force Overwrite an existing box if it exists --insecure Do not validate SSL certificates --cacert FILE CA certificate for SSL download --capath DIR CA certificate directory for SSL download --cert FILE A client SSL cert, if needed --location-trusted Trust 'Location' header from HTTP redirects and use the same credentials for subsequent urls as for the initial one --provider PROVIDER Provider the box should satisfy --box-version VERSION Constrain version of the added boxThe box descriptor can be the name of a box on HashiCorp's Vagrant Cloud,or a URL, or a local .box file, or a local .json file containingthe catalog metadata.The options below only apply if you're adding a box file directly,and not using a Vagrant server or a box structured like 'user/box': --checksum CHECKSUM Checksum for the box --checksum-type TYPE Checksum type (md5, sha1, sha256) --name BOX Name of the box --[no-]color Enable or disable color output --machine-readable Enable machine readable output -v, --version Display Vagrant version --debug Enable debug output --timestamp Enable timestamps on log output --debug-timestamp Enable debug output with timestamps --no-tty Enable non-interactive output-h, --help Print this help使用 vagrant box remove ,可以删除指定名称的 box。
4、初始化 Vagrant Box
打开 PowerShell(win10 自带,直接在搜索框中可以找到)
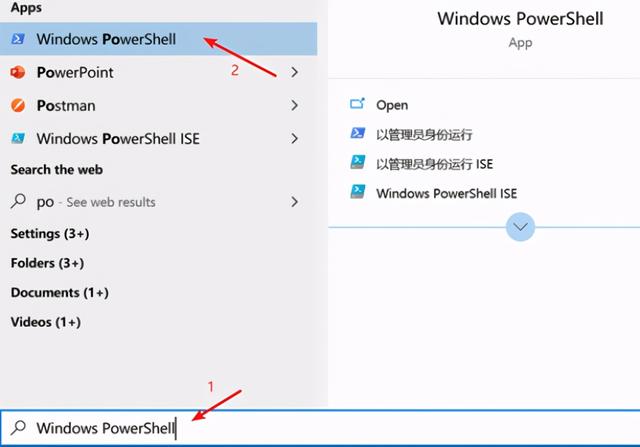
Windows PowerShell 是一种命令行外壳程序和脚本环境。
通过该命令 vagrant box list我们可以查看刚才安装的 CentOS Box:

切换到需要安装虚拟机的路径,然后运行 vagrant init ,执行初始化 Box 操作。

命令执行成功后,会在当前路径下生成 Vagrantfile 配置文件。
5、vagrantfile 配置
在 vagrantfile 中,我们一般会配置以下这些参数。
(1)配置 box 名称
config.vm.box = "centos7"
(2)配置私有网络
私有网络的意思是:只有当前主机才可以访问这个虚拟机。语法示例为:config.vm.network "private_network", ip: "192.168.33.10"
(3)配置共享文件夹
Vagrant 提供了将本机目录挂载到虚拟机目录的功能,默认是将Vagrant 配置文件所在目录挂载到虚拟机 /vagrant 目录下。语法示例为:config.vm.synced_folder "C:/VM/Vagrant/data", "/host_data"。注意:本机目录(示例中的 C:/VM/Vagrant/data)必须预先创建好。
配置好后,就会在 vagrant up 命令启动后,看到输出日志:

通过 vagrant ssh 登录 CentOS 系统后,通过 cd / 进入根目录,就会看到主机所共享出来的目录:

(4)配置虚拟机内存与 CPU 数
vb.memory = "2048"vb.cpus = 2完整 vagrantfile 内容如下:
# -*- mode: ruby -*-# vi: set ft=ruby :# All Vagrant configuration is done below. The "2" in Vagrant.configure# configures the configuration version (we support older styles for# backwards compatibility). Please don't change it unless you know what# you're doing.Vagrant.configure("2") do |config| # The most common configuration options are documented and commented below. # For a complete reference, please see the online documentation at # https://docs.vagrantup.com. # Every Vagrant development environment requires a box. You can search for # boxes at https://vagrantcloud.com/search. config.vm.box = "centos7" #config.vm.boot_timeout = 600 # Disable automatic box update checking. If you disable this, then # boxes will only be checked for updates when the user runs # `vagrant box outdated`. This is not recommended. # config.vm.box_check_update = false # Create a forwarded port mapping which allows access to a specific port # within the machine from a port on the host machine. In the example below, # accessing "localhost:8080" will access port 80 on the guest machine. # NOTE: This will enable public access to the opened port # config.vm.network "forwarded_port", guest: 80, host: 8080 # Create a forwarded port mapping which allows access to a specific port # within the machine from a port on the host machine and only allow access # via 127.0.0.1 to disable public access # config.vm.network "forwarded_port", guest: 80, host: 8080, host_ip: "127.0.0.1" # Create a private network, which allows host-only access to the machine # using a specific IP. config.vm.network "private_network", ip: "192.168.33.10" # Create a public network, which generally matched to bridged network. # Bridged networks make the machine appear as another physical device on # your network. # config.vm.network "public_network" # config.vm.network "public_network",use_dhcp_assigned_default_route: true # Share an additional folder to the guest VM. The first argument is # the path on the host to the actual folder. The second argument is # the path on the guest to mount the folder. And the optional third # argument is a set of non-required options. config.vm.synced_folder "C:/VM/Vagrant/data", "/vagrant_data" # Provider-specific configuration so you can fine-tune various # backing providers for Vagrant. These expose provider-specific options. # Example for VirtualBox: # config.vm.provider "virtualbox" do |vb| # # Display the VirtualBox GUI when booting the machine vb.gui = true # # # Customize the amount of memory on the VM: # vb.memory = "1024" end # # View the documentation for the provider you are using for more # information on available options. config.vm.provider "virtualbox" do |vb| vb.memory = "2048" vb.cpus = 2 end # Enable provisioning with a shell script. Additional provisioners such as # Puppet, Chef, Ansible, Salt, and Docker are also available. Please see the # documentation for more information about their specific syntax and use. # config.vm.provision "shell", inline: <6、Vagrant 常用命令
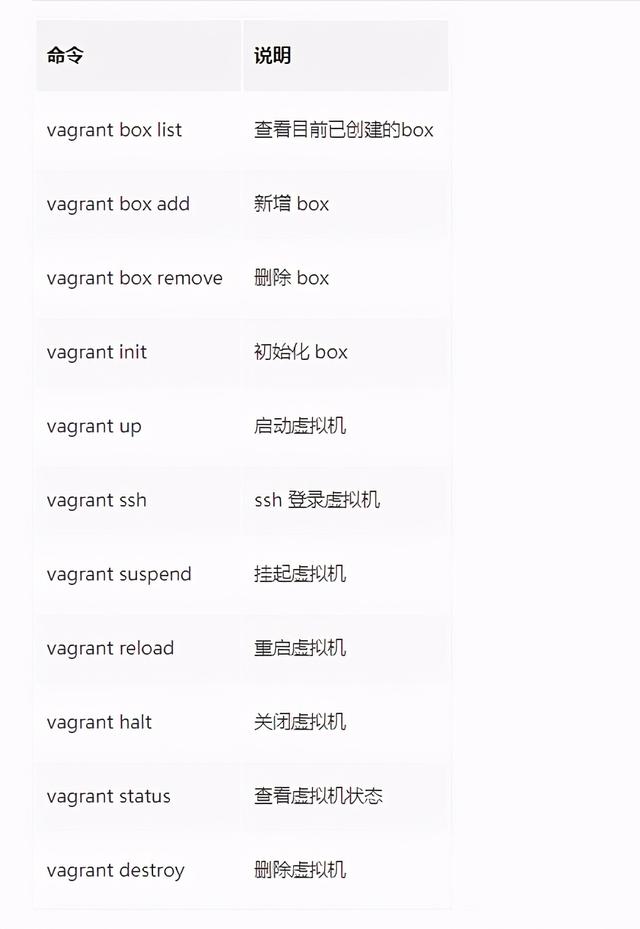
7、启动虚拟机
在 Windows PowerShell 中运行 vagrant up,等待片刻,就可以在 VirtualBox 中看到虚拟机已经启动起来了。

虚拟机启动成功的输出日志为:
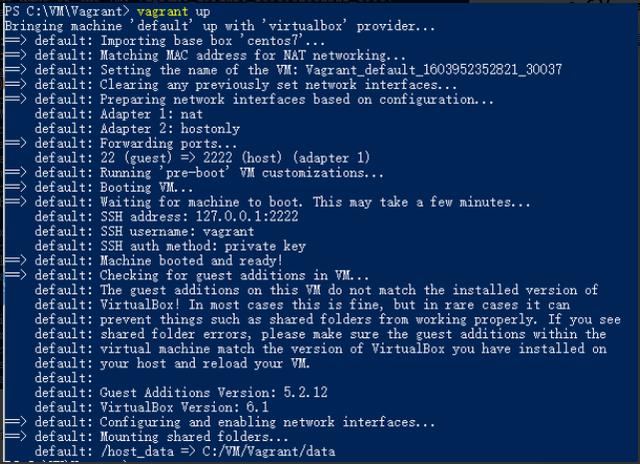
最后通过 vagrant ssh 命令就可以登录虚拟机的 CentOS 系统。
作者:deniro
链接:https://juejin.im/post/6892166418356256782
来源:掘金


 被折叠的 条评论
为什么被折叠?
被折叠的 条评论
为什么被折叠?
 到【灌水乐园】发言


