


 本文介绍了如何快速搭建SpringBoot项目,并详细讲述了整合Mybatis、Druid数据源以及Thymeleaf模板引擎的步骤。从新建Maven项目到配置相关依赖,再到编写配置文件和测试连接数据库,最后遇到并解决启动时的错误问题。
1.新建maven项目
1.1 Eclipse新建maven项目
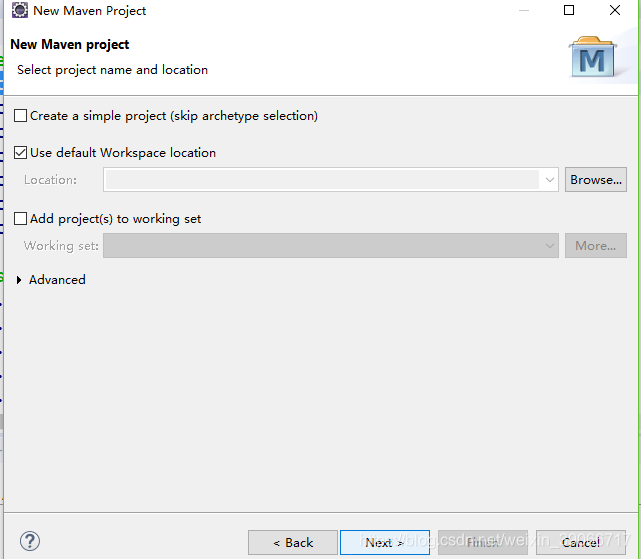
1.2点击下一步
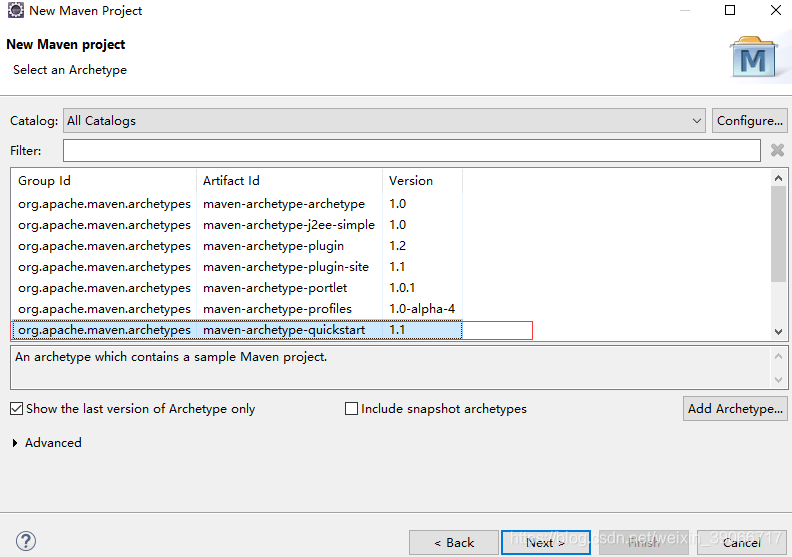 选择标红选项,点击下一步
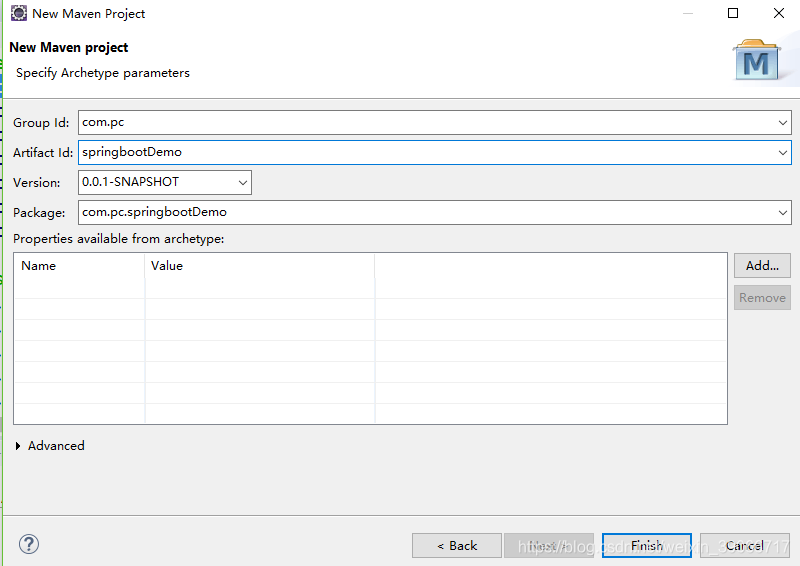 点击finish,完成项目初步搭建
2.整合springboot
2.1.在pom文件里添加springboot相关依赖
<project xmlns="http://maven.apache.org/POM/4.0.0" xmlns:xsi="http://www.w3.org/2001/XMLSchema-instance"
  xsi:schemaLocation="http://maven.apache.org/POM/4.0.0 http://maven.apache.org/xsd/maven-4.0.0.xsd">
  <modelVersion>4.0.0</modelVersion>

  <groupId>com.pc</groupId>
  <artifactId>springbootDemo</artifactId>
  <version>0.0.1-SNAPSHOT</version>
  <packaging>jar</packaging>

  <name>springbootDemo</name>
  <url>http://maven.apache.org</url>

  <parent>
        <groupId>org.springframework.boot</groupId>
        <artifactId>spring-boot-starter-parent</artifactId>
        <version>2.0.1.RELEASE</version>
        <relativePath/>
  </parent>

    <properties>
        <project.build.sourceEncoding>UTF-8</project.build.sourceEncoding>
        <project.reporting.outputEncoding>UTF-8</project.reporting.outputEncoding>
        <java.version>1.8</java.version>
    </properties>

  <dependencies>
  <!-- 引入springboot相关依赖 -->
  	<dependency>
            <groupId>org.springframework.boot</groupId>
            <artifactId>spring-boot-starter-web</artifactId>
    </dependency>
    <dependency>
      <groupId>junit</groupId>
      <artifactId>junit</artifactId>
      <version>3.8.1</version>
      <scope>test</scope>
    </dependency>
  </dependencies>
</project>
此时你会发现Maven Dependencies下多了好多spring相关jar包和日志相关jar包,这就体现出了springboot配置简单的优点了,明明只引入一个依赖,却相关jar包都已经引入工程。
此时jar包我们已经添加完毕,接下来创建程序入口,在springbootDemo包下创建MainApplication类
package com.pc.springbootDemo;

import org.springframework.boot.SpringApplication;
import org.springframework.boot.autoconfigure.SpringBootApplication;
import org.springframework.context.annotation.ComponentScan;
@SpringBootApplication
@ComponentScan(basePackages={"com.pc.controller"})//此注解将扫描指定包下的注解,若不添加,则在spring容器内找不到相关bean,默认扫描路径为入口类同包路径
public class MainApplication {
	public static void main(String[] args) throws Exception {
        SpringApplication.run(MainApplication.class, args);
    }
}
2.2新建测试Action
package com.pc.controller;
import org.springframework.stereotype.Controller;
import org.springframework.web.bind.annotation.RequestMapping;
import org.springframework.web.bind.annotation.ResponseBody;
@Controller
@RequestMapping("/test")
public class TestController {
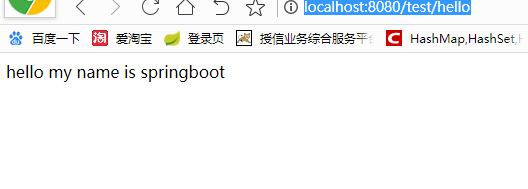
@RequestMapping("/hello")
@ResponseBody
public String hello(){
return "hello my name is springboot";
}
}
此时直接运行MainApplication中的main方法会看到控制台出现以下内容则启动成功
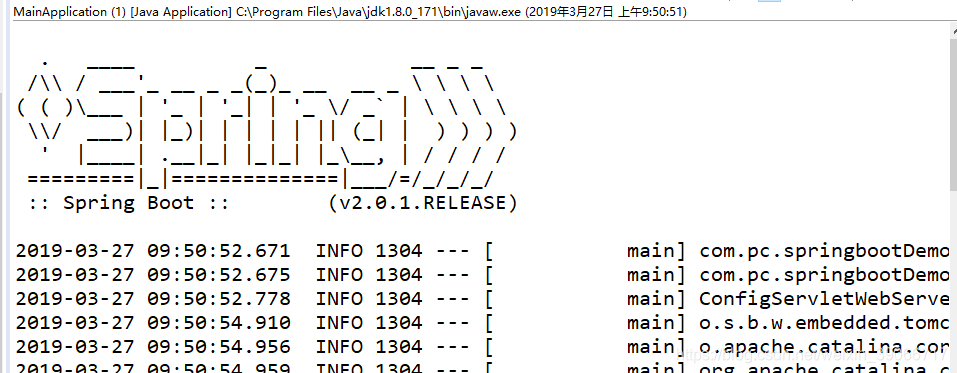 打开浏览器输入http://localhost:8080/test/hello
3.此时你已经搭建了一半了,接下来整合mybatis和druid,以及thymeleaf
3.1在pom文件中添加相关依赖
<!-- 引入模板引擎thymeleaf框架 -->
       <dependency>
            <groupId>org.springframework.boot</groupId>
            <artifactId>spring-boot-starter-thymeleaf</artifactId>
        </dependency>
        <!--添加mybatis依赖  -->
        <dependency>
		    <groupId>org.mybatis.spring.boot</groupId>
		    <artifactId>mybatis-spring-boot-starter</artifactId>
		    <version>1.3.2</version>
        </dependency>
        <!--mybatis的分页插件-->
		<dependency>
			<groupId>com.github.pagehelper</groupId>
			<artifactId>pagehelper-spring-boot-starter</artifactId>
			<version>1.2.3</version>
		</dependency>
		<!--mysql连接-->
		<dependency>
			<groupId>mysql</groupId>
			<artifactId>mysql-connector-java</artifactId>
			<version>5.1.38</version>
		</dependency>
		<!--druid包-->
		<dependency>
			<groupId>com.alibaba</groupId>
			<artifactId>druid-spring-boot-starter</artifactId>
			<version>1.1.9</version>
		</dependency>
3.2此时我们需要在配置文件中添加相关配置,这时有小伙伴会纳闷了,在哪添加配置文件呢?
在项目下新建src/main/resources文件夹
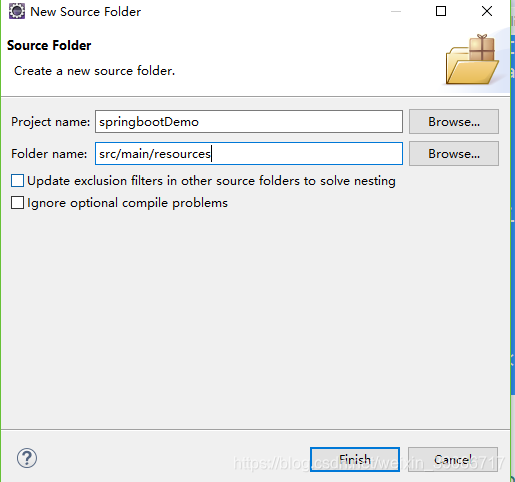 在resources文件夹下新建application.properties在配置文件中添加如下配置
#thymeleaf
spring.thymeleaf.cache=false  #默认开启缓存,开发环境建议关闭
spring.thymeleaf.servlet.content-type=text/html
spring.thymeleaf.enabled=true
spring.thymeleaf.encoding=UTF-8
spring.thymeleaf.mode=HTML5
spring.thymeleaf.prefix=classpath:/templates/  #模板前缀,在此路径下存放模板
spring.thymeleaf.suffix=.html		#模板后缀

#mybatis
mybatis.type-aliases-package=com.pc.pojo
mybatis.configuration.map-underscore-to-camel-case=true
mybatis.configuration.default-fetch-size=100
mybatis.configuration.default-statement-timeout=3000
mybatis.mapperLocations=classpath:/com/pc/dao/*.xml
#druid
spring.datasource.url = jdbc:mysql://localhost:3306/bank?useUnicode=true&characterEncoding=utf-8
spring.datasource.username = root
spring.datasource.password = root
spring.datasource.driverClassName = com.mysql.jdbc.Driver
#druid 连接池的配置 可以是默认的
spring.datasource.type=com.alibaba.druid.pool.DruidDataSource
spring.datasource.druid.filters=stat
spring.datasource.druid.max-active=20
spring.datasource.druid.initial-size=1
spring.datasource.druid.min-idle=1
spring.datasource.druid.max-wait=60000
spring.datasource.druid.time-between-eviction-runs-millis=60000
spring.datasource.druid.min-evictable-idle-time-millis=300000
spring.datasource.druid.validation-query=select 'x'
spring.datasource.druid.test-while-idle=true
spring.datasource.druid.test-on-borrow=false
spring.datasource.druid.test-on-return=false
spring.datasource.druid.pool-prepared-statements=true
spring.datasource.druid.max-open-prepared-statements=20
接下来我们做一个测试,测试是否连接上数据库
编写pojo
package com.pc.pojo;

public class Customer {
	private Integer custNumber;
	private String custName;
	private String custPwd;
	public Integer getCustNumber() {
		return custNumber;
	}
	public void setCustNumber(Integer custNumber) {
		this.custNumber = custNumber;
	}
	public String getCustName() {
		return custName;
	}
	public void setCustName(String custName) {
		this.custName = custName;
	}
	public String getCustPwd() {
		return custPwd;
	}
	public void setCustPwd(String custPwd) {
		this.custPwd = custPwd;
	}
}
编写dao
package com.pc.dao;

import org.apache.ibatis.annotations.Mapper;
import org.apache.ibatis.annotations.Param;
import org.apache.ibatis.annotations.Select;

import com.pc.pojo.Customer;

@Mapper
public interface CustomerDao {
	@Select("select * from customer where custNumber=#{id}")
	public Customer findById(@Param("id")int id);
}
编写service接口和实现类
package com.pc.service;

import com.pc.pojo.Customer;

public interface CustomerService {
	public Customer findById(int id);
}
实现类
package com.pc.service.impl;

import org.springframework.beans.factory.annotation.Autowired;
import org.springframework.stereotype.Service;

import com.pc.dao.CustomerDao;
import com.pc.pojo.Customer;
import com.pc.service.CustomerService;


@Service
public class CustomerServiceImpl implements CustomerService{
	@Autowired
	private CustomerDao customerDao;

	public Customer findById(int id) {
		return customerDao.findById(id);
	}

}
接下来编写控制层Action
package com.pc.controller;

import org.springframework.beans.factory.annotation.Autowired;
import org.springframework.stereotype.Controller;
import org.springframework.web.bind.annotation.RequestMapping;
import org.springframework.web.bind.annotation.ResponseBody;

import com.pc.pojo.Customer;
import com.pc.service.CustomerService;

@Controller
@RequestMapping("/test")
public class TestController {
	@Autowired
	private CustomerService customerService;
	@RequestMapping("/hello")
	@ResponseBody
	public String hello(){
		return "hello my name is springboot";
	}
	@RequestMapping("/db")
	@ResponseBody
	public Customer getDb(){
		return customerService.findById(1);
	}
}
启动项目报如下错误
. ____ _ __ _ _
/\ / ’ __ _ () __ __ _ \ \ \
( ( )__ | '_ | '| | ’ / ` | \ \ \
\/ )| |)| | | | | || (| | ) ) ) )
’ || .__|| ||| |__, | / / / /
=|_|======|/=////
:: Spring Boot :: (v2.0.1.RELEASE)
2019-03-27 10:26:21.651 INFO 9272 — [ main] com.pc.springbootDemo.MainApplication : Starting MainApplication on Pei-PC with PID 9272 (G:\MavenEclipseWorkSpace\springbootDemo\target\classes started by PC in G:\MavenEclipseWorkSpace\springbootDemo)
2019-03-27 10:26:21.657 INFO 9272 — [ main] com.pc.springbootDemo.MainApplication : No active profile set, falling back to default profiles: default
2019-03-27 10:26:21.784 INFO 9272 — [ main] ConfigServletWebServerApplicationContext : Refreshing org.springframework.boot.web.servlet.context.AnnotationConfigServletWebServerApplicationContext@e50a6f6: startup date [Wed Mar 27 10:26:21 CST 2019]; root of context hierarchy
2019-03-27 10:26:23.233 WARN 9272 — [ main] o.m.s.mapper.ClassPathMapperScanner : No MyBatis mapper was found in ‘[com.pc.springbootDemo]’ package. Please check your configuration.
2019-03-27 10:26:24.411 INFO 9272 — [ main] o.s.b.w.embedded.tomcat.TomcatWebServer : Tomcat initialized with port(s): 8080 (http)
2019-03-27 10:26:24.460 INFO 9272 — [ main] o.apache.catalina.core.StandardService : Starting service [Tomcat]
2019-03-27 10:26:24.462 INFO 9272 — [ main] org.apache.catalina.core.StandardEngine : Starting Servlet Engine: Apache Tomcat/8.5.29
2019-03-27 10:26:24.477 INFO 9272 — [ost-startStop-1] o.a.catalina.core.AprLifecycleListener : The APR based Apache Tomcat Native library which allows optimal performance in production environments was not found on the java.library.path: [C:\Program Files\Java\jdk1.8.0_171\bin;C:\Windows\Sun\Java\bin;C:\Windows\system32;C:\Windows;C:/Program Files/Java/jdk1.8.0_171/bin/…/jre/bin/server;C:/Program Files/Java/jdk1.8.0_171/bin/…/jre/bin;C:/Program Files/Java/jdk1.8.0_171/bin/…/jre/lib/amd64;F:\app\PC\product\11.1.0\db_1\bin;C:\Program Files\Java\jdk1.8.0_171\bin;C:\Program Files\Java\jdk1.8.0_171\jre\bin;c:\windows\system32;C:\Program Files\TortoiseSVN\bin;D:\maven\apache-maven-3.3.9\bin;C:\Program Files (x86)\VanDyke Software\Clients;E:\nodejs;E:\nodejs\node_cache;C:\Users\PC\AppData\Local\Microsoft\WindowsApps;C:\Program Files (x86)\VanDyke Software\Clients;E:\nodejs\node_global;;D:\Eclipse\eclipse;;.]
2019-03-27 10:26:24.639 INFO 9272 — [ost-startStop-1] o.a.c.c.C.[Tomcat].[localhost].[/] : Initializing Spring embedded WebApplicationContext
2019-03-27 10:26:24.640 INFO 9272 — [ost-startStop-1] o.s.web.context.ContextLoader : Root WebApplicationContext: initialization completed in 2860 ms
2019-03-27 10:26:24.891 INFO 9272 — [ost-startStop-1] o.s.b.w.servlet.ServletRegistrationBean : Servlet dispatcherServlet mapped to [/]
2019-03-27 10:26:24.893 INFO 9272 — [ost-startStop-1] o.s.b.w.servlet.ServletRegistrationBean : Servlet statViewServlet mapped to [/druid/]
2019-03-27 10:26:24.898 INFO 9272 — [ost-startStop-1] o.s.b.w.servlet.FilterRegistrationBean : Mapping filter: ‘characterEncodingFilter’ to: [/]
2019-03-27 10:26:24.899 INFO 9272 — [ost-startStop-1] o.s.b.w.servlet.FilterRegistrationBean : Mapping filter: ‘hiddenHttpMethodFilter’ to: [/]
2019-03-27 10:26:24.899 INFO 9272 — [ost-startStop-1] o.s.b.w.servlet.FilterRegistrationBean : Mapping filter: ‘httpPutFormContentFilter’ to: [/]
2019-03-27 10:26:24.900 INFO 9272 — [ost-startStop-1] o.s.b.w.servlet.FilterRegistrationBean : Mapping filter: ‘requestContextFilter’ to: [/]
2019-03-27 10:26:24.901 INFO 9272 — [ost-startStop-1] o.s.b.w.servlet.FilterRegistrationBean : Mapping filter: ‘webStatFilter’ to urls: [/]
2019-03-27 10:26:24.962 WARN 9272 — [ main] ConfigServletWebServerApplicationContext : Exception encountered during context initialization - cancelling refresh attempt: org.springframework.beans.factory.UnsatisfiedDependencyException: Error creating bean with name ‘testController’: Unsatisfied dependency expressed through field ‘customerService’; nested exception is org.springframework.beans.factory.NoSuchBeanDefinitionException: No qualifying bean of type ‘com.pc.service.CustomerService’ available: expected at least 1 bean which qualifies as autowire candidate. Dependency annotations: {@org.springframework.beans.factory.annotation.Autowired(required=true)}
2019-03-27 10:26:24.966 INFO 9272 — [ main] o.apache.catalina.core.StandardService : Stopping service [Tomcat]
2019-03-27 10:26:24.988 WARN 9272 — [ost-startStop-1] o.a.c.loader.WebappClassLoaderBase : The web application [ROOT] appears to have started a thread named [Abandoned connection cleanup thread] but has failed to stop it. This is very likely to create a memory leak. Stack trace of thread:
java.lang.Object.wait(Native Method)
java.lang.ref.ReferenceQueue.remove(ReferenceQueue.java:143)
com.mysql.jdbc.AbandonedConnectionCleanupThread.run(AbandonedConnectionCleanupThread.java:43)
2019-03-27 10:26:25.002 INFO 9272 — [ main] ConditionEvaluationReportLoggingListener :
Error starting ApplicationContext. To display the conditions report re-run your application with ‘debug’ enabled.
2019-03-27 10:26:25.168 ERROR 9272 — [ main] o.s.b.d.LoggingFailureAnalysisReporter :
APPLICATION FAILED TO START
Description:
Field customerService in com.pc.controller.TestController required a bean of type ‘com.pc.service.CustomerService’ that could not be found.
Action:
Consider defining a bean of type ‘com.pc.service.CustomerService’ in your configuration.
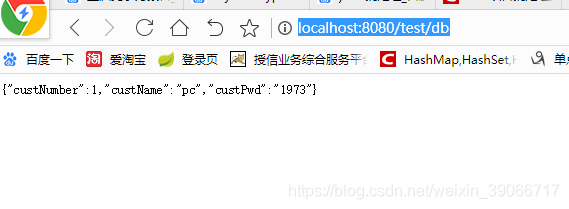
分析原因,在启动类上忘记添加扫描包在启动类上添加扫描包
@MapperScan("com.pc.dao")
@ComponentScan(basePackages={"com.pc.controller","com.pc.service"})
再次启动,启动成功,在浏览器输入http://localhost:8080/test/db


 3728
3728

 被折叠的 条评论
为什么被折叠?
被折叠的 条评论
为什么被折叠?
 到【灌水乐园】发言


