


 本文介绍如何在IDEA中搭建Spring+SpringMVC+MyBatis(SSM)项目,包括配置application-context.xml、jdbc.properties等文件,以及创建DAO、Service层实现增删改查操作,并提供单元测试示例。
IDEA下搭建ssm项目-01
application-context.xml配置,这里的模板后面就不贴出了<?xml version="1.0" encoding="UTF-8"?>
<beans xmlns="http://www.springframework.org/schema/beans"
xmlns:xsi="http://www.w3.org/2001/XMLSchema-instance" xmlns:aop="http://www.springframework.org/schema/aop"
xmlns:tx="http://www.springframework.org/schema/tx" xmlns:jdbc="http://www.springframework.org/schema/jdbc"
xmlns:context="http://www.springframework.org/schema/context"
xsi:schemaLocation="
http://www.springframework.org/schema/context http://www.springframework.org/schema/context/spring-context-3.0.xsd
http://www.springframework.org/schema/beans http://www.springframework.org/schema/beans/spring-beans-3.0.xsd
http://www.springframework.org/schema/jdbc http://www.springframework.org/schema/jdbc/spring-jdbc-3.0.xsd
http://www.springframework.org/schema/tx http://www.springframework.org/schema/tx/spring-tx-3.0.xsd
http://www.springframework.org/schema/aop http://www.springframework.org/schema/aop/spring-aop-3.0.xsd">
<!--这里直接 把其他配置分开-->
<import resource="config/*.xml" />
</beans>
properties目录下
jdbc.properties:driverClass=com.mysql.jdbc.Driver
jdbcUrl=jdbc:mysql://localhost:3306/你的数据库?characterEncoding=UTF-8
user=root
password=123456接下来是config目录下的配置文件
annotation.xml:
<!--spring 扫包   @Service .....-->
<context:component-scan base-package="com.nelsoner">
   <!--不扫描 Controller -->
   <context:exclude-filter type="annotation" expression="org.springframework.stereotype.Controller"/>
</context:component-scan>

<!--自动装配-->
   <context:annotation-config/>
property.xml
<!-- 读取jdbc配置 -->
<!--这种方式的扩展性不好-->
<!--
   <context:property-placeholder location="classpath:properties/jdbc.properties" />
-->
<bean class="org.springframework.beans.factory.config.PropertyPlaceholderConfigurer">
   <property name="locations">
      <list>
         <!-- jdbc配置 -->
         <value>classpath:properties/jdbc.properties</value>
         <!-- memcached配置 -->

      </list>
   </property>
</bean>
jdbc.xml:
<!-- c3p0-->
<bean id="dataSource" class="com.mchange.v2.c3p0.ComboPooledDataSource">
   <property name="driverClass" value="${driverClass}"/>
   <property name="jdbcUrl" value="${jdbcUrl}"></property>
   <property name="user" value="${user}" />
   <property name="password" value="${password}"/>
</bean>
mybatis.xml:
<!--mybatis  sessionFactory配置-->
<bean id="sqlSessionFactory" class="org.mybatis.spring.SqlSessionFactoryBean">
   <property name="dataSource" ref="dataSource"/>
   <!--这里要特别注意 classpath:com.nelsoner.core.dao/**/*.xml  /**/ 表示任意多级目录-->
   <property name="mapperLocations" value="classpath:com.nelsoner.core.dao/**/*.xml"/>
   <property name="typeAliasesPackage" value="com.nelsoner.core.bean"/>
</bean>
<!-- 扫包 --><bean class="org.mybatis.spring.mapper.MapperScannerConfigurer"> <property name="basePackage" value="com.nelsoner.core.dao"/></bean>
transation.xml:
<!-- spring 事务 -->
<bean id="transactionManager" class="org.springframework.jdbc.datasource.DataSourceTransactionManager">
   <property name="dataSource" ref="dataSource"/>
</bean>
<!-- 开启事务注解 -->
<tx:annotation-driven transaction-manager="transactionManager"/>
到这里基本配置完成
接下来写个测试
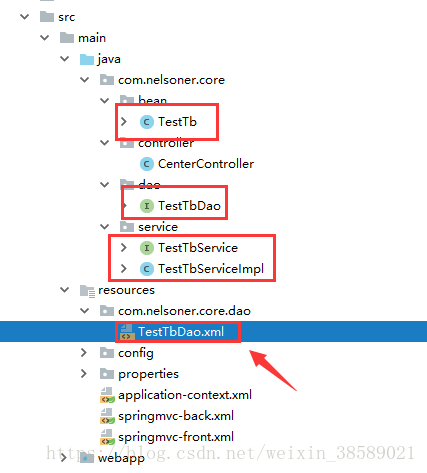
TestTb:
private Integer id;
private String name;
private Date birthday;
//这里省略get set
TestTbDao:
public interface TestTbDao {
   public void addTestTb(TestTb testTb);
}
TestTbService:
public interface TestTbService {
   public void addTestTb(TestTb testTb);
}
TestTbServiceImpl:
@Service
@Transactional
public class TestTbServiceImpl implements TestTbService{
   @Resource
   private TestTbDao testTbDao;
   public void addTestTb(TestTb testTb) {
      testTbDao.addTestTb(testTb);
   }
}
TestTbDao.xml:
<?xml version="1.0" encoding="UTF-8" ?>
<!DOCTYPE mapper PUBLIC "-//mybatis.org//DTD Mapper 3.0//EN" "http://mybatis.org/dtd/mybatis-3-mapper.dtd">
<mapper namespace="com.nelsoner.core.dao.TestTbDao">
   <!--  添加测试数据  -->
   <!-- id 就是TestTbDao类的函数名-->
   <!--
      在mybatis.xml 中配置了如下: 所以 parameterType可以不写前面的包
      <property name="typeAliasesPackage" value="com.nelsoner.core.bean"/>
   -->
   <insert id="addTestTb" parameterType="TestTb">
      insert into test_tb
      (name,birthday)
      values
      (#{name},#{birthday})
   </insert>
</mapper>
接下来写测试方法
基于注解的Junit单元测试
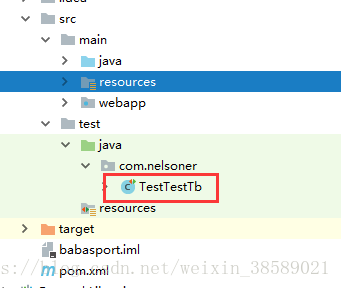
TestTestTb:
@RunWith(SpringJUnit4ClassRunner.class)
@ContextConfiguration(locations = "classpath:application-context.xml")
public class TestTestTb{

   @Autowired
   private TestTbService testTbService;
   @Test
   public void testAdd() throws Exception {
      TestTb testTb = new TestTb();
      testTb.setName("金乐乐");

      testTbService.addTestTb(testTb);
   }
}
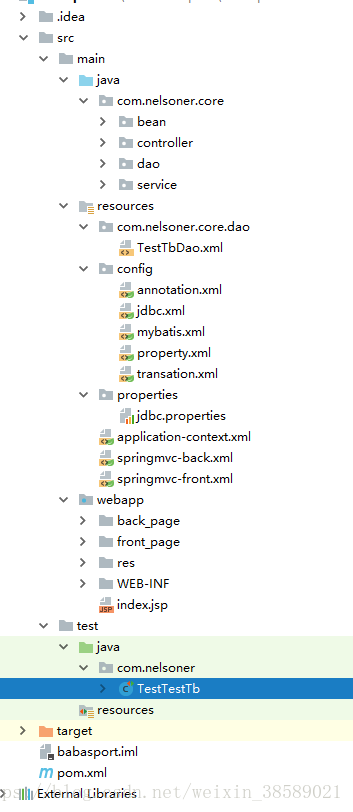
项目目录结构:


 1391
1391

 被折叠的 条评论
为什么被折叠?
被折叠的 条评论
为什么被折叠?
 到【灌水乐园】发言


