


一.Fragment简介
Fragment是Android3.0后引入的一个新的API,它出现的初衷是为了适应大屏幕的平板电脑, 当然现在它仍然是平板APP UI设计的宠儿,而且我们普通手机开发也会加入这个Fragment, 我们可以把他看成一个小型的Activity,又称Activity片段。如果一个很大的界面,我们 就一个布局,写起界面来会有多麻烦,而且如果组件多的话是管理起来也很麻烦。而使用Fragment 我们可以把屏幕划分成几块,然后进行分组,进行一个模块化的管理。从而可以更加方便的在 运行过程中动态地更新Activity的用户界面。另外Fragment并不能单独使用,它需要嵌套在Activity 中使用,尽管它拥有自己的生命周期,但是还是会受到宿主Activity的生命周期的影响,比如Activity 被destory销毁了,它也会跟着销毁。
二.Fragment生命周期图
1.和Activity生命周期对比图

2.Fragment生命周期图

三.创建一个Fragment
将Fragment添加到Activity中,或者是Fragment的使用。有两种方式。
静态加载Fragment和动态加载Fragment
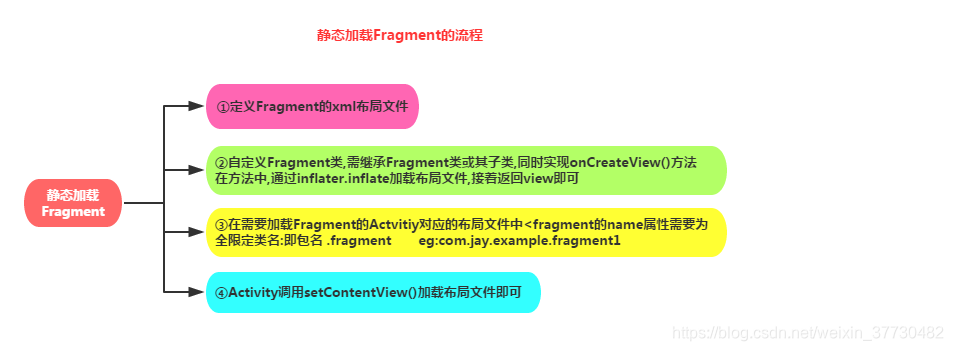
1.静态加载Fragment
1.1.说明
1.2.代码
Activity代码
package com.dchealth.patient.XinSui.test;

import android.support.v7.app.AppCompatActivity;
import android.os.Bundle;

import com.dchealth.patient.XinSui.R;

public class OneActivity extends AppCompatActivity {

    @Override
    protected void onCreate(Bundle savedInstanceState) {
        super.onCreate(savedInstanceState);
        setContentView(R.layout.activity_one);
    }
}
Activity布局
<?xml version="1.0" encoding="utf-8"?>
<LinearLayout xmlns:android="http://schemas.android.com/apk/res/android"
    android:layout_width="match_parent"
    android:layout_height="match_parent"
    android:background="@color/app_background_and_linecolor"
    android:orientation="vertical">

    <fragment
        android:id="@+id/activity_one_fragment"


        android:name="com.dchealth.patient.XinSui.test.OneFragment"


        android:layout_width="match_parent"
        android:layout_height="match_parent">

    </fragment>

</LinearLayout>
说明:
1.通过name属性将Fragment引入Activity布局(被引入的Fragment要写全路径)。
2.fragment必须指定id,否则报错。
Fragment代码
package com.dchealth.patient.XinSui.test;

import android.content.Context;
import android.content.Intent;
import android.os.Bundle;
import android.support.annotation.Nullable;
import android.support.v4.app.Fragment;
import android.util.Log;
import android.view.LayoutInflater;
import android.view.View;
import android.view.ViewGroup;
import android.widget.TextView;

import com.dchealth.patient.XinSui.R;
import com.dchealth.patient.XinSui.activity.FollowUpArchivesActivity;

public class OneFragment extends Fragment {

    @Override
    public void onAttach(Context context) {
        super.onAttach(context);
        Log.d("TAG","onAttach方法");
    }

    @Override
    public void onCreate(Bundle savedInstanceState) {
        super.onCreate(savedInstanceState);
        Log.d("TAG","onCreate方法");
    }

    @Override
    public View onCreateView(LayoutInflater inflater, ViewGroup container,Bundle savedInstanceState) {
        Log.d("TAG","onCreateView方法");
        View view = inflater.inflate(R.layout.fragment_one, container, false);
        initView(view);
        return view;
    }

    private void initView(View view){
        TextView textView=view.findViewById(R.id.fragment_one_textview);
        textView.setOnClickListener(new View.OnClickListener() {
            @Override
            public void onClick(View v) {
                Intent intent=new Intent(getActivity(), FollowUpArchivesActivity.class);
                getActivity().startActivity(intent);
            }
        });
    }

    @Override
    public void onActivityCreated(Bundle savedInstanceState) {
        super.onActivityCreated(savedInstanceState);
        Log.d("TAG","onActivityCreated方法");
    }

    @Override
    public void onStart() {
        super.onStart();
        Log.d("TAG","onStart方法");
    }

    @Override
    public void onResume() {
        super.onResume();
        Log.d("TAG","onResume方法");
    }

    @Override
    public void onPause() {
        super.onPause();
        Log.d("TAG","onPause方法");
    }

    @Override
    public void onStop() {
        super.onStop();
        Log.d("TAG","onStop方法");
    }

    @Override
    public void onDestroyView() {
        super.onDestroyView();
        Log.d("TAG","onDestroyView方法");
    }

    @Override
    public void onDestroy() {
        super.onDestroy();
        Log.d("TAG","onDestroy方法");
    }

    @Override
    public void onDetach() {
        super.onDetach();
        Log.d("TAG","onDetach方法");
    }
}
Fragment布局
<?xml version="1.0" encoding="utf-8"?>
<RelativeLayout xmlns:android="http://schemas.android.com/apk/res/android"
    android:layout_width="match_parent"
    android:layout_height="match_parent">

    <TextView
        android:layout_width="match_parent"
        android:layout_height="match_parent"
        android:gravity="center"
        android:text="静态加载Fragment" />

    <TextView
        android:id="@+id/fragment_one_textview"
        android:layout_width="200dp"
        android:layout_height="60dp"
        android:background="@color/app_color"
        android:gravity="center"
        android:layout_centerInParent="true"
        android:text="跳转"
        android:textColor="#ffffff" />


</RelativeLayout>
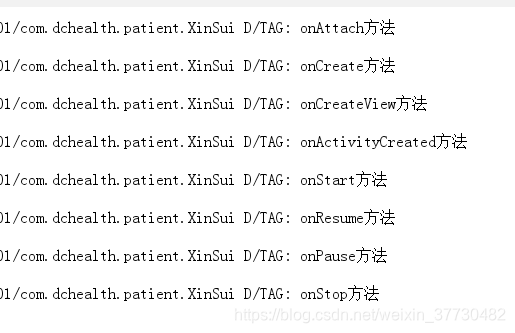
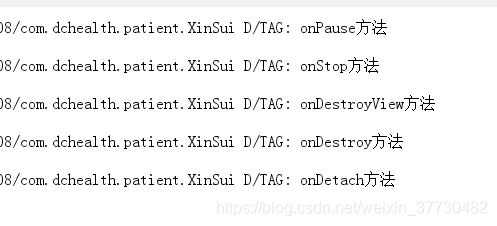
1.3.效果

刚刚进入
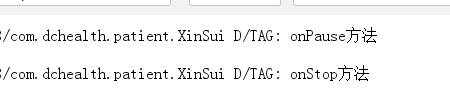
点击“跳转”按钮跳转到其他页面(此页面被覆盖)
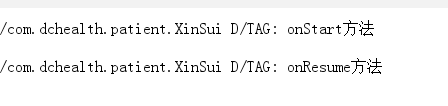
关闭其他页面(此页面又重新回到前台)
退出此页面对应的Activity
2.动态加载Fragment
2.1.说明
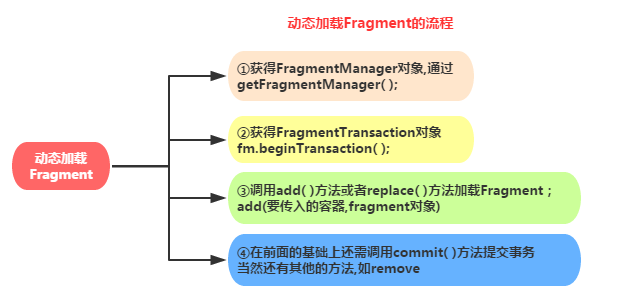
2.2代码
Activity代码
package com.dchealth.patient.XinSui.test;

import android.support.v4.app.Fragment;
import android.support.v7.app.AppCompatActivity;
import android.os.Bundle;

import com.dchealth.patient.XinSui.R;

public class TwoActivity extends AppCompatActivity {

    @Override
    protected void onCreate(Bundle savedInstanceState) {
        super.onCreate(savedInstanceState);
        setContentView(R.layout.activity_two);

        Fragment fragment=new TwoFragment();
        getSupportFragmentManager().beginTransaction().replace(R.id.activity_two_layout,fragment).commit();

    }
}
Activity布局
<?xml version="1.0" encoding="utf-8"?>
<LinearLayout xmlns:android="http://schemas.android.com/apk/res/android"
    android:layout_width="match_parent"
    android:layout_height="match_parent"
    android:background="@color/app_background_and_linecolor"
    android:orientation="vertical">

    <RelativeLayout
        android:id="@+id/activity_two_layout"
        android:layout_width="match_parent"
        android:layout_height="match_parent">

    </RelativeLayout>

</LinearLayout>
Fragment代码
package com.dchealth.patient.XinSui.test;

import android.content.Context;
import android.content.Intent;
import android.os.Bundle;
import android.support.v4.app.Fragment;
import android.util.Log;
import android.view.LayoutInflater;
import android.view.View;
import android.view.ViewGroup;
import android.widget.TextView;

import com.dchealth.patient.XinSui.R;
import com.dchealth.patient.XinSui.activity.FollowUpArchivesActivity;

public class TwoFragment extends Fragment {

    @Override
    public void onAttach(Context context) {
        super.onAttach(context);
        Log.d("TAG","onAttach方法");
    }

    @Override
    public void onCreate(Bundle savedInstanceState) {
        super.onCreate(savedInstanceState);
        Log.d("TAG","onCreate方法");
    }

    @Override
    public View onCreateView(LayoutInflater inflater, ViewGroup container, Bundle savedInstanceState) {
        Log.d("TAG","onCreateView方法");
        View view = inflater.inflate(R.layout.fragment_two, container, false);
        initView(view);
        return view;
    }

    private void initView(View view){
        TextView textView=view.findViewById(R.id.fragment_two_textview);
        textView.setOnClickListener(new View.OnClickListener() {
            @Override
            public void onClick(View v) {
                Intent intent=new Intent(getActivity(), FollowUpArchivesActivity.class);
                getActivity().startActivity(intent);
            }
        });
    }

    @Override
    public void onActivityCreated(Bundle savedInstanceState) {
        super.onActivityCreated(savedInstanceState);
        Log.d("TAG","onActivityCreated方法");
    }

    @Override
    public void onStart() {
        super.onStart();
        Log.d("TAG","onStart方法");
    }

    @Override
    public void onResume() {
        super.onResume();
        Log.d("TAG","onResume方法");
    }

    @Override
    public void onPause() {
        super.onPause();
        Log.d("TAG","onPause方法");
    }

    @Override
    public void onStop() {
        super.onStop();
        Log.d("TAG","onStop方法");
    }

    @Override
    public void onDestroyView() {
        super.onDestroyView();
        Log.d("TAG","onDestroyView方法");
    }

    @Override
    public void onDestroy() {
        super.onDestroy();
        Log.d("TAG","onDestroy方法");
    }

    @Override
    public void onDetach() {
        super.onDetach();
        Log.d("TAG","onDetach方法");
    }

}
Fragment布局
<?xml version="1.0" encoding="utf-8"?>
<RelativeLayout xmlns:android="http://schemas.android.com/apk/res/android"
    android:layout_width="match_parent"
    android:layout_height="match_parent">

    <TextView
        android:layout_width="match_parent"
        android:layout_height="match_parent"
        android:gravity="center"
        android:text="动态加载Fragment" />

    <TextView
        android:id="@+id/fragment_two_textview"
        android:layout_width="200dp"
        android:layout_height="60dp"
        android:background="@color/app_color"
        android:gravity="center"
        android:layout_centerInParent="true"
        android:text="跳转1"
        android:textColor="#ffffff" />


</RelativeLayout>
2.3效果
同上
注意:
1. 关于Fragment包

2.关于FragmentManager

四.Fragment与Activity的交互
1.Activit传递数据给Fragment
在Activity中创建Bundle数据包,调用Fragment实例的setArguments(bundle) 从而将Bundle数据包传给Fragment,然后Fragment中调用getArguments获得 Bundle对象,然后进行解析就可以了。
Bundle对象要判空
Activity中
fragment=new TwoFragment();

Bundle bundle=new Bundle();

if(null==bundle){
  return;
}

bundle.putString("name","张三");
bundle.putString("age","29");
fragment.setArguments(bundle);
getSupportFragmentManager().beginTransaction().replace(R.id.activity_two_layout,fragment).commit();
Fragment中
@Override
public View onCreateView(LayoutInflater inflater, ViewGroup container, Bundle savedInstanceState) {
    Log.d("TAG","onCreateView方法");
    View view = inflater.inflate(R.layout.fragment_two, container, false);
    initView(view);
    return view;
}


private void initView(View view){
    TextView textView1=view.findViewById(R.id.fragment_two_textview1);
    Bundle bundle=getArguments();
    String name=bundle.getString("name","");
    String age=bundle.getString("age","");
    textView1.setText("Fragment接收宿主Activity传值:name="+name+" age="+age);
}
2.Fragment传递数据给Activity
可采用EventBus方式。
五.项目使用


 1021
1021

 被折叠的 条评论
为什么被折叠?
被折叠的 条评论
为什么被折叠?
 到【灌水乐园】发言


