


 本文详细介绍了iOS中的三种控件:UISwitch、UISlider和UISegmentedControl。UISwitch类似于Android的CheckBox,具有开/关状态;UISlider类似SeekBar,可设置初始值、最小值和最大值;UISegmentedControl则用于选项切换,支持文字修改和事件绑定。文章通过实例演示了如何添加事件处理和使用这些控件。
目录
1.5.3 UISegmentedControl 添加action
UIControl
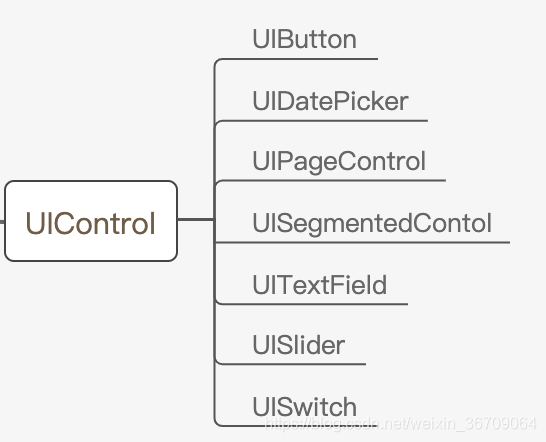
1.1 UIControl体系图
UIControl控件有7个子类,如下:
1.2 内容概要
UITextField前面的笔记已经记录过了,UIButton 前面的也提到过,类似于Android中Button,属性也类似匹配,这篇笔记主要是记录UISwitch、UISlider和UISegmentedControl
1.3 UISwitch
1.3.1 UISwitch图

1.3.2 UISwitch简介
UISwitch类似于Android中的CheckBox,只有checked = true 或 checked = false者两种状态,UISwitch通过setOn:函数设置其值true or false;
1.3.3 UISwitch使用
故事板布局如下图

1.3.4 UISwitch拖拽方式添加action
然后通过拖拽的方式 (如果不回,参考《IOS 学习笔记 UITextView UITextField 协议》的第5部分Button的点击事件怎么添加),添加属性,也就是Android中所说的View的全局变量,分别命名为:switchFirst、switchSecond;然后添加点击事件switchValueChanged函数,并通过拖拽的方式让switchFirst、switchSecond同时与之绑定,注意在拖拽的时候必须同时按住control键,然后会出现一条蓝色线条,让另一段被拖拽到 switchValueChanged所在的代码块,绑定后switchValueChanged前的圆圈就是实心圆了,参见下图:
代码如下:
#import "ViewController.h"

@interface ViewController ()
@property (weak, nonatomic) IBOutlet UISwitch *switchFirst;
@property (weak, nonatomic) IBOutlet UISwitch *switchSecond;

@end

@implementation ViewController

- (void)viewDidLoad {
    [super viewDidLoad];
    // Do any additional setup after loading the view, typically from a nib.
}

- (IBAction)switchValueChanged:(id)sender {
    BOOL isOn = ((UISwitch *)sender).isOn;
    [self.switchFirst setOn:isOn animated:true];
    [self.switchSecond setOn:isOn animated:true];
}


@end
1.3.4 UISwitch代码添加action
当然也能够通过代码的方式实现添加事件,如下:
#import "ViewController.h"

@interface ViewController ()
@property (weak, nonatomic) IBOutlet UISegmentedControl *segmentView;
@property (weak, nonatomic) IBOutlet UISwitch *switchFirst;
@property (weak, nonatomic) IBOutlet UISwitch *switchSecond;

@property (weak, nonatomic) IBOutlet UISlider *sliderView;

@end

@implementation ViewController

- (void)viewDidLoad {
    [super viewDidLoad];
    // Do any additional setup after loading the view, typically from a nib.
    //给switchFirst添加点击事件
    [self.switchFirst addTarget:self action:@selector(switchValueChanged:) forControlEvents:UIControlEventValueChanged];

    //给switchSecond添加点击事件
    [self.switchSecond addTarget:self action:@selector(switchValueChanged:) forControlEvents:UIControlEventValueChanged];
}

- (IBAction)switchValueChanged:(id)sender {
    BOOL isOn = ((UISwitch *)sender).isOn;
    [self.switchFirst setOn:isOn animated:true];
    [self.switchSecond setOn:isOn animated:true];
}


@end注意到:action:@selector(switchValueChanged:)这句话中switchValueChanged后面带有“:”和不带“:”是什么意思,注意这里不带“:”说明switchValueChanged没有入参,带“:”是说明有入参,这里只是一个入参,以后再看多个入参的情况,这里暂时不学习。
1.3.5 UISwitch运行测试
当由于两个UISwitch同时绑定了switchValueChanged函数,那么任何一个被点击都会触发该函数,通过setOn将2个UISwitch的值设置成一样的,如下效果:(这里录制了视频并且转gif图,可以参考:Mac环境给iOS模拟器录屏,并制作Gif)
1.4 UISlider 滑块控件
1.4.1 UISlider图
![]()
1.4.2 UISlider简介
UISlider类似于Android的SeekBar(下图)
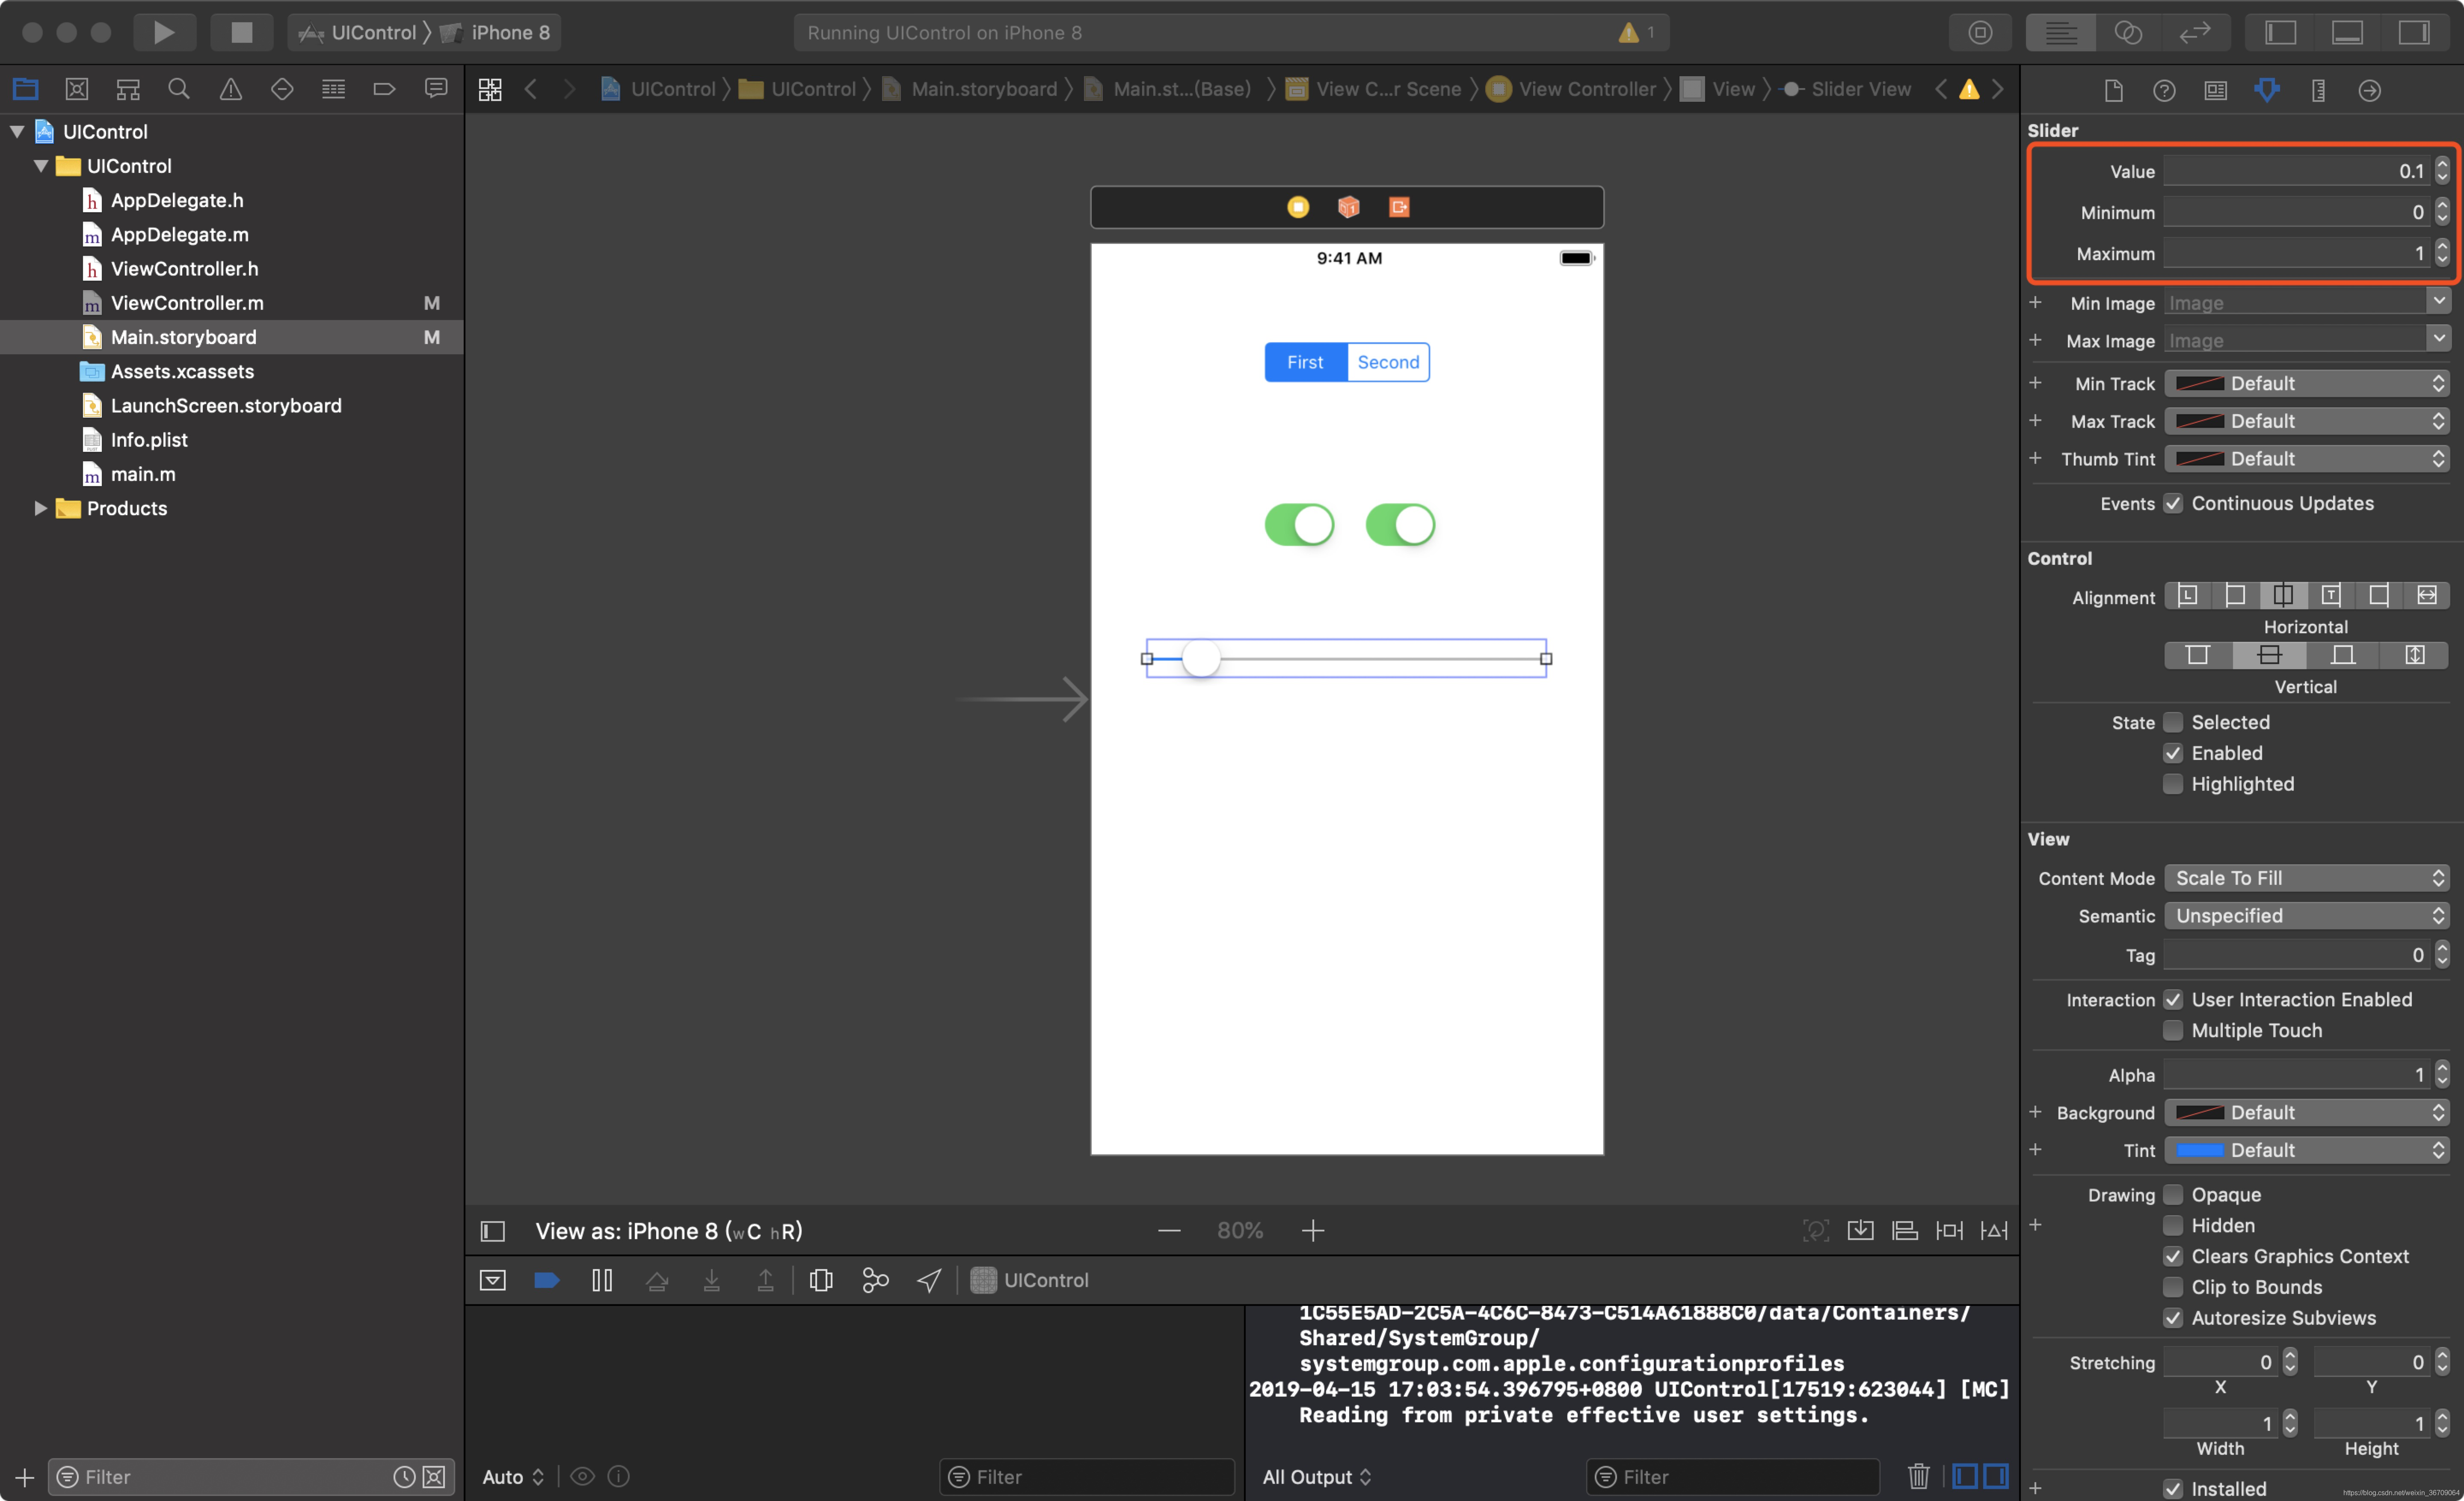
![]()
UISlider有自己特有的属性,Value(初始值),Minimum(最小值),Maximun(最大值),如下图初始值为0.1,最小值0,最大值1。
1.4.3 UISlider 使用
这里就不通过拖拽的方式添加action事件了,直接使用代码添加,先设置
先添加一个属性,入下图操作,会自动生成属性,android中称为全局变量的slideVIew,
系统自动生成如下代码,或者自己写出下面代码,通过拖拽的方式连接二者,就是上面图的反向步骤
@property (weak, nonatomic) IBOutlet UISlider *sliderView;然后在后面使用sliderView添加action事件,如下:
#import "ViewController.h"

@interface ViewController ()

@property (weak, nonatomic) IBOutlet UISlider *sliderView;

@end

@implementation ViewController

- (void)viewDidLoad {
    [super viewDidLoad];
    // Do any additional setup after loading the view, typically from a nib.

    [self.sliderView addTarget:self action:@selector(sliderValueChanged:) forControlEvents:UIControlEventValueChanged];
}


- (IBAction)sliderValueChanged:(id)sender {
    int value = (int)((UISlider *)sender).value;
    NSLog(@"slider value is %d",value);
}


@end
1.4.3 UISlider测试结果
设置最大值为100,最小值为0,设置初始值为10,如下图,注意日志打印

1.5 UISegmentedControl
1.5.1 UISegmentedControl图
![]()
1.5.2 UISegmentedControl修改文字
是可以选择UISegmentedControl的segment属性,切换修改文字,这里做个演示,将second修改为right,先吧Segment选中Segment 1 - second,然后修改Title为right,回车,如下图,
1.5.3 UISegmentedControl 添加action
有3种方将一个函数和Segment的点击事件绑定
1)拖拽的方式制动生成对应函数,入下图
2)先手写函数让后,拖拽和UISegmentedControl视图绑定
第一步手写函数如下:
- (IBAction)actionSelect:(id)sender {
    int index = (int)((UISegmentedControl *)sender).selectedSegmentIndex;
//    NSInteger index = self.segmentView.selectedSegmentIndex;
    NSLog(@"Selected segment is :%d", index);
}
第二步:绑定函数
3)代码绑定:
同上面视图,这里不重复了
1.5.3 UISegmentedControl 测试
如下图,看日志:


 1万+
1万+

 被折叠的 条评论
为什么被折叠?
被折叠的 条评论
为什么被折叠?
 到【灌水乐园】发言


