


mosquitto_pub&mosquitto_sub
MQTT服务器
订阅
发布
使用C语言实现MQTT Client
代码分析
初始化操作
加载证书
建立TCP连接
TLS握手
MQTT连接
github link
mosquitto_pub&mosquitto_sub
在实现MQTT client之前,我们可以先使用mosquitto_pub和mosquitto_sub模拟,MQTT的发布和订阅
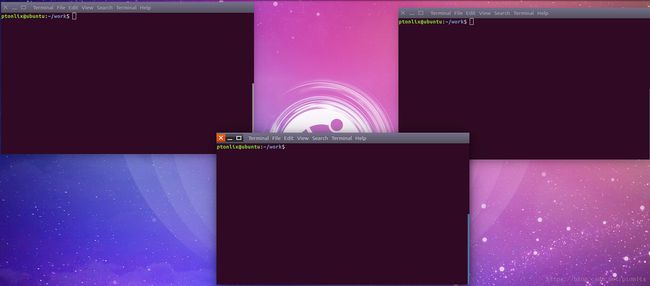
打开三个终端,分别作为:
MQTT服务器,订阅者,发布者
MQTT服务器
mosquitto -c mosquitto.conf
运行服务
订阅
mosquitto_sub -t mtopic -u sub_client -P 123456 -v --cafile cacert.pem --cert client.crt --key client.key -p 8883 --tls-version tlsv1.2 --insecure
–cafile:加载ca证书的路径,后面以此类推
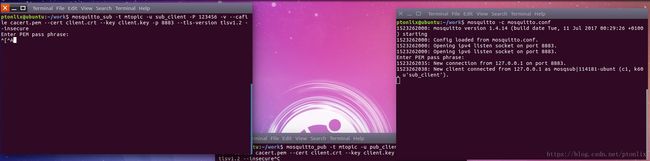
上图所示,连接成功的情况。
发布
mosquitto_pub -t mtopic -u pub_client -P 123456 -m "test" --cafile cacert.pem --cert client.crt --key client.key -p 8883 --tls-version tlsv1.2 --insecure

如上图所示,消息发布成功,然后订阅也成功,主题为mtopic,消息是test
使用C语言实现MQTT Client
这里我使用了两个开源库,libemqtt和mbedtls,感谢这两个开源库的作者,感谢开源~
https://github.com/menudoproblema/libemqtt.git
https://github.com/ARMmbed/mbedtls.git
代码分析
初始化操作
/*
* 0. Initialize the RNG and the session data
*/
mbedtls_net_init( &server_fd );
mbedtls_ssl_init( &ssl );
mbedtls_ssl_config_init( &conf );
mbedtls_x509_crt_init( &cacert );
mbedtls_x509_crt_init( &clicert );
mbedtls_pk_init( &pkey );
mbedtls_ctr_drbg_init( &ctr_drbg );
mbedtls_printf( "\n . Seeding the random number generator..." );
fflush( stdout );
mbedtls_entropy_init( &entropy );
if( ( ret = mbedtls_ctr_drbg_seed( &ctr_drbg, mbedtls_entropy_func, &entropy,
(const unsigned char *) pers,
strlen( pers ) ) ) != 0 )
{
mbedtls_printf( " failed\n ! mbedtls_ctr_drbg_seed returned %d\n", ret );
goto exit;
}
mbedtls_printf( " ok\n" );
加载证书
ret = mbedtls_x509_crt_parse_file( &cacert, "./cacert.pem");
if( ret < 0 )
{
mbedtls_printf( " failed\n ! mbedtls_x509_crt_parse returned -0x%x\n\n", -ret );
goto exit;
}
mbedtls_printf( " ok (%d skipped)\n", ret );
ret = mbedtls_x509_crt_parse_file( &clicert, "./client.crt");
if( ret != 0 )
{
mbedtls_printf( " failed\n ! mbedtls_x509_crt_parse returned %d\n\n", ret );
goto exit;
}
ret = mbedtls_pk_parse_keyfile( &pkey, "./client.key", "123456");
if( ret != 0 )
{
mbedtls_printf( " failed\n ! mbedtls_pk_parse_key returned %d\n\n", ret );
goto exit;
}
mbedtls_pk_parse_keyfile 第三个参数是生成客户端证书,自己输入的密钥
建立TCP连接
/*
* 1. Start the connection
*/
mbedtls_printf( " . Connecting to tcp/%s/%s...", SERVER_NAME, SERVER_PORT );
fflush( stdout );
if( ( ret = mbedtls_net_connect( &server_fd, SERVER_NAME,
SERVER_PORT, MBEDTLS_NET_PROTO_TCP ) ) != 0 )
{
mbedtls_printf( " failed\n ! mbedtls_net_connect returned %d\n\n", ret );
goto exit;
}
TLS握手
/*
* 4. Handshake
*/
mbedtls_printf( " . Performing the SSL/TLS handshake..." );
fflush( stdout );
while( ( ret = mbedtls_ssl_handshake( &ssl ) ) != 0 )
{
if( ret != MBEDTLS_ERR_SSL_WANT_READ && ret != MBEDTLS_ERR_SSL_WANT_WRITE )
{
mbedtls_printf( " failed\n ! mbedtls_ssl_handshake returned -0x%x\n\n", -ret );
goto exit;
}
}
mbedtls_printf( " ok\n" );
握手阶段结束,就完成了TLS连接,开始加密通讯,下面就是应用层MQTT的连接
MQTT连接
mbedtls_printf(" \n.....................mqtttenter.....................\n" );
PTmqtttenter();
mqtt_connect((mqtt_broker_handle_t *)PTMqttGetBroker());
mbedtls_printf( "\n....................mqtt_connect.....................\n" );
mqtt_subscribe((mqtt_broker_handle_t *)PTMqttGetBroker(), MQTTSUBTOPIC, 0);
mqtt_publish((mqtt_broker_handle_t *)PTMqttGetBroker(), MQTTPUBTOPIC, test, strlen(test), 0);
这样就完成MQTT的连接,我们来看下实际效果
如上图,我发送的MQTT消息,主题为mtopic 消息为test_cfd
订阅的终端,可以成功收到消息。
注意:程序运行加载的证书是在工程目录下,并且需要各位根据自己生成的客户端证书进行相应的替换。
github link
最后附上,本工程的github船票:
https://github.com/ptonlix/MQTTWithTLS


 被折叠的 条评论
为什么被折叠?
被折叠的 条评论
为什么被折叠?
 到【灌水乐园】发言


