


 本文介绍了如何使用Excel的Outlines功能进行数据分组与汇总,包括设置快速访问按钮及调整汇总行显示方向的方法,并详细说明了如何通过Group与Ungroup按钮调整行级别的具体步骤。
Outlines Grouped Data
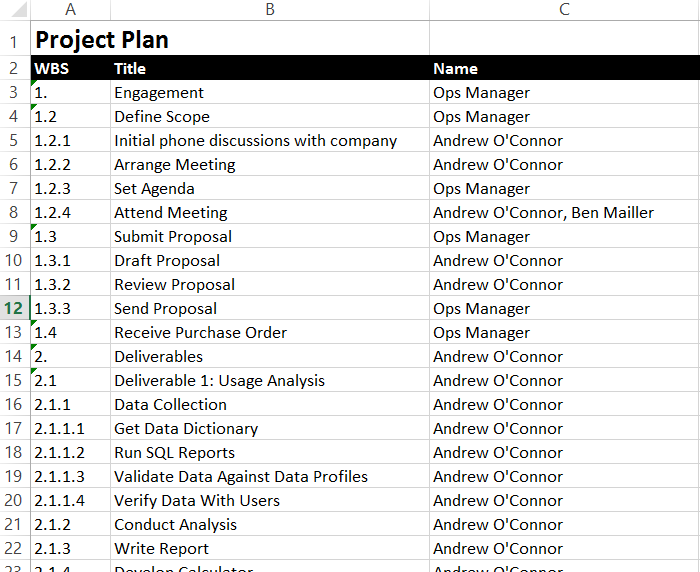
Before
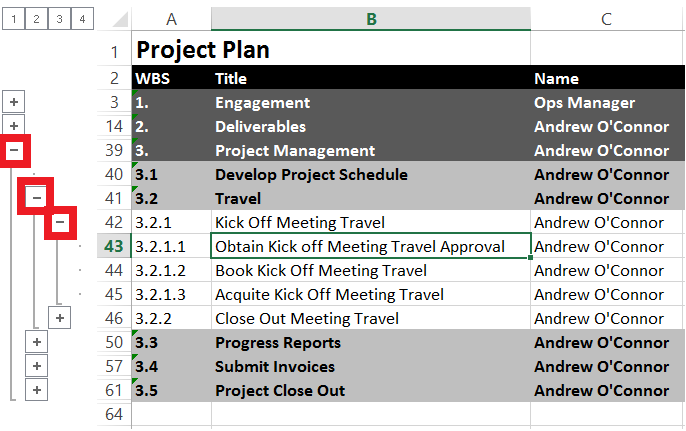
After
Preparing the Workbook
In order to make this feature easy to use, you must do two things to your excel set up.
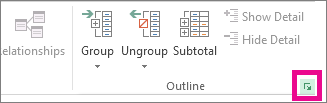
(1) Put the group and ungroup buttons into your quick launch area.

- In MS Excel 2007-2013 open the Data tab in the ribbon bar. Right click on the Group button and select Add to Quick Access Toolbar. Do the same for Ungroup.
- In MS Excel 2003 you'll have to rely upon shortcut keys Alt-Shift-RightArrow to Group and Alt-Shift-RightArrow to Ungroup.
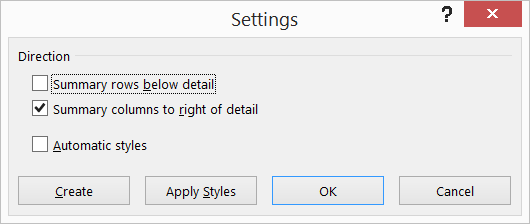
(2) Change the direction which summary rows are displayed.
- In MS Excel 2007-2013 click the Data tab, in the Outline group, click the Outline dialog box launcher. Clear the Summary rows below detail check box.
- In MS Excel 2003 on the Data menu, point to Group and Outline, and then click Settings. Clear the Summary rows below detail check box.
Setting Row Levels
To set row levels, you can think of it as setting the 'indent' for each row. Simply select the rows you wish to change the level on, and select the Group or Ungroup button to move the row level left or right.


 386
386

 被折叠的 条评论
为什么被折叠?
被折叠的 条评论
为什么被折叠?
 到【灌水乐园】发言


