


 本文详细介绍了一个iOS应用中TabView的实现过程,包括基本实现步骤、自定义单元格的方法等。通过配置.h和.m文件,创建UI界面,并定义单元格数量及内容,实现了完整的TabView功能。

1.基本实现:
1)配置.h文件:

2)配置.m文件:
//
// CVUViewController.m
// IOS-0705-TabView
//
// Created by apple on 13-7-5.
// Copyright (c) 2013年 apple. All rights reserved.
//
#import "CVUViewController.h"
@interface CVUViewController ()
@end
@implementation CVUViewController
//定义模型
- (NSArray *)getTabs
{
NSLog(@"2");
//延迟实力化
if(! self.tbs)
{
//10个单元格
self.tbs = [NSArray arrayWithObjects:@"1",@"2",@"3",@"4",@"5",@"6",@"7",@"8",@"9",@"10",nil];
}
return self.tbs;
}
// 从模型中得到单元格的数量
-(NSInteger)tableView:(UITableView *)tableView numberOfRowsInSection:(NSInteger)section
{
NSLog(@"1");
//注意这里调用的是方法返回数组再得到其属性值
return self.getTabs.count;
}
//依次初始化单元格
-(UITableViewCell *)tableView:(UITableView *)tableView cellForRowAtIndexPath:(NSIndexPath *)indexPath
{
NSLog(@"3");
//标示符
NSString * identifier=@"cell";
//创建单元格
UITableViewCell * cell = [tableView dequeueReusableCellWithIdentifier:identifier];
if (cell == nil) {
//风格,标示符
cell = [[UITableViewCell alloc]initWithStyle:UITableViewCellStyleDefault reuseIdentifier:identifier];
}
//表格内容(行号)
cell.textLabel.text = [self.tbs objectAtIndex:indexPath.row];
return cell;
}
//定义删除单元格事件
-(void)tableView:(UITableView *)tableView commitEditingStyle:(UITableViewCellEditingStyle)editingStyle forRowAtIndexPath:(NSIndexPath *)indexPath
{
NSLog(@"4");
//得到现有模型
NSMutableArray * ps = [self.tbs mutableCopy];
//移除数据
[ps removeObjectAtIndex:indexPath.row];
//更新模型
self.tbs = [ps copy];
//重载数据
[tableView reloadData];
}
//得到选择的单元格
-(void)tableView:(UITableView *)tableView didSelectRowAtIndexPath:(NSIndexPath *)indexPath
{
//根据选择的单元格初始化
UITableViewCell * cell = [tableView cellForRowAtIndexPath:indexPath];
//创建一个字符串,得到所选的cell的文本
NSString * str = cell.textLabel.text;
NSLog(@"%@", str);
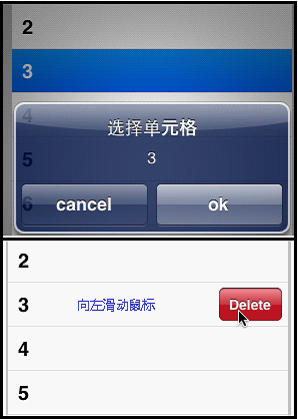
//初始化对话框
UIAlertView * alter = [[UIAlertView alloc] initWithTitle:@"选择单元格" message:str delegate:nil cancelButtonTitle:@"cancel" otherButtonTitles:@"ok" , nil];
//显示alter对话框
[alter show];
}
@end3)创建UI:
拖放一个TableView到视图,右键File'sOwner添加dataSource和delegate关联。

4)测试:
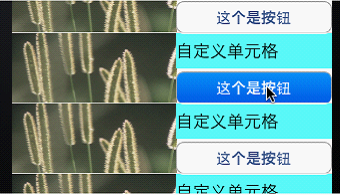
2.自定义单元格:
1)创建自定义单元格类:
(1)Object-C文件:
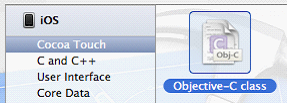
(2)继承UITableViewCell:

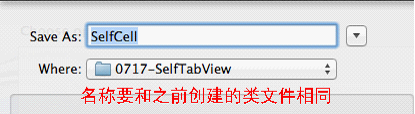
2)创建自定义单元格UI:
(1)Empty UI:

(2)和类文件同名:
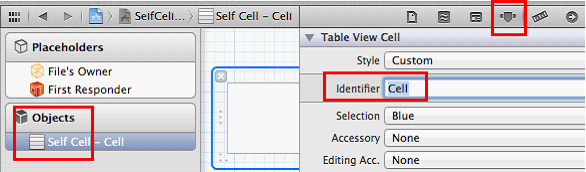
(3)在xib中放入一个TableViewCell控件,并修改文件关联:

(4)修改标示符关联:
(5)自定义单元格:

3)项目原.h:
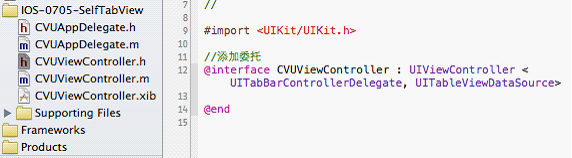
4)项目原.m:
//
 //  CVUViewController.m
 //  IOS-0705-SelfTabView
 //
 //  Created by apple on 13-7-5.
 //  Copyright (c) 2013年 apple. All rights reserved.
 //

 #import "CVUViewController.h"

 //导入自定义单元格类
 #import "SelfCell.h"

 @interface CVUViewController ()

 @end

 @implementation CVUViewController

 //定义单元格数量
 -(NSInteger)tableView:(UITableView *)tableView numberOfRowsInSection:(NSInteger)section
 {
 return 10;
 }

 //设置单元格高度
 -(CGFloat)tableView:(UITableView *)tableView heightForRowAtIndexPath:(NSIndexPath *)indexPath
 {
 return 70;
 }

 //依次初始化单元格
 -(UITableViewCell *)
 tableView:(UITableView *)tableView
 cellForRowAtIndexPath:(NSIndexPath *)indexPath
 {
 //标示符。 -----------------------  对应图2. -> 2) ->(4)  ------------------------
 NSString * identifier=@"Cell";
 //创建单元格
 SelfCell * cell = [tableView dequeueReusableCellWithIdentifier:identifier];

 if (cell == nil) {
 //风格,标示符
 NSArray * nib = [[NSBundle mainBundle]
 loadNibNamed:@"SelfCell"   //自定义单元格
 owner:self options:nil];
 cell = [nib objectAtIndex:0];
 }

 return cell;
 }

 @end
5)项目UI:

6)测试:
- end


 被折叠的 条评论
为什么被折叠?
被折叠的 条评论
为什么被折叠?
 到【灌水乐园】发言


