


 本文详细介绍如何使用Flask、Gunicorn、Supervisor和Nginx在服务器上部署Python Web应用程序。从克隆项目到配置Supervisor实现后台守护运行,再到Gunicorn的安装与设置,提供了完整的部署步骤。

主要参考
Flask + Gunicorn + Nginx 部署
http://www.cnblogs.com/Ray-liang/p/4837850.html
python web 部署:nginx + gunicorn + supervisor + flask 部署笔记
http://www.jianshu.com/p/be9dd421fb8d
下面记录下部署的主要过程
1.在服务器中克隆python flask 项目
git clone https://git.oschina.net/caomenglong/SMT.git
2.安装 virtualenv
yum install python-setuptools python-devel
easy_install virtualenv
cd SMT
virtualenv venv
. venv/bin/activate
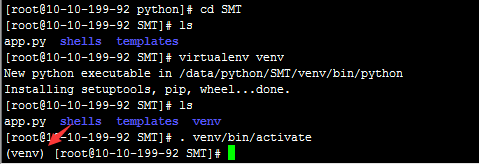
进入 venv 虚拟环境成功,接着根据项目依赖,使用pip安装相应的模块。
pip install Flask

安装成功,测试项目能否正常启动。

项目启动成功,virtualenv和flask项目部署ok。
下面安装Gunicorn 提高项目运行性能。
安装Gunicorn
pip install gunicorn
安装完成后使用以下命令启动项目
gunicorn -w 4 -b 0.0.0.0:7000 app:app
0.0.0.0不限制访问来路
app:app 启动文件app.py : 项目中的flask应用变量名。

ok 关闭它这样 Flask就加了一个套子了。
下面我们配置Supervisor 让程序能够在后台守护运行
安装supervisor
pip install supervisor
再项目SMT目录下初始化配置文件
echo_supervisord_conf > supervisor.conf
vim supervisor.conf
在配置文件最底部加入
[program:smt]
command=/data/python/SMT/venv/bin/gunicorn -w 4 -b 0.0.0.0:7000 app:app ; supervisor启动命令
directory=/data/python/SMT ; 项目的文件夹路径
startsecs=0 ; 启动时间
stopwaitsecs=0 ; 终止等待时间
autostart=false ; 是否自动启动
autorestart=false ; 是否自动重启
stdout_logfile=/data/python/SMT/log/gunicorn.log ; log 日志
stderr_logfile=/data/python/SMT/log/gunicorn.err ; 错误日志
保存!
启动supervisord
supervisord -c supervisor.conf
查看状态
supervisorctl -c supervisor.conf status

smt未启动
supervisorctl -c supervisor.conf start smt
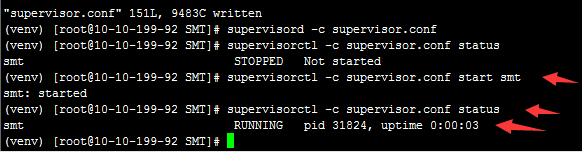
到这里 项目就部署成功了,smt项目将会在后台一直自动运行。挂了后也会自动重启。
supervisord -c supervisor.conf 通过配置文件启动supervisor
supervisorctl -c supervisor.conf status 察看supervisor的状态
supervisorctl -c supervisor.conf reload 重新载入 配置文件
supervisorctl -c supervisor.conf start [all]|[appname] 启动指定/所有 supervisor管理的程序进程
supervisorctl -c supervisor.conf stop [all]|[appname] 关闭指定/所有 supervisor管理的程序进程


 4344
4344

 被折叠的 条评论
为什么被折叠?
被折叠的 条评论
为什么被折叠?
 到【灌水乐园】发言


