


ECS 服务器环境搭建
使用阿里云的服务器,配置一些基本的环境,来搭建一个网站 主要是使用 nginx + php + mysql
服务器环境: centos
1. nginx 安装
1. 直接使用 yum 安装
后面一个参数表示指定安装的位置
yum install nginx --prefix=/app/soft/nginx
上面这种安装,在配置https时,会有问题,提示要安装ssl模块啥的,因此可以这么添加一下参数
yum install nginx --prefix=/app/soft/nginx --with-http_stub_status_module --with-http_ssl_module
如果你是先执行了上面的步骤,后面发现需要安装ssl模块,要怎么办 ?
操作如下:
1. 获取安装的nginx版本 `nginx -V`
2. 获取对应的源码包  `wget http://nginx.org/download/nginx-1.12.0.tar.gz`
3. 解压源码包  `tar -zxvf nginx-1.12.0.tar.gz`, 进入解压的目录
4. 编译 `./configure --prefix=/app/soft/nginx --with-http_stub_status_module --with-http_ssl_module`
5. `make`
6. 备份老的nginx     `cp /app/soft/nginx/sbin/nginx  cp /app/soft/nginx/sbin/nginx.bk`
7. 拷贝新的nginx     `cp sbin/nginx /app/soft/nginx/sbin/nginx`
2. 源码安装
上面其实已经包含了源码安装的步骤,下面简单的列一下
wget http://nginx.org/download/nginx-1.12.0.tar.gz
tar -zxvf nginx-1.12.0.tar.gz; cd nginx-1.12.0
./configure --prefix=/app/soft/nginx --with-http_stub_status_module --with-http_ssl_module
make
make install
3. 命令
nginx 命令
# 启动
/app/soft/nginx/sbin/nginx

# 停止
/app/soft/nginx/sbin/nginx -s stop
验证是否安装成功,浏览器输入 localhost 即可,如果出现nginx的欢迎页面,则表示成功
2. php 安装
安装
安装 php, 执行下面的命令安装出来的可能版本是5.+ 的
yum install php php-devel php-fpm php-mysql php-gd php-imap php-ldap php-odbc php-pear php-xml php-xmlrpc
因为我安装的php7, 所以执行的下面的方案
php-7 安装过程
rpm -ivh http://dl.fedoraproject.org/pub/epel/7/x86_64/e/epel-release-7-9.noarch.rpm


rpm -Uvh https://mirror.webtatic.com/yum/el7/webtatic-release.rpm


## php 安装
yum install php70w


## fpm 安装
yum install php70w-fpm


## 依赖安装
yum -y install gd-devel zlib-devel libjpeg-devel libpng-devel libiconv-devel freetype-devel libxml2 libxml2-devel openssl openssl-devel curl-devel libxslt-devel libmcrypt-devel mhash mcrypt


## mysql 安装
yum install php70w-mysql
如果php缺少一些什么依赖,可以通过下面命令
## 列出可安装的依赖项
yum list | grep php70w

## 找到对应的依赖配置,执行
yum install php70w-xxx

## 如配置  laravel 的mysql读取时, 需要配置 pdo,可以执行一下命令

yum install php70w-pdo_dblib php70w-pdo_mysql php70w-mysql php70w-pdo
php-fpm
启动: `service php-fpm start`
停止: `service php-fpm stop`
nginx 配置
server {
          listen  80;
          server_name localhost;
          rewrite ^(.*)$  https://localhost$1 permanent;   ## 这个表示将http转到走https
          set $root_path '/var/www/html';     ## 这里设置的是存放html代码的地址
          root $root_path;

          index index.php index.html index.htm;

          try_files $uri $uri/ @rewrite;

          location @rewrite {
              rewrite ^/(.*)$ /index.php?_url=/$1;
          }

          location ~ \.php {
              fastcgi_pass 127.0.0.1:9000;
              fastcgi_index /index.php;

              include fastcgi_params;

              fastcgi_split_path_info       ^(.+\.php)(/.+)$;
              fastcgi_param PATH_INFO       $fastcgi_path_info;
              fastcgi_param PATH_TRANSLATED $document_root$fastcgi_path_info;
              fastcgi_param SCRIPT_FILENAME $document_root$fastcgi_script_name;
          }

          location ~* ^/(css|img|js|flv|swf|download)/(.+)$ {
              root $root_path;
          }

          location ~ /\.ht {
              deny all;
          }

    }
3. laravel 配置
折腾这个弄了好久,现在加一个过程记录
-
安装 Composer
wget http://laravel.com/laravel.phar mv laravel.phar laravel sudo mv laravel /usr/local/bin -
安装 laravel
// 下面这一步可能要等待很久很久 composer global require "laravel/installer=~1.1" // 上一步成功之后, 将 `~/.composer/vendor/bin` 路径放置于您的 PATH 里, 这样 laravel 执行文件就会存在你的系统。 -
创建一个项目
// 第三个参数为项目名 laravel new blog -
设置权限
cd blog/ // 注意将 storage 目录以及其目录下的所有文件都设置可读写, 否则会有问题 chmod -R 777 storage chmod -R 777 bootstrap/cache // 打开debug, 设置 APP_DEBUG , true vim config/app.php // xxx // 生成加密 php artisan key:generate -
启动
composer install -
配置 nginx.conf
server {
          listen  80;
          server_name locahost;
          set $root_path '/var/www/html/blog/public';
          root $root_path;

          index index.php index.html index.htm;

          try_files $uri $uri/ @rewrite;

          location @rewrite {
              rewrite ^/(.*)$ /index.php?_url=/$1;
          }

          location ~ \.php {
              fastcgi_pass 127.0.0.1:9000;
              fastcgi_index /index.php;

              include fastcgi_params;

              fastcgi_split_path_info       ^(.+\.php)(/.+)$;
              fastcgi_param PATH_INFO       $fastcgi_path_info;
              fastcgi_param PATH_TRANSLATED $document_root$fastcgi_path_info;
              fastcgi_param SCRIPT_FILENAME $document_root$fastcgi_script_name;
          }

          location ~* ^/(css|img|js|flv|swf|download)/(.+)$ {
              root $root_path;
          }

          location ~ /\.ht {
              deny all;
          }

    }
##4. https 证书配置
阿里有个免费的个人证书可以使用,在使用证书之前请保证自己有一个域名
进入个人控制台 > 云顿控制台概览 -> 购买证书 -> 选择免费(收费的也可以)
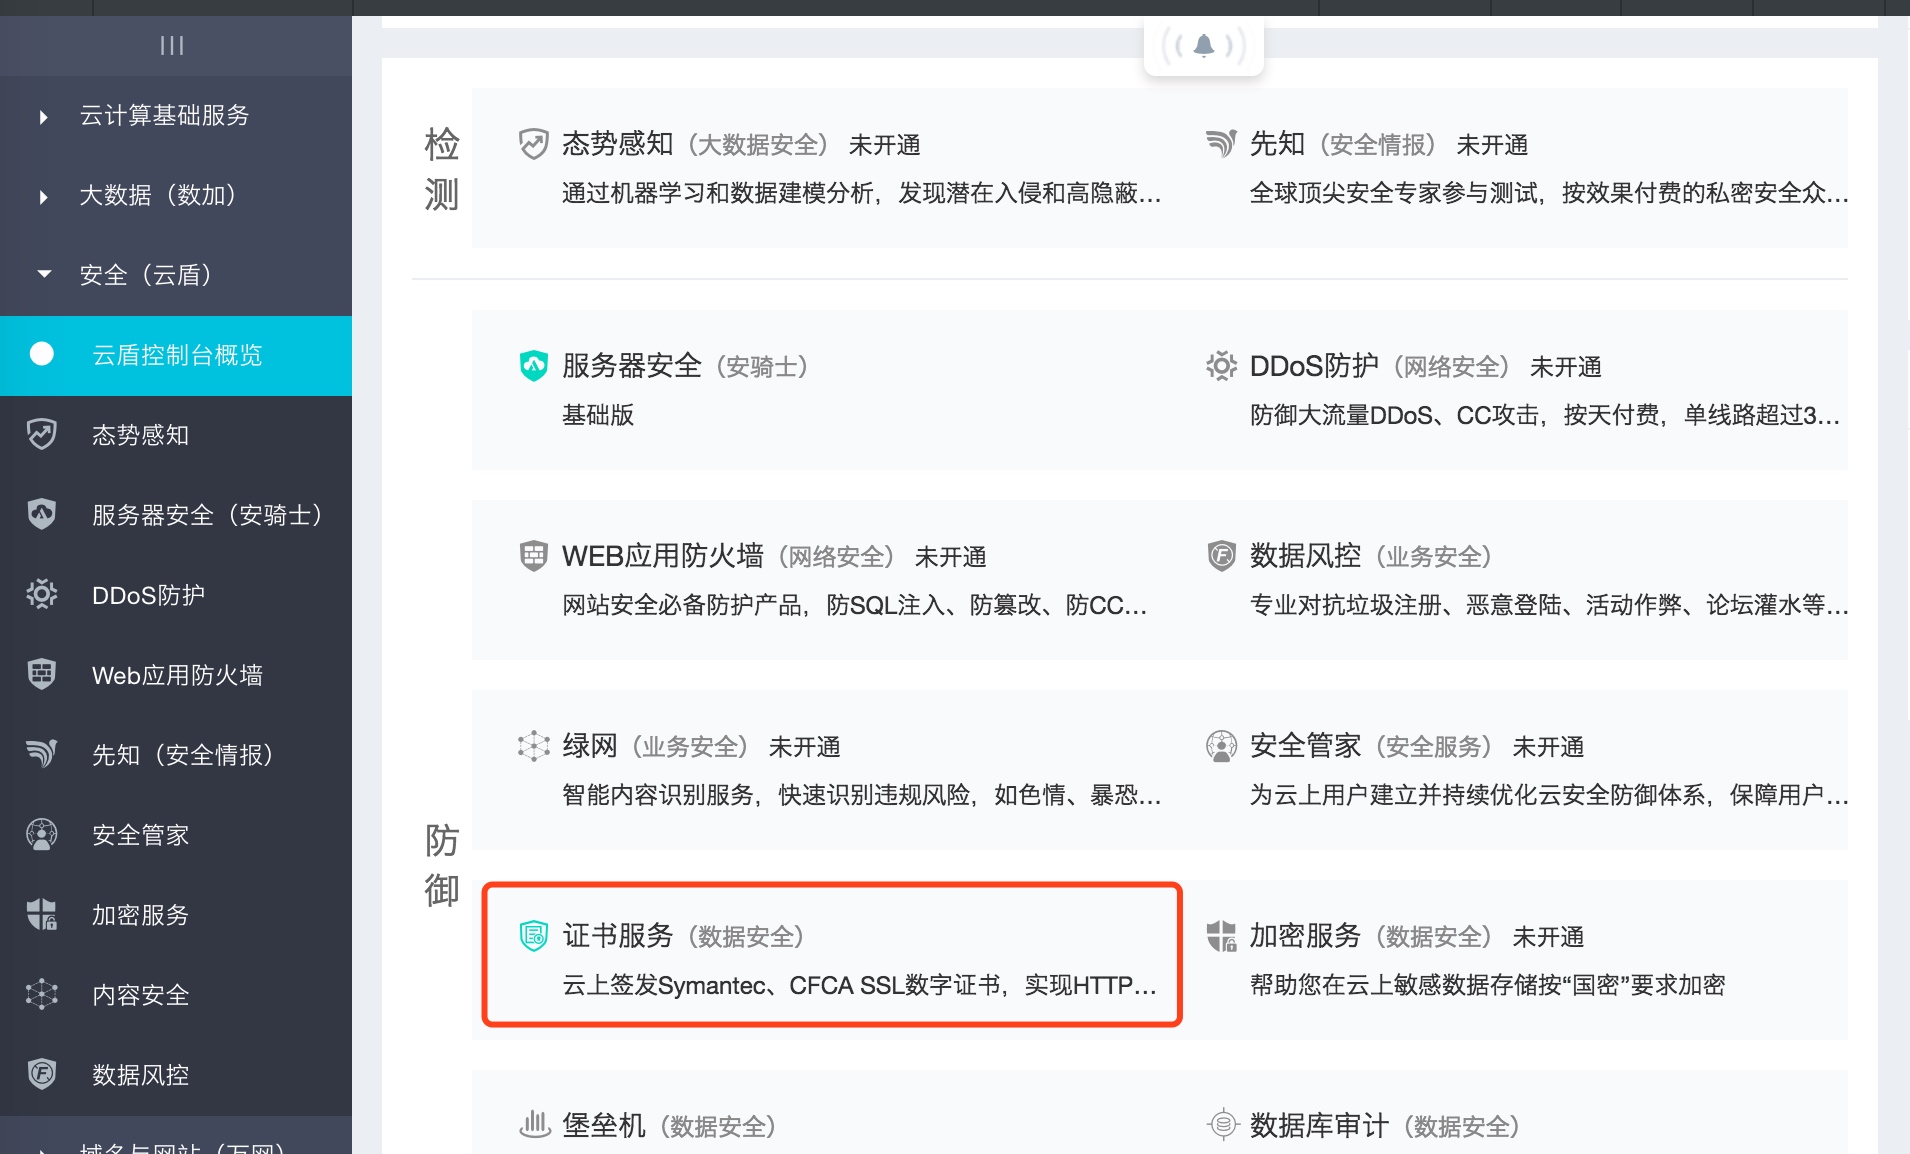 

购买完成之后,在我的订单下会多一个记录,需要补全你的信息,按照提示做即可,等待审核通过(很快就通过了),点下载去获取证书
获取到了证书之后,按照指示照着操作即可,唯一需要注意的是
<font color='red'>走https请开启443端口</font>
<font color='red'>走https请开启443端口</font>
<font color='red'>走https请开启443端口</font>
在这个地方我弄了好久,配好了https就是死活不行,后来查了一些文章,才意识到可能是端口号的问题
开启强制走https
在nginx的配置中加下面一行即可, 上面的nginx配置其实已经包含了
rewrite ^(.*)$ https://localhost$1 permanent;
浏览器输入域名,开始测试....
个人演示如下


 691
691

 被折叠的 条评论
为什么被折叠?
被折叠的 条评论
为什么被折叠?
 到【灌水乐园】发言


