MySQL replication M-M
1、理论部分
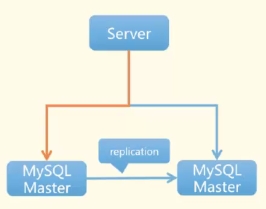
1.1、Master to Master
1)左右两台主机互为Master
2)不会同时做写操作,只一台做写操作
1.2、M-M模式的工作模型的介绍
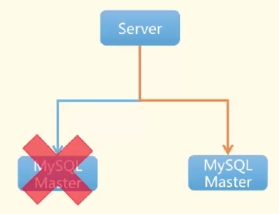
1)当左边的Master突然当机,有健康检测的前端将自动切换到右边的Master,不会造成前端的服务中断,请求可以继续,但由于出问题之前数据时可以同步的,所以数据是保持一致性的,我们可以继续将数据往下写。
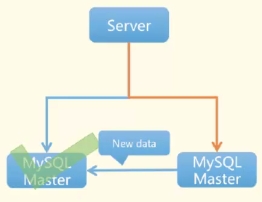
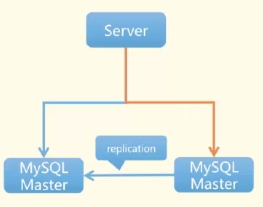
2)当左边的Master都恢复正常,而新的数据都被提交到右边Master,数据都会同步到左边的Master上。
3)而当前左边的Master变成写操作的机器。
不能同时写入两台机器的原因:
当数据库设计到实务性操作的时候,增加写入点会破坏事务的唯一性和原则性的操作
2、实验部分
配置MySQL的replication的M-M模式
2.1、step1
基础环境配置
主机信息:
1)MySQL-RM
hostname=MySQL-RM
ipaddress=10.168.0.107
2)MySQL-LM
hostname=MySQL-LM
ipaddress=10.168.0.108
安装官方的yum源:
|
1
|
yum -y
install
http:
//dev
.mysql.com
/get/mysql-community-release-el6-5
.noarch.rpm
|
并安装以下rpm包:
|
1
|
yum
install
-y mysql mysql-server mysql-devel
|
启动服务并设置服务自动启动:
|
1
2
|
chkconfig mysqld on
/etc/init
.d
/mysqld
start
|
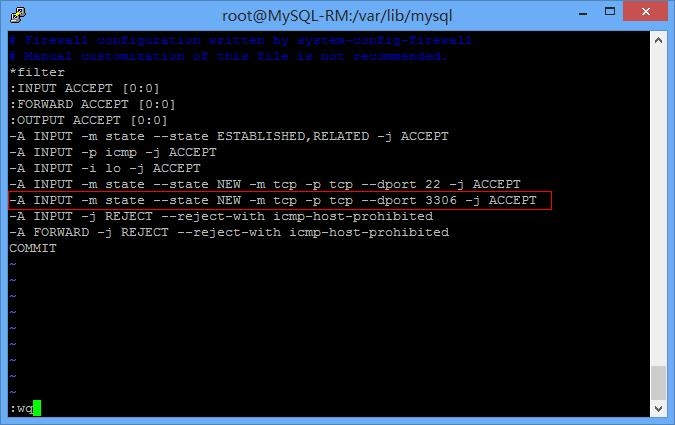
开启服务的防火墙:
vim编辑/etc/sysconfig/iptables
|
1
|
-A INPUT -m state --state NEW -m tcp -p tcp --dport 3306 -j ACCEPT
|
重启iptables服务:
|
1
|
/etc/init
.d
/iptables
restart
|
In Right Master
vim 编辑/etc/my.cnf
|
1
2
3
|
[mysqld]
server-
id
= 1
log-bin = on
|
以下参数是可选项:
|
1
2
3
4
5
|
gtid-mode=on
enforce-gtid-consistency
log-slave-updates
log-bin
binlog-
format
=row
|
创建MySQL新用户权限
|
1
2
|
grant
super,reload,replication slave
on
*.*
to
repl@10.168.0.108 identified
by
'repl'
;
flush
privileges
;
|
重启MySQL服务
|
1
2
|
quit
/etc/init
.d
/mysqld
restart
|
|
1
2
|
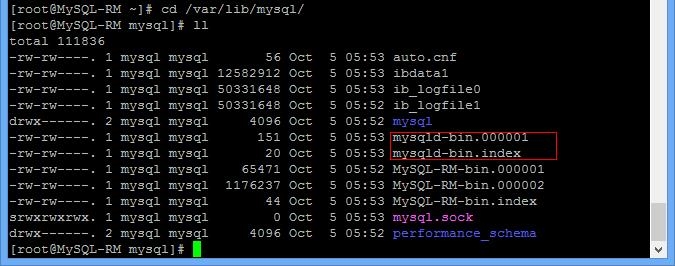
cd
/var/lib/mysql/
ls
|
可以发现新增以下两个二进制日志文件:
mysqld-bin.000001
mysqld-bin.index
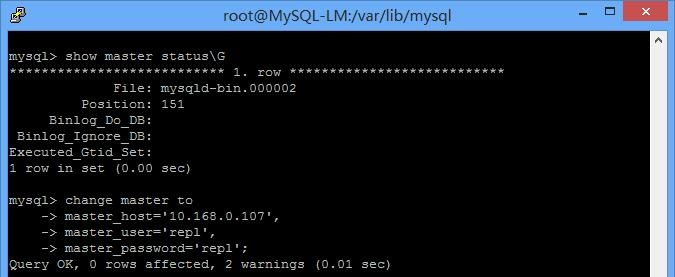
查看master角色的状态:
|
1
2
|
mysql -uroot -p
show master status;
|
In Left Master
vim 编辑/etc/my.cnf
|
1
2
3
|
[mysqld]
server-
id
= 2
log-bin = on
|
以下参数是可选项:
|
1
2
3
4
5
|
gtid-mode=on
enforce-gtid-consistency
log-slave-updates
log-bin
binlog-
format
=row
|
重启MySQL服务
|
1
|
/etc/init
.d
/mysqld
restart
|
|
1
2
|
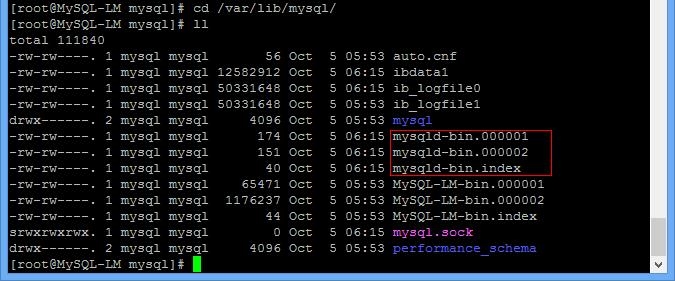
cd
/var/lib/mysql/
ls
|
可以发现新增以下两个二进制日志文件:
mysqld-bin.000001
mysqld-bin.index
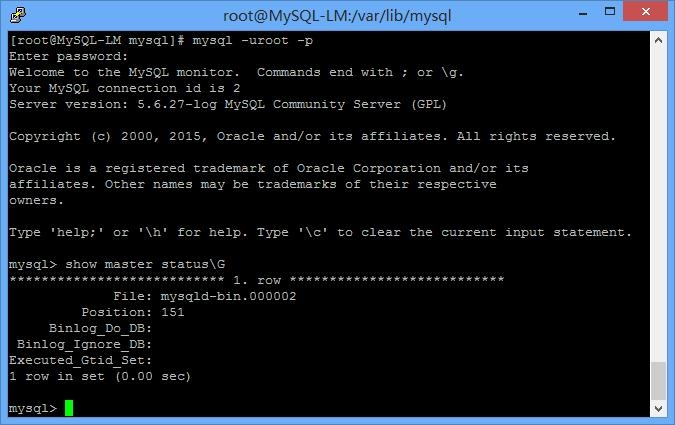
show master status;
连接到Right Master:
|
1
2
3
4
5
6
|
change master
to
master_host=
'10.168.0.107'
,
master_user=
'repl'
,
master_password=
'repl'
;
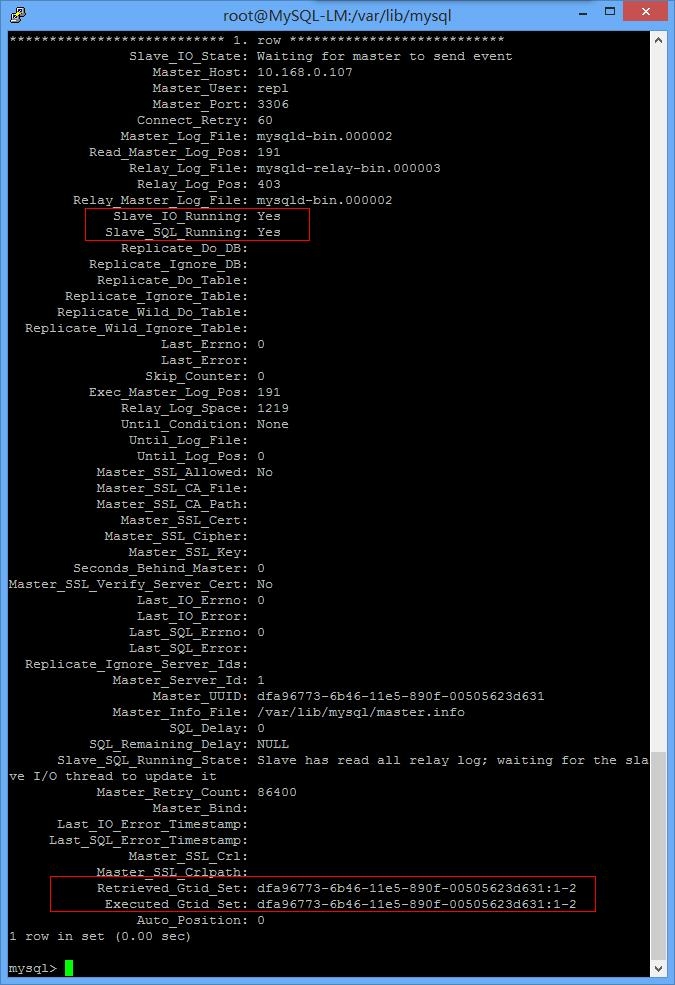
start slave;
show slave status\G
|
2.3、step3
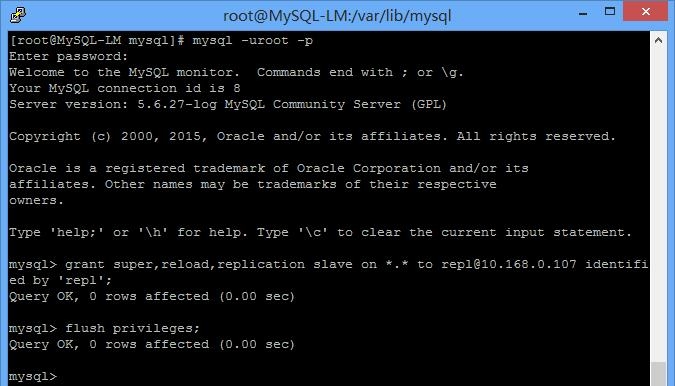
In Left Master
|
1
2
3
|
mysql -uroot -p
grant
super,reload,replication slave
on
*.*
to
repl@10.168.0.107 identified
by
'repl'
;
flush
privileges
;
|
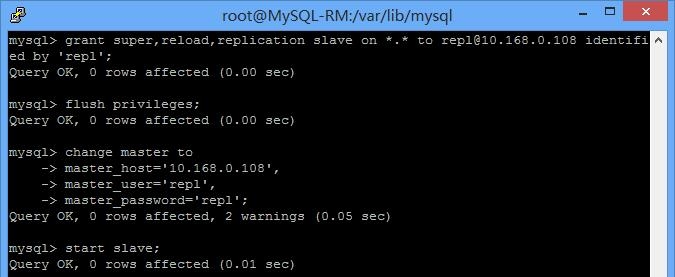
In Right Master
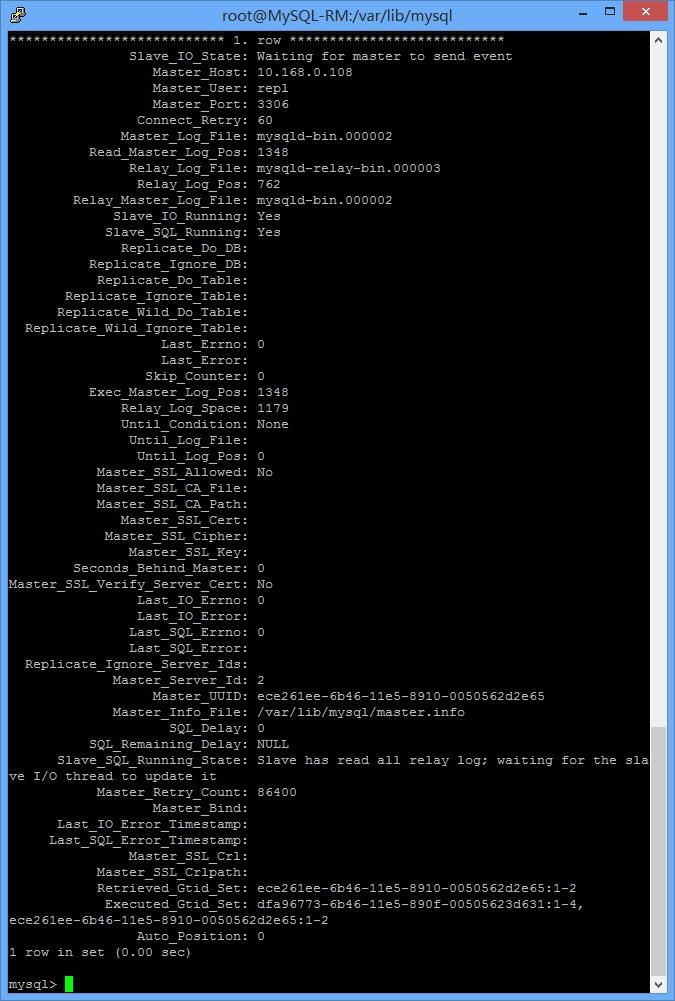
链接到Left Master
|
1
2
3
4
5
6
|
change master
to
master_host=
'10.168.0.108'
,
master_user=
'repl'
,
master_password=
'repl'
;
start slave;
show slave status\G
|
2.4、step4
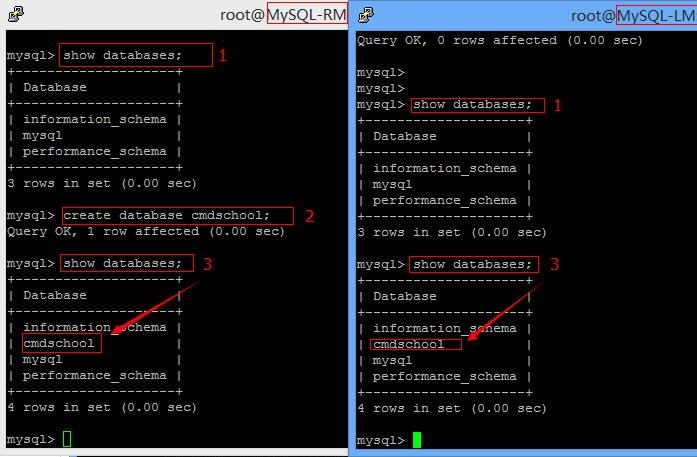
测试
In Right Master
|
1
2
|
create
database
cmdschool;
show databases;
|
In Left Master
|
1
2
|
show databases;
show databases;
|
In Left Master
|
1
2
|
drop
database
cmdschool;
show databases;
|
In Right Master
|
1
|
show databases;
|


 本文详细介绍了 MySQL 的 Master to Master (M-M) 复制模式原理及配置步骤。通过两台服务器互相作为主从,实现数据的双向同步,确保了数据的一致性和高可用性。特别适用于需要故障转移和负载均衡的场景。







 568
568

 被折叠的 条评论
为什么被折叠?


