


 本文详细介绍了如何使用Spring和CXF在Web容器中发布Web服务,包括配置Maven、引入依赖、配置web.xml、编写WS接口及其实现、配置CXF的endpoint以及启动Web容器等步骤。

Web Service,即“Web 服务”,简写为 WS。那么服务有服务需求方和提供服务方,顾名思义,提供服务方对外发布服务,而服务需求方则调用服务提供方发布的服务。
WS 其实就是建立在 HTTP 协议上实现异构系统通讯的工具,例如:可在 PHP 系统中调用 Java 系统对外发布的 WS,获取 Java 系统中的数据,或者把数据推送到 Java 系统中。
为了让 WS 的开发与使用变得更加简单、更加轻量级,于是出现了另一种风格的 WS,名为 JAX-RS(JSR-339),全称 Java API for RESTful Web Services,同样也是一种规范,同样也有若干实现,它们分别是:
Jersey:https://jersey.java.net/
Restlet:http://restlet.com/
RESTEasy:http://resteasy.jboss.org/
CXF(丑媳妇):http://cxf.apache.org/
其中,Jersey 是 Oracle 官方提供的实现,Restlet 是最老牌的实现,RESTEasy 是 JBoss 公司提供的实现,CXF 是 Apache 提供的实现。
可见,CXF 不仅用于开发基于 SOAP 的 WS,同样也适用于开发基于 REST 的 WS,这么好的框架我们怎能错过?
来接下来进入本文的主题:
在 Web 容器中使用 Spring + CXF 发布 WS
Tomcat + Spring + CXF,接近我们的实际开发
最后总结如下四点,
配置 web.xml
编写 WS 接口及其实现
配置 CXF 的 endpoint(端点)
启动 Web 容器
那么现在围绕着这四点来发布我们自己的WS
第一步,引入jar包,配置Maven pom.xml
<project xmlns="http://maven.apache.org/POM/4.0.0" xmlns:xsi="http://www.w3.org/2001/XMLSchema-instance"
  xsi:schemaLocation="http://maven.apache.org/POM/4.0.0 http://maven.apache.org/maven-v4_0_0.xsd">
  <modelVersion>4.0.0</modelVersion>
  <groupId>com.sunsharing.demo</groupId>
  <artifactId>Spring</artifactId>
  <packaging>war</packaging>
  <version>1.0-SNAPSHOT</version>
  <name>Spring Maven Webapp</name>
  <url>http://maven.apache.org</url>
  <properties>
    <project.build.sourceEncoding>UTF-8</project.build.sourceEncoding>
    <spring.version>3.1.1.RELEASE</spring.version>
       <junit.version>4.9.0</junit.version>
      <cxf.version>3.0.0</cxf.version>
  </properties>
  <dependencies>

        <dependency>
          <groupId>org.springframework</groupId>
          <artifactId>spring-context</artifactId>
          <version>${spring.version}</version>
        </dependency>
        <dependency>
          <groupId>org.springframework</groupId>
          <artifactId>spring-web</artifactId>
          <version>${spring.version}</version>
        </dependency>

        <dependency>
          <groupId>junit</groupId>
          <artifactId>junit</artifactId>
          <version>${junit.version}</version>
        </dependency>

        <!-- CXF -->
        <dependency>
          <groupId>org.apache.cxf</groupId>
          <artifactId>cxf-rt-frontend-jaxws</artifactId>
          <version>${cxf.version}</version>
        </dependency>
        <dependency>
          <groupId>org.apache.cxf</groupId>
          <artifactId>cxf-rt-transports-http</artifactId>
          <version>${cxf.version}</version>
        </dependency>
  </dependencies>
  <build>
    <finalName>Spring</finalName>
    <plugins>
      <plugin>
        <groupId>org.mortbay.jetty</groupId>
        <artifactId>maven-jetty-plugin</artifactId>
        <version>6.1.5</version>
        <configuration>
          <scanIntervalSeconds>10</scanIntervalSeconds>
          <connectors>
            <connector implementation="org.mortbay.jetty.nio.SelectChannelConnector">
              <port>8088</port>
            </connector>
          </connectors>
          <contextPath>/Spring</contextPath>
        </configuration>
      </plugin>
    </plugins>
  </build>
</project>
第二步:配置web.xml
<?xml version="1.0" encoding="UTF-8"?>
<web-app xmlns="http://java.sun.com/xml/ns/javaee"
         xmlns:xsi="http://www.w3.org/2001/XMLSchema-instance"
         xsi:schemaLocation="http://java.sun.com/xml/ns/javaee
         http://java.sun.com/xml/ns/javaee/web-app_3_0.xsd"
         version="3.0">
    <!-- Spring -->
    <context-param>
        <param-name>contextConfigLocation</param-name>
        <param-value>classpath:spring.xml</param-value>
    </context-param>
    <listener>
        <listener-class>org.springframework.web.context.ContextLoaderListener</listener-class>
    </listener>
    <!-- CXF -->
    <servlet>
        <servlet-name>cxf</servlet-name>
        <servlet-class>org.apache.cxf.transport.servlet.CXFServlet</servlet-class>
    </servlet>
    <servlet-mapping>
        <servlet-name>cxf</servlet-name>
        <url-pattern>/ws/*</url-pattern>
    </servlet-mapping>
</web-app>
所有带有 /ws 前缀的请求,将会交给被 CXFServlet 进行处理,也就是处理 WS 请求了。
第三步,编写我们自己的WS
首先是服务接口
    package com.sunsharing.rest_cxf;
/**
 * Created by nyp on 2015/2/28.
 */
import javax.jws.WebService;
@WebService
public interface HelloService {
    String say(String name);
}
最后是服务接口的实现
package com.sunsharing.rest_cxf;

/**
 * Created by nyp on 2015/2/28.
 */
import org.springframework.stereotype.Component;
import javax.jws.WebService;

@WebService
@Component
public class HelloServiceImpl implements HelloService {

    public String say(String name) {
        return "hello " + name;
    }
}
值得一提的是引包,Component引入的是spring的包,作用当然是注解注入bean啦,好了我们简单的WS就写好了
第四步,就是配置 CXF
接着web.xml中配置的spring.xml
<?xml version="1.0" encoding="UTF-8"?>
<beans xmlns="http://www.springframework.org/schema/beans"
       xmlns:xsi="http://www.w3.org/2001/XMLSchema-instance"
       xmlns:context="http://www.springframework.org/schema/context"
       xsi:schemaLocation="http://www.springframework.org/schema/beans
       http://www.springframework.org/schema/beans/spring-beans-3.1.xsd
       http://www.springframework.org/schema/context
       http://www.springframework.org/schema/context/spring-context-3.1.xsd">
    <context:component-scan base-package="com.sunsharing.rest_cxf"/>
    <import resource="spring-cxf.xml"/>
</beans>将配置文件分离,是一种很好的开发方式,到这里我们就就自觉地配置spring-cfx.xml
<?xml version="1.0" encoding="UTF-8"?>
<beans xmlns="http://www.springframework.org/schema/beans"
       xmlns:xsi="http://www.w3.org/2001/XMLSchema-instance"
       xmlns:jaxws="http://cxf.apache.org/jaxws"
       xmlns:simple="http://cxf.apache.org/simple"
       xsi:schemaLocation="http://www.springframework.org/schema/beans
       http://www.springframework.org/schema/beans/spring-beans-3.1.xsd
       http://cxf.apache.org/jaxws
       http://cxf.apache.org/schemas/jaxws.xsd
       http://cxf.apache.org/simple
       http://cxf.apache.org/schemas/simple.xsd">
    <!--第一种-->
   <!-- <jaxws:server id="helloService" address="/soap/hello">
        <jaxws:serviceBean>
            <ref bean="helloServiceImpl"/>
        </jaxws:serviceBean>
    </jaxws:server>-->

    <!--第二种 -->
    <jaxws:endpoint id="helloService"  implementorClass="#helloServiceImpl" address="/soap/hello"/>

    <!--第三种-->
    <!--<simple:server id="helloService" serviceClass="#helloService" address="/soap/hello">
        <simple:serviceBean>
            <ref bean="#helloServiceImpl"/>
        </simple:serviceBean>
    </simple:server>-->
</beans>
注意:第二种方法中的 implementor 属性值是 #helloServiceImpl,这是 CXF 特有的简写方式,并非是 Spring 的规范,意思是通过 Spring 的 Bean ID 获取 Bean 实例。
(#helloServiceImpl在IDEA中提示红色,并不是报错,不要瞎捣腾)三种方法推荐第二种方法,原因嘛两个字简洁。
说到这里值得一提的就是address="/soap/hello" 结合web.xml中配置的/ws 那么可想像之后的请求是长这个样子的“***/ws/soap/hello”
第五步:启动Web容器
将应用部署到 Tomcat 中,在浏览器中输入以下地址可进入 CXF 控制台:
http://localhost:8080/ws
当然我这个地址时报的是404,因为我在发布的项目时添加了项目名
我的实例中输入的地址
http://localhost:8080/Spring/ws点击上图中的超链接亦或是在地址栏中输入
http://localhost:8080/Spring/ws/soap/hello?wsdl可见如下页面
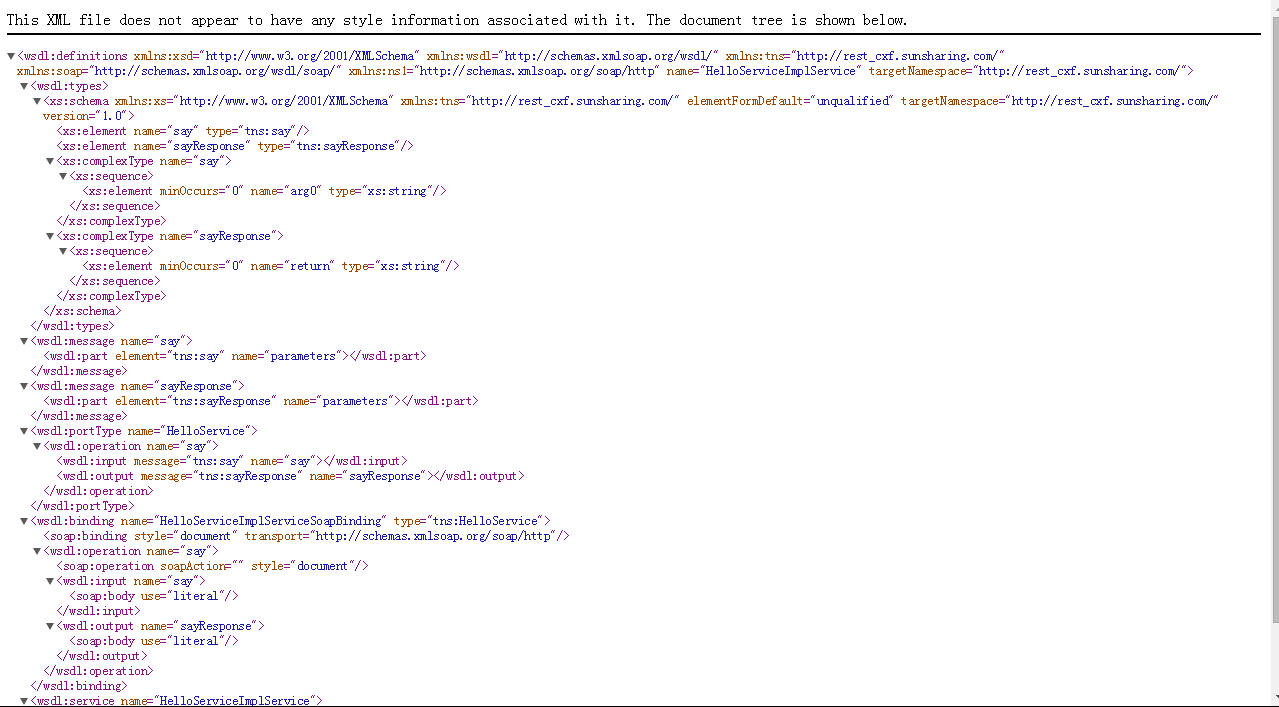
到这里,首先得恭喜你现在已经成功地通过 CXF 对外发布了 WS,下面要做的事情就是用 WS 客户端来调用这些 endpoint 了。
关于 CXF 提供的 WS 客户端
一共有五个方案
方案一:静态代理客户端
方案二:动态代理客户端
方案三:通用动态代理客户端
方案四:基于 CXF simple 方式的客户端
方案五:基于 Spring 的客户端
这里我们就只讲方案五,更多的方案实现请查阅
Web Service 那点事儿(2)—— 使用 CXF 开发 SOAP 服务
本文也是基于这篇文章以及自己部署后总结所写。
首先是配置spring-client.xml
<?xml version="1.0" encoding="UTF-8"?>
<beans xmlns="http://www.springframework.org/schema/beans"
      xmlns:xsi="http://www.w3.org/2001/XMLSchema-instance"
      xmlns:jaxws="http://cxf.apache.org/jaxws"
      xsi:schemaLocation="http://www.springframework.org/schema/beans
      http://www.springframework.org/schema/beans/spring-beans-4.0.xsd
      http://cxf.apache.org/jaxws
      http://cxf.apache.org/schemas/jaxws.xsd">
 <!--使用 JaxWsProxyFactoryBean-->
 <!--  <bean id="factoryBean" class="org.apache.cxf.jaxws.JaxWsProxyFactoryBean">
       <property name="serviceClass" value="com.sunsharing.rest_cxf.HelloService"/>
       <property name="address" value="http://localhost:8080/Spring/ws/soap/hello"/>
   </bean>
   <bean id="helloService" factory-bean="factoryBean" factory-method="create"/>-->
   <!--使用 jaxws:client(推荐)-->
   <jaxws:client id="helloService"
                 serviceClass="com.sunsharing.rest_cxf.HelloService"
                 address="http://localhost:8080/Spring/ws/soap/hello"/>
</beans>
然后是客服端代码
package com.sunsharing.rest_cxf;
import org.springframework.context.ApplicationContext;
import org.springframework.context.support.ClassPathXmlApplicationContext;
/**
 * Created by nyp on 2015/2/28.
 */
public class Client {
    public static void main(String[] args) {
        ApplicationContext context = new ClassPathXmlApplicationContext("spring-client.xml");
        HelloService helloService = context.getBean("helloService", HelloService.class);
        String result = helloService.say("Spring world");
        System.out.println(result);
    }
}
最后想说的是,我们要结合实际选择方案


 3896
3896

 被折叠的 条评论
为什么被折叠?
被折叠的 条评论
为什么被折叠?
 到【灌水乐园】发言


