


 本文详细介绍如何在iOS开发环境中创建并使用bundle资源文件。包括配置bundle的基本属性、导入资源文件的方法、真机与模拟器环境下的编译流程,以及在项目中集成bundle的具体步骤。此外还提供了解决常见打包上传问题的方案。
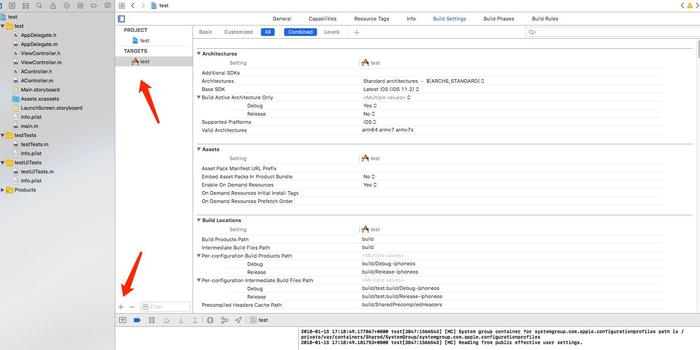
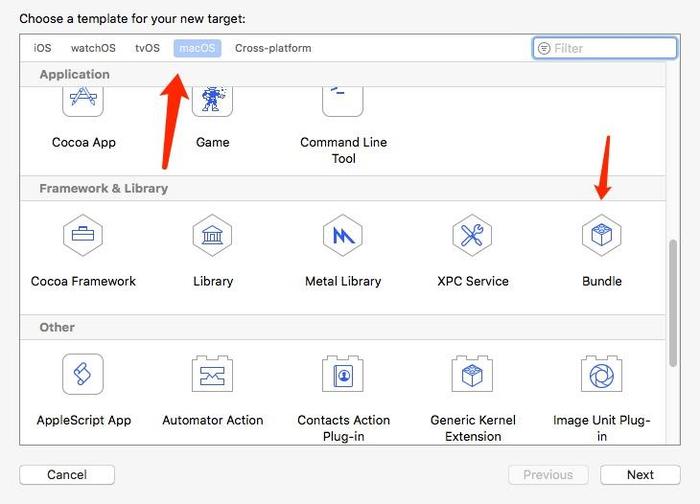
1. 创建bundle,如图,点击 + ,弹出选择框, macOS 下的Framework & Library ,点击bundle,输入bundle的名字,然后点击 finish。
2. 点击创建好的bundle ,修改属性
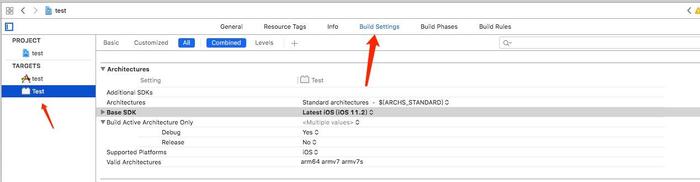
"Base SDK" 设置为 "Latest iOS (iOS 11.2)" (Xcode 9.2为例)
"Build Active Architecture Only" 设置为 "YES"
Installation Directiotory 删除掉后面的路径
Code Signing Identity 选择 Don't Code Sign
"iOS Deployment Target" 设置为 iOS 8.0 (为了兼容性,最好选择最低版本)
"Skip Install" 设置为 "NO"
"Strip Debug Symbols During Copy" 中"Release"模式设置为 "YES"
"IOS Deployment Target" 设置为 "iOS 8.0"
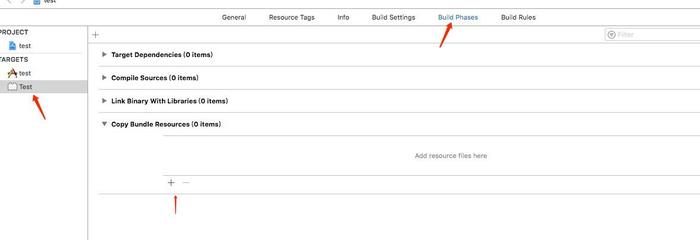
"COMBINE_HIDPI_IMAGES" 设置为 "NO" 3. 现在开始导入资源,可以导入Xib文件和图片,此处以导入图片为例,点击➕进行添加,如图3.1;或者直接将图片拖入左侧创建的bundle文件夹下,系统会自动导入Copy Bundle Resources里去,如张图3.2所示:
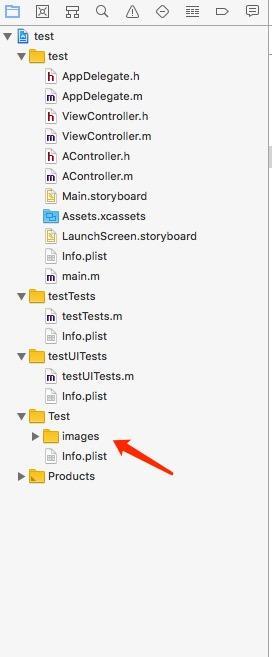
4. 选择创建的bundle 进行编译,开始生成bundle,分别选择真机和模拟器,然后各运行一遍,即可生成真机和模拟器使用的bundle:

5. 找到生成的bundle,打包上架APP的时候应使用真机模式下运行生成的Bundle,即Debug-iPhoneos 文件夹内的bundle。
现在已经生成了我们需要的bundle,在项目中直接导入即可使用,
6. 将要使用的bundle集成到项目中后,就可以使用了。需要注意的就是,bundle是静态的,不进行编译的资源文件。所以,要使用bundle中的资源,就需要找到相应的资源路径。
VC获得bundle中的资源
NSString * bundlePath = [[ NSBundle mainBundle] pathForResource: @ "MyBundle"ofType :@ "bundle"];
NSBundle *resourceBundle = [NSBundle bundleWithPath:bundlePath];
UIViewController *vc = [[UIViewController alloc] initWithNibName:@"vc_name"bundle:resourceBundle];
图片获得bundle中的资源
UIImageView *imgView=[[UIImageView alloc] initWithFrame:CGRectMake(50, 50, 50,50)];
UIImage *image = [UIImage imageNamed:@"MyBundle.bundle/img_collect_success"];
[imgView setImage:image];
或者
UIImageView *imgView=[[UIImageView alloc] initWithFrame:CGRectMake(50, 50, 50,50)];
NSString *bundlePath = [[ NSBundle mainBundle] pathForResource:@"Test" ofType :@"bundle"];
NSBundle *bundle = [NSBundle bundleWithPath:bundlePath];
NSString *img_path = [bundle pathForResource:imageName ofType:@"png"];
UIImage *image_1=[UIImage imageWithContentsOfFile:img_path];
[imgView setImage:image_1];
当然,可以写成预编译语句:
#define MYBUNDLE_NAME @ "MyBundle.bundle"
#define MYBUNDLE_PATH [[[NSBundle mainBundle] resourcePath] stringByAppendingPathComponent: MYBUNDLE_NAME]
#define MYBUNDLE [NSBundle bundleWithPath: MYBUNDLE_PATH]
7. 如果将自己打包的bundle给别人使用,别人在打包上传过程中可能会遇到错误提示如:
ERROR ITMS-90171: "Invalid Bundle Structure - The binary file 'lhby.app/Test.bundle/Test' is not permitted. Your app can’t contain standalone executables or libraries, other than a valid CFBundleExecutable of supported bundles. Refer to the Bundle Programming Guide at...
或者
ERROR ITMS-90535: "Unexpected CFBundleExecutable Key. The bundle at 'Payload/dianlan2.app/EaseUIResource.bundle' does not contain a bundle executable. If this bundle intentionally does not contain an executable, consider removing the CFBundleExecutable key from its Info.plist and using a CFBundlePackageType of BNDL. If this bundle is part of a third-party framework, consider contacting the developer of the framework for an update to address this issue."
或者
ERROR ITMS-90034: "Missing or invalid signature. The bundle 'ABC.Test' at bundle path 'Payload/lhby.app/Test.bundle' is not signed using an Apple submission certificate."
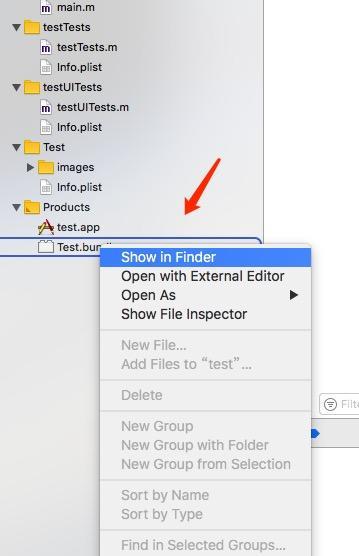
网上也有很多的解决办法,这里提供一种解决方法,就是删除bundle里的执行文件:找到工程中的Test.Bundle,右键单击后 选择 "显示包内容",找到里面黑色的可执行文件Test,删除掉,然后找到里面的info.plist文件 ,删除掉Executable file 字段,重新打包,上传应用商店就可以了。


 被折叠的 条评论
为什么被折叠?
被折叠的 条评论
为什么被折叠?
 到【灌水乐园】发言


